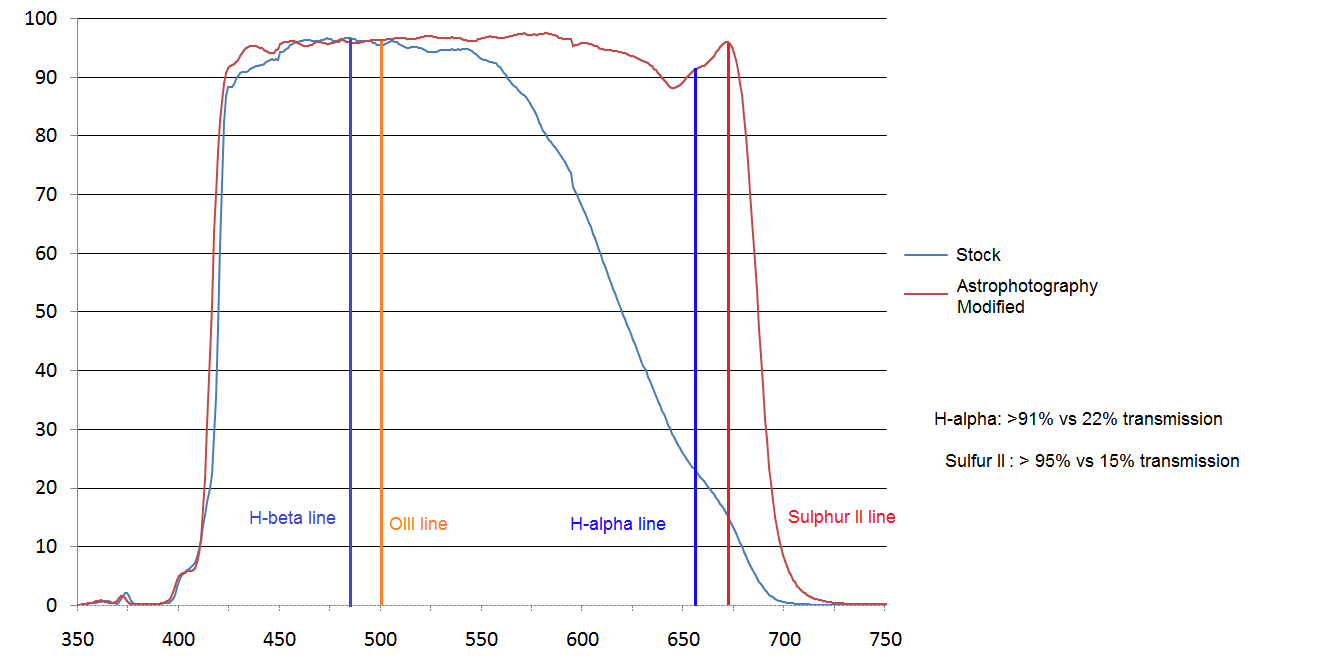
We have previously discussed the benefits of having an astrophotography or full spectrum conversion performed to increase the deep-red response of digital cameras to record vibrant red emission nebula. Having a conversion done will allow you to record these wavelengths much easier, along with all other parts of the visible spectrum. This will provide a big improvement to many night sky images as is. Still, a conversion will also allow you to use narrowband hydrogen filters to take it a step further and record even greater detail and contrast in these objects. Both full spectrum and h-alpha astrophotography conversions can take advantage of narrowband filters.
Emission nebulae in the night sky emit light at very specific and narrow wavelengths. The three most common are oxygen-III, which is blue-green at 500.7nm; hydrogen alpha or H-alpha at 656.2nm in the deep red; and sulfur-II, even deeper red at 672.4nm. H-alpha is the brightest and most abundant of these and is particularly interesting for nightscape images since it is easiest to capture. These emission spectral lines are extremely narrow, which means that nearly all H-alpha is emitted at 656.2nm, and we don’t care about capturing light at wavelengths on either side of this when photographing H-alpha.
Narrowband Filters
A modified camera will capture H-alpha just fine, but it will also capture all the unwanted light from light pollution, sky glow, moon glow, and other light, lowering the signal-to-noise ratio and contrast. Narrowband filters have a small bandpass that lets only the desired wavelength pass with a sharp cutoff on either side to block all other unwanted light from reaching the camera sensor. This results in very high contrast and good quality images and allows photographing in less-than-ideal conditions with light pollution and even with the moon out.
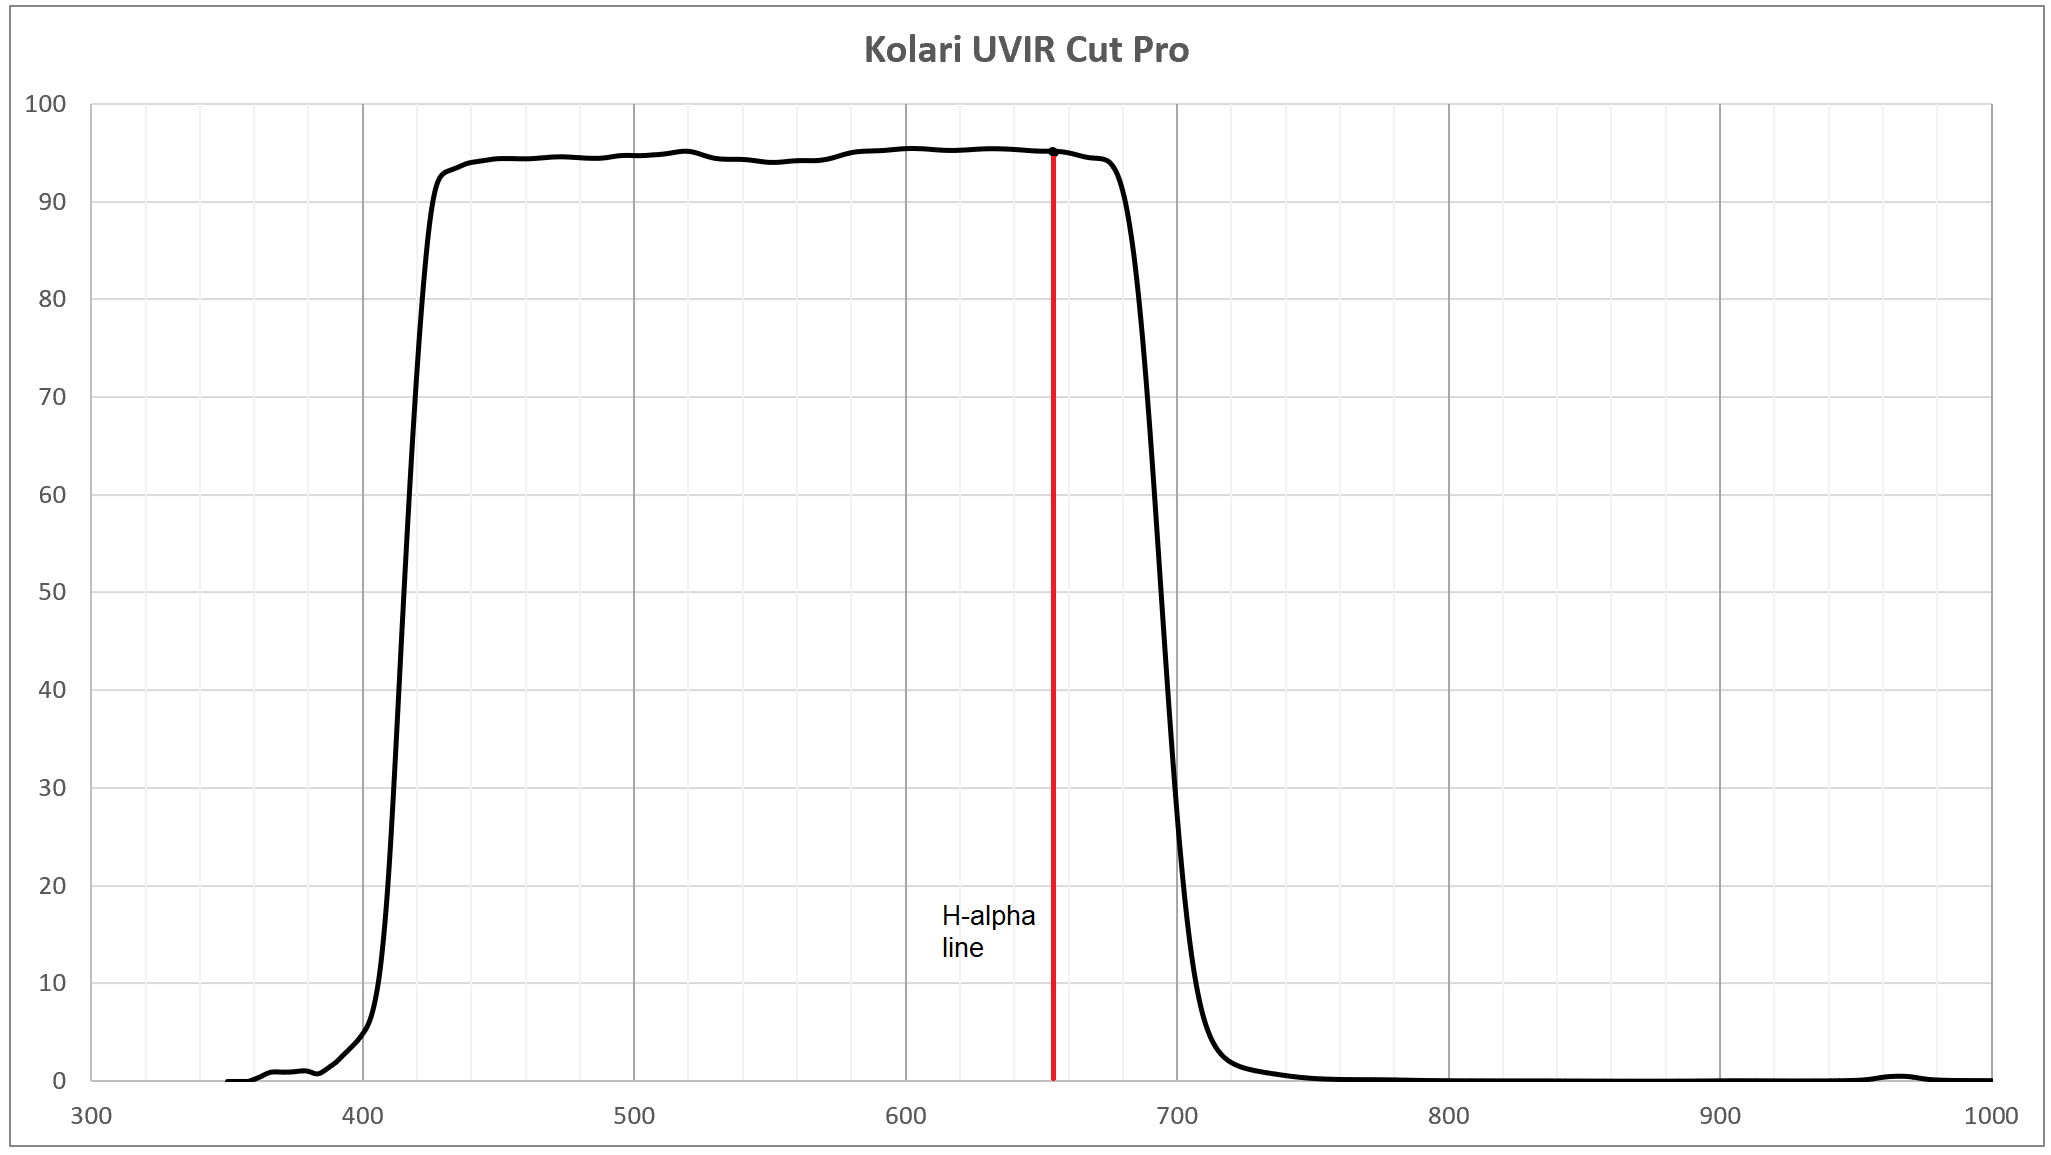
For deep sky astrophotography, it is common to image exclusively with different narrowband filters. For wider field nightscape images, narrowband hydrogen imaging works best in conjunction with full-color imaging to add hydrogen data and enhance the overall image. This is commonly referred to as the Ha+RGB technique, which involves taking normal full-color images of the night sky, then additional images with a hydrogen filter, and combining the two. Alternatively, you can achieve this in a single image with the Kolari UV/IR Cut H-alpha filter.
Options for Camera Lenses
Narrowband filters are traditionally made with deep sky astrophotography through telescopes in mind, not for use with camera lenses which presents some challenges. When using narrowband filters with a telescope, 2” or 48mm filters are typically used, and they are screwed in between the camera and the back of the telescope. Most astronomical filters are this size or smaller, and there aren’t larger screw filter sizes available that fit most camera lenses. Even so, these filters are interference-based by design and do not behave well when put in front of shorter focal length lenses (85mm and less). They produce strange vignetting and transmission problems.
For most camera models, this leaves clip-in filters as the only option. Clip-in filters have their challenges and drawbacks, but this is just something I must deal with and work around if I want to use an H-alpha filter on my Sony camera with native lenses. Adding a filter between the back of a lens and the sensor changes the effective flange-focal distance of the lens and can introduce artifacts with aberrated stars in the corners. How much of an issue this is varies, and some lenses seem much less affected, with wider angles generally having more problems. Stopping down the lens can improve this and help with other challenges of narrowband filters I will get to in a moment.
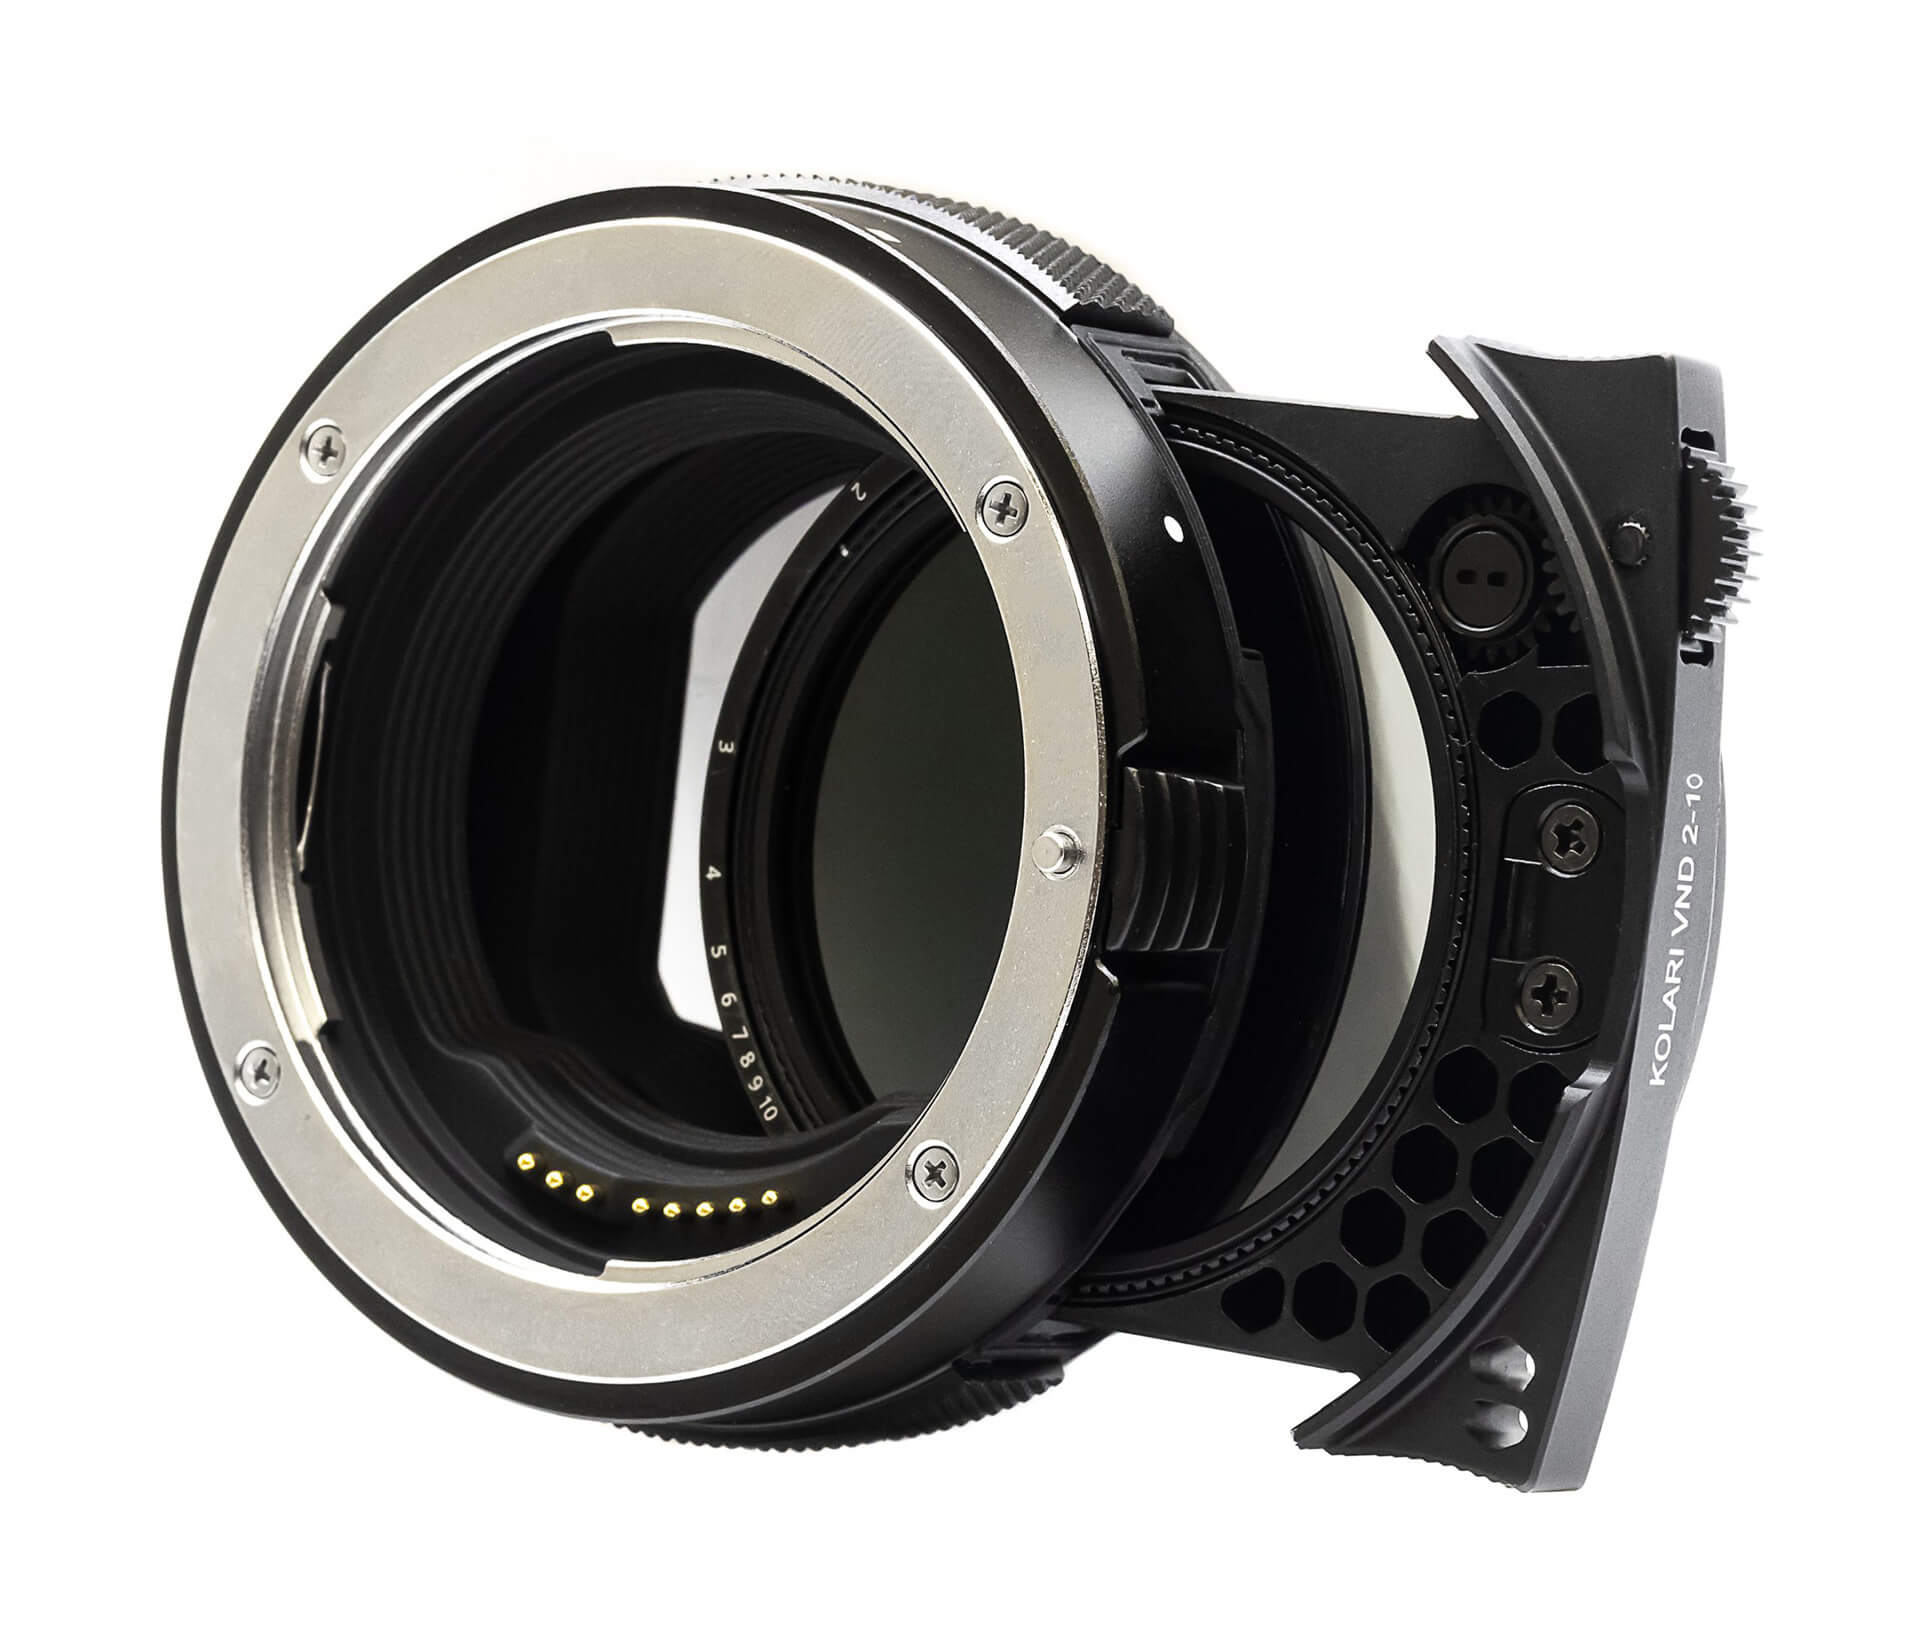
Perhaps the most elegant solution for using narrowband filters is a drop-in filter adapter like the EOS R system with a drop-in EF adapter. Some astrophotographers have succeeded with this since it allows for adapting 48mm or 52mm filters behind camera lenses and has fewer drawbacks than clip-in filters. However, you will be limited to using older DSLR lenses since this solution will not work with native mirrorless lenses. Switching between shooting full-color RGB and an H-alpha filter is much quicker without taking off the lens and potentially messing up your polar alignment or framing. Again, you can simplify this by using a Kolari UV/IR Cut H-alpha filter, also available as both a clip-in and drop-in filter.
Filter Width Considerations
Narrowband filters come in a variety of widths, from standard 12nm bandpass and wider to 5-6nm and filters as narrow as 3nm or less. We care about that very narrow emission line, so the narrower, the better to block unwanted light. Narrower filters will perform better in light pollution and imaging with the moon, but they come with higher costs and other challenges.

Narrow bandpass filters present challenges when used behind faster focal ratio lenses or telescopes. As the focal ratio decreases, the light that passes through the filter shifts frequency slightly, so very narrow bandpass filters do not work well with faster lenses, and the transmission of the wanted signal will drop the more the lens is opened and the frequency shifts outside the range of the filter. For Ha, typically at f4.5 and above, there is full transmission; you do not need to be concerned with this. At f2.8 and below, this can be problematic for narrower 3-6nm filters. With a 12nm or greater filter, the bandpass is wide enough that the wanted signal will still mostly pass through the filter, even with a band shift.
I use a 12nm clip-in Ha filter and recommend staying around there for cost reasons and the bonus of having fewer issues with the transmission on camera lenses, which are usually faster than telescopes. If you are using a clip-in filter and stopping down to have better stars, there is also the benefit of not worrying about reduced transmission. There are specialty high-speed narrowband filters designed for f2 or faster systems, but they are more expensive with fewer options.
Putting it All Together
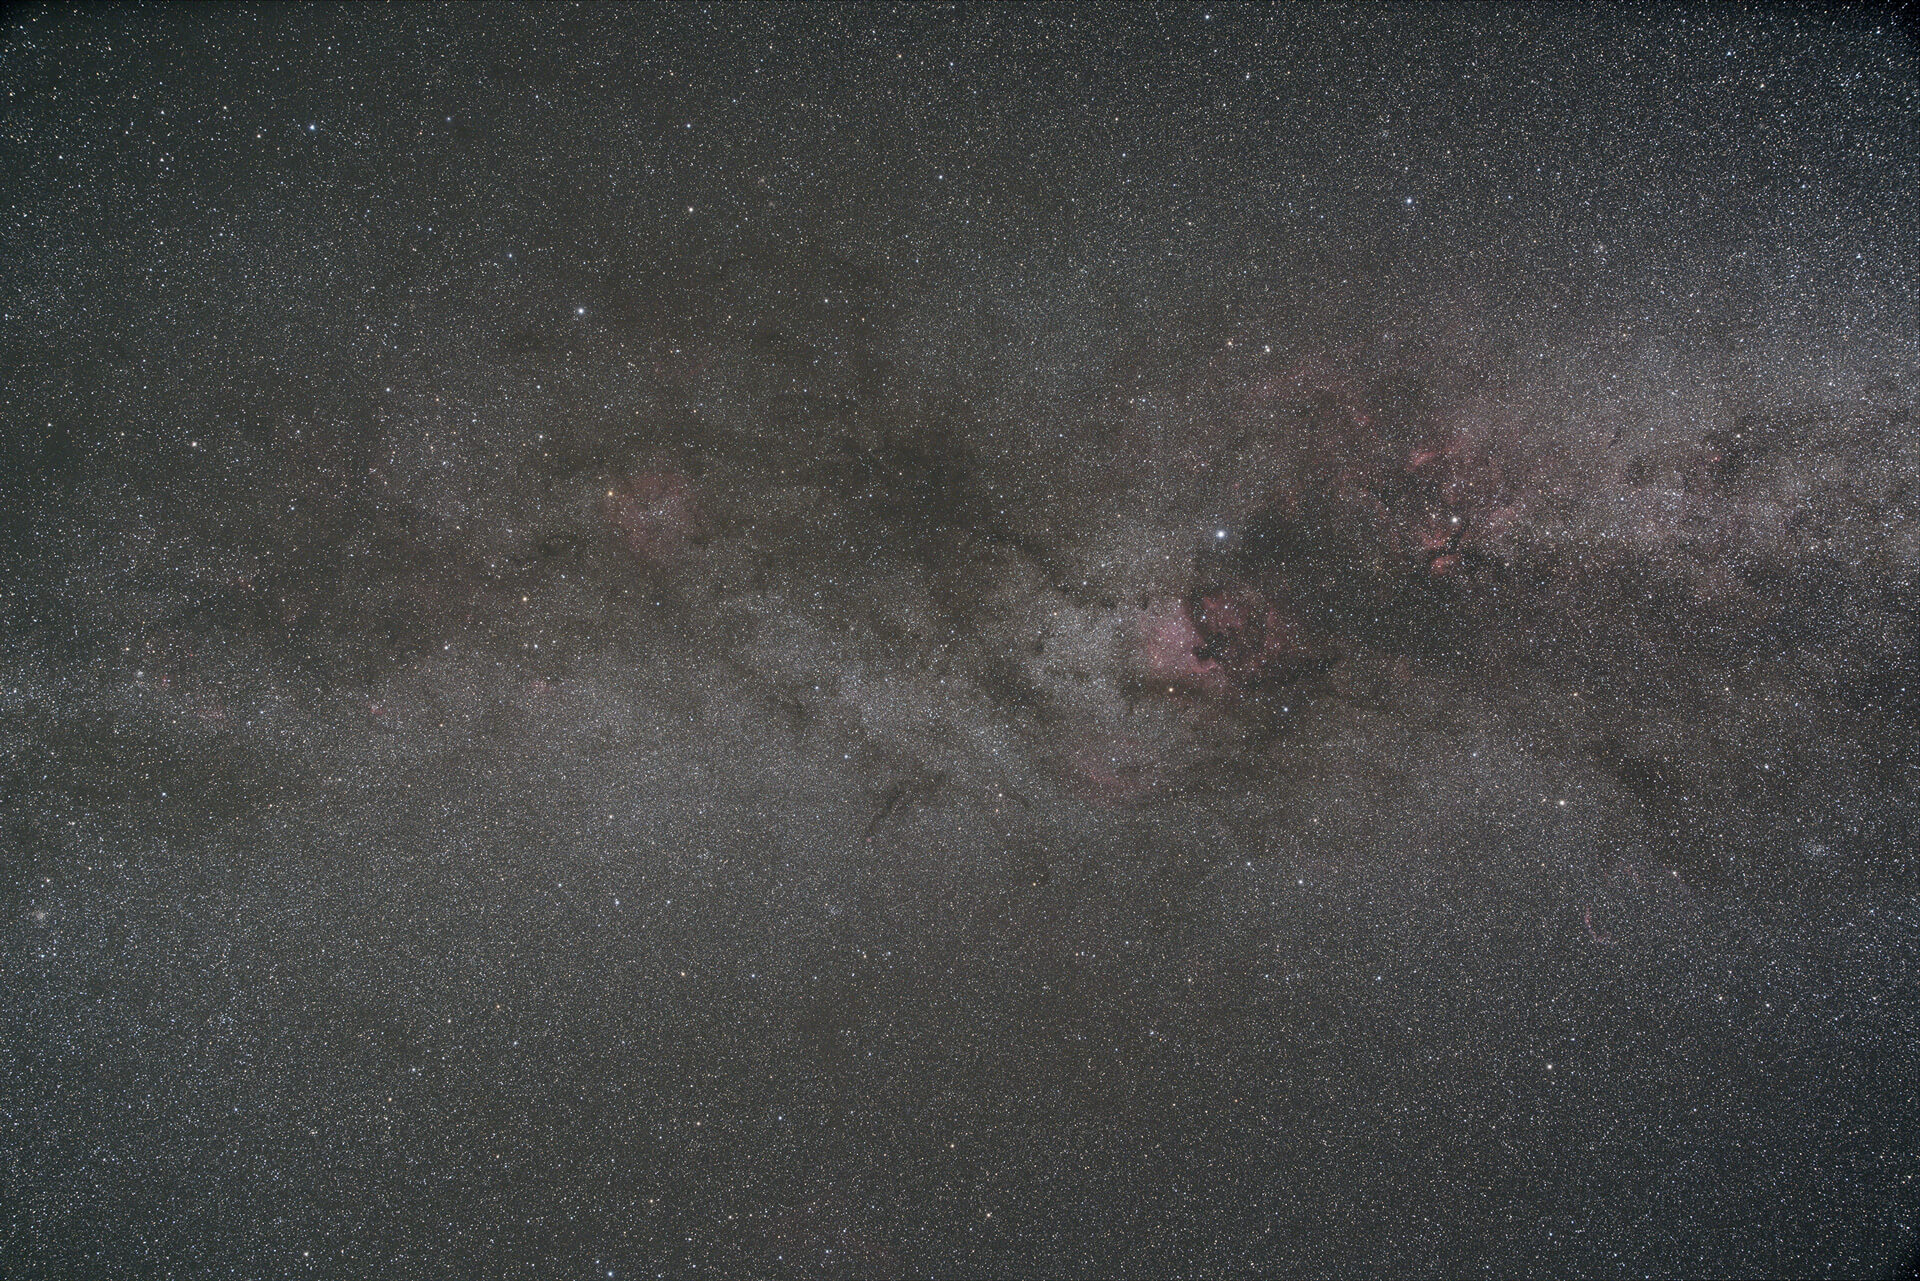
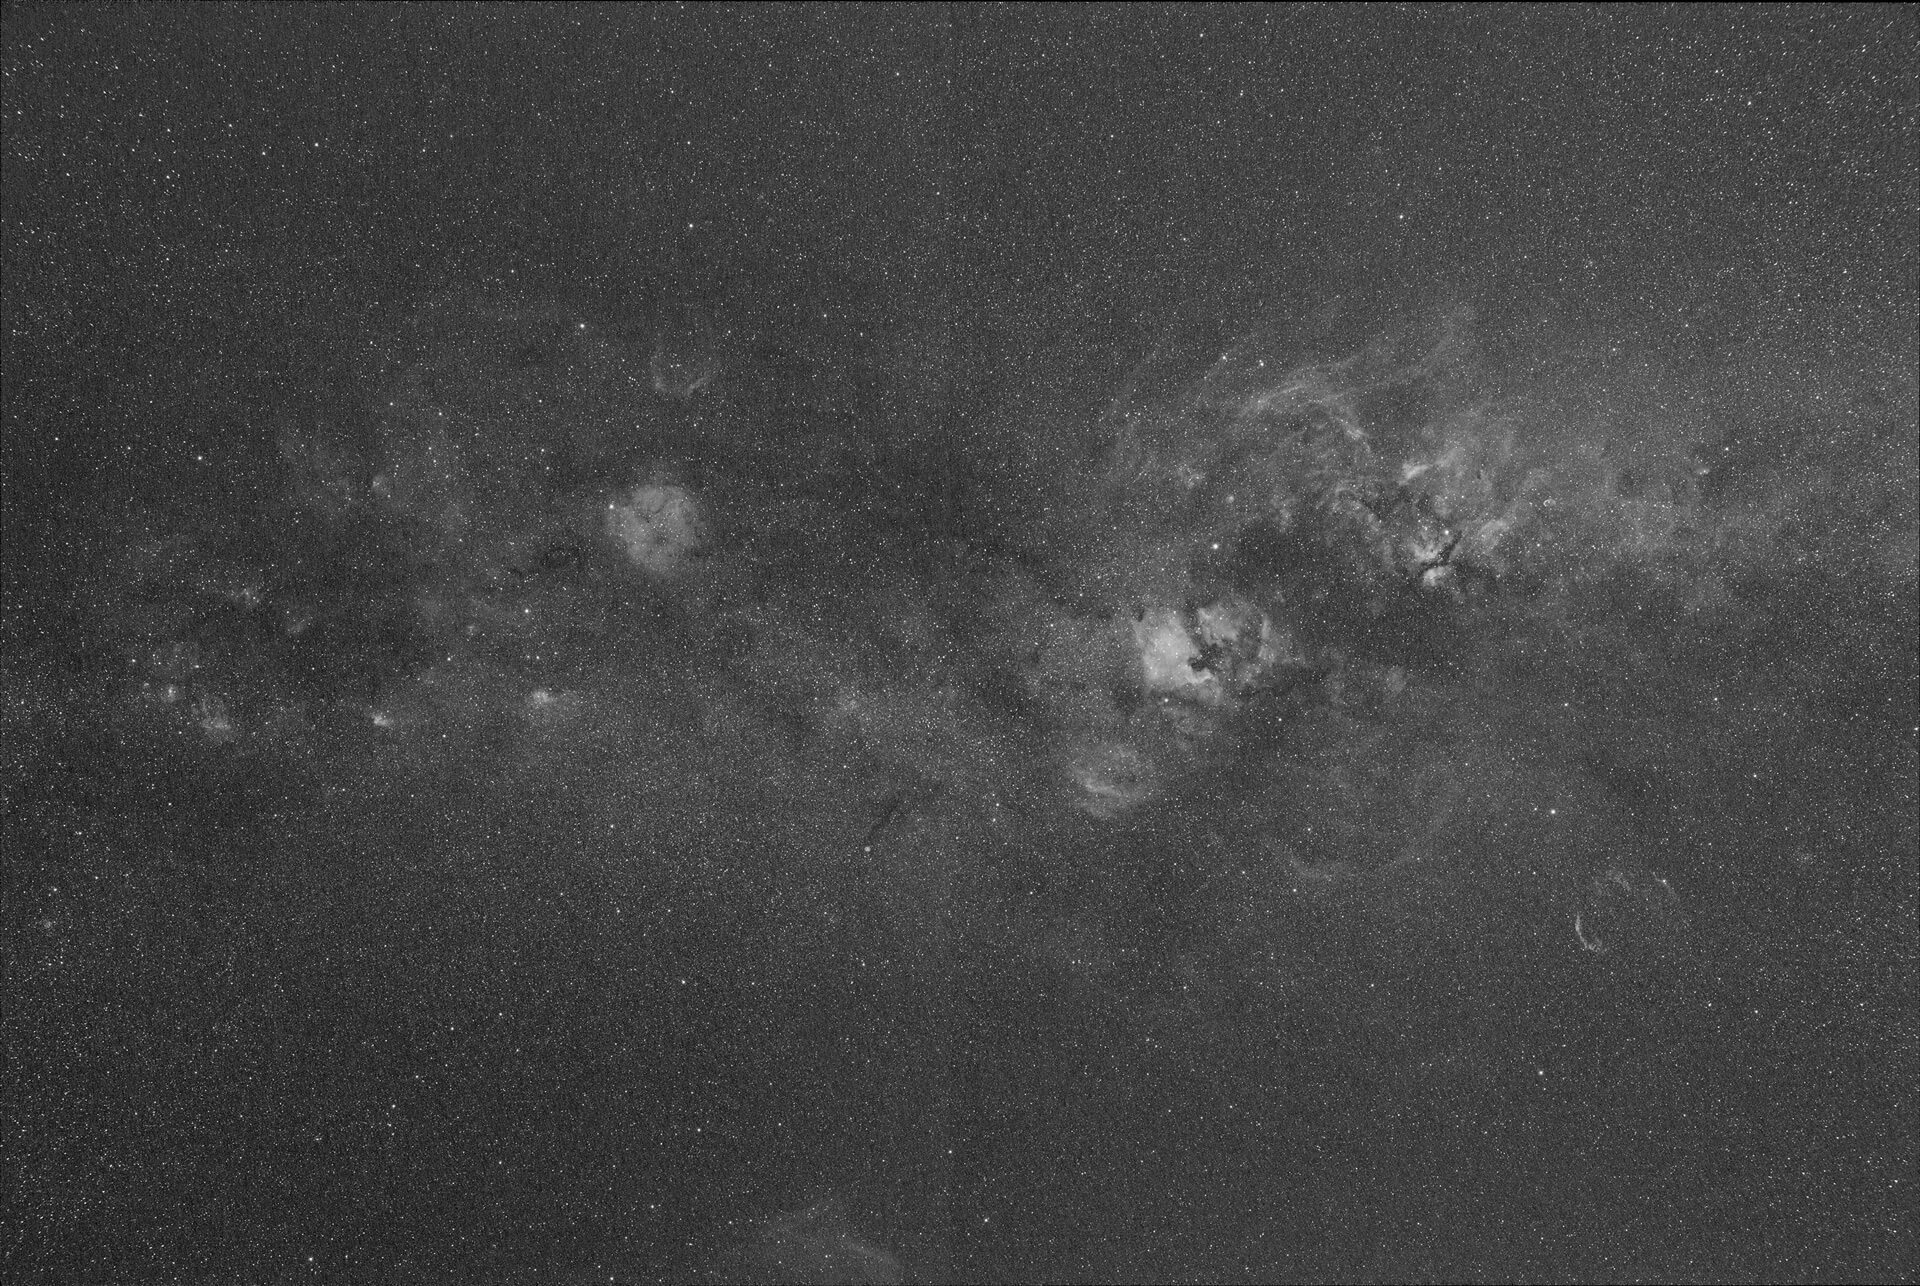
The basic workflow for adding H-alpha to a nightscape image is to first capture your normal RGB color light frames with no additional filters, then keep your same framing, put on the narrowband filter, and take additional H-alpha frames. When shooting with an H-alpha filter, everything on your camera screen will look red, and much less light is passing to the sensor, so you may want to increase the ISO a bit to see anything on the back of the screen. I would aim to get at least as much total imaging time on H-alpha as you did in RGB, but often more time spent on H-alpha is beneficial.
You will then take your calibration frames and bring everything into your stacking program of choice. I use Astro Pixel Processor, which has an easy option to separate the light frames by type, so I bring both RGB and H-alpha in and assign them to different filters. I then calibrate and stack them and select the option to stack each filter separately. I am left with a final integration for all the RGB frames and another for the H-alpha frames, but they are registered to each other, meaning the stars on both are all aligned.
There are a few techniques to then combine the two together. The narrowband stack is converted to grayscale since it is monochromatic, and we will add it to the red channel. Users of Pixinsight will often use pixel math to separate the RGB image into its color component and then add the H-alpha data to the red channel with different algorithms. I have done this with success, but for nightscapes, I have found Photoshop to work well for this. You bring the RGB image and H-alpha image in as two layers. They are already aligned, and you then use layer blending modes to use the H-alpha image as a mask to add red to the underlying RGB image. This allows a lot of freedom to tweak the H-alpha image, control the amount of blending, and add the H-alpha color only where you want it.
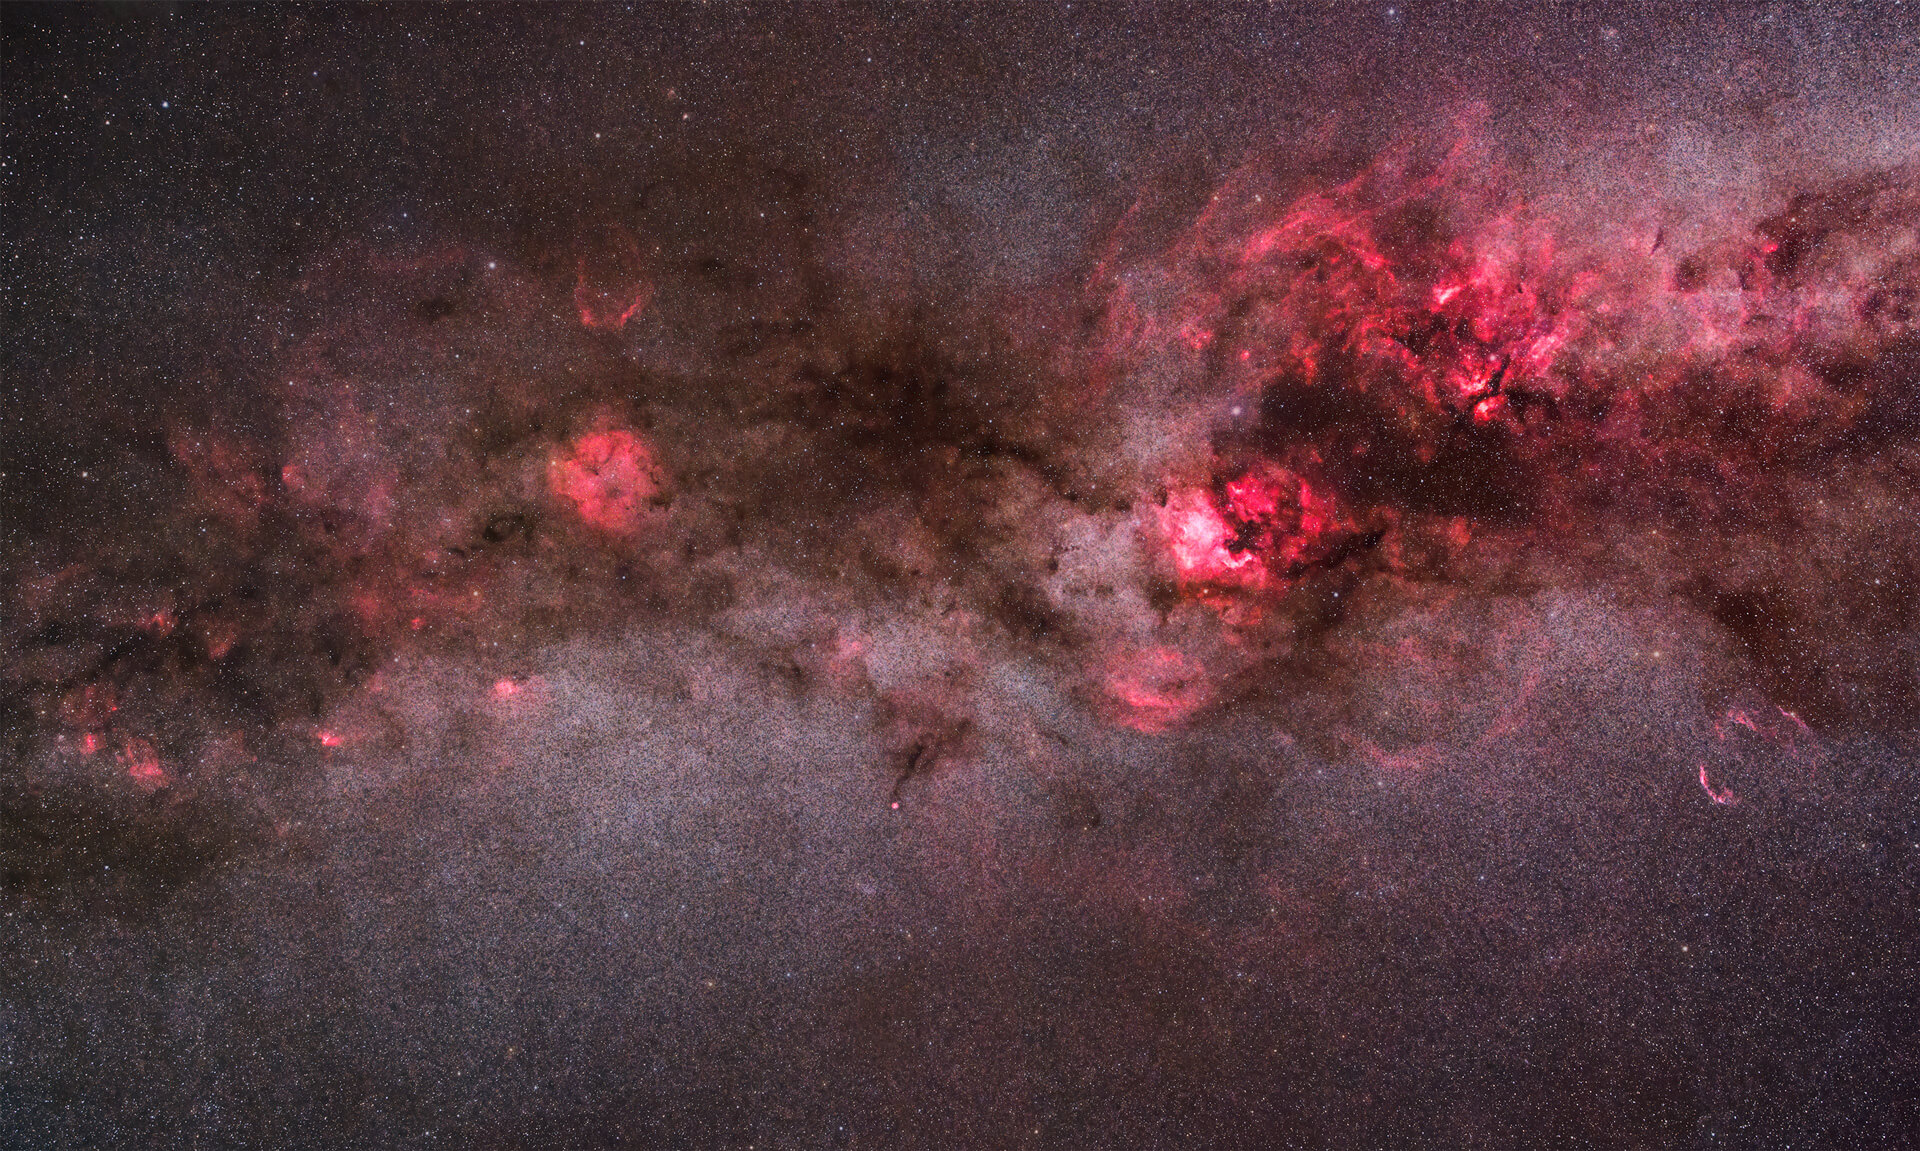
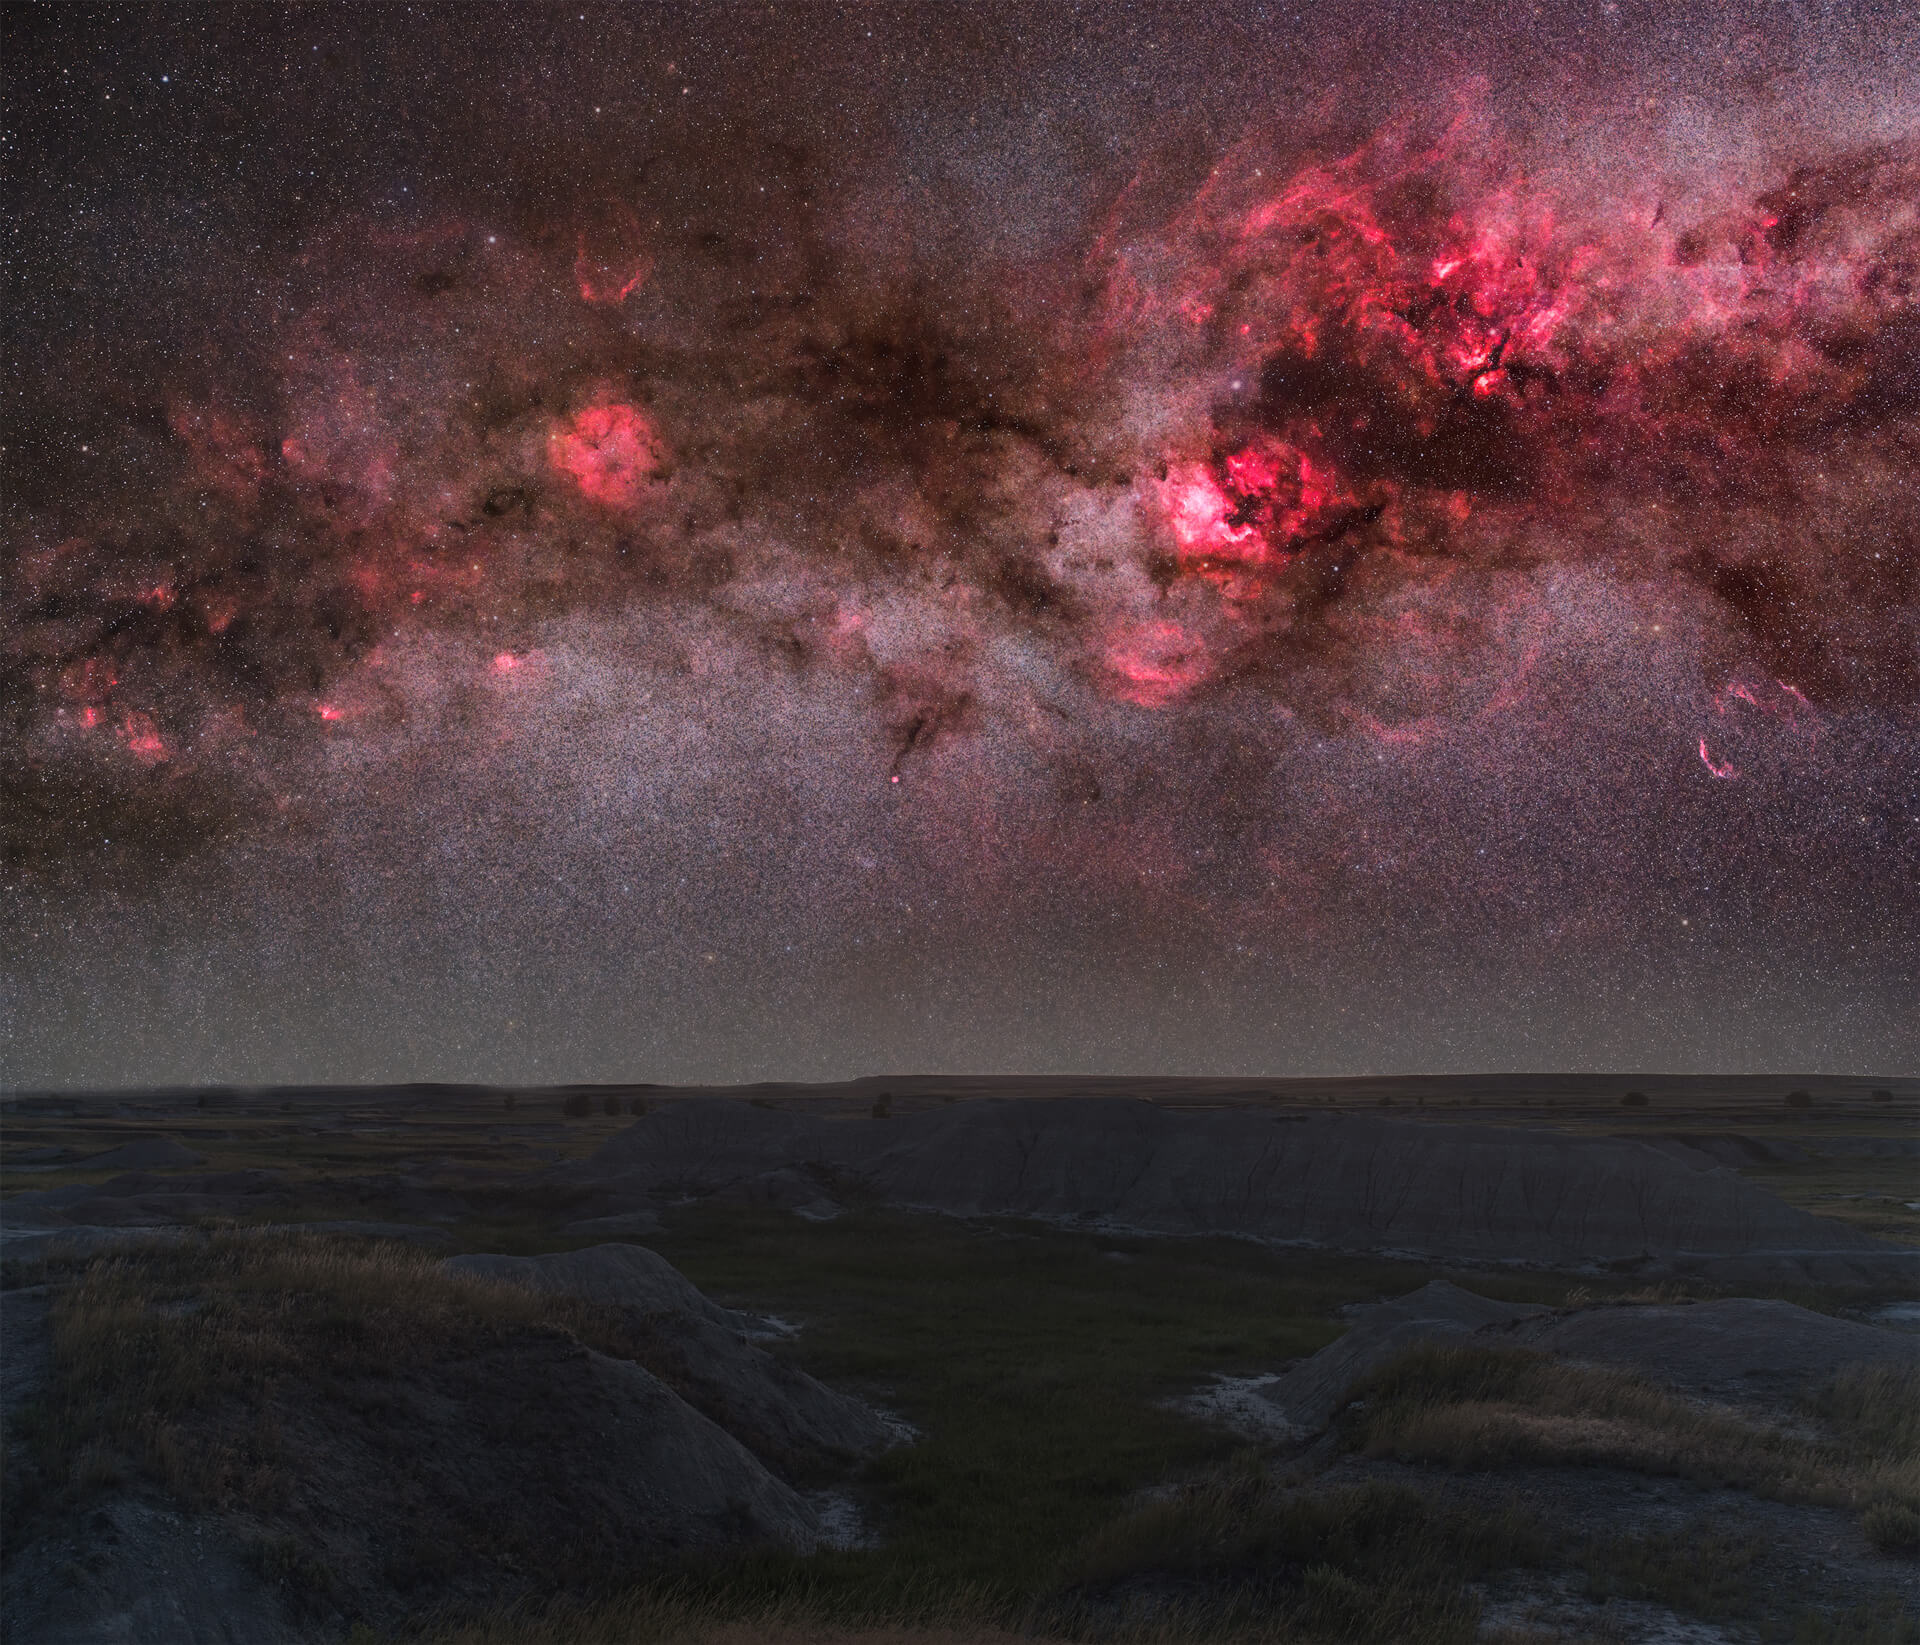
Processing can get very involved, and there are many techniques, but this is the general workflow for incorporating H-alpha data. This technique gives the improved contrast of narrowband data with the natural colors from the RGB data. You would then process and blend your foreground image with the sky to create your final H-alpha-enhanced nightscape image.
H-Alpha Filters for Astrophotography FAQs
What Is An H-Alpha Filter In Astrophotography?
An H-alpha filter is a narrowband filter designed to capture hydrogen alpha light, a deep-red emission line at 656.2nm. This wavelength is especially useful for photographing red emission nebulae in night sky and landscape astrophotography.
Why Use A Narrowband Filter For Landscape Astrophotography?
A narrowband filter helps block unwanted light from light pollution, sky glow, moon glow, and other sources while allowing the desired emission wavelength to pass. This improves contrast and signal-to-noise ratio when photographing emission nebulae.
Can You Use H-Alpha Filters With Camera Lenses?
Yes, but there are challenges. The article explains that clip-in filters are often the main option for many camera systems, while drop-in filter adapters can be an elegant solution for some setups, especially when adapting DSLR lenses.
What H-Alpha Filter Width Is Best For Camera Lenses?
The article recommends staying around a 12nm H-alpha filter for camera lenses because it is more affordable and has fewer transmission issues than very narrow 3–6nm filters, especially when using faster lenses.
What Is The Ha+RGB Workflow For Nightscape Photography?
The Ha+RGB workflow involves capturing normal full-color RGB frames, then keeping the same framing and capturing additional H-alpha frames with a narrowband filter. The RGB and H-alpha stacks are aligned, then the H-alpha data is blended into the red channel to enhance nebula detail while keeping natural color.