One of my favorite elements of photography is how you can combine two simple concepts to challenge your understanding of the medium and improve your overall skills as a photographer. In this article, I will walk you through how I tested the focusing and exposure characteristics of a medium format film camera combined with a filter to capture ultraviolet images without having a digital camera to reference!
Supplies
While shooting film without visible light may seem challenging, it can be done with some simple supplies:
Tripod – This is essential for establishing focus, bracketing your shots, and capturing long exposures without blurriness.
Kolari Vision UV Bandpass filter– This filter limits the light transmitted to your camera’s sensor (film or digital) to a narrow range of around 340-380nm within the electromagnetic spectrum.
Film Camera – Almost any type of film camera will work for this experiment. I’ve used UV filters with 35mm, 120, and 4×5 film with great success.
UV-Friendly Lens – Modern lenses often have an anti-UV coating to reduce the amount of UV light reaching the sensor, so I recommend a vintage lens. They’re typically cheap because they’re optically imperfect, but they are well-suited for this project. Make sure your lens mount matches the camera body that you’ve selected to use! If you’re feeling extra-motivated, you can look intoa dedicated UV lens for the best performance, but be prepared to pay a hefty sum.
Lots of light! – Light can take the form of a flash or direct sunlight if the weather is fitting for such work. Whatever you choose, make sure you can capture a large amount of light because this process effectively limits your camera’s light sensitivity to ~ISO 1!
Film – Some films will be better than others in capturing the UV portion of the spectrum, but this is up to you to experiment and find out! If you’d like to start with a reference point, I have tested Kodak Ektachrome 100, Fujifilm Provia 100F, Kodak Portra 800, Ilford Delta 400, and Ilford Ortho Plus 80 with great success. Each film I use will be labeled throughout the article.
Exposure Testing
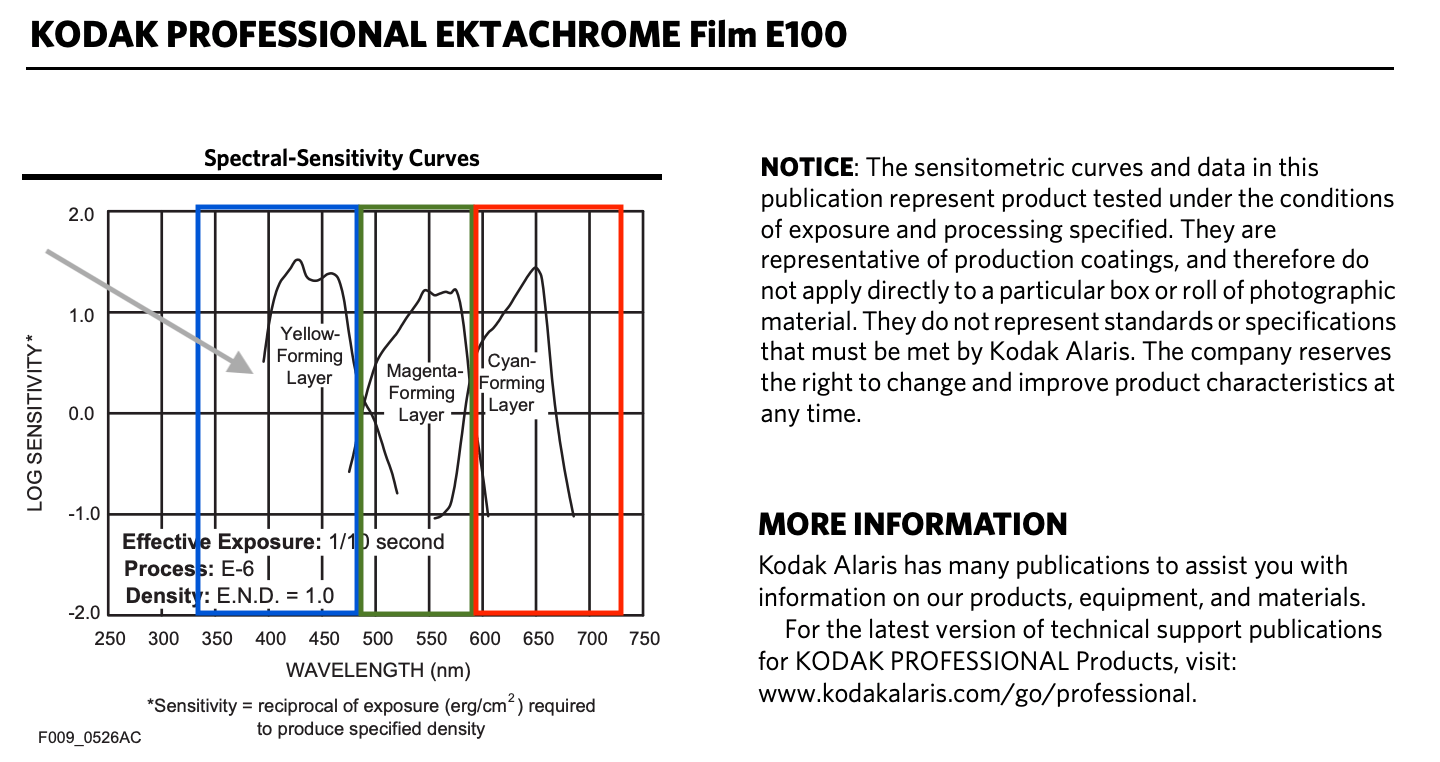
I began my search for potential film stocks to use by exploring the film data sheets for each available option. As UV light is energetically most similar to blue light, I was looking for greater sensitivity in that region of the spectral sensitivity curve (seen below).
There were several viable options, so I took my best guess and began with a black and white film before progressing to a color positive (slide) film and finally to a color negative film. I used the same light throughout this entire experiment (a Norman P2000D strobe at max power) and varied the aperture settings to capture different exposure intensities to see which would be the best fit.
Because I was using a Mamiya RB67, I was limited to ten exposures, so I took one photo at f4.5, f5.6, f6.3, f8, f11, f16, f22, f32, and f45. The final exposure (double exposure at f4.5) served as a safeguard if I lacked sufficient light to stimulate the film even with the widest aperture and would inform my next steps if the experiment did not go as intended. My shutter speed was 1/125s, but this was irrelevant because the flash provided most of the light for each exposure. If you’re not using a flash, I suggest varying the shutter speed to allow more light to enter.
My first six exposures with Ektachrome 100 pushed 3-stops in development. The remaining exposures were too far under or over-exposed and were left out.
Finding Focus
After achieving the exposure you desire, the next step is to isolate a mechanism to adjust the focus after you’ve attached the UV filter to the front of the lens. While visible light can be focused directly on the ground glass or viewfinder of the camera, capturing regions outside of visible light (i.e., infrared or ultraviolet) requires an adjustment to the original focus point. For more information on this phenomenon,see here.
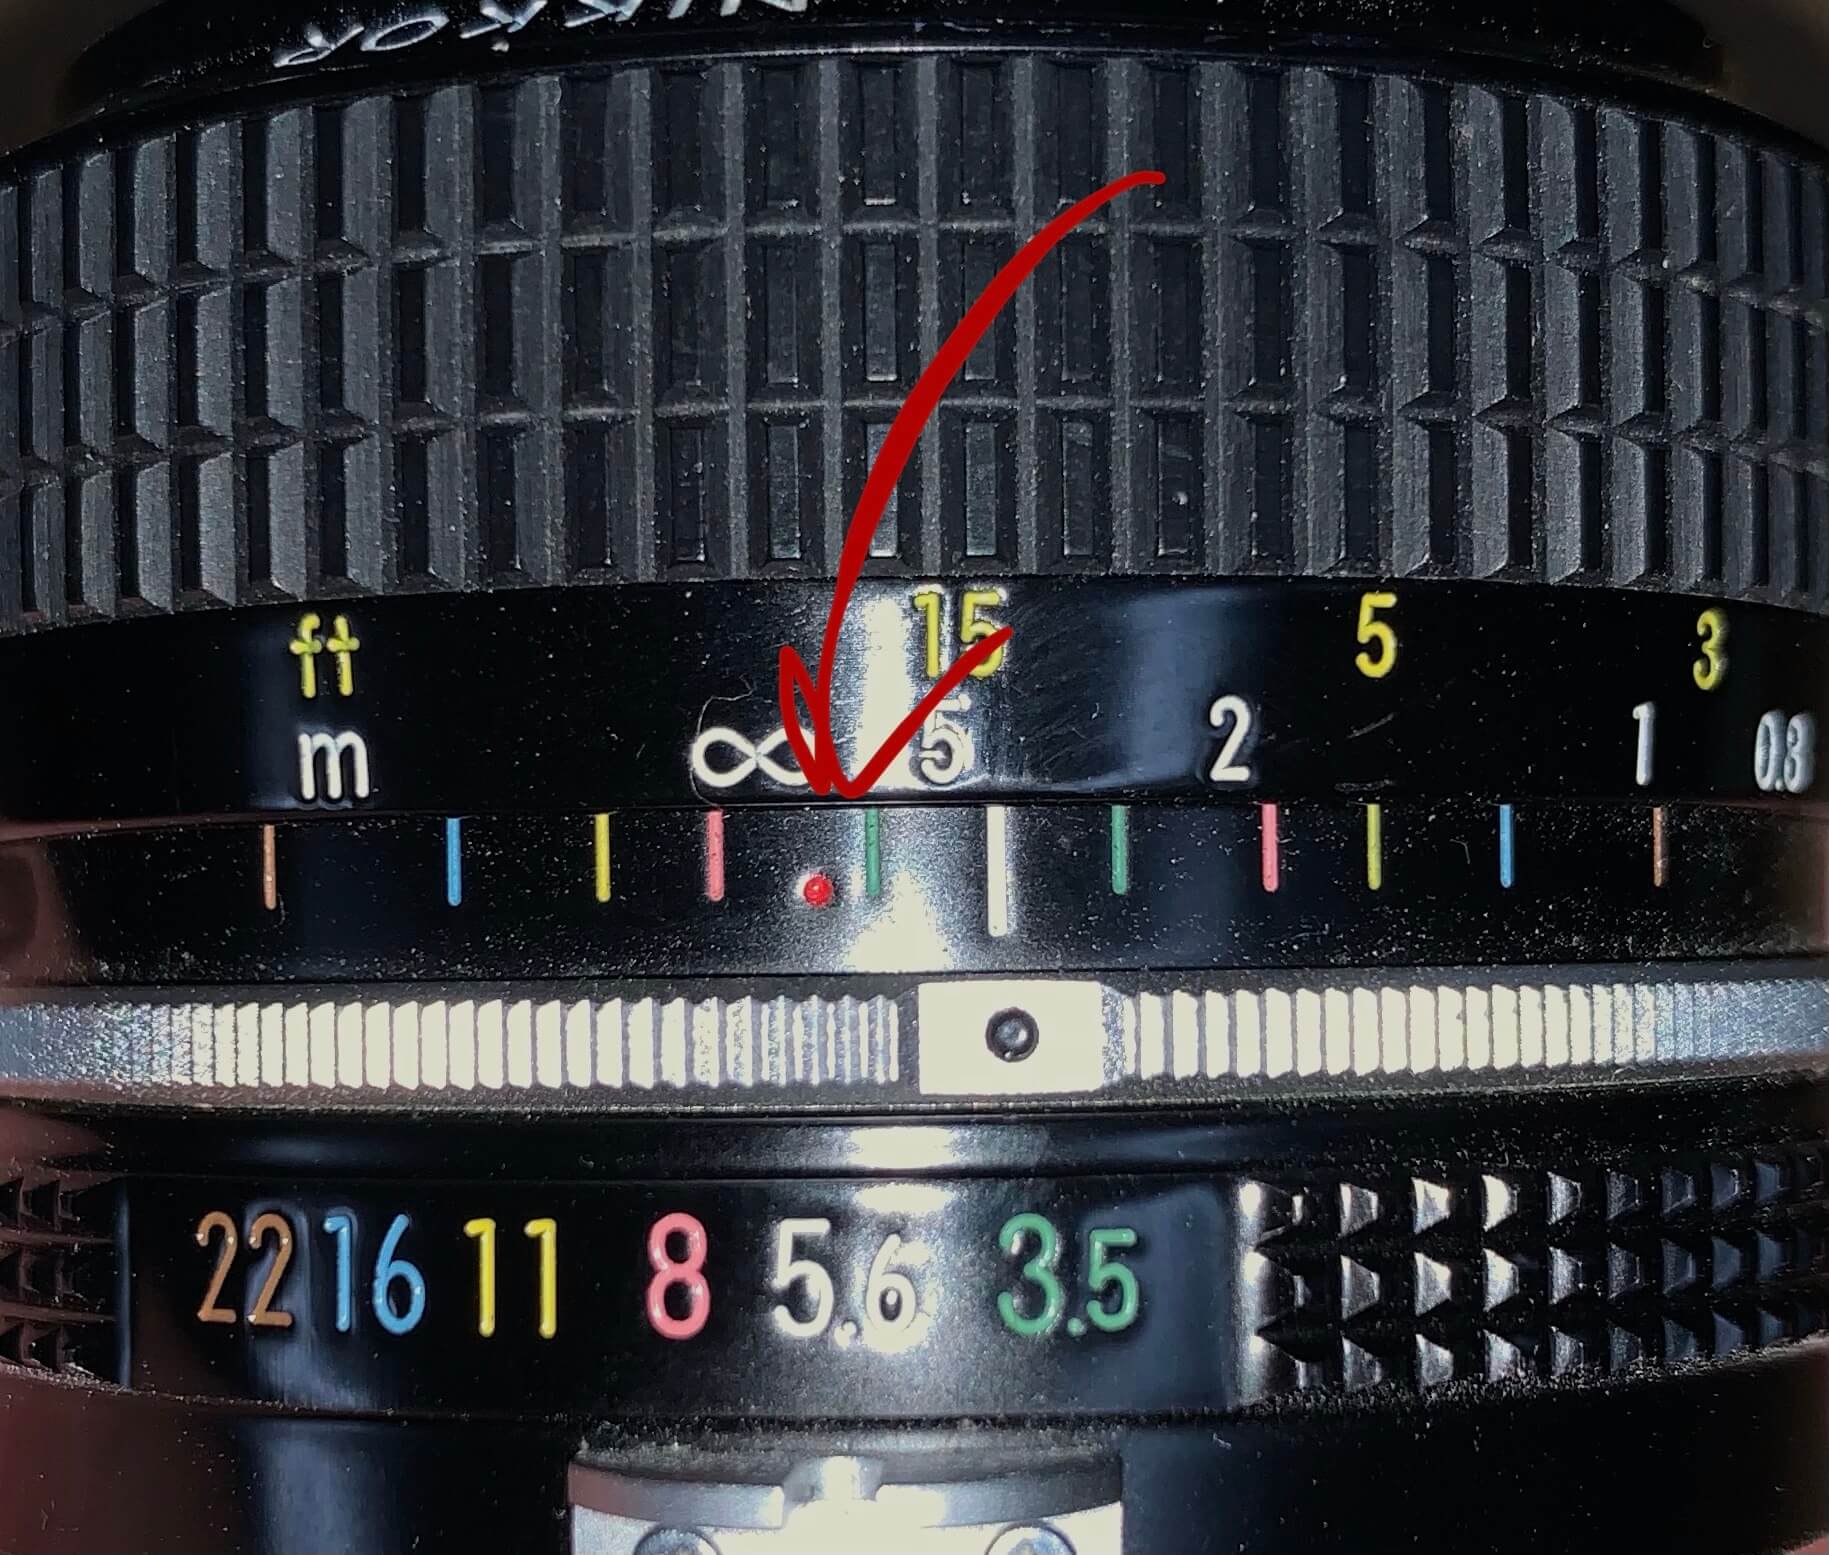
Example of an IR calibration marker on a Nikkor 28mm lens.
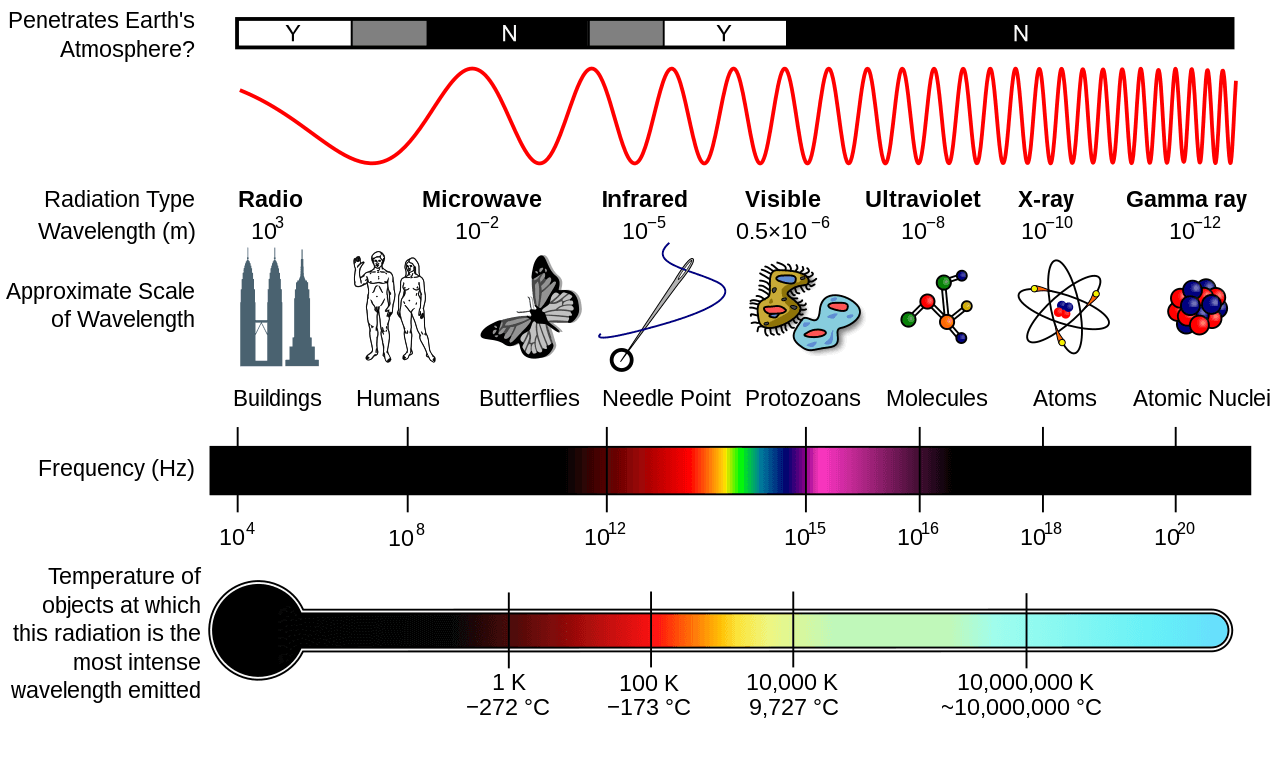
From prior experience, I know that to focus in IR at infinity, you set the lens to infinity and then turn it back until the new focus aligns with the IR calibration marker (typically denoted by a red “R,” red dot, or red line). This is because IR wavelengths are longer than visible light. Unfortunately, no such calibration exists for UV, but following that same logic, I knew I would need to twist the lens in the opposite direction because UV wavelengths are shorter than visible light.
To make an educated guess of how far I would need to adjust the focus throw to calibrate the focus in UV, I performed focus bracketing—taking multiple pictures and slowly adjusting the focus. If you’re doing this over an extended period, I recommend taking a photo of the starting and ending lens position with your phone to create detailed notes to review after the film is developed. Additionally, if you have enough light, you can consider stopping down your lens to a smaller aperture to draw out the depth of field and give you more room to work with.
After establishing the calibration distance, I captured some portraits of friends using this unique ultraviolet setup. To minimize the difference between frames, I had everyone sit on the same apple box with the same lighting setup, camera, lens, and tripod. After I finished shooting, it was time to develop and print! For each development, I opted to “push” (or extend) development because I wanted to boost the contrast in the film that would only exhibit the blue/violet area of the spectrum. Due to the high-energy nature of UV light, this setup should work with normal box speed development as well, but that’s up to you to explore.
Final Darkroom Print
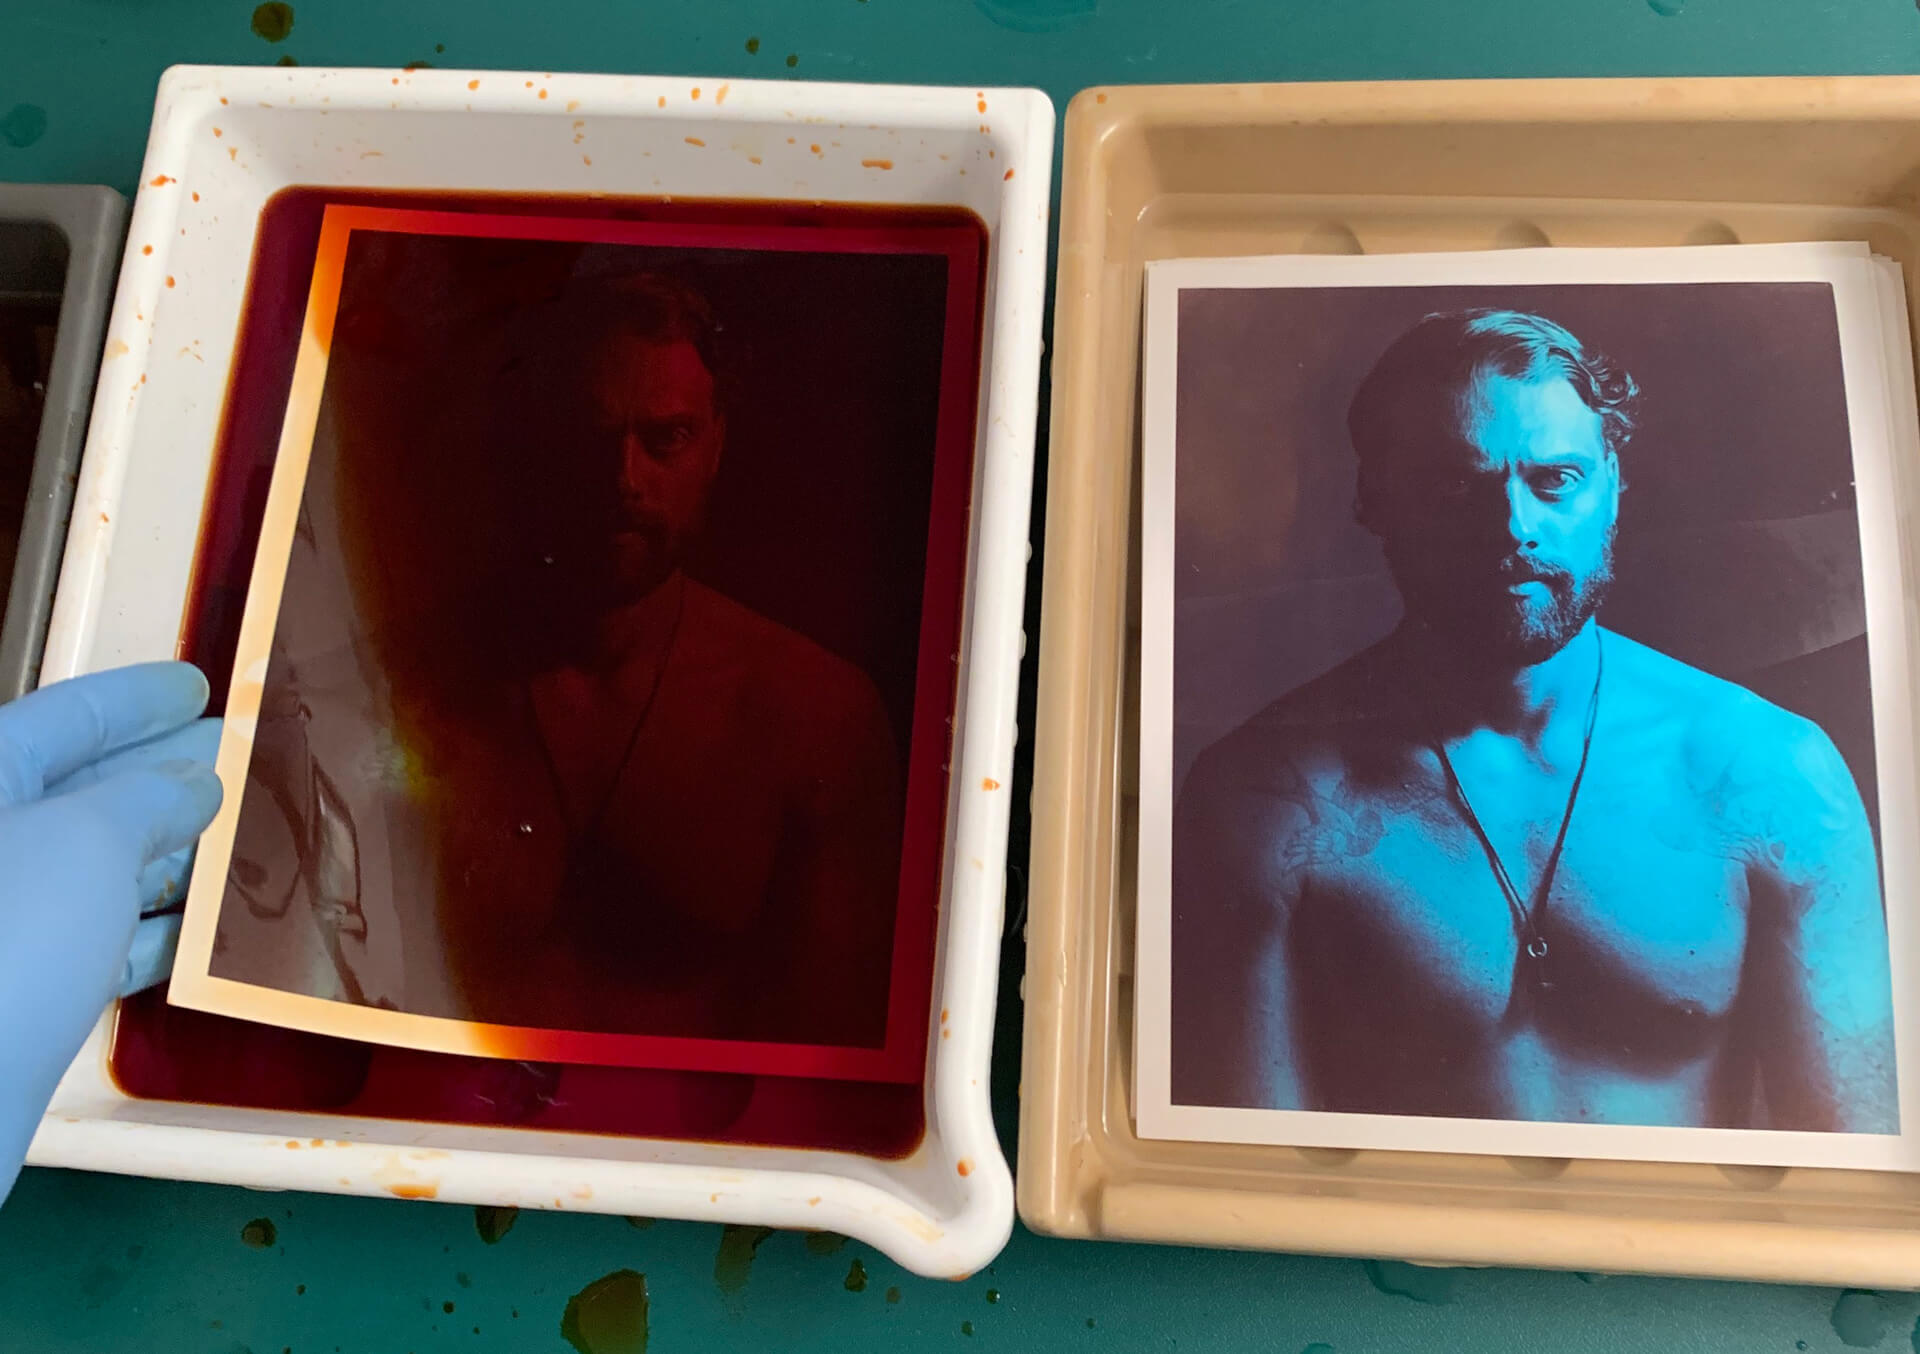
Using RA-4 color darkroom paper and the appropriate chemicals, I made some darkroom hand prints using Kodak Portra 800 negatives. The final tone and character of the image are up to your interpretation and can range from a muted violet to a punchy cyan. I preferred the latter look, so I altered my darkroom filtration to make the shadows neutral black. Notably, true ultraviolet light is outside the visible spectrum and colorless to the human eye. In this experiment, we see a combination of the small amounts of light that leak through the filter and the ultraviolet light that stimulates the “blue” layer of the film.
RA-4 Handprint of UV Portrait
Final Thoughts
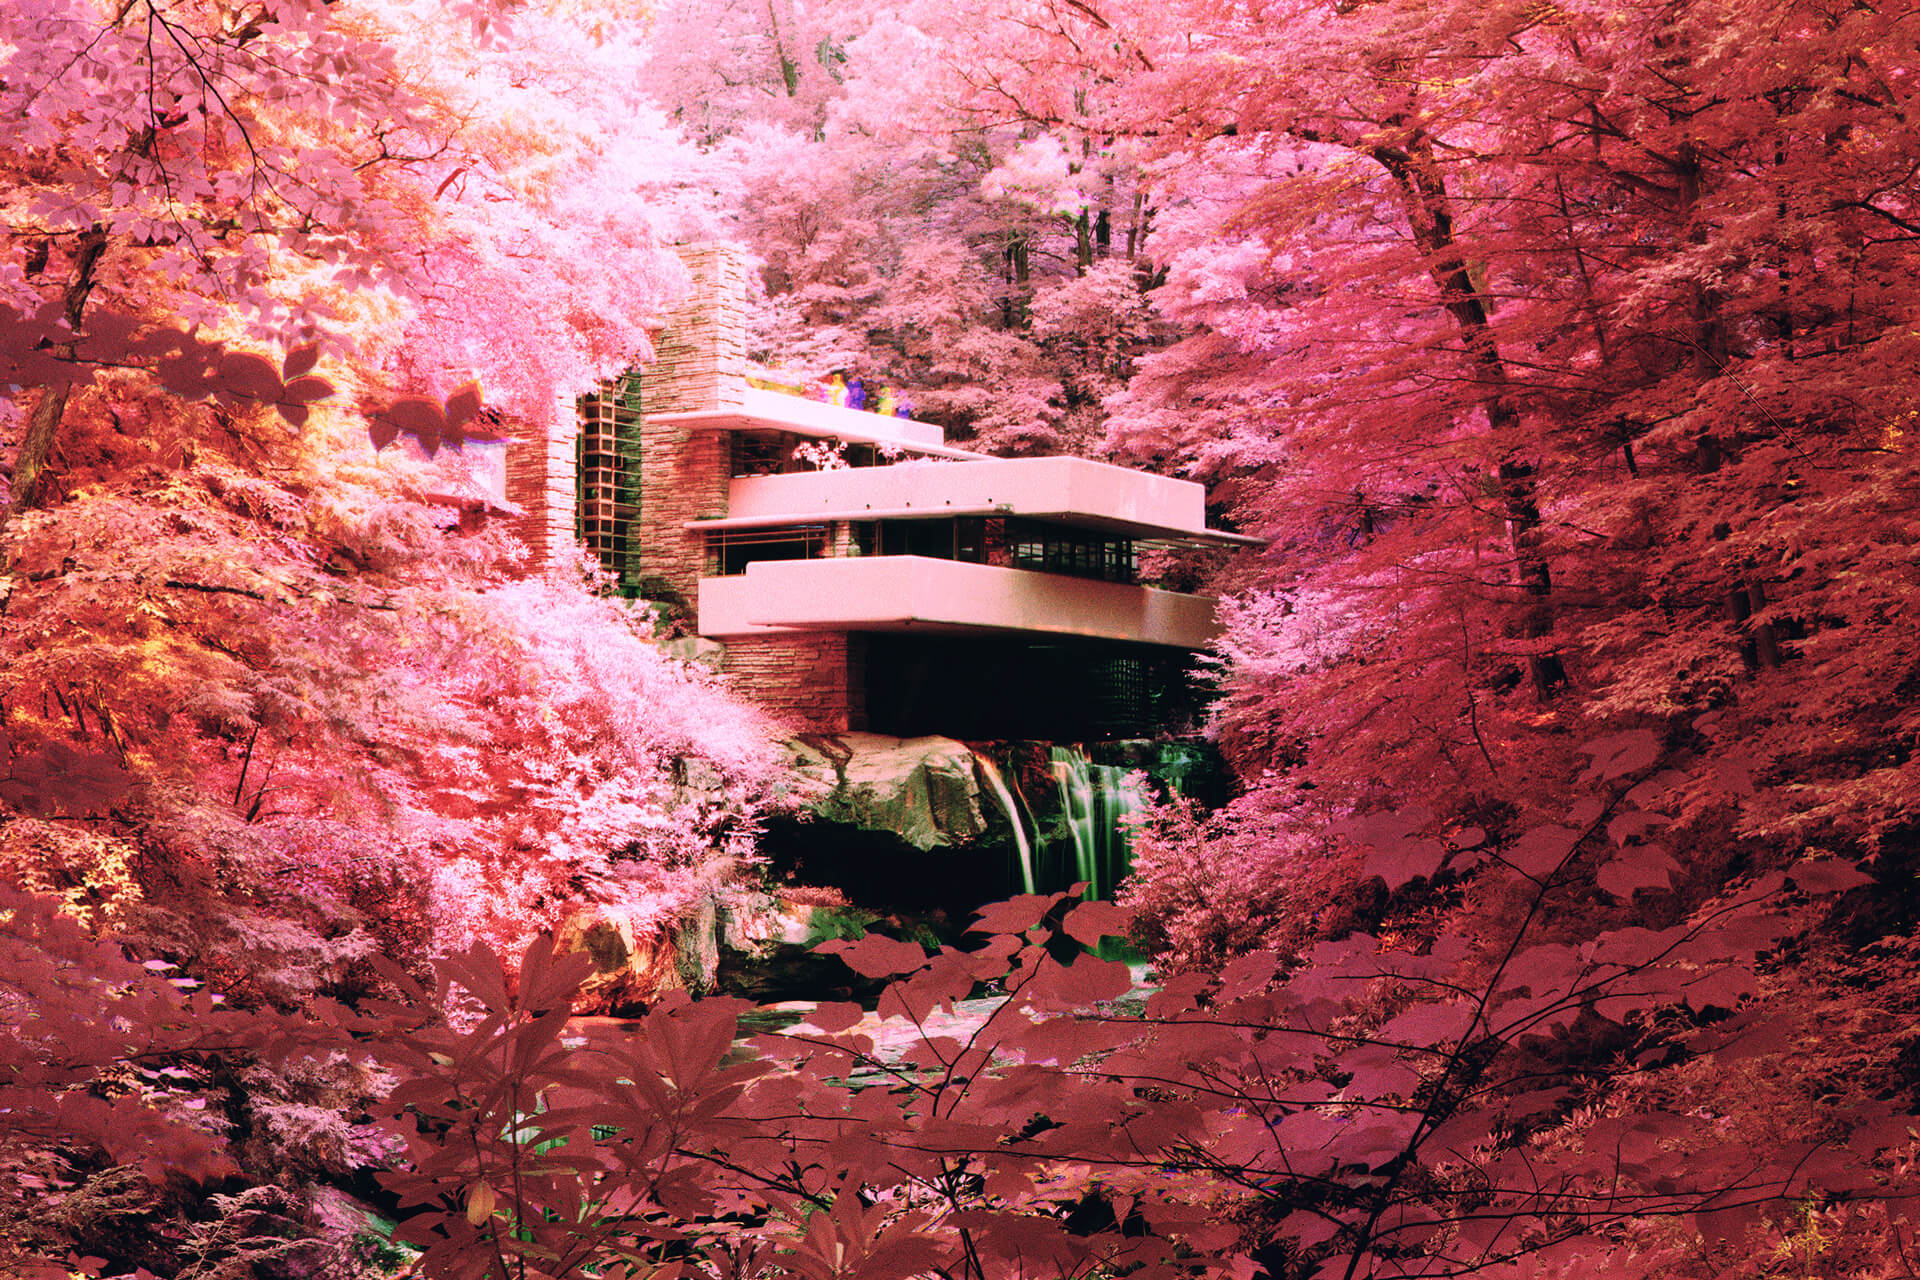
Through completing this project, I became more familiar with ultraviolet light. This experience informed some of my other experiments in infrared analog photography, namely infrared tri-chromes that recreate the look of Kodak’s long-discontinued Aerochrome film.
Trichrome using Rollei IR film with R72, blue, and green filters, composited in Photoshop
I hope this experiment inspires you to explore and test the possibilities of the camera gear you have at your disposal. Feel free to swap out film stocks, lenses, and filters to see what variations you can make, and comment below if you’ve done similar work before!