There isn’t a rule book to follow when starting as a photographer. Sure, there is lots of technical knowledge to learn, but as far as essential tips and tricks are concerned, there just isn’t a handbook that can provide insider knowledge that comes from working in the field.
Whether you’ve just purchased your first camera or just want some basic tips and tricks, I have put together the top five things you might find helpful as a starting point. Consider it a list of basics to help you build a strong foundation from which you can keep learning and growing as you progress along your photographic journey.
1. Shoot RAW
Whether you are considering going pro or not, it is always best practise to shoot RAW files. Camera RAW files contain all the data captured by your camera’s digital sensor in an uncompressed format (unlike JPEG). Shooting images in RAW gives you a much higher image quality and will provide you with much more latitude in the post-processing stage. Working with RAW files allows you to make corrections for over or under exposure, contrast, and white balance easily and in a non-destructive way to your finished image.
However, when shooting RAW files, you need to be aware that these are extremely large files that require a great deal of processing power from your computer, and you’ll need adequate storage systems to accomodate archiving your files. Saving RAW files in your archive alongside the finished JPEGs allows you to revisit the original images at any point should you wish to and to make non-destructive changes to them repeatedly by exporting edited JPEGs. Think of RAW files as the originals and your JPEGs as edited versions of the originals — by shooting and keeping RAW files, you can always go back to the beginning should you need to.
If you have a big enough memory card, you can always shoot RAW + JPEG — an option in your camera settings. This allows you to have both an original copy of the data file, along with a compressed JPEG preview of the unedited image. This is sometimes helpful when you have to quickly turn around an image or want quick access to a file. Many professional photographers shoot RAW + JPEG as a backup, just another way to ensure that there is more than one copy of an image.
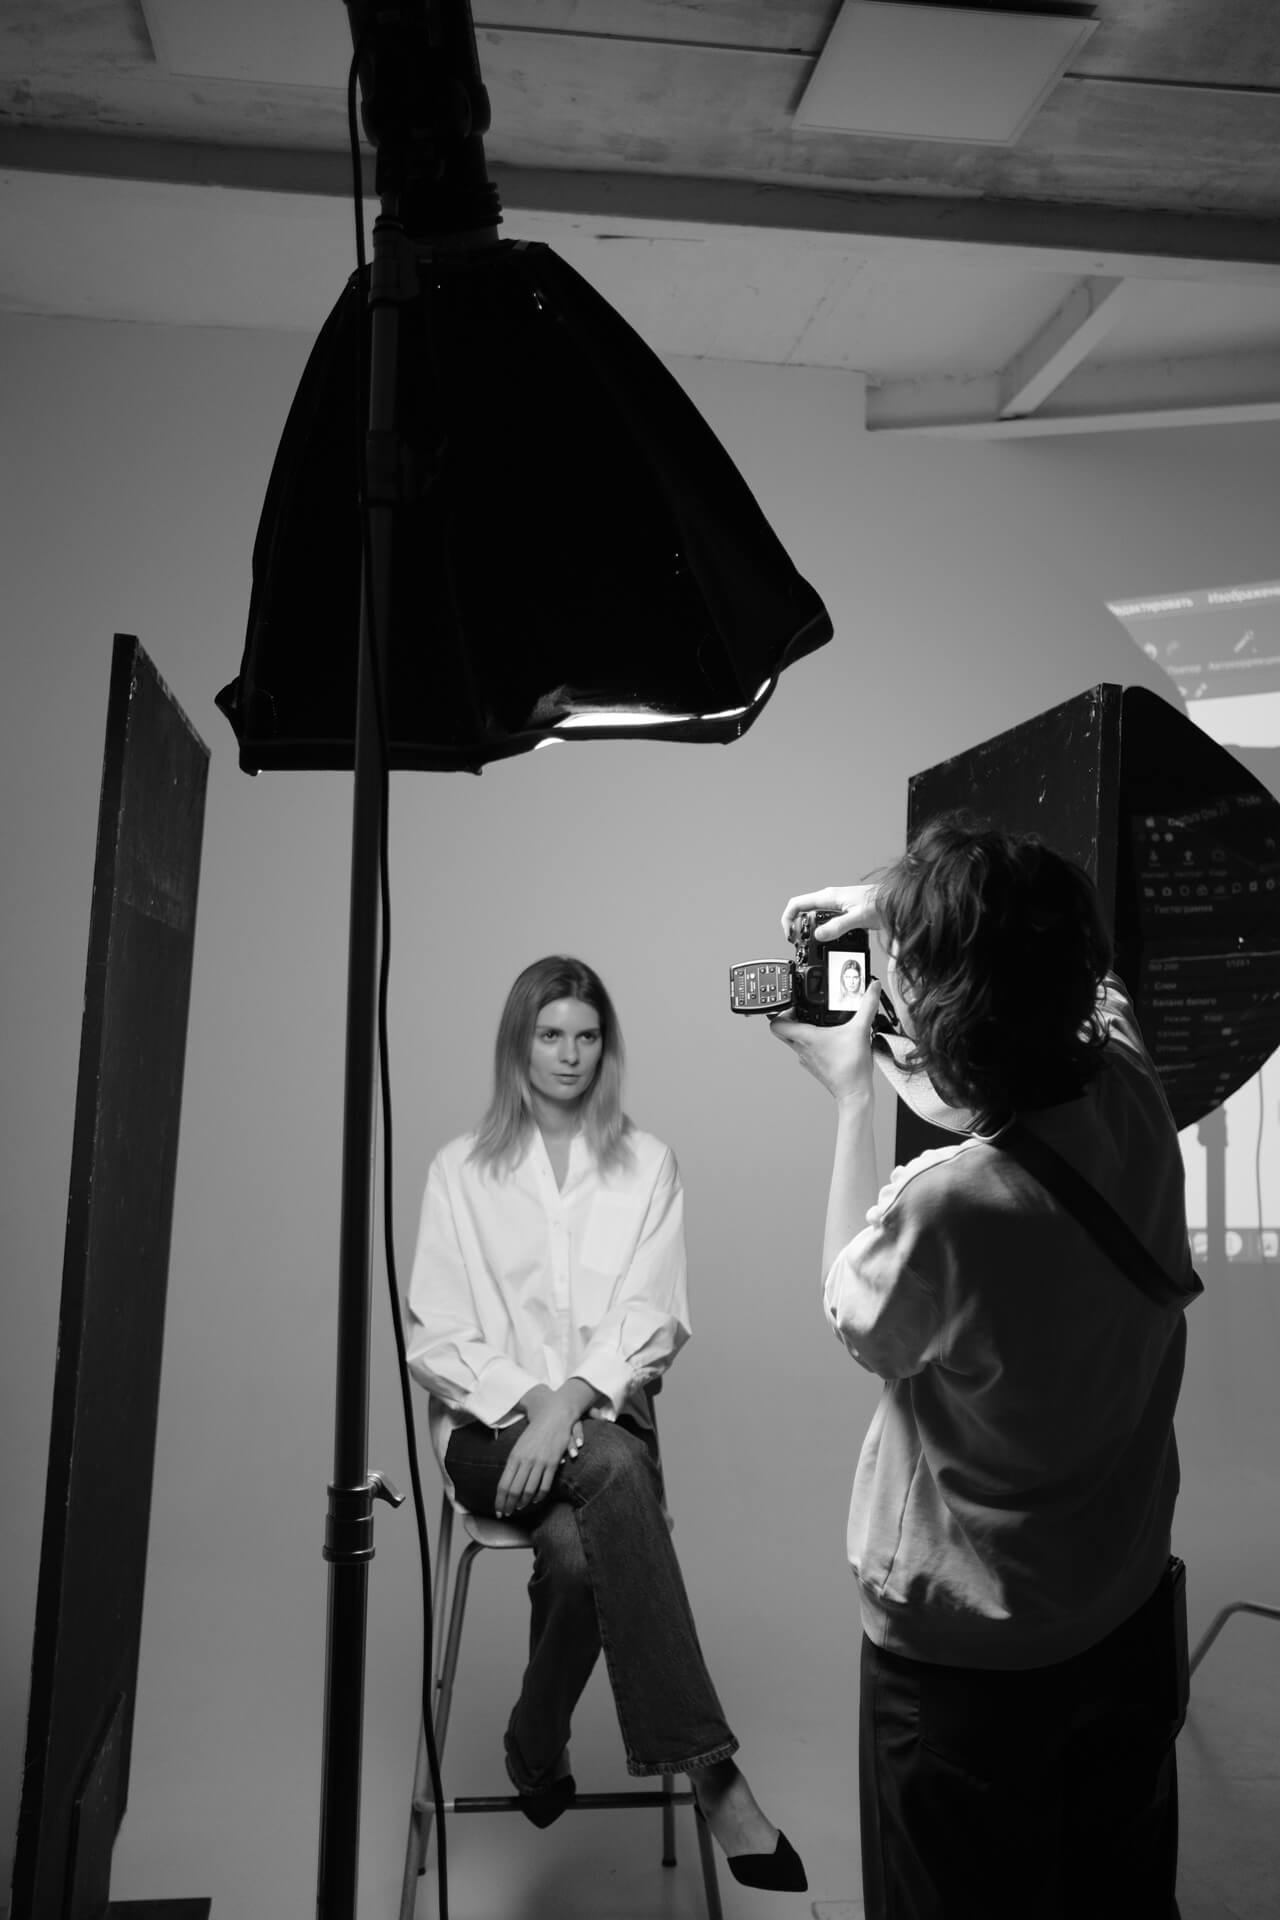
2. Learn to use your camera’s histogram
When you start getting to know your camera, you might be overwhelmed with the number of menu options available, but the histogram is one you should most definitely utilise. When first beginning to shoot, most people rely on the LCD playback of the image they have shot to determine whether their image is correctly exposed. This is an unreliable way to check your exposure because sometimes they might appear okay on the LCD, but when you get home and download the file, you discover that you’ve blown out your highlights or lost detail in the shadows.
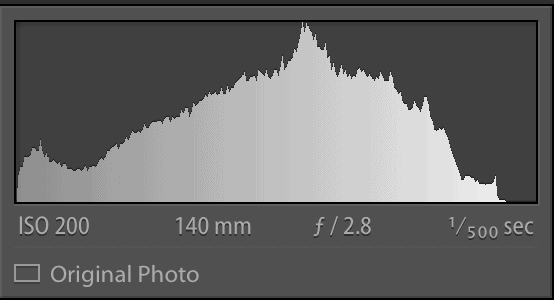
The most reliable way to check your exposure when actively shooting images is to use the camera’s histogram — a graph available in one of your camera’s menu options (review your camera’s manual for how to turn on the histogram for all photos).
Learning the histogram and how to use it when exposing your images is hugely helpful. In short, the histogram provides information about the tonal range of your photo. The lefthand side of the histogram represents blacks (or shadows), and the whites (or highlights) are on the righthand side. If your histogram is heavy on the right side, you may have overexposed your image; if it is heavy on the left, it might be underexposed or too dark to gain detail from shadow.
Each digital camera has a histogram function, and it might take a little while to get used to where yours generally sits in terms of the images you capture. For example, some photographers shoot light and bright and find their histogram leans more to the right, while others who shoot more dark and moody images find theirs skew more to the left. However, it is most important to understand where the histogram sits on a given image as you shoot to ensure you will come away with a usable and correctly exposed image. It is also helpful to use when out shooting so you can make adjustments on the fly instead of resorting to post-production. While many photos can be corrected and adjusted from RAW, nothing is as good as a correctly exposed image in the first instance, so use your histogram as much as possible to help here.
3. Learn and experiment with the different modes your camera has
While the auto modes delivered by most cameras these days are pretty good at capturing an accurate average exposure for a scene, there is no point in spending a fortune on a good-quality camera body only to shoot in this mode. We invest in good gear so that we can take good images — and taking good images comes from learning how to control your camera — so make it a priority to learn your camera shooting modes as soon as possible.
If the leap to manual mode is too far for you as a beginner, take time to learn the aperture and shutter priority modes. It is worth investing time in understanding what each mode does and the decisions the camera makes on your behalf. Aperture priority lets you select an aperture while the camera chooses a corresponding shutter speed for the correct exposure. With shutter priority mode, you select the shutter speed, and your camera selects the corresponding aperture.

There are times when one mode is more useful than the other. For example, if you are an event or sports photographer and you want to freeze action, you might choose shutter priority mode to make sure that you never get blur in your images. If you are a landscape, street, or portrait photographer, you might want to select a specific depth of field with your aperture; thus, aperture priority mode would be your go-to. Note that you must still input the ISO when shooting either of these modes unless auto ISO is selected.
Of course, for complete control of your camera, you can learn to use manual mode, where you select all three of the exposure controls to suit your intended look. Personally, I shoot in manual mode almost exclusively and have since my early days of shooting. Learning in manual mode helped me gain a nuanced understanding of the exposure triangle very quickly and helped me create images that felt the way I wanted them to look. Some photographers wouldn’t recommend this approach, particularly in changing light conditions; however, I am a fast thinker and can quickly calculate where I need to change my exposure while shooting, so I feel most comfortable in manual mode.
Make sure to familiarise yourself with your camera’s shooting modes to discover what works for you and your shooting style — I promise you that the outcomes are far superior to what can be achieved using your camera’s auto mode!
4. Invest in a good photo editing program and learn its functions
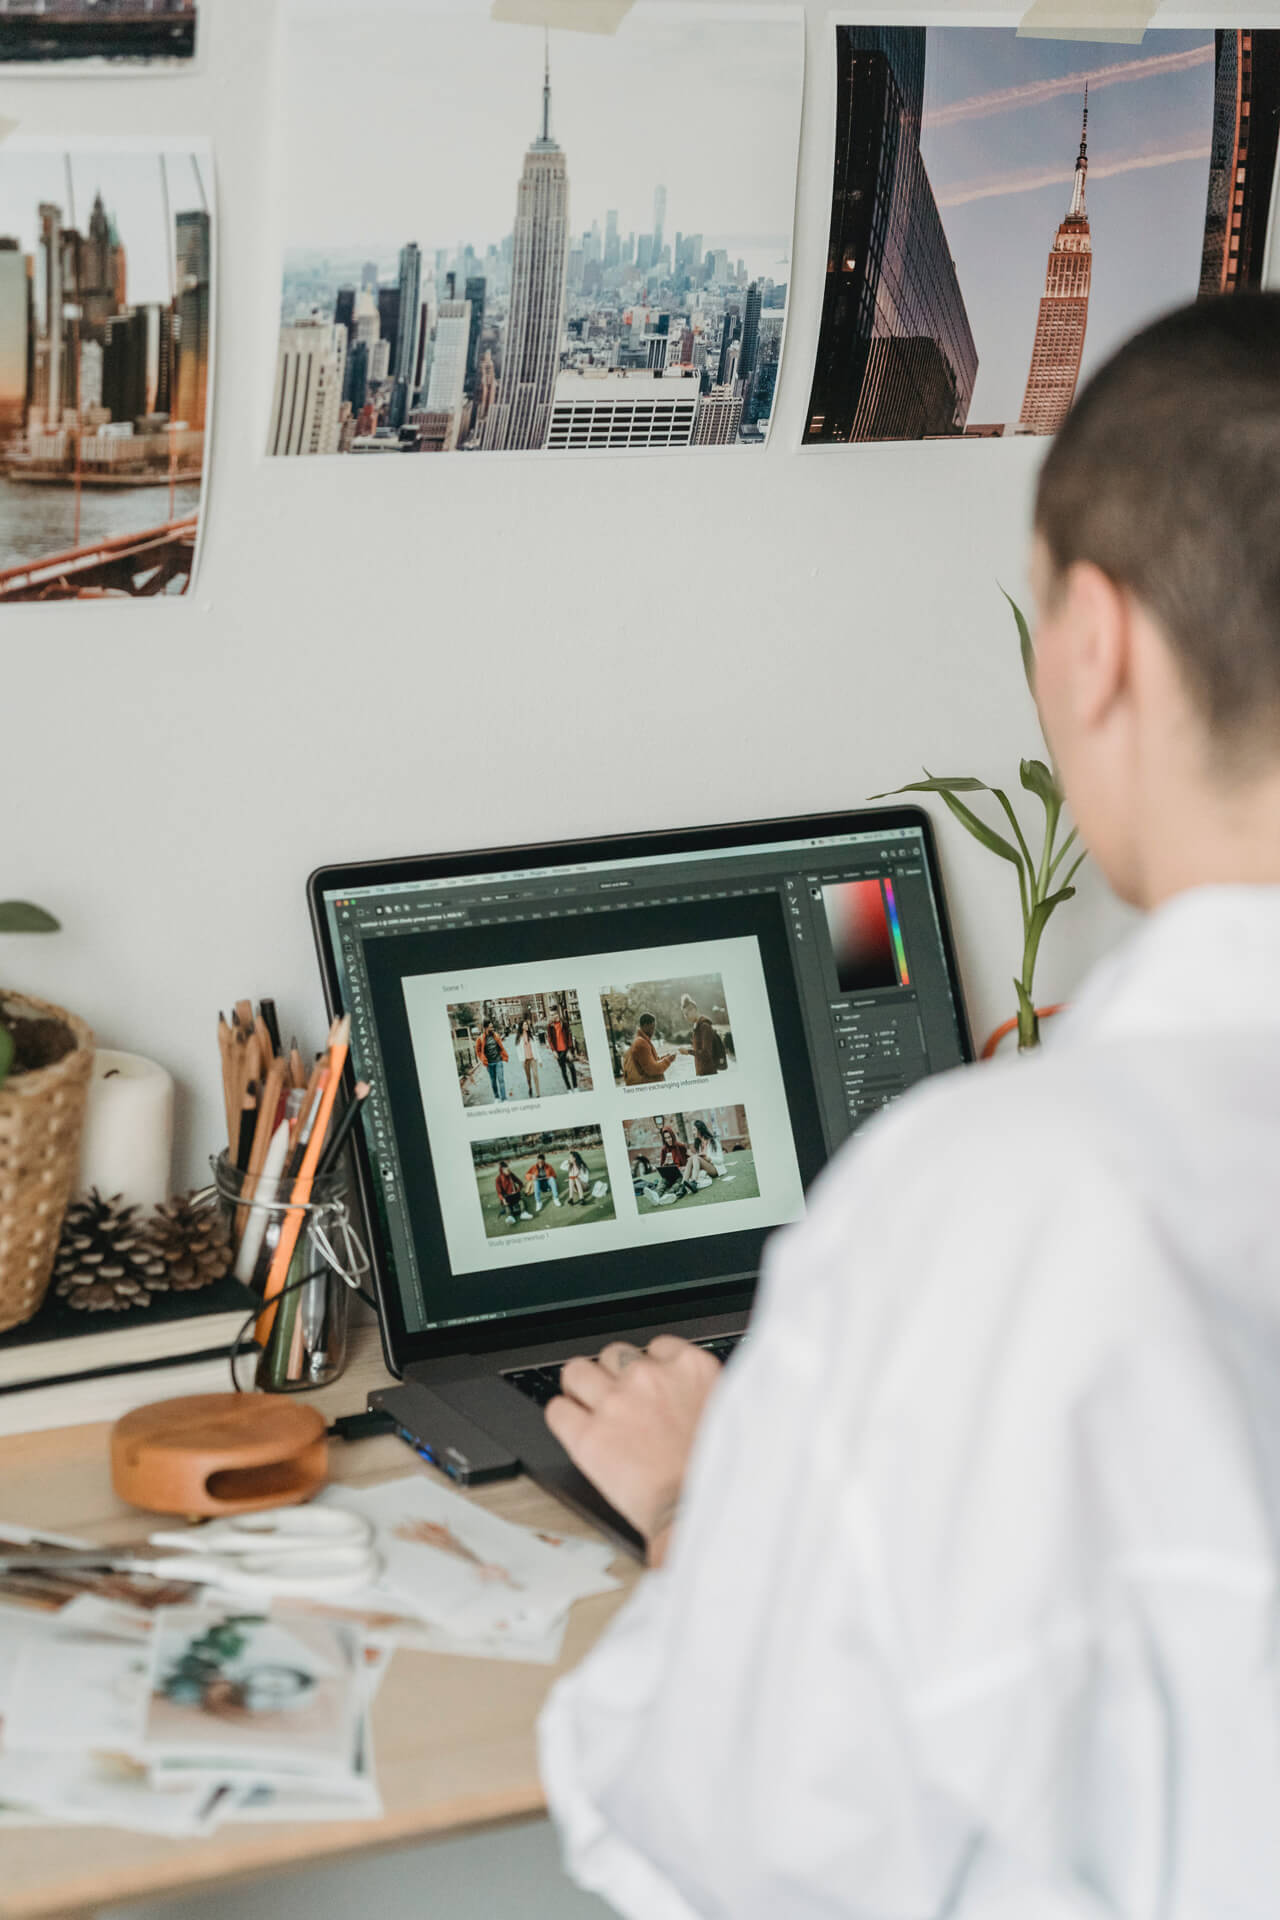
I’ll admit that I didn’t edit my images when I first started shooting. I thought that shooting JPEG was enough and that we should all learn to embrace imperfections and not fuss too much with retouching. At the time, I was unaware of the undeniable need to make adjustments to our images, particularly when we are working at a professional level. Be that an exposure adjustment, retouching, or colour grading your work — we must consistently deliver the high-quality images we are expected to.
There are many options for photo editing software, but I recommend starting with industry-standard software such as Adobe Camera Raw and Adobe Lightroom for post-processing your files. These programs are relatively user-friendly and easy to learn. They both offer powerful adjustment tools to achieve your desired outcomes.
This is where you fine-tune your images and make any adjustments to white balance, contrast, highlights, shadows, exposure, and many other things. There are correction tools for almost anything within these programs. Most hobbyist photographers can easily get away with not having to take their images further into programs like Adobe Photoshop for more complex image-finishing tasks.
5. Back up! Back up! Back up!
I cannot stress the importance of this enough. BACK! UP! YOUR! WORK! Having an archive of your work is crucial in the digital world. When we used to shoot on film, we always kept our negatives so we could return and make prints from them whenever we wanted. Sometimes that would be ten or twenty years into the future. The same goes for digital files. Don’t think that just because you’ve printed your photo, posted it to social media, or put it on your website, that it’s the end of the line.
As you start out, developing a digital backup system is imperative so that your original files can always be safe. Remember that you can never capture many moments again; if the digital file is lost, it is gone for good. You can use numerous ways to back up your RAW and JPEG files. I personally use a combination of HDD (Hard Disk Drive) and SSD (Solid State Drive) to transfer and backup. There are innumerable systems, from very affordable to highly complex and expensive. What matters is that you have a storage system that works, preferably two of them (a backup of your backup will always be helpful if one of your drives fails). Of course, you can use cloud and internet-based storage systems for your digital files, so look into your options and spend money where you think it is warranted.
Coming from someone who has lost data several times on corrupt Hard Disk Drives, I know the costly and time-consuming pain of trying to recover important digital assets. So my recommendation from day one of shooting digital images is to create a robust backup system. If you choose to back up to HDD, I’d advise you not to use portable devices. Buy a desktop HDD and never move it. Keep portable drives (I use an SSD) for their purpose — portable backup and transfers. I use them only on location and transfer my files to my desktop HDD as soon as possible. Portable devices are great and affordable, but they are easily dropped or unplugged, and the risk of corruption is much higher with these possibilities.
Final Note
There are so many more things I could have put into this list, but I wanted to hone in on the top five things that I think are most important to know when it comes to digital photography, whether you are starting out or just good practice in general.
If you are thinking about taking the next steps in your photography journey and you’re looking at moving from hobbyist to pro photographer, take a look at my article here, which takes you through some of the more practical steps required as you make that transition.
Author Bio:
Jade Ferguson is a Brisbane, Australia-based photographer who applies a fine art approach to the subjects she shoots. As an early-career photographer, her work attempts to create an emotionally visceral experience for the viewer by capturing the unseen. She works with film and digital formats; her subjects cover portraiture, performing arts, and a developing personal art practise. She is currently an undergraduate at Griffith University, Queensland College of Art, studying for a Bachelor of Visual Art.