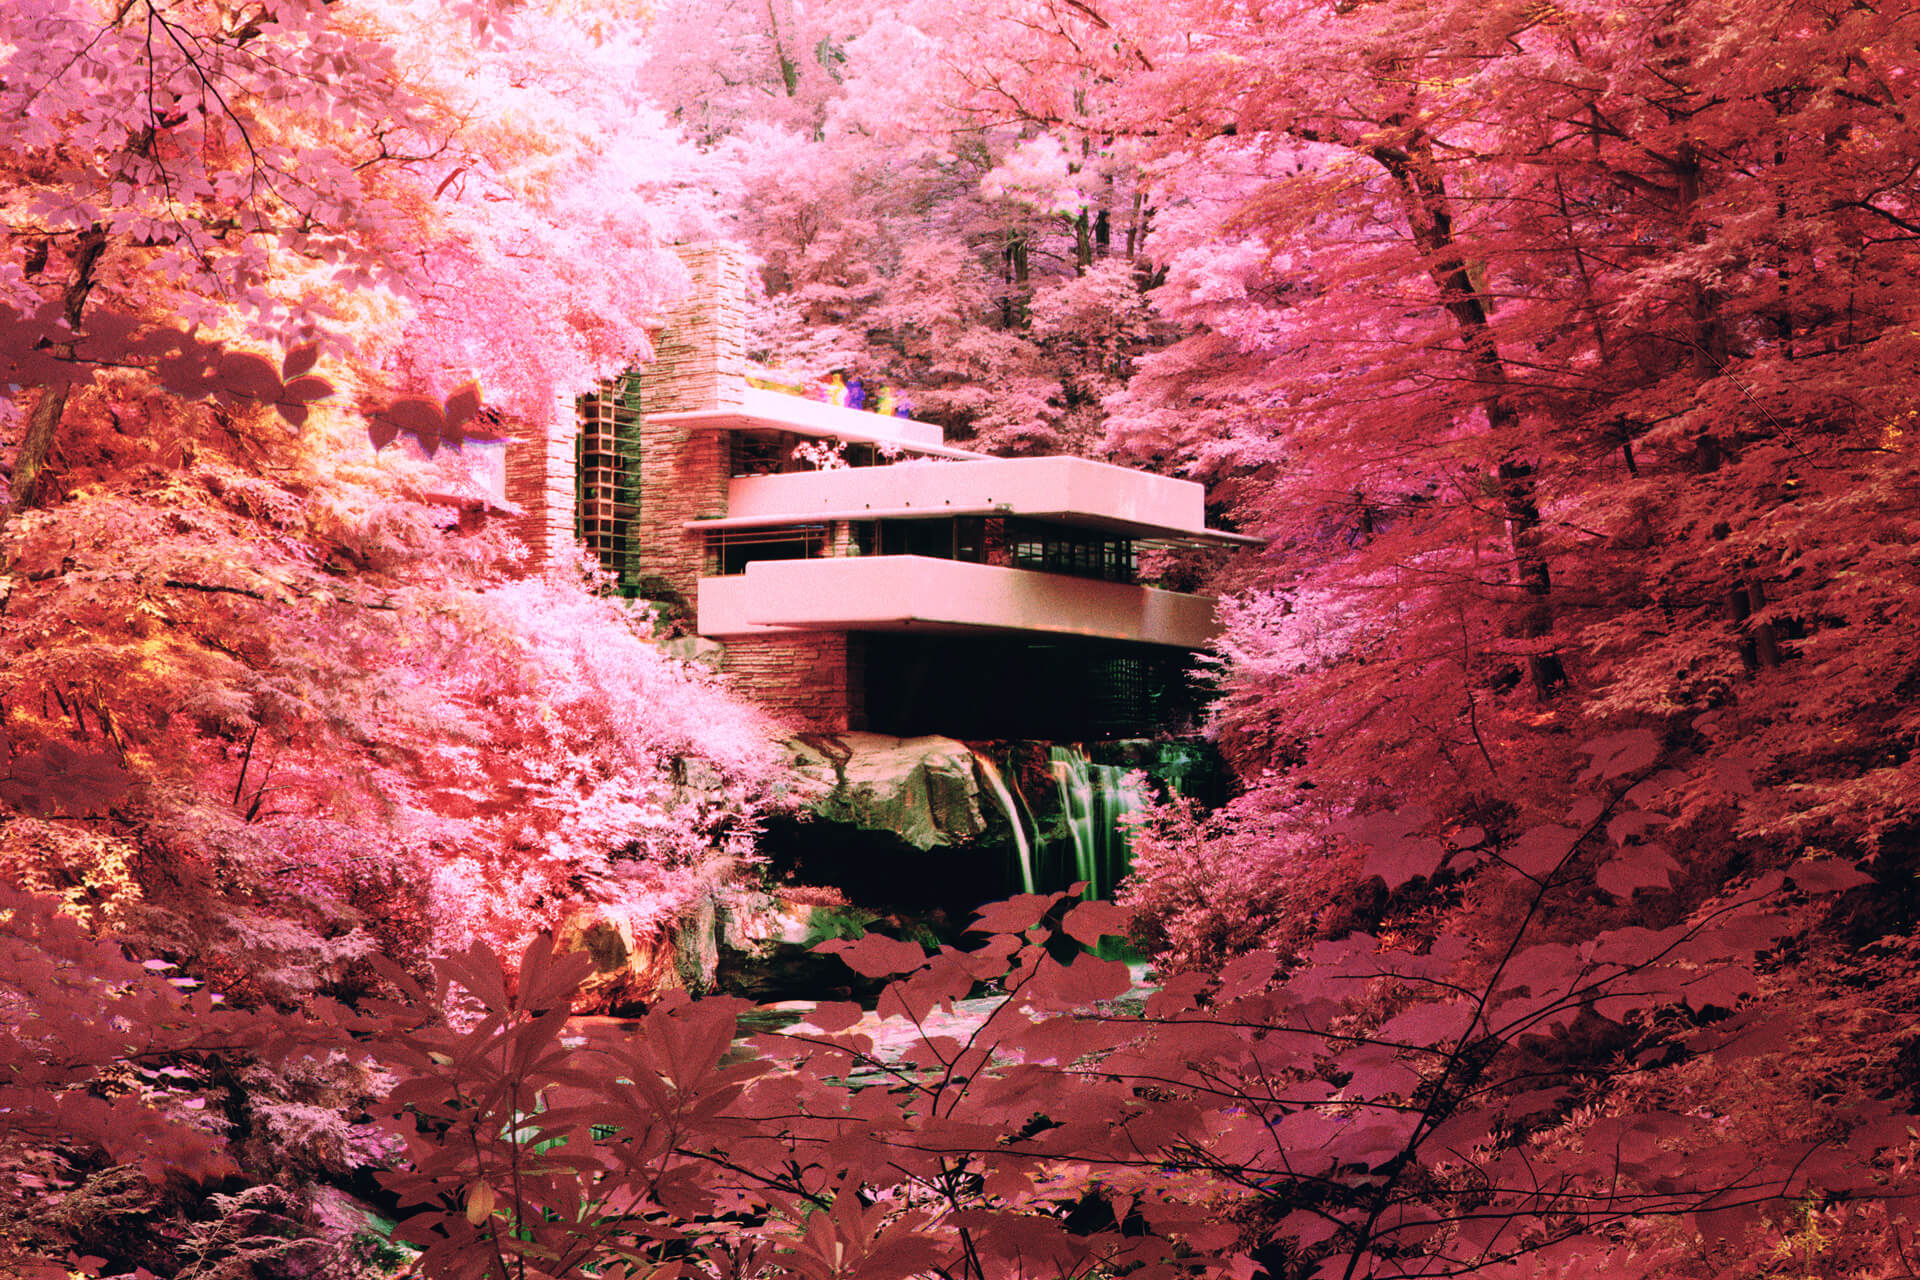
Kodak Aerochrome is a classic film stock with a storied history. Originally, it was the result of a joint venture between the Kodak corporation and the United States military focused on aiding in aerial reconnaissance. As a “false color” infrared film, it renders deep blues and bright pinks/reds that are recognizable anywhere. However, this film can be cost-prohibitively expensive (on the order of hundreds of dollars per roll) or simply impossible to find because it is no longer manufactured, so we must examine other options that provide a similar look. In this article, I’ll directly compare the results of an infrared trichrome with 35mm film and digital results with a full spectrum camera with a Kolari Vision IR Chrome filter.
Building a tri-chrome
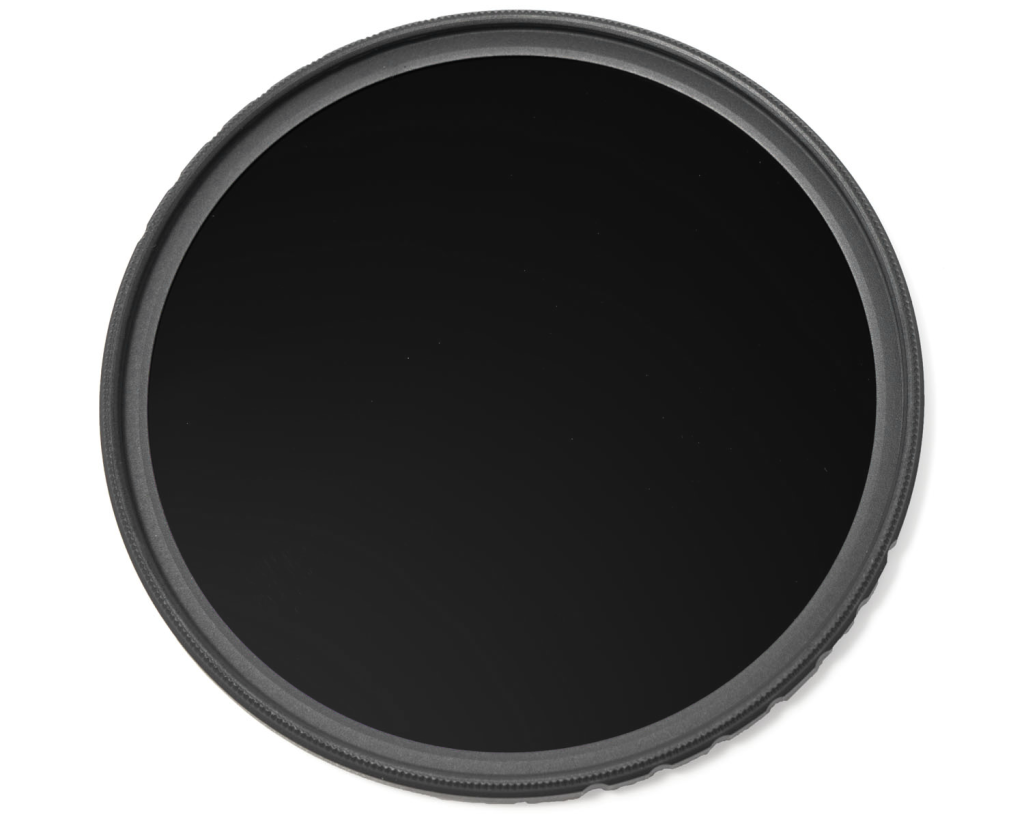
The Filters
Tri-chromes require at least three filters, but I’ve had the best results using four. There are multiple recipes available online that provide similar results, so be sure to give them a shot and find what suits your tastes. I’ll share mine here:
- Red (25A Filter + R72 Filter) – I’ve tried an R72 as a standalone filter and felt it still let too much light sneak through. By adding another red filter on top of things, you cut out extraneous light and improve the fidelity of infrared transmission in this channel.
- Green (58 Filter) – Outside of this filter, the Green 14 filter is a potential alternative to explore.
- Blue (47 Filter) – Be cautious when using other blue filters (such as an 85B); the filters must be strong enough to remove the majority of blue from a scene, which is beyond the strength of a filter used to adjust white balance.
For more visual examples of the process and some nuances in capturing the images concerning exposure compensation, refer to this video.
The Film
This approach requires a black and white film with infrared sensitivity. The two commercially available options are:
- Rollei Infrared (400 ISO) – 35mm, 120, 4×5
- Ilford SFX (200 ISO) – 35mm, 120
Choose whichever you’d like. I’ve had good results with both, but I prefer the Rollei stock if I had to choose. If you’re shooting sheet film, then Rollei Infrared is your only option.
The Capture Workflow
Given that this technique consumes multiple frames per roll, it is wise to carefully plan out each shot you take. I typically take three infrared images in my workflow: one green, one blue, and one unfiltered image. Using three infrared photos allows me to bracket my exposure and have more control over the final product. Choosing a denser infrared negative will result in a lighter, pinkish color palette, while choosing a less dense infrared negative will result in a darker, more red-magenta color palette. Green and blue are both exposed using the appropriate filter compensation factors. Finally, the unfiltered photo acts as a normal reference in case the order of my scans get mixed up or I lose my place in development and scanning.
The Post-Processing
After receiving your scans, you’ll want to open a new document in Photoshop. Then go to File > Scripts > Load Files into Stack and select your files. This macro will open the different filtered images as layers and attempt to align them directly. If you need to adjust further, feel free to do so. You’ll need to convert each layer into a Smart Object and add an HSL adjustment to each layer—one for the red channel, one for the green channel, and one for the blue channel. Check out this video walkthrough for some great values to start from. Then set the blend mode to “Linear Dodge (Add)” on each layer to combine the colors and form the tri-chrome.
When you’re done, you simply export your image to share the final product!
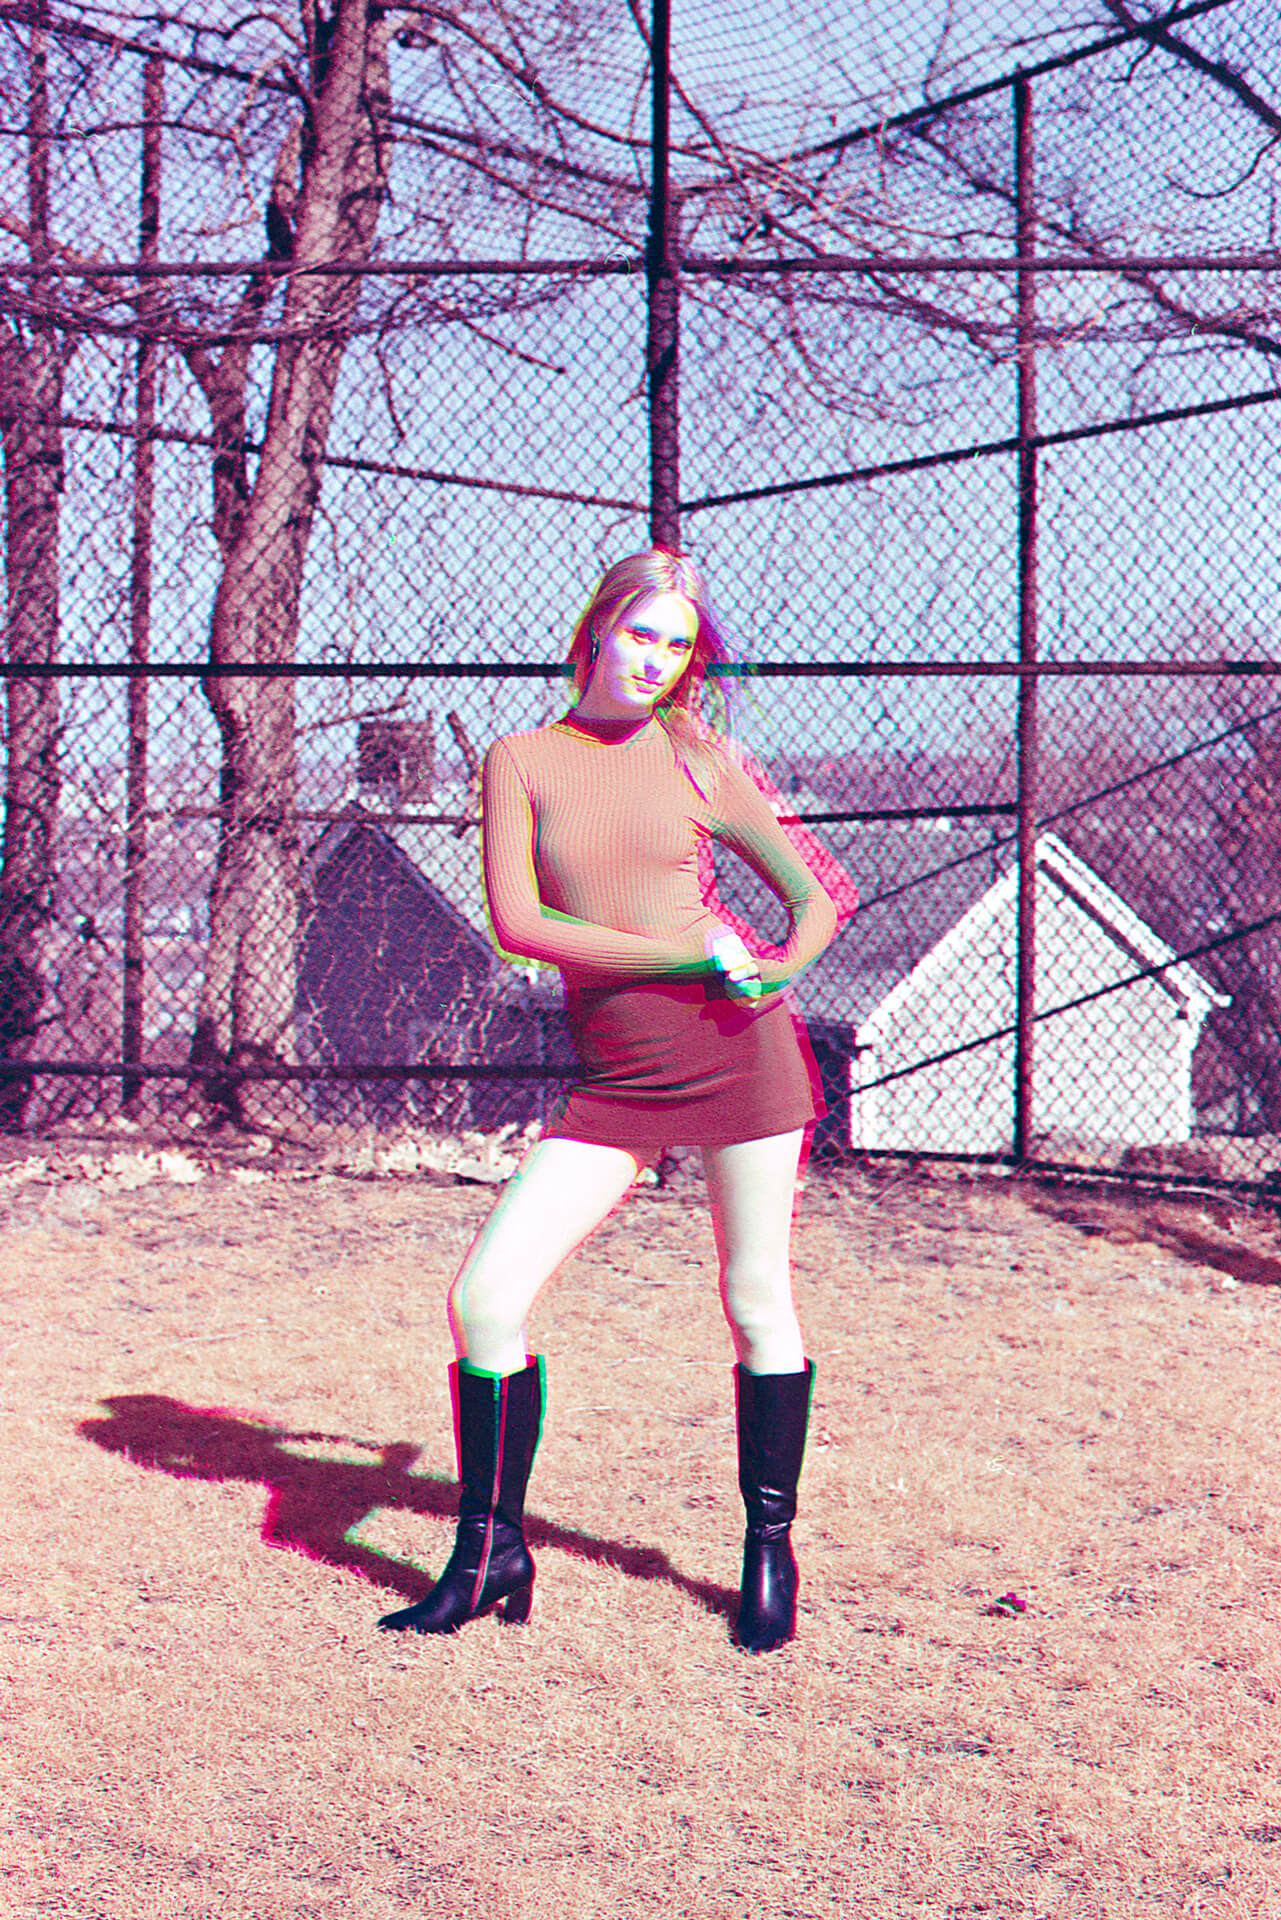
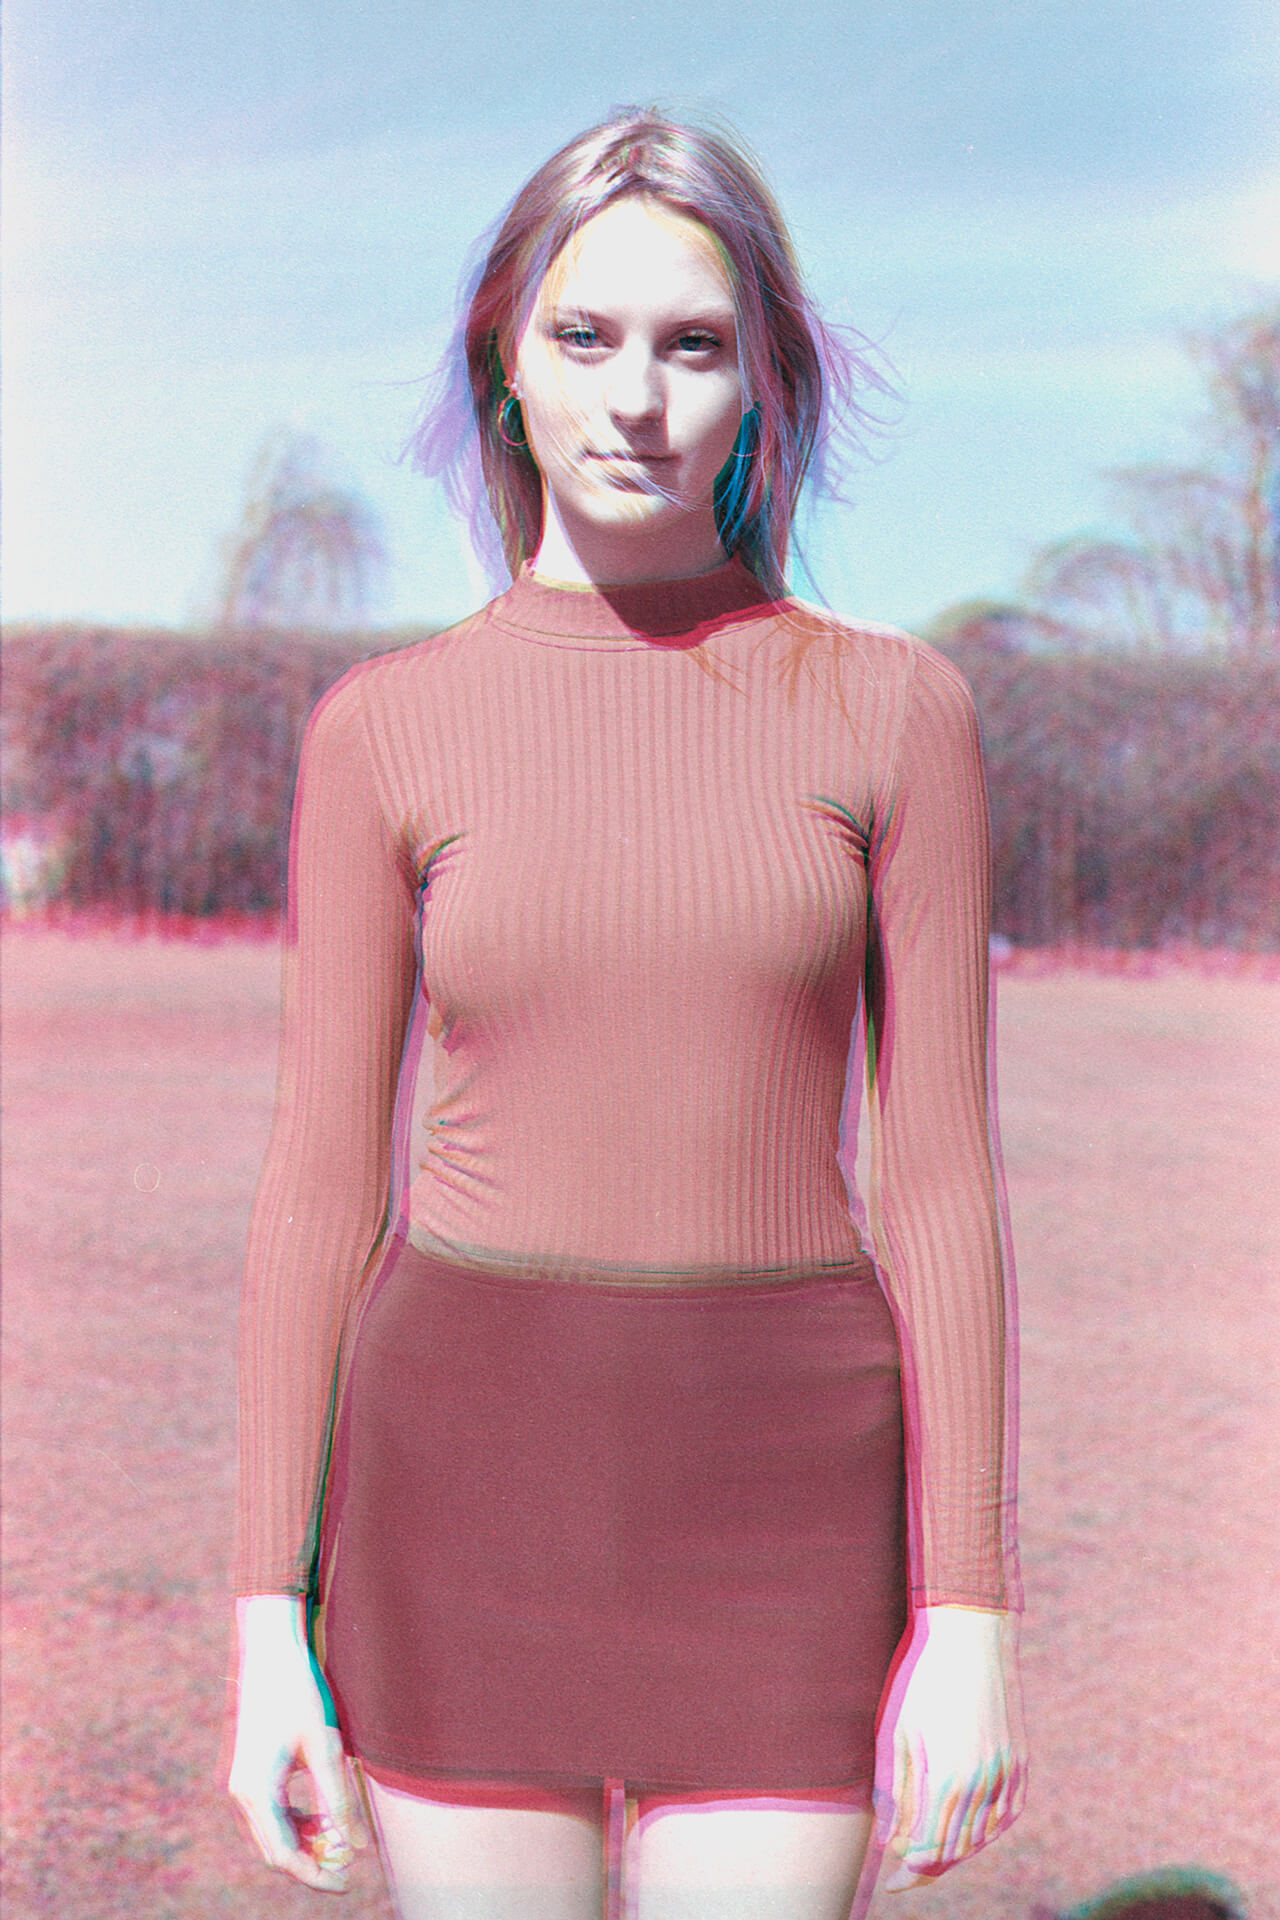
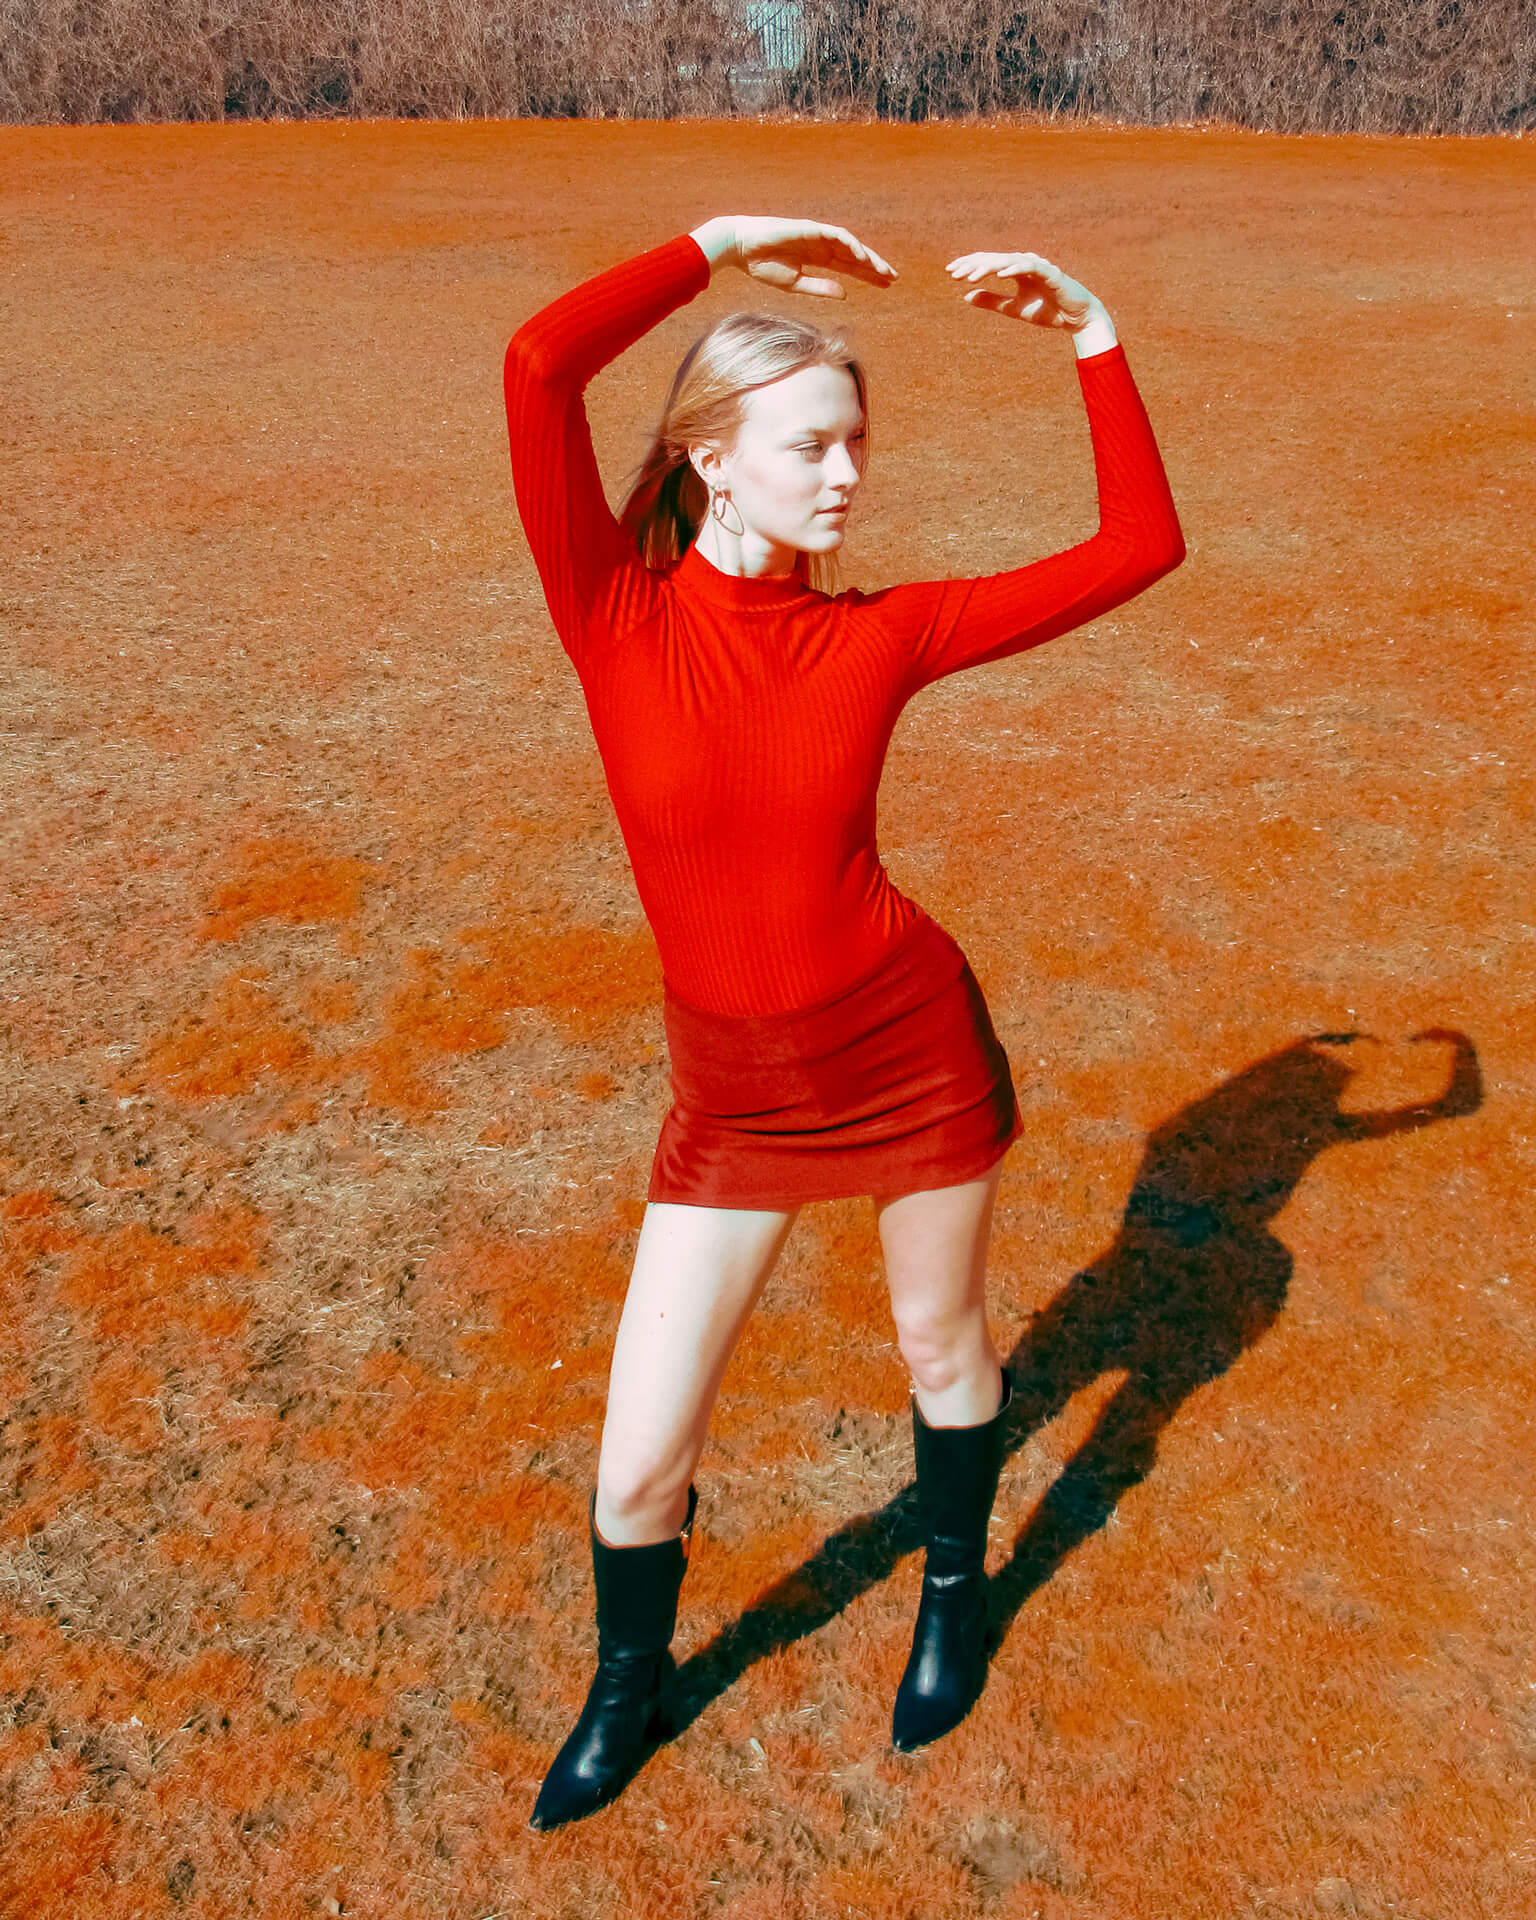
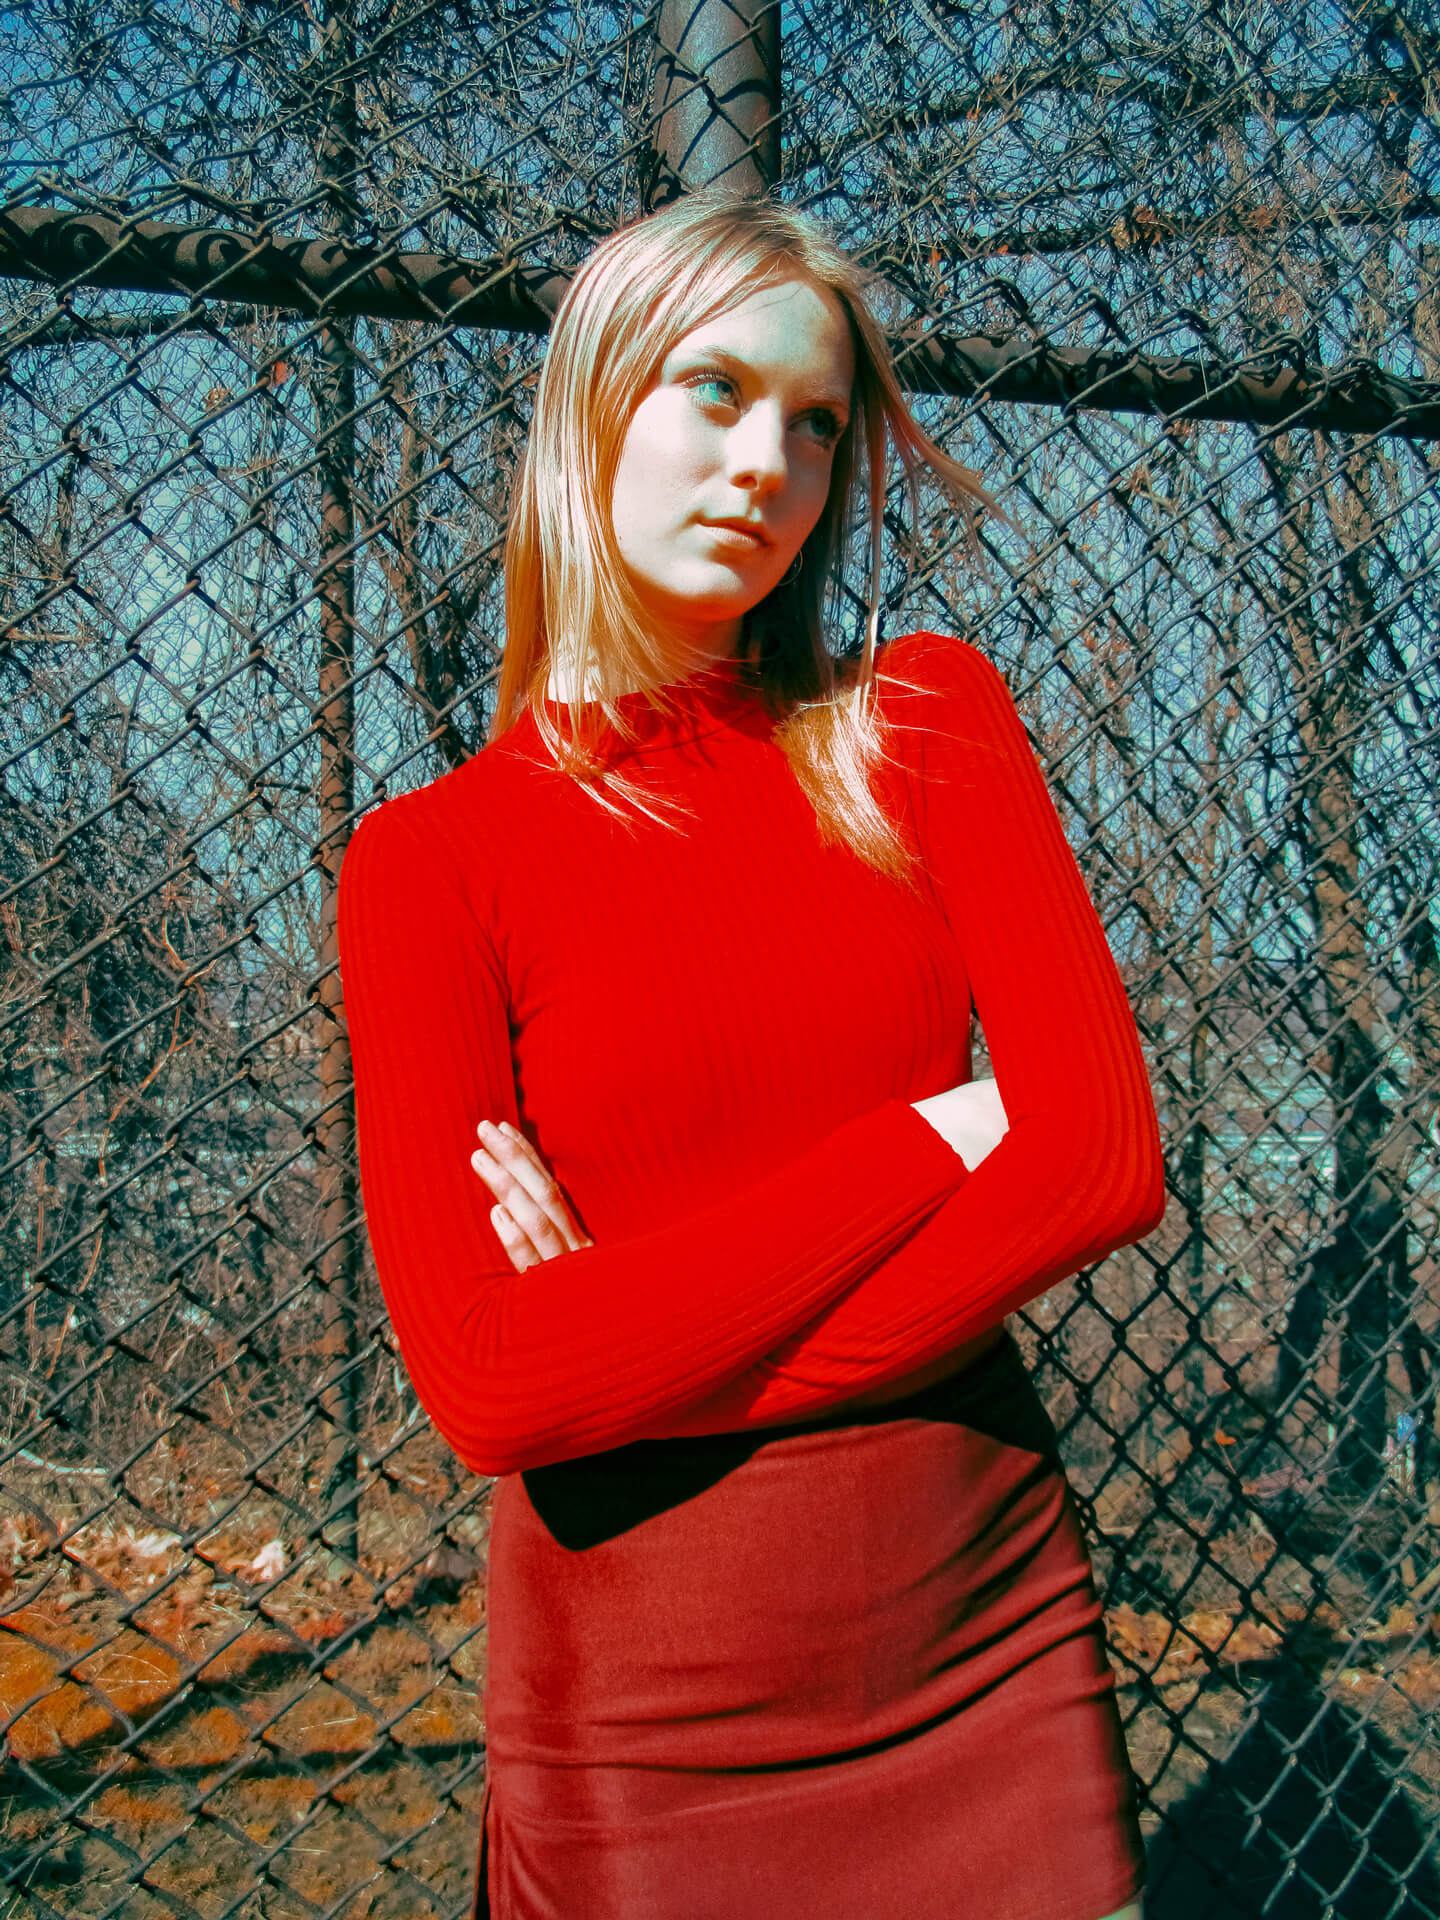
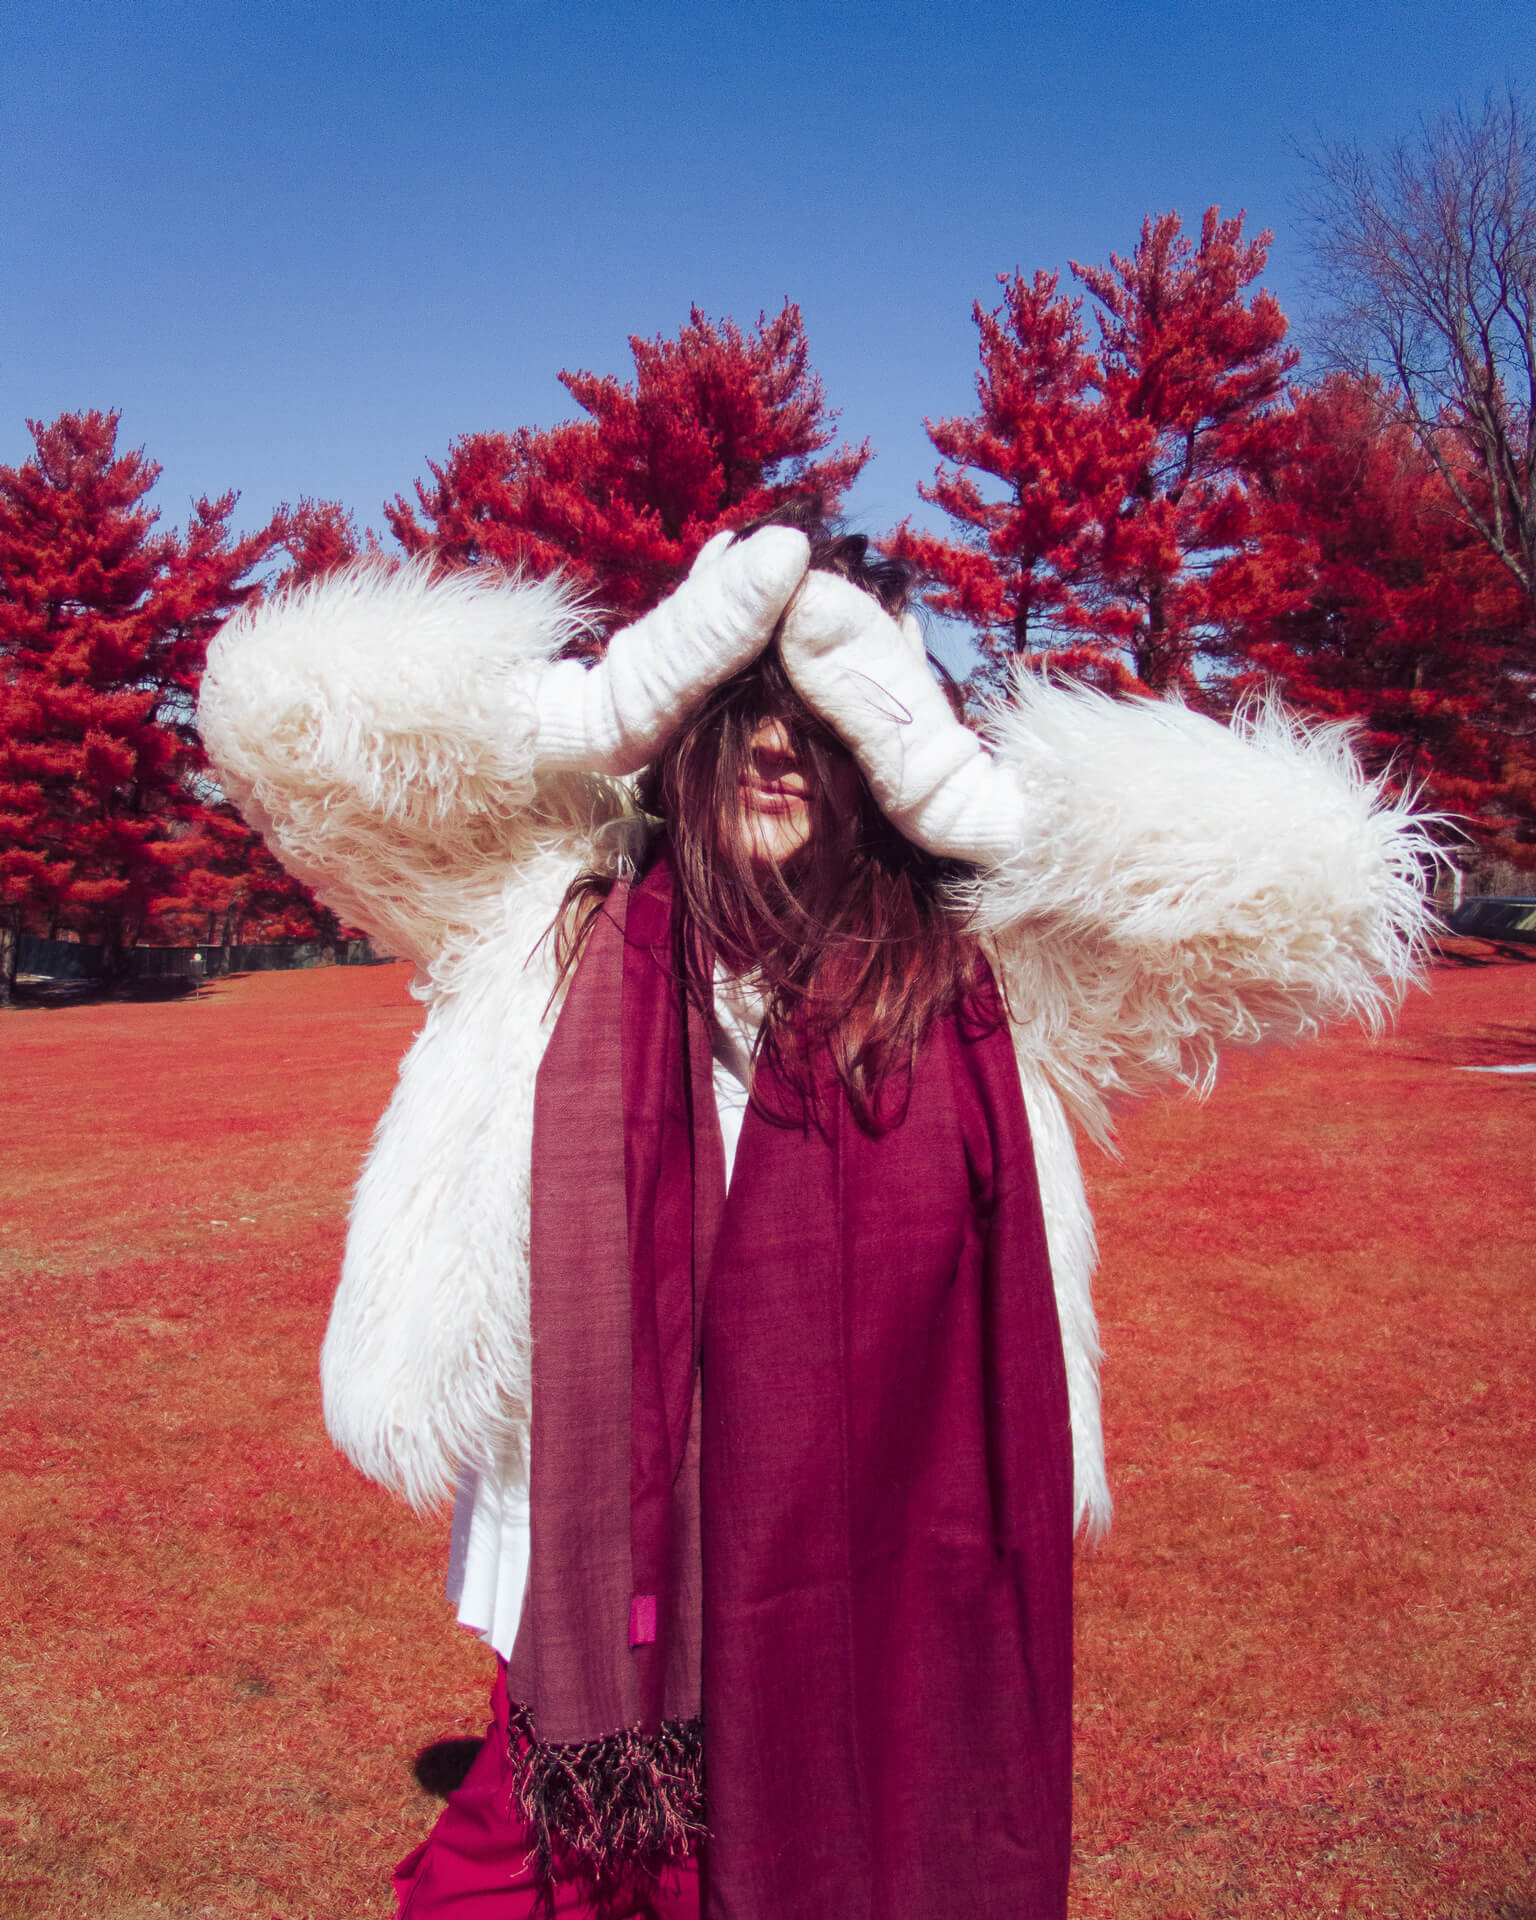
Film Images
Infrared Tri-Chromes with Rollei Infrared 35mm film on my Canon EOS A2
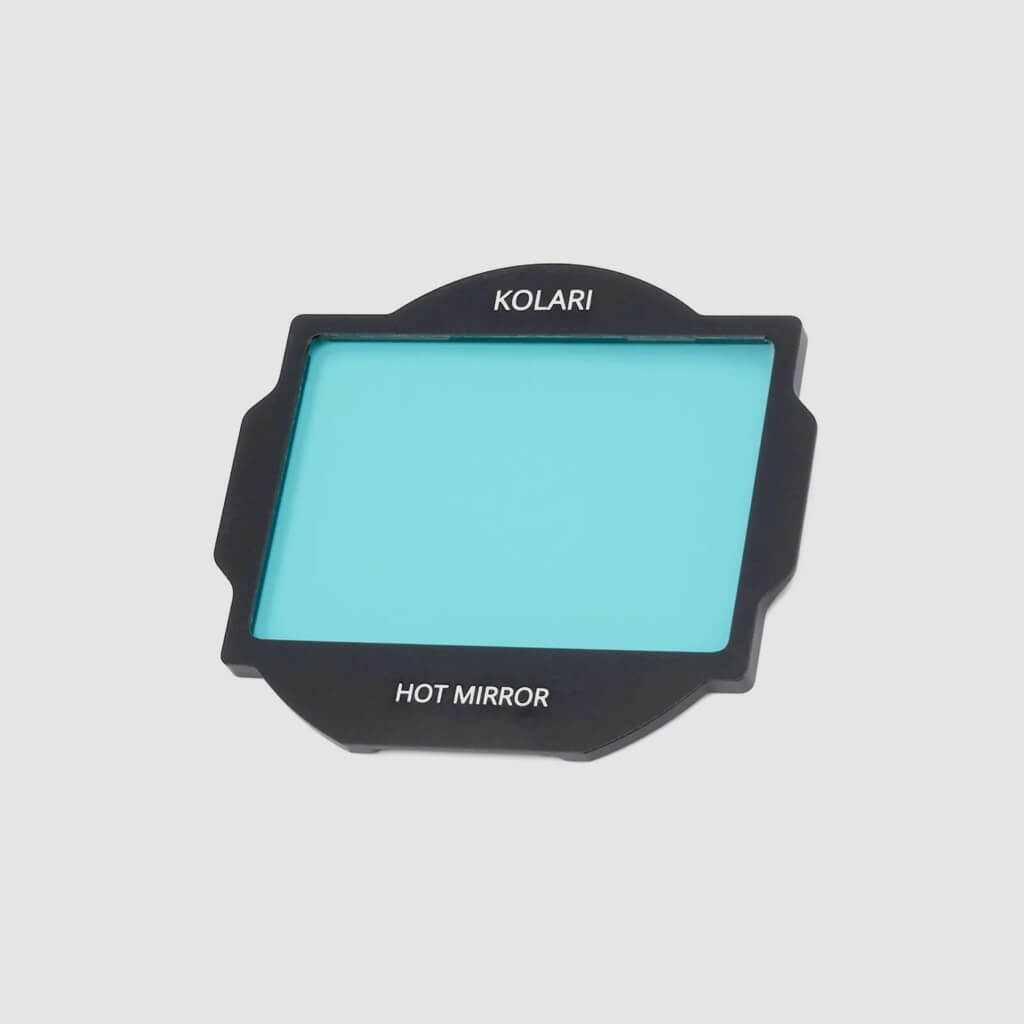
Capturing Digital Images with the IR Chrome Filter
The Gear
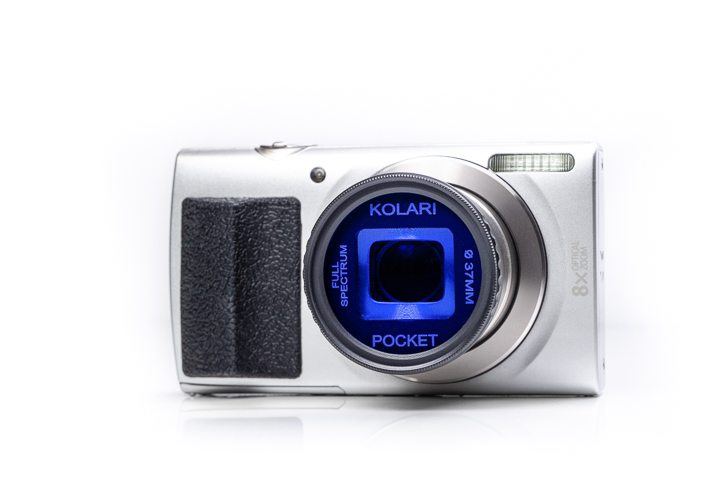
Though any full-spectrum camera with an appropriate filter will do to create digital images, I will be using the Kolari Pocket with an IR Chrome filter to capture mine.
The Post-Processing
The Kolari Pocket is a traditional point-and-shoot that works with a CHDK memory card, meaning you can shoot RAW as well as JPEG! There is a short delay compared to shooting only JPEG, but you’ll barely notice the difference when snapping away.
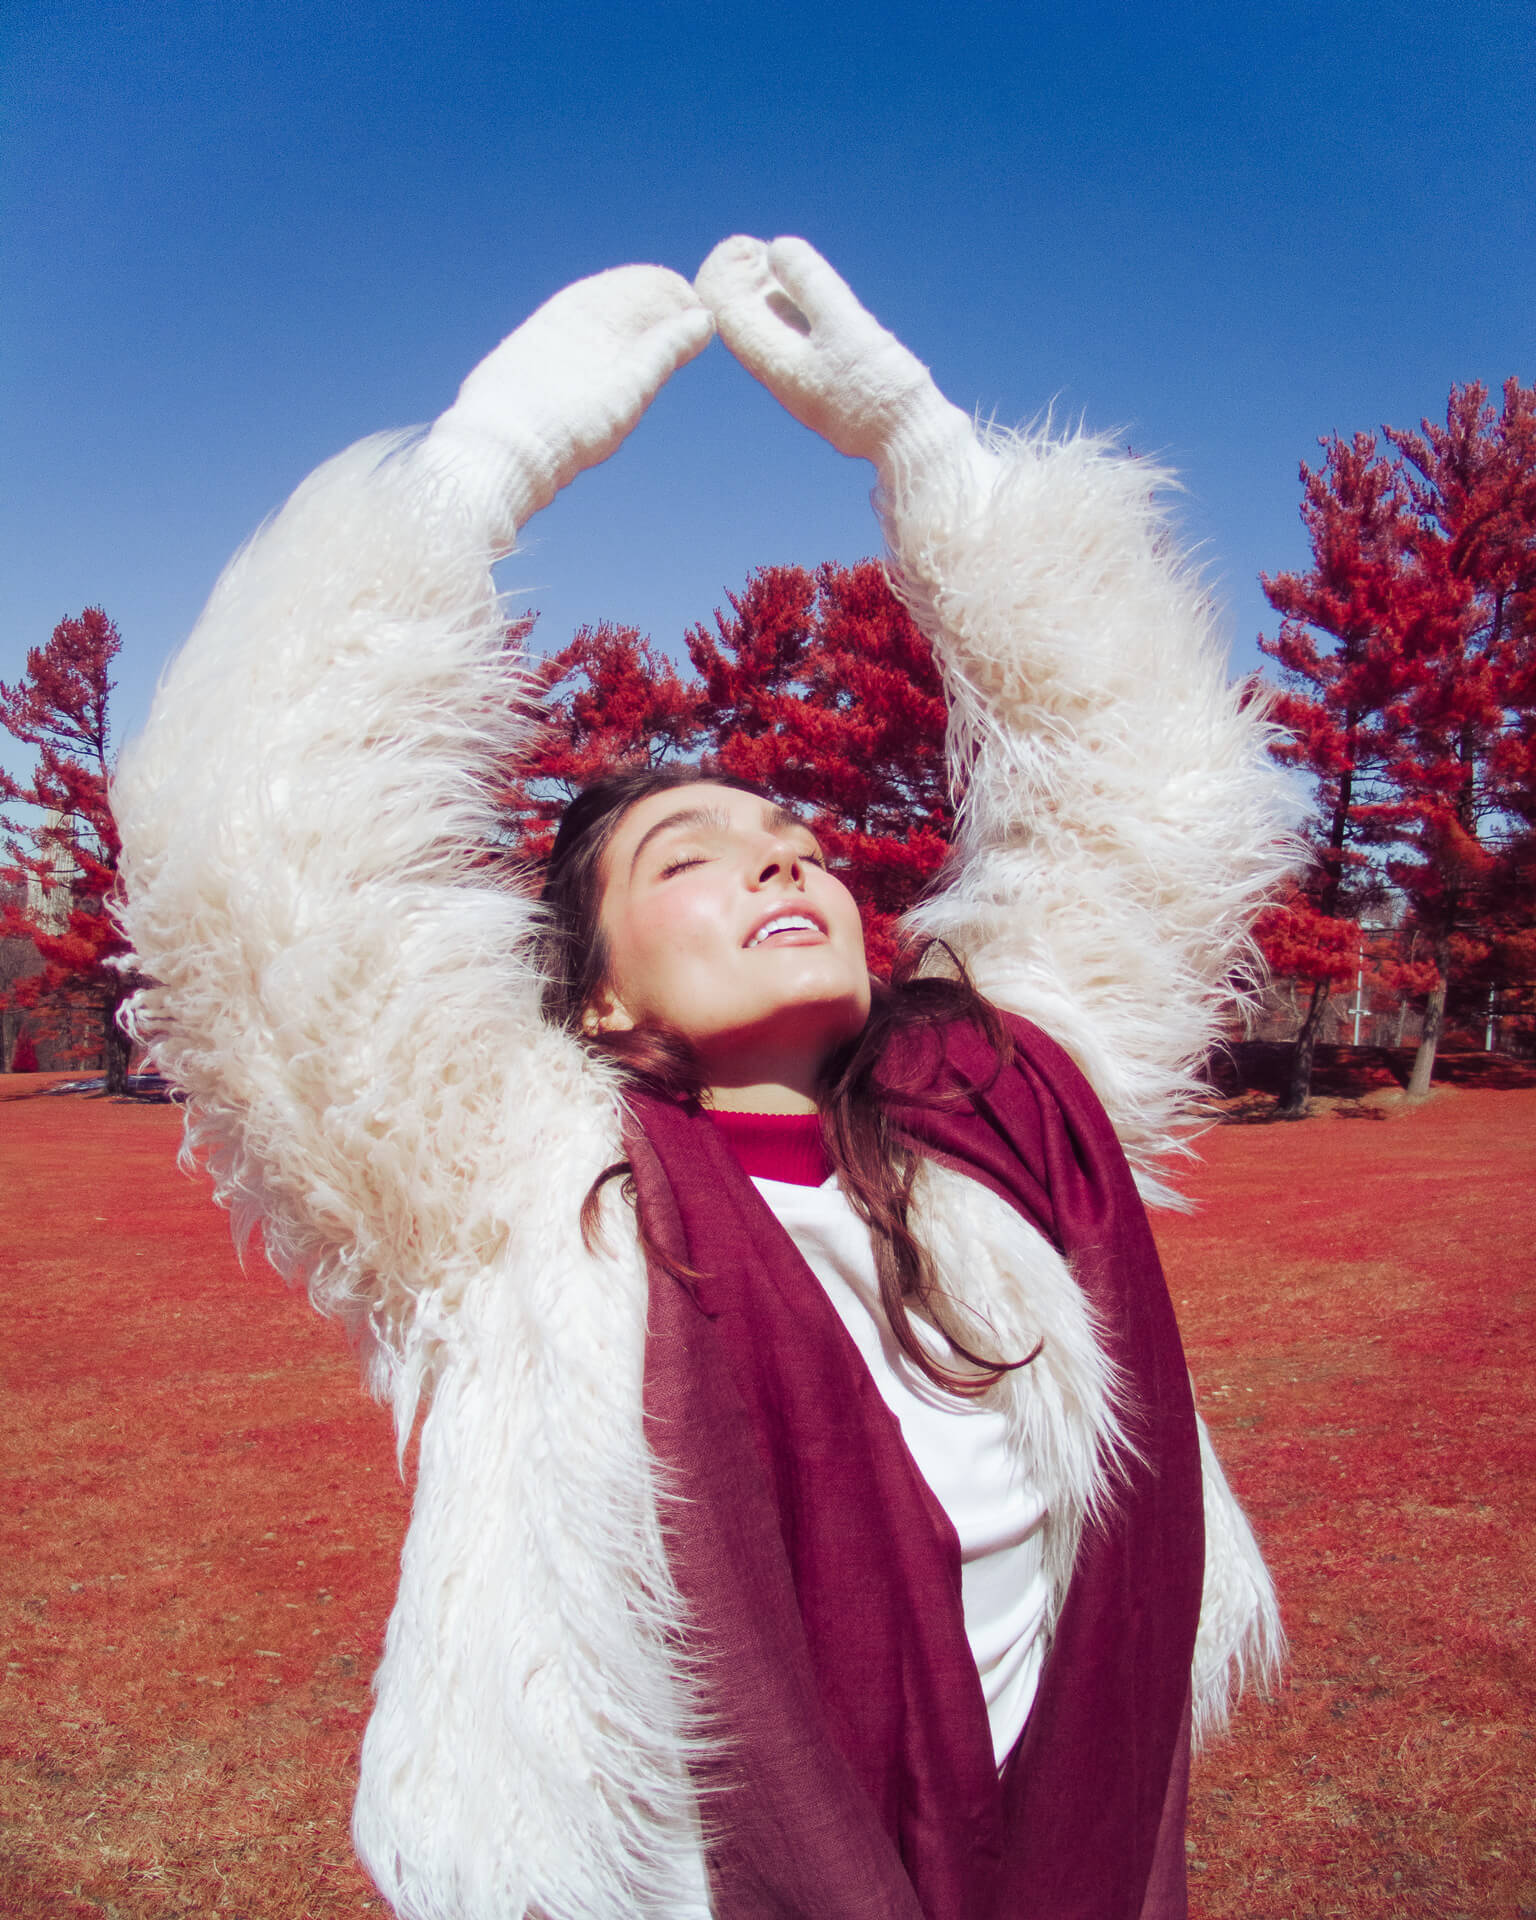
***Note: I made an error for the first model in this series with blonde hair and shot only JPEGs. This was corrected with the second model with brown hair.***
All of the captured images were imported into Adobe Lightroom for post-processing. I found that the backlit images with evaluative metering did not turn out to my liking—this positioned the subject and contextual environment too far away from each other on the exposure scale.
For the JPEG-based images, because the highlights were more sensitive to disturbances in white balance, I added a warm, almost magenta hue to neutralize their appearance. Similarly, I added some blue for the shadows to counteract their appearance. With respect to color, I used a Pakon film profile from a dedicated scanner because it is famous for rich, deep reds and oranges. For the RAW images, I corrected for white balance and made some minor adjustments to skin tones to render the final images.
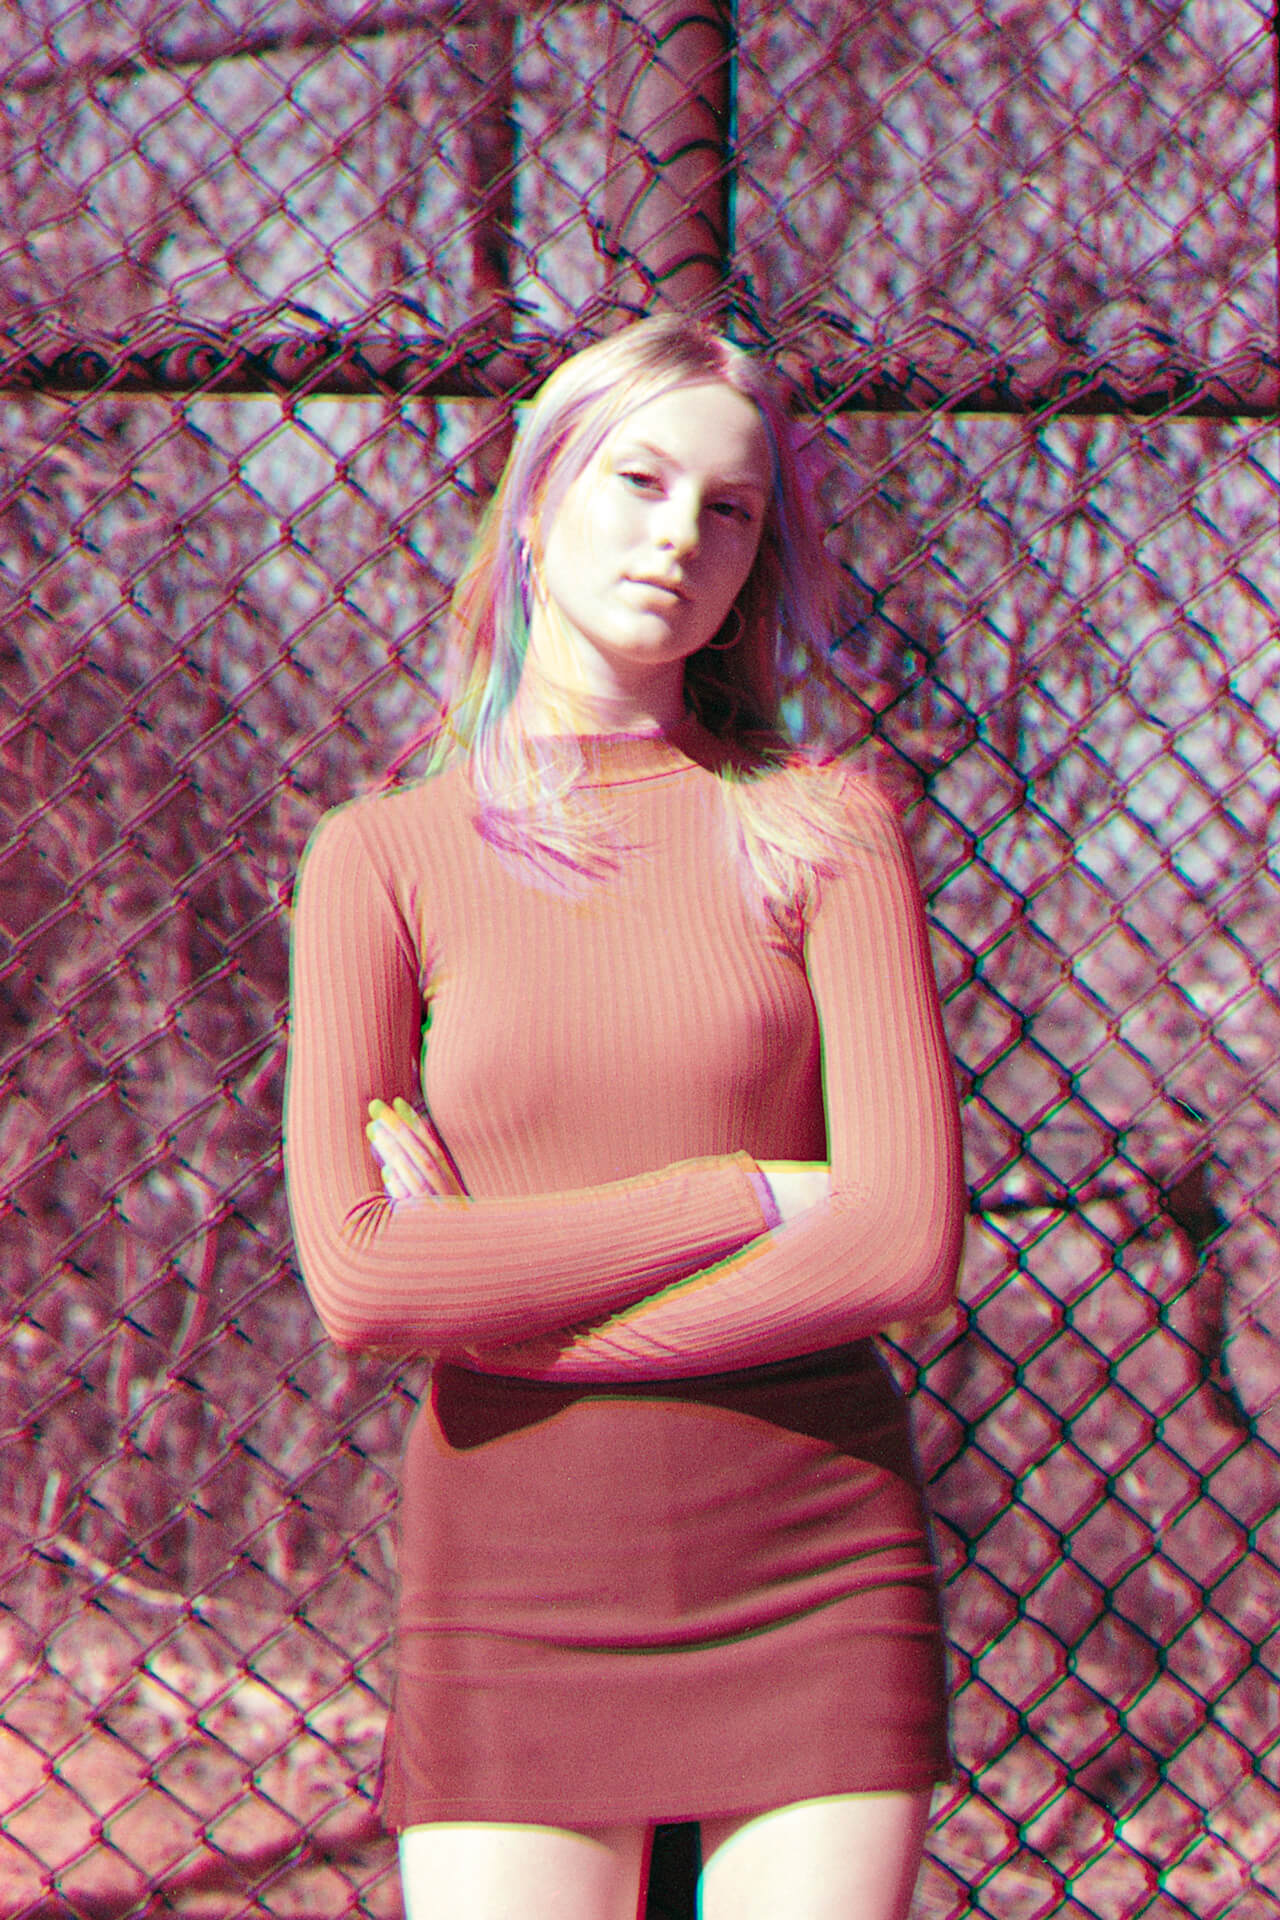
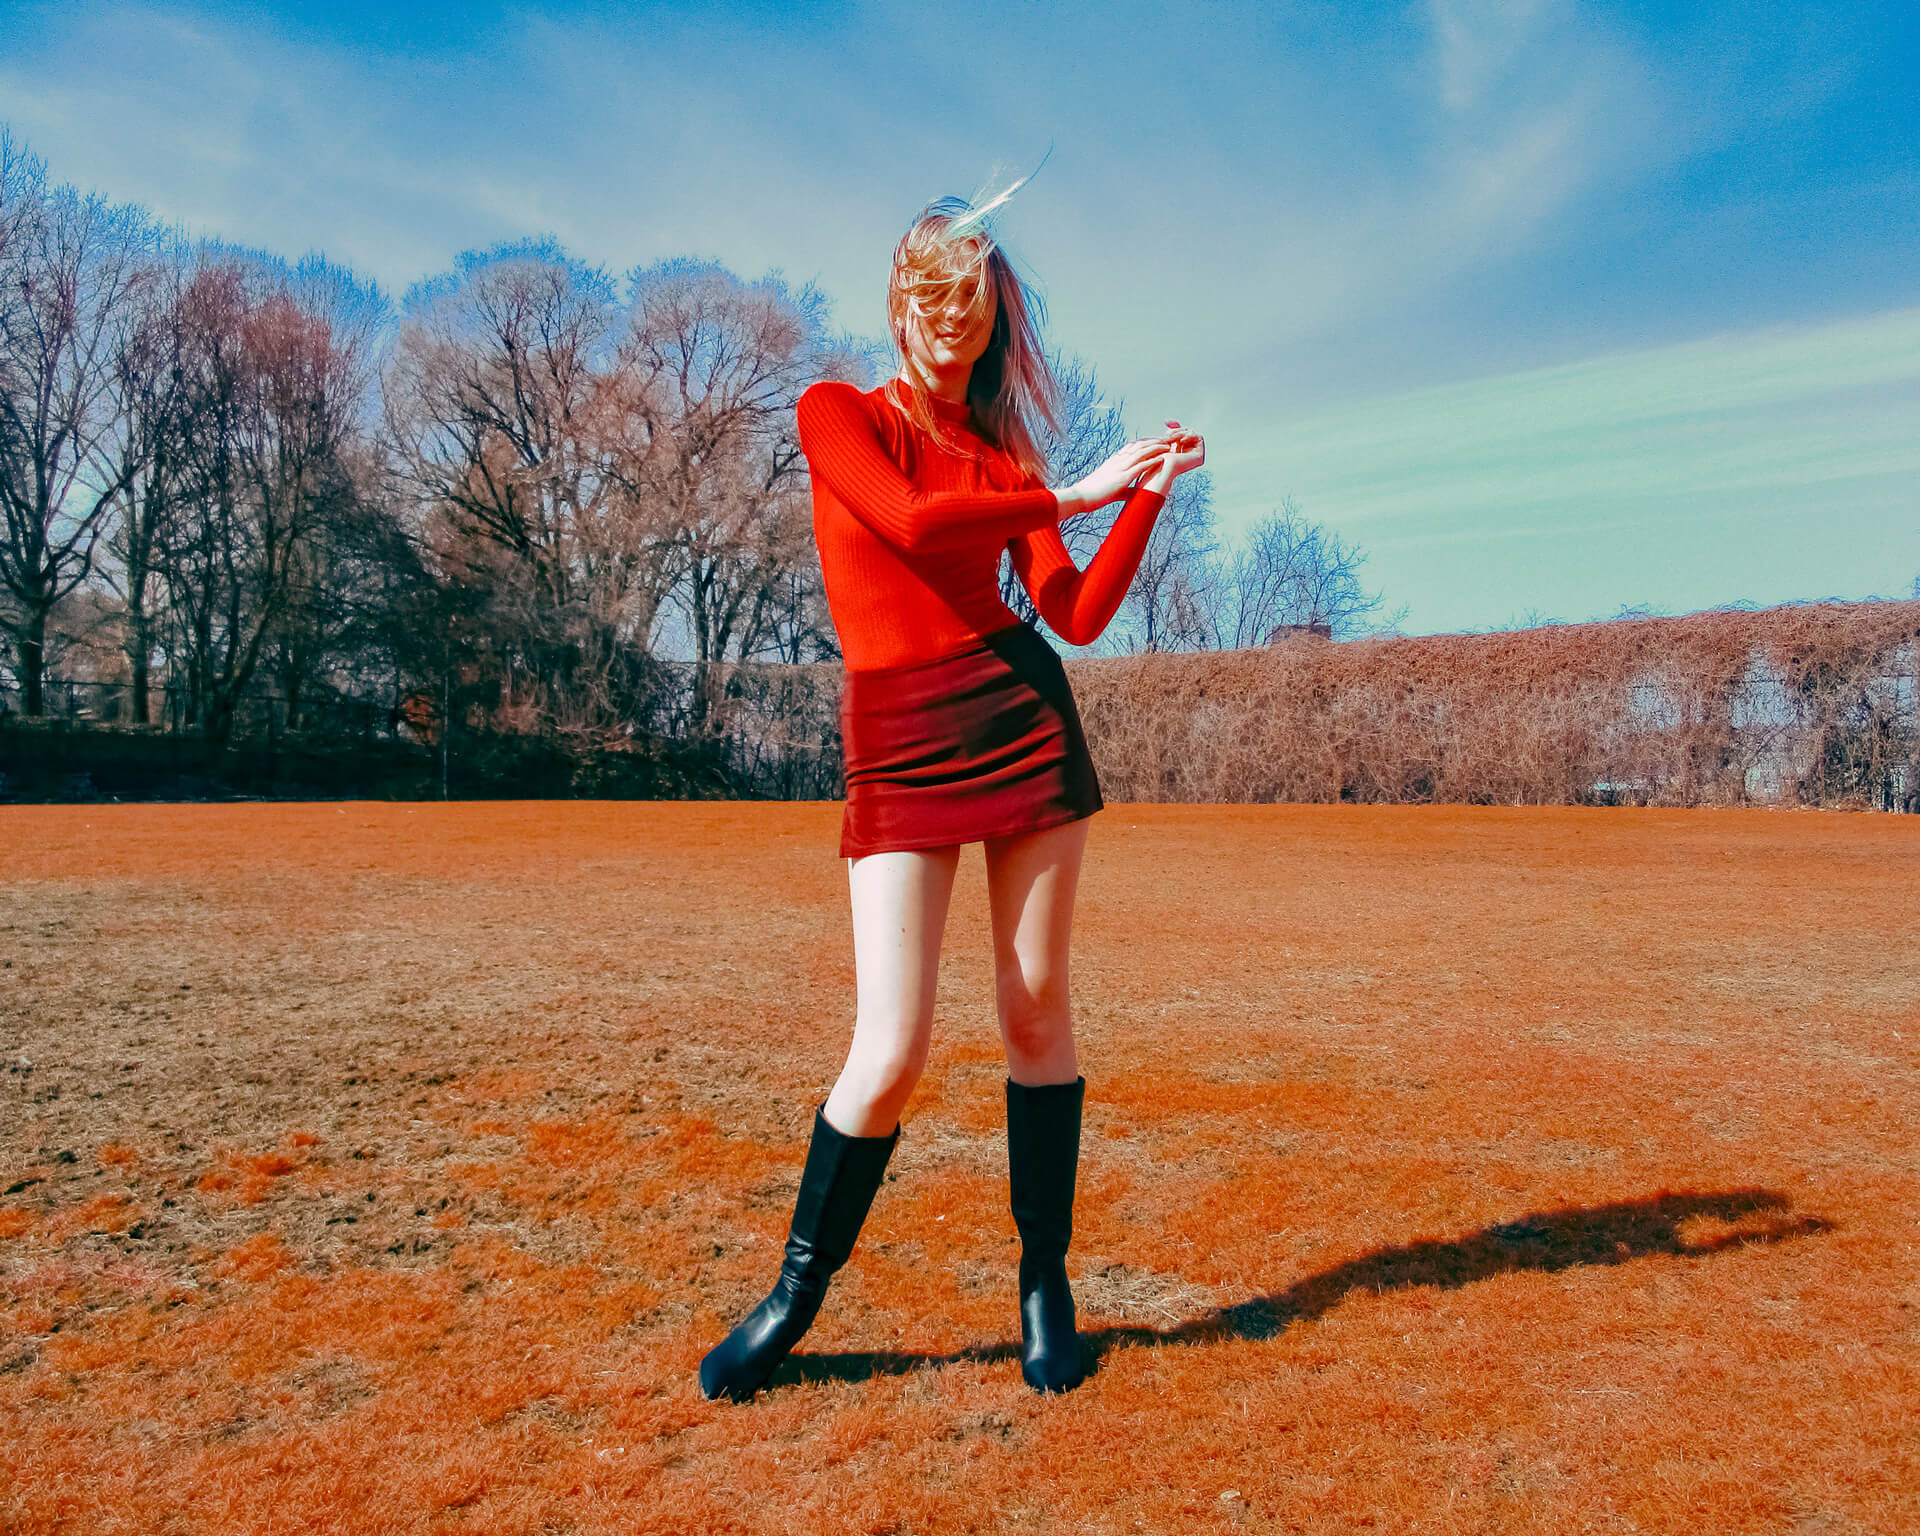
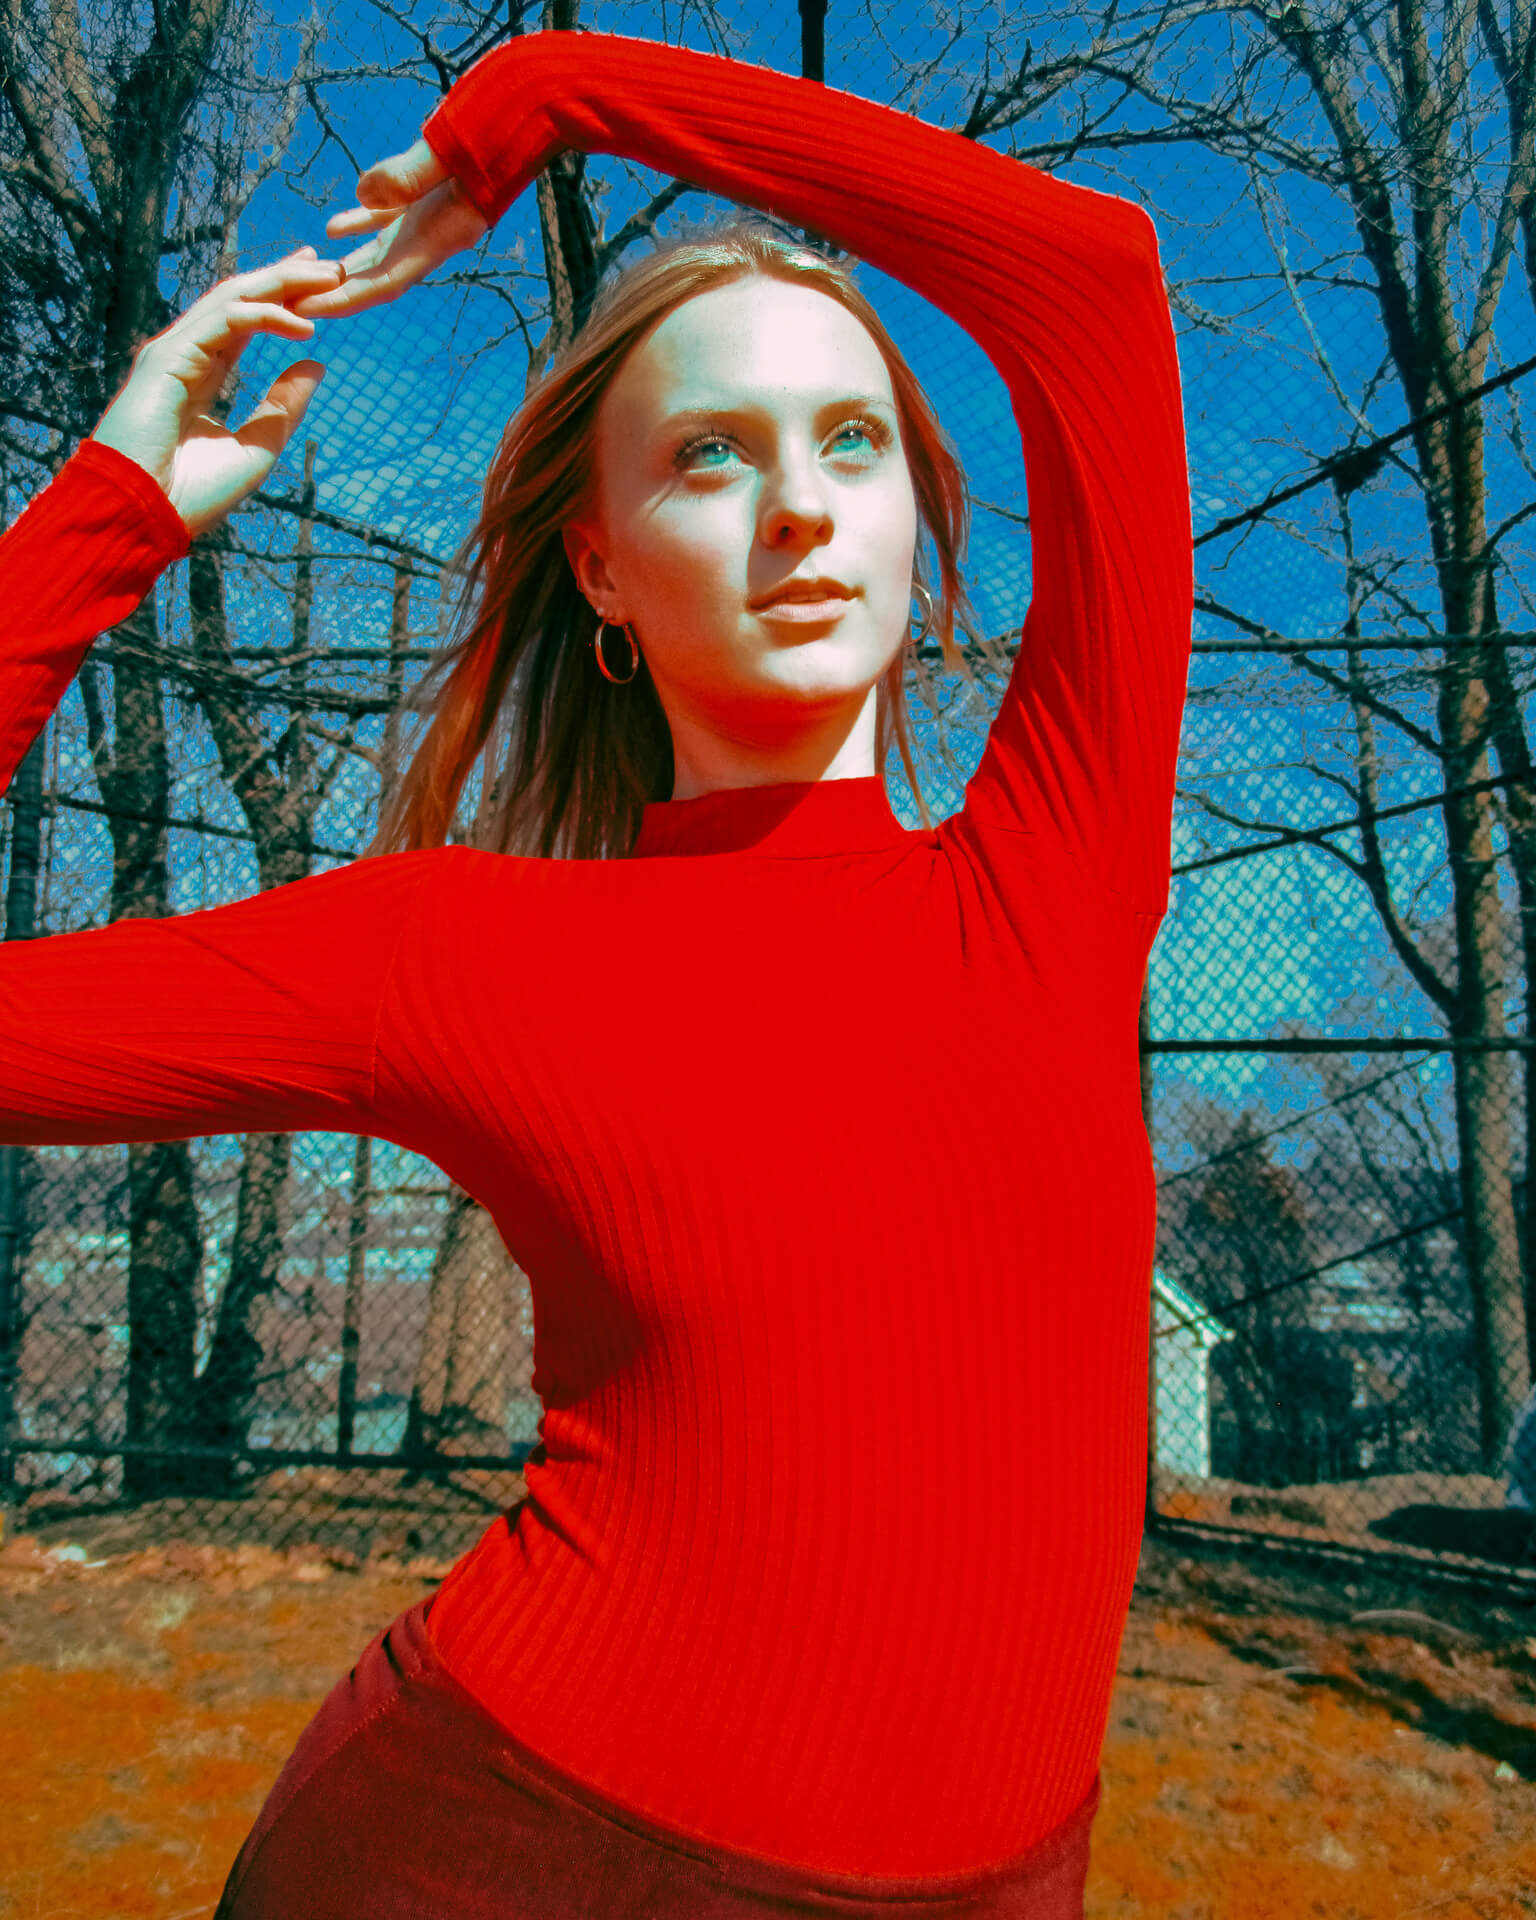
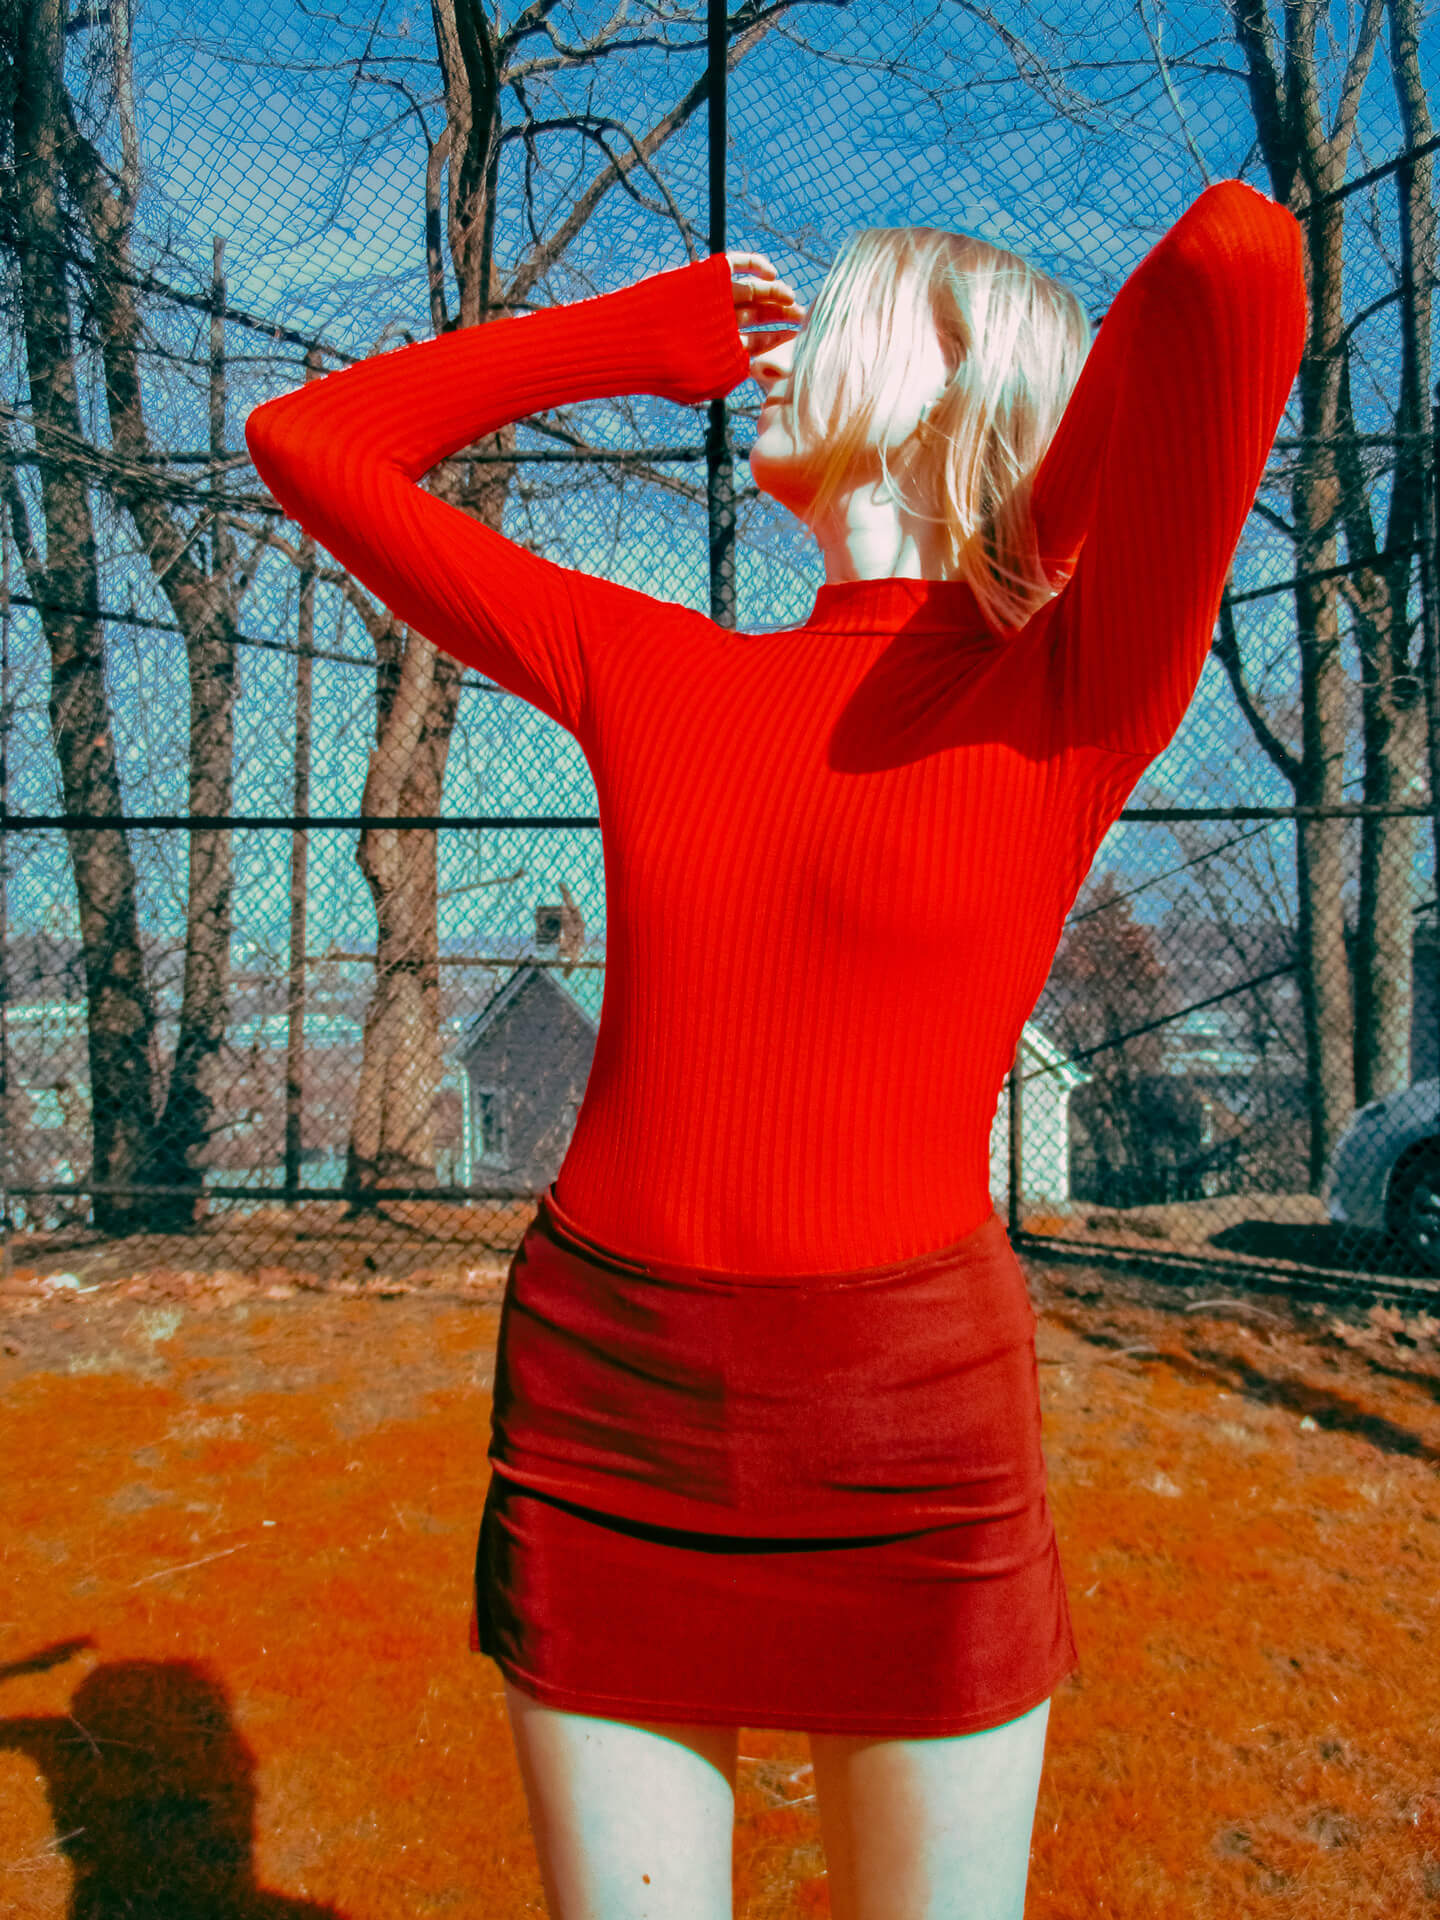
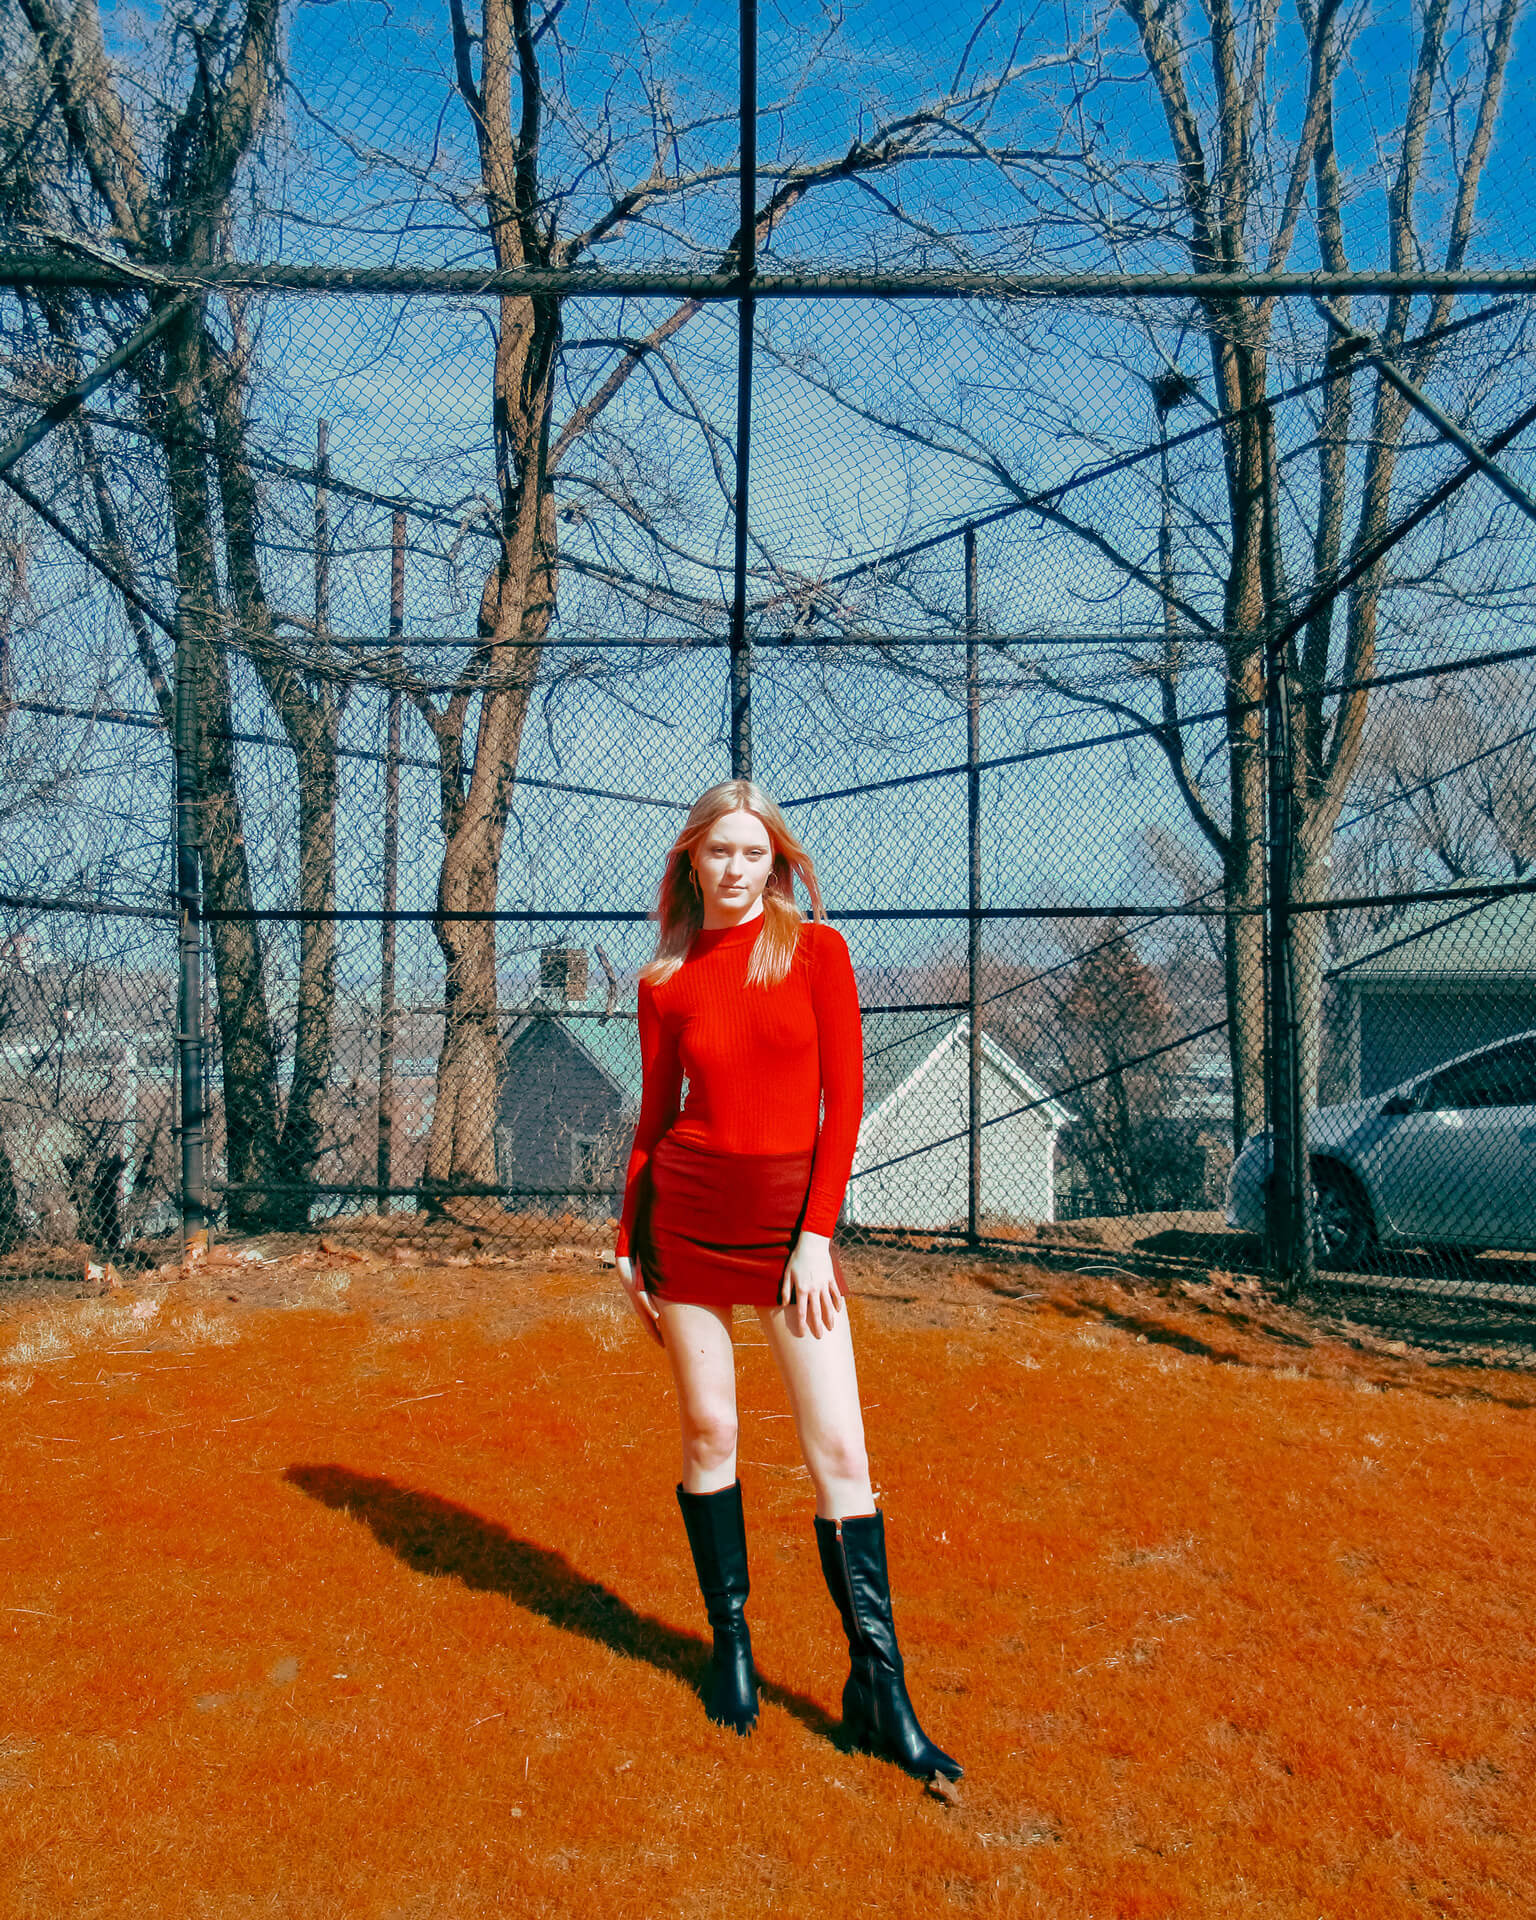
JPEG-Based Digital Images
Lauren Sweeney on Kolari Pocket with IR Chrome Filter
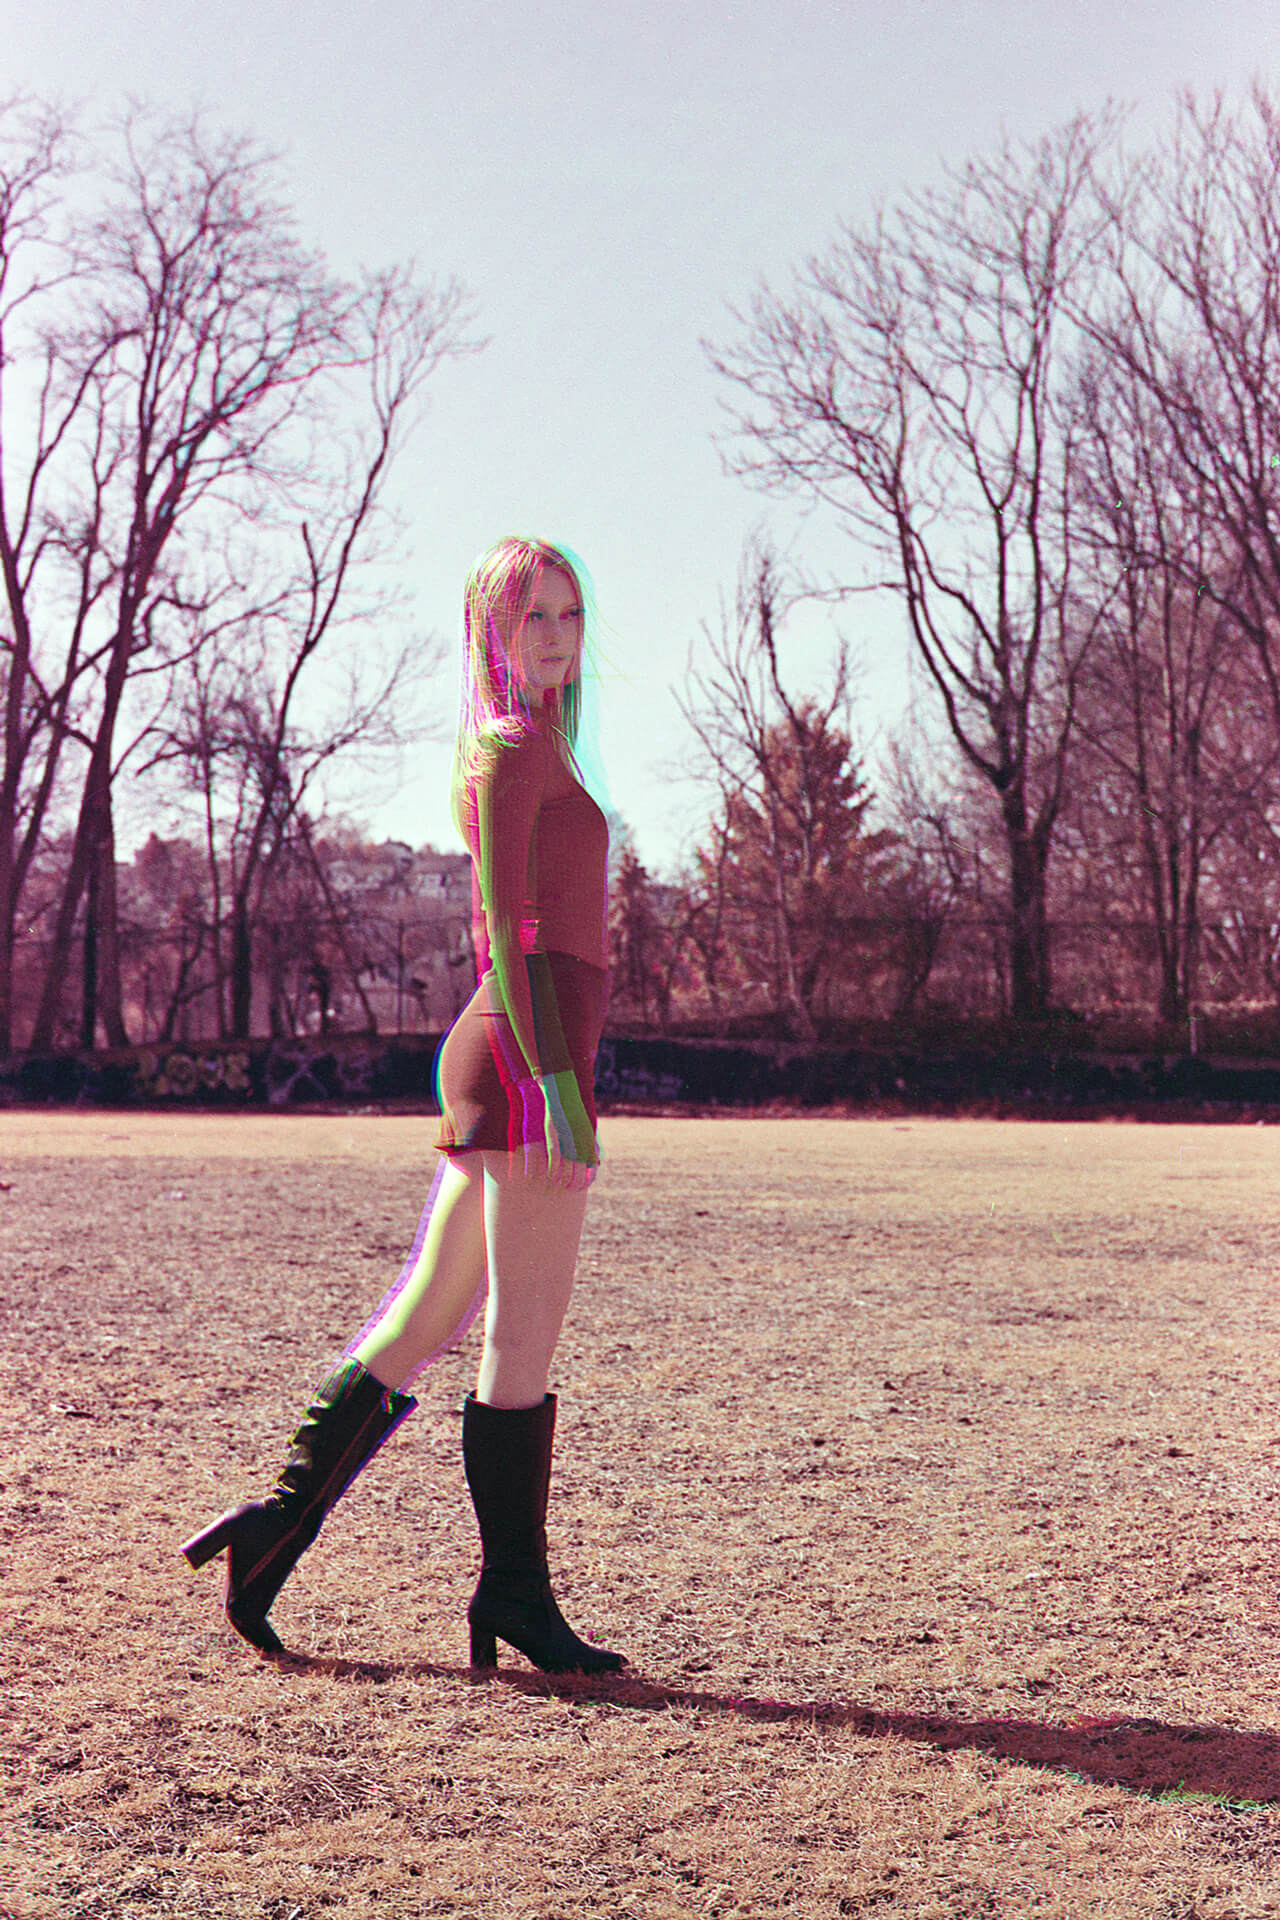
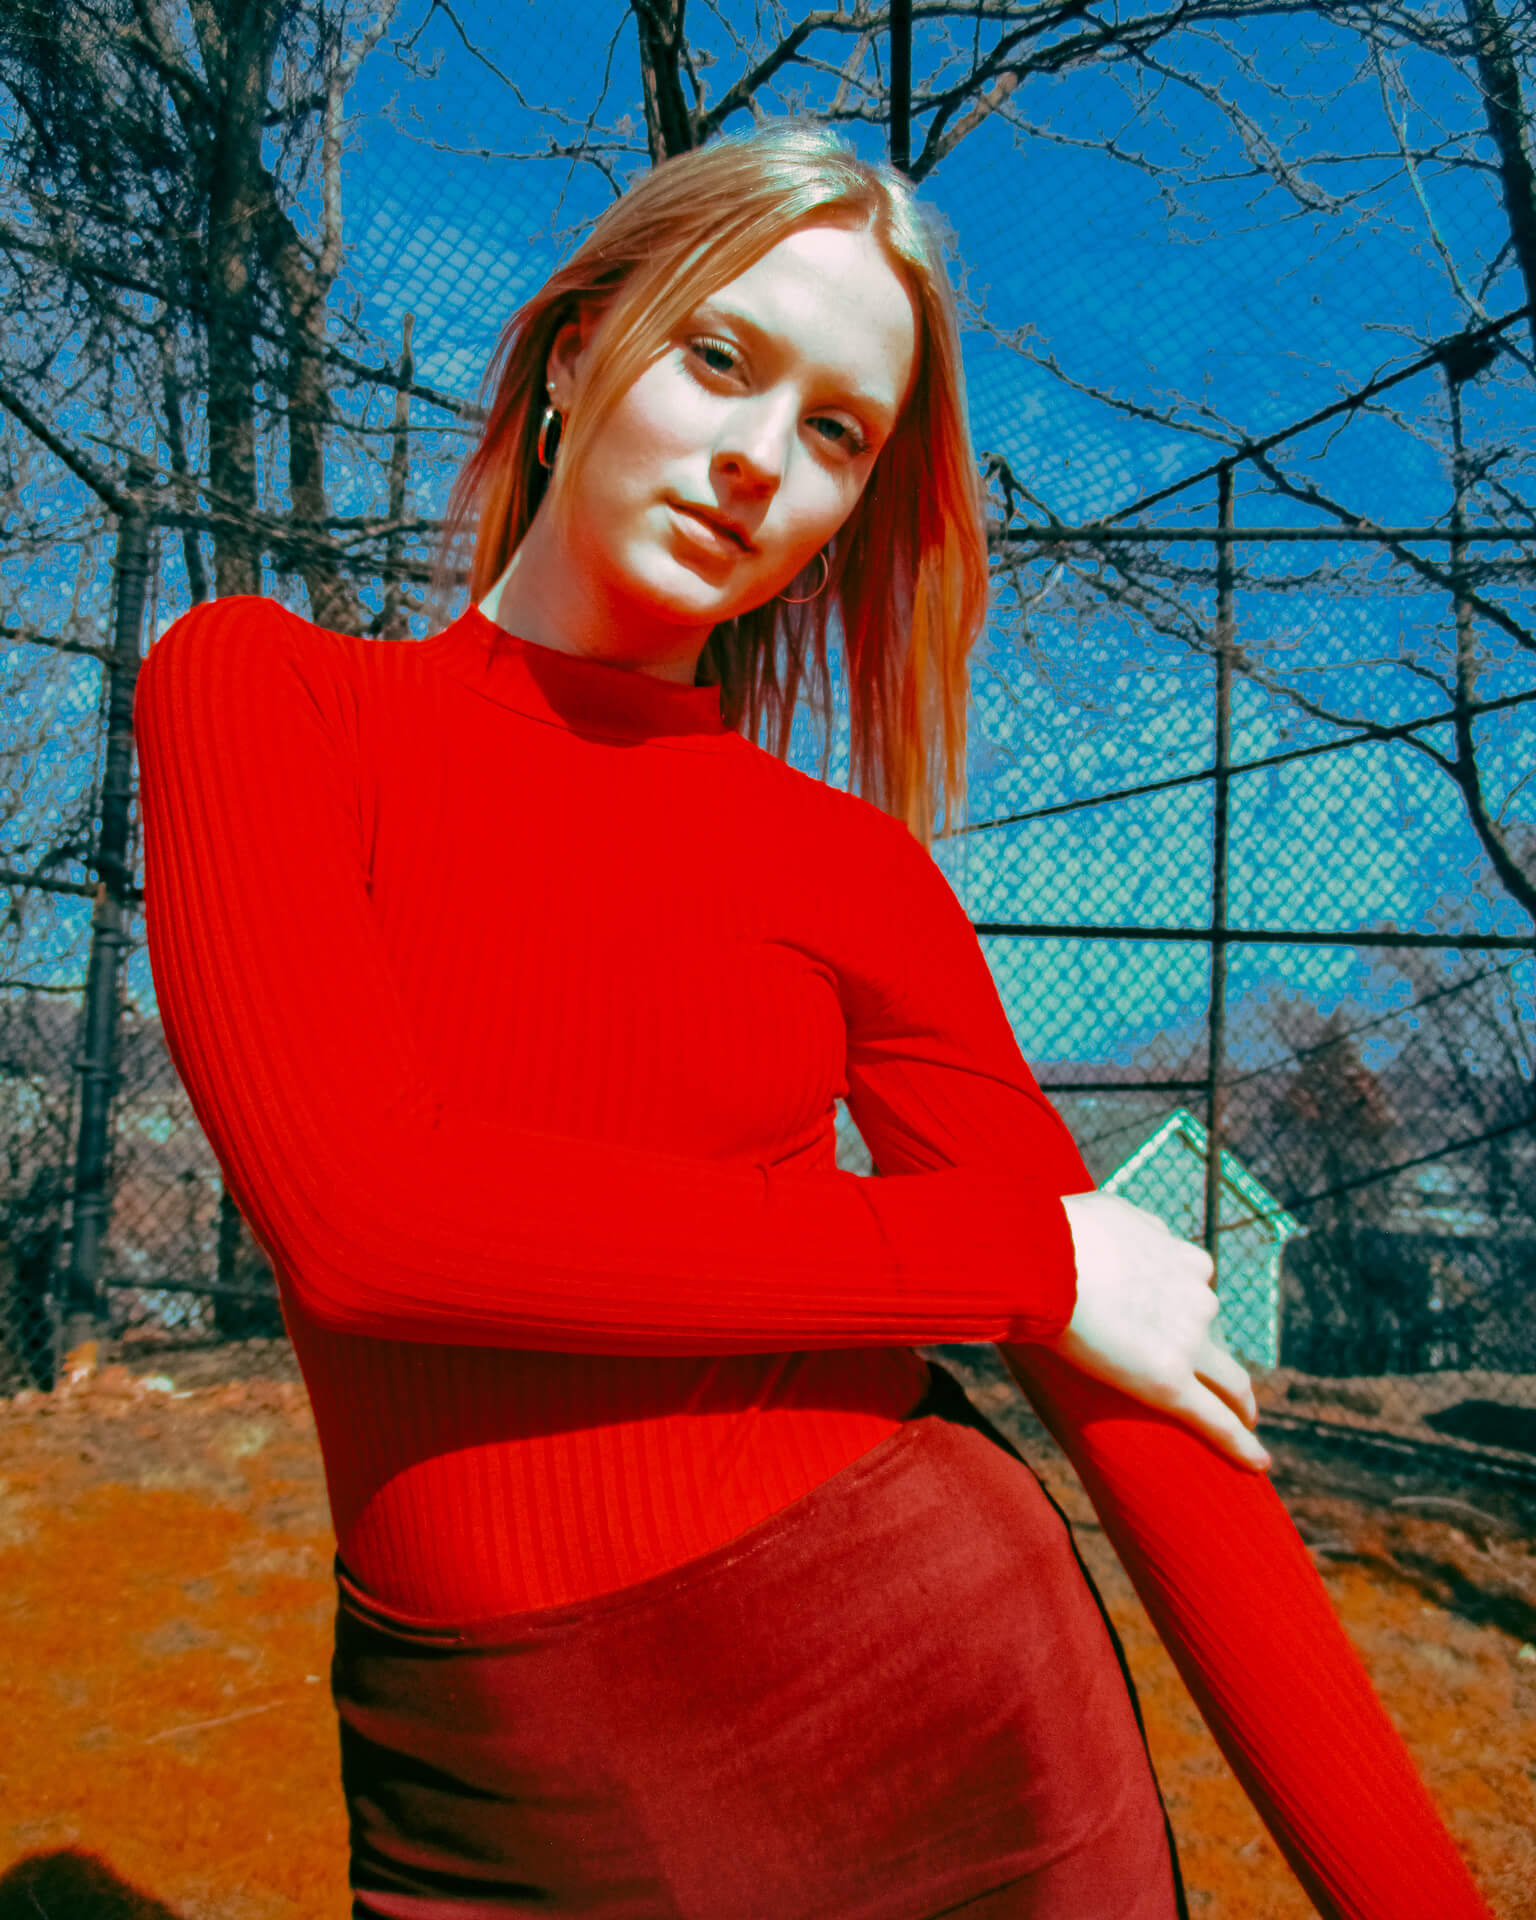
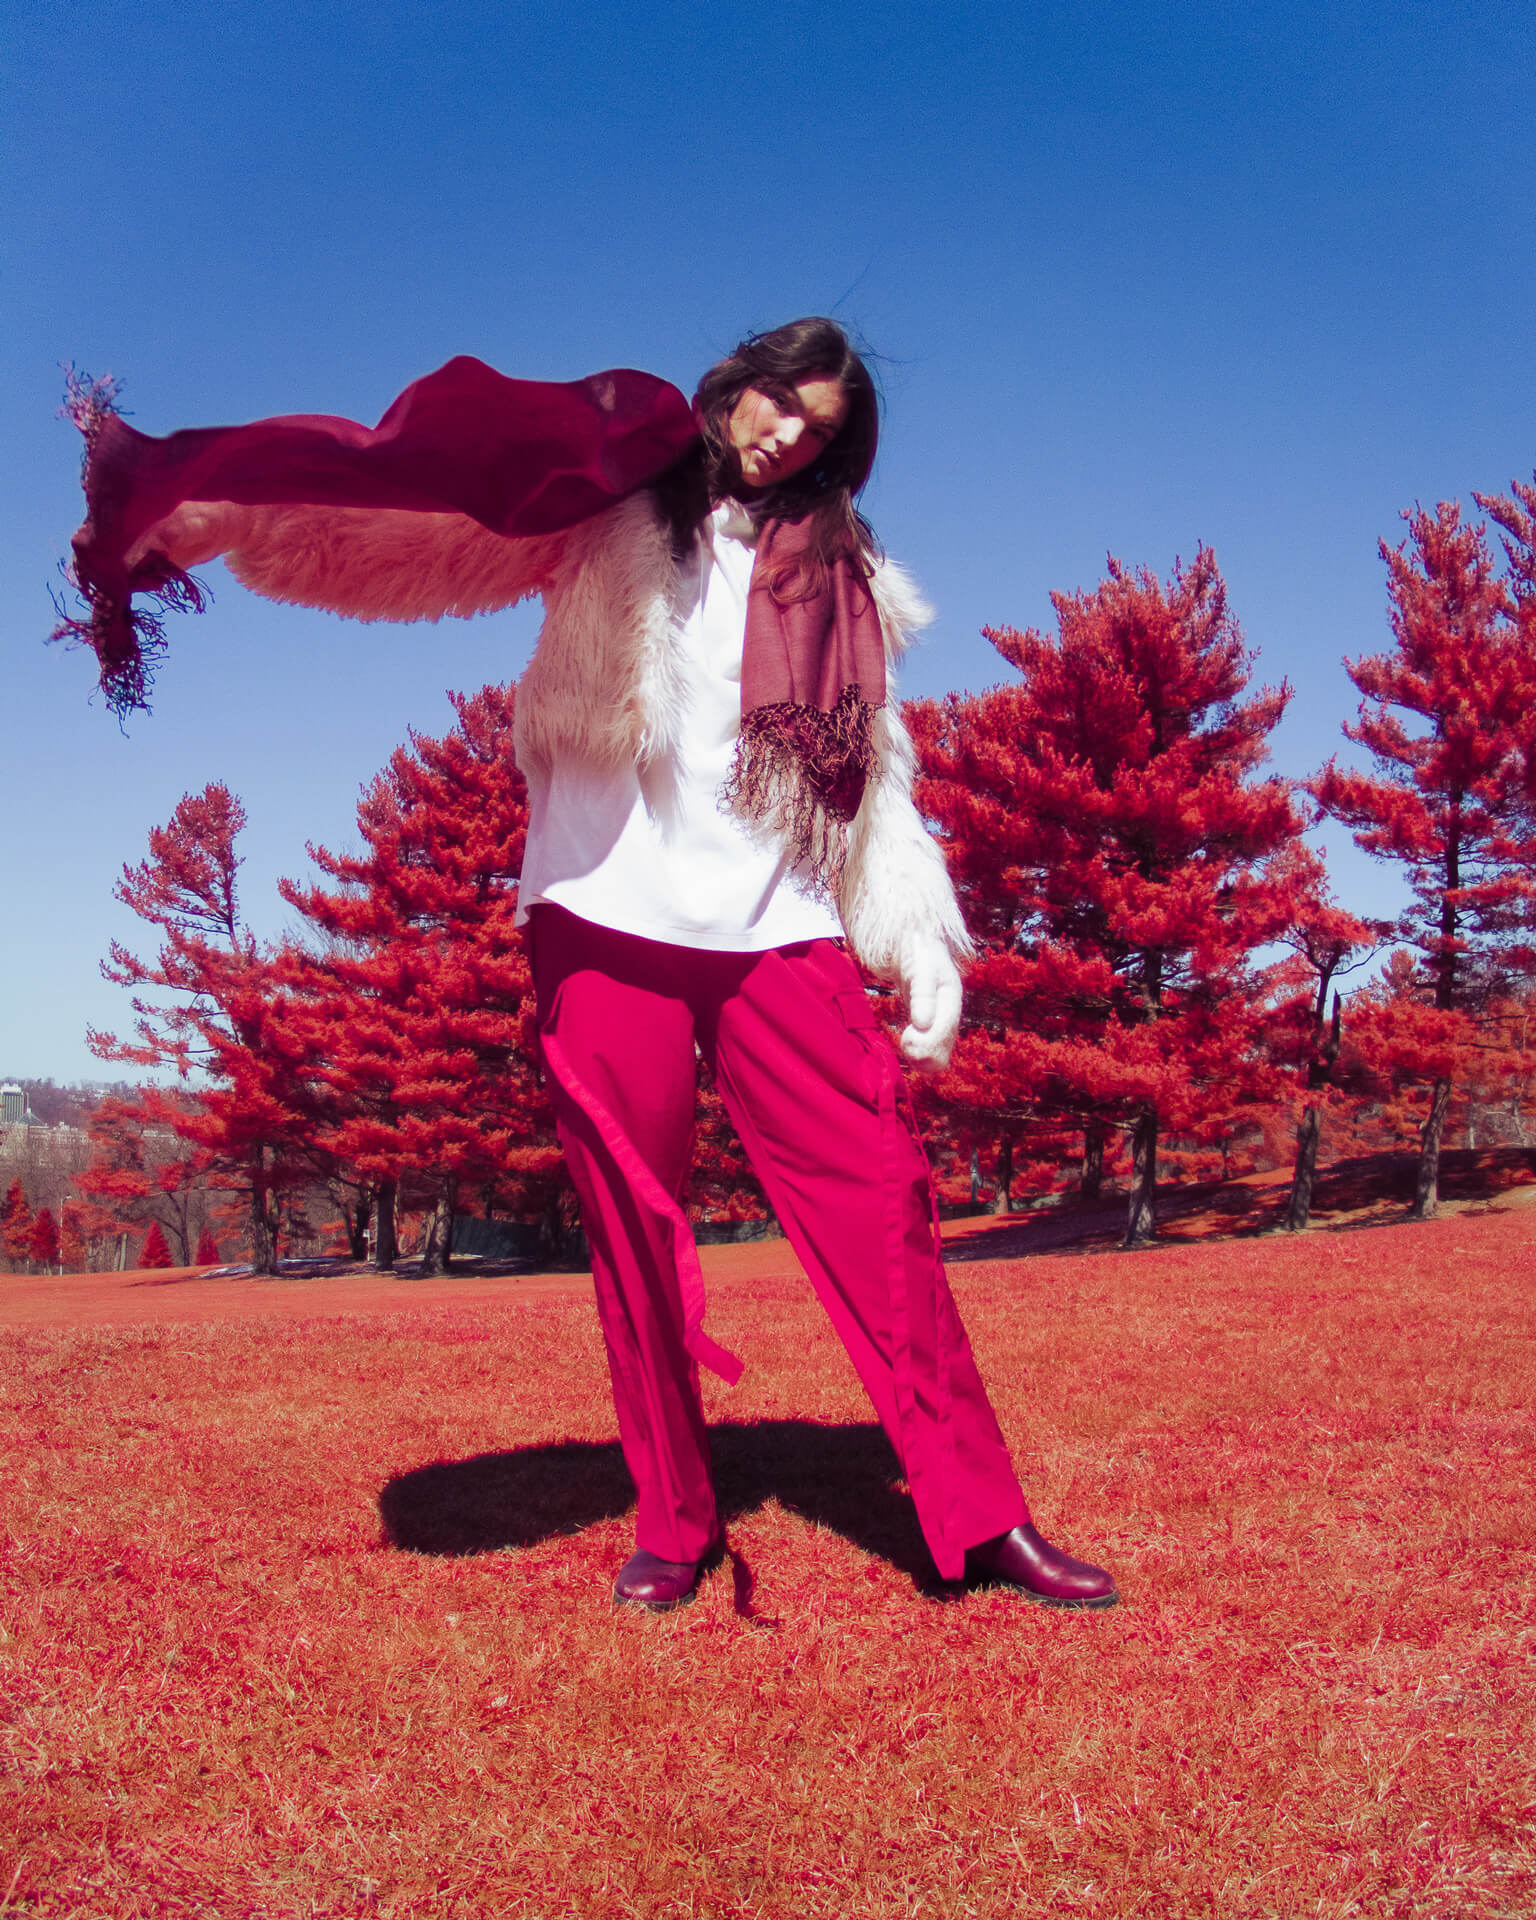
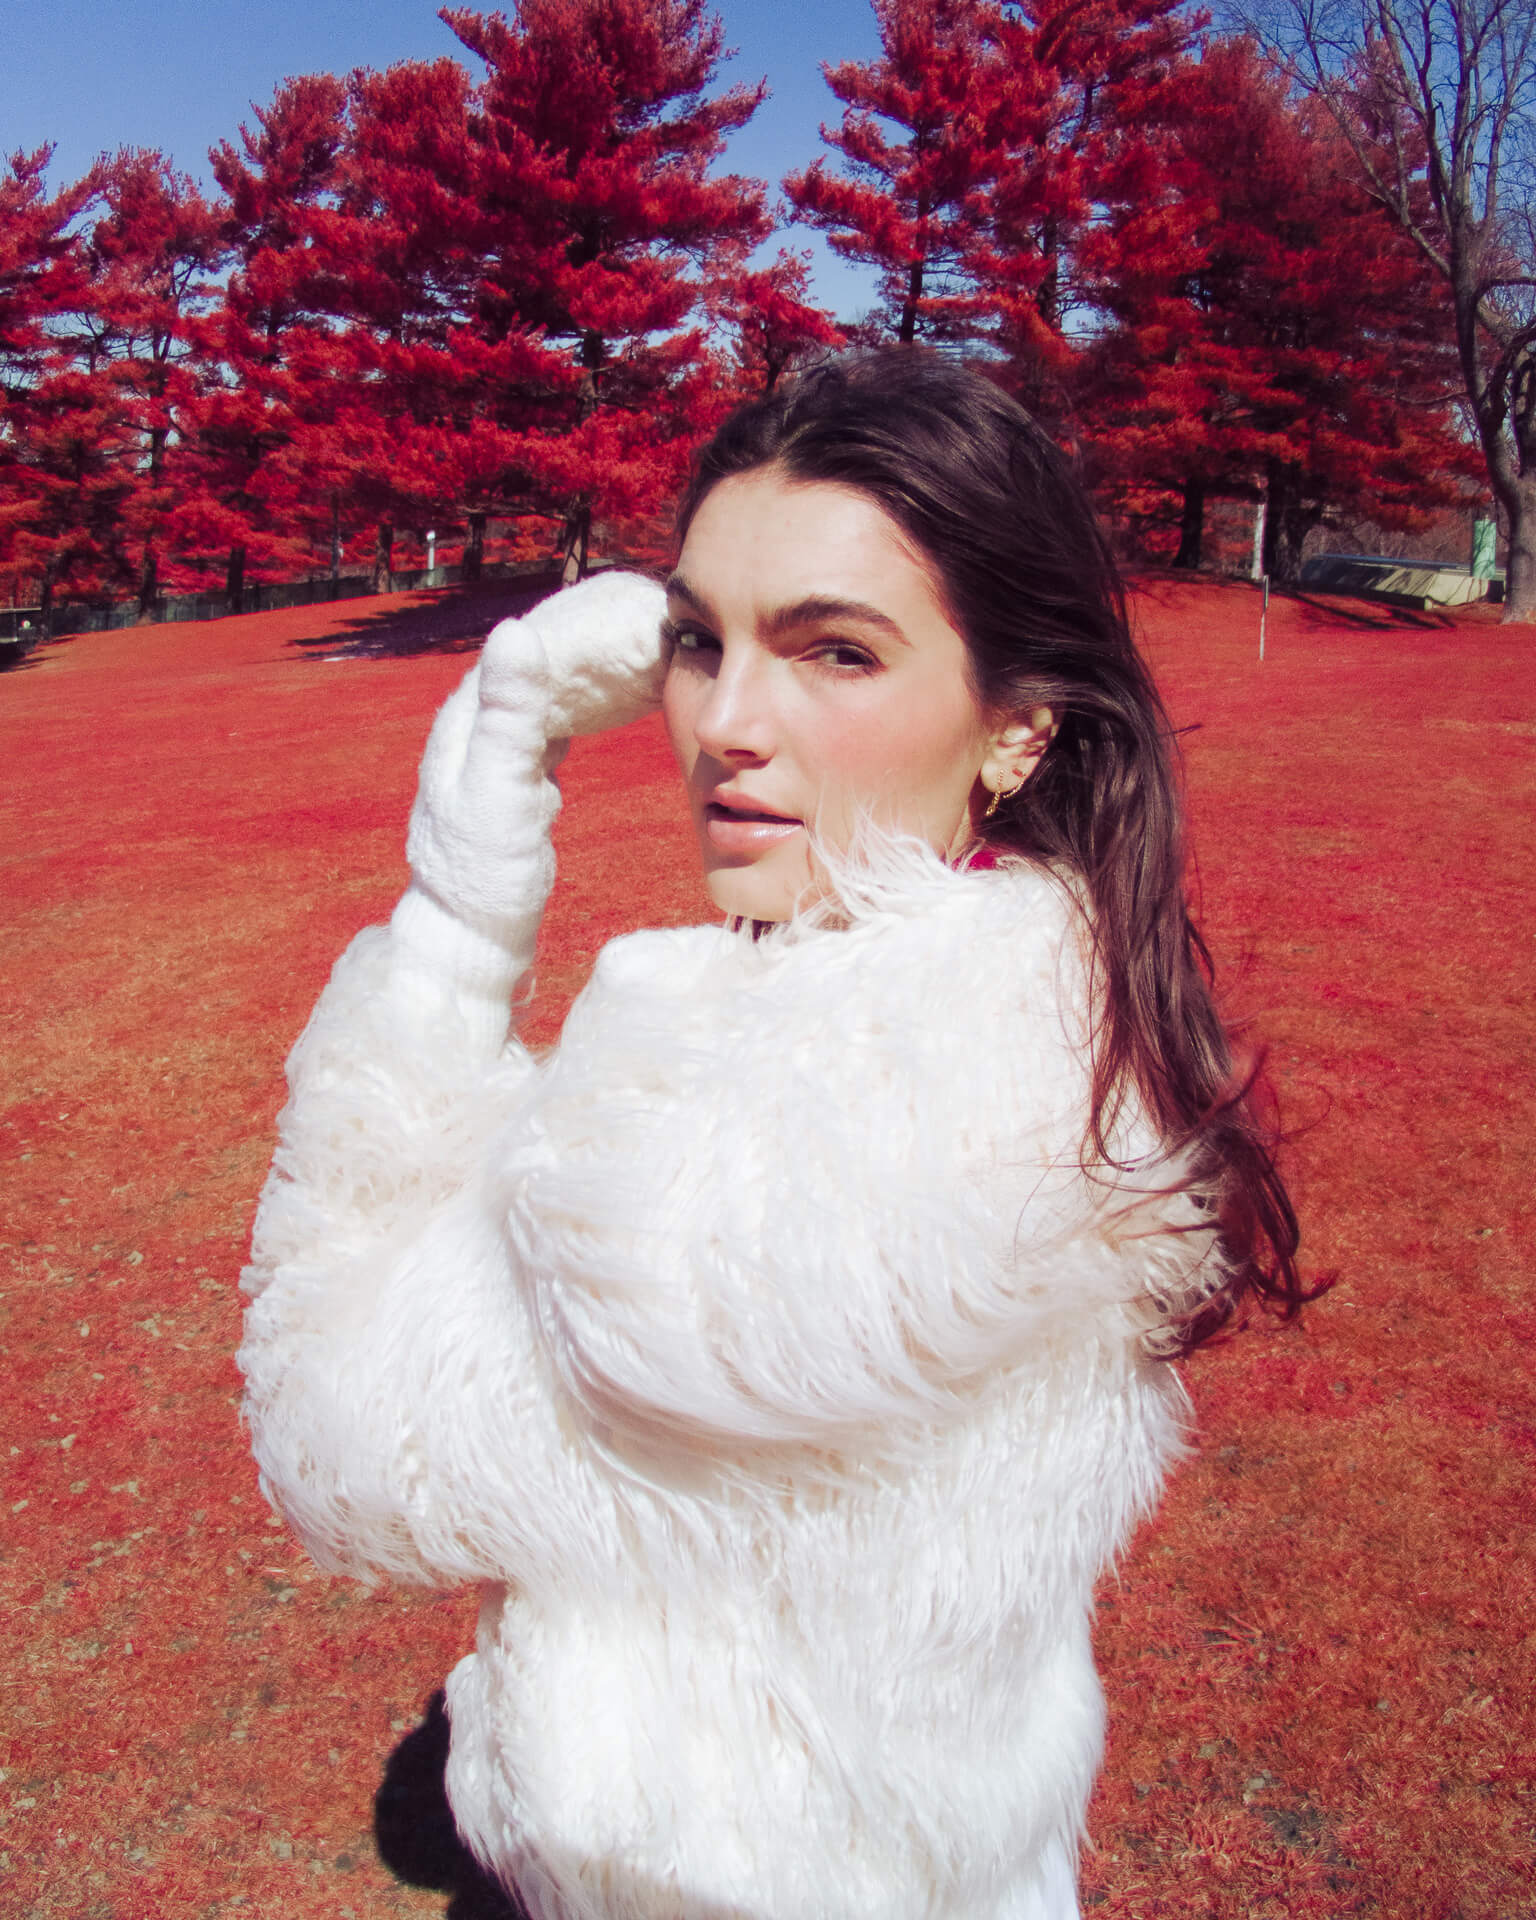
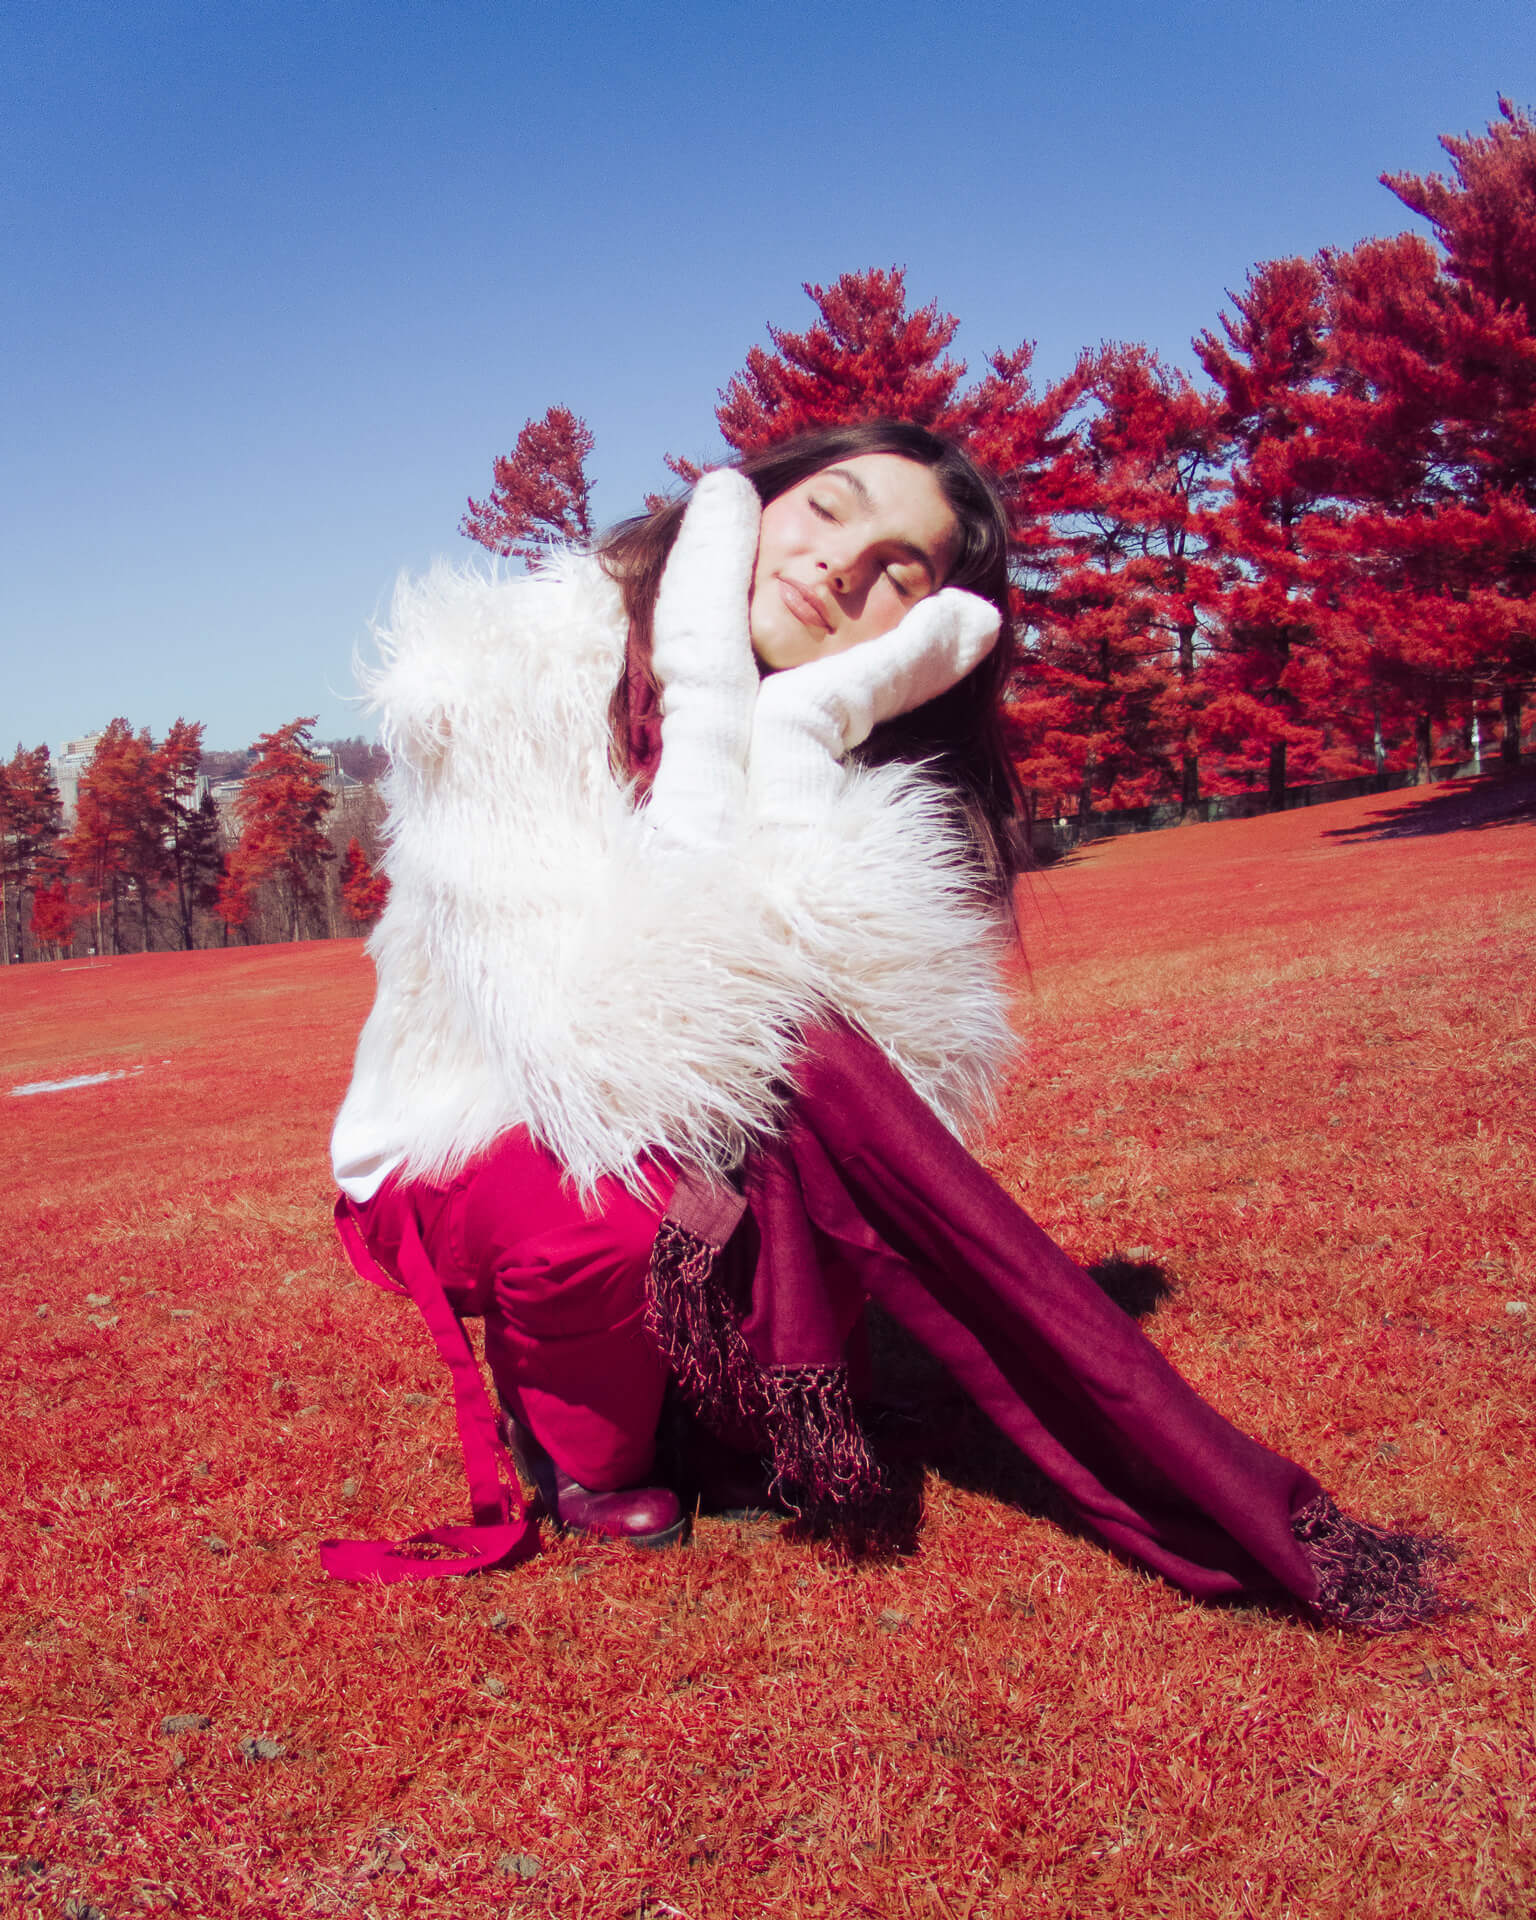
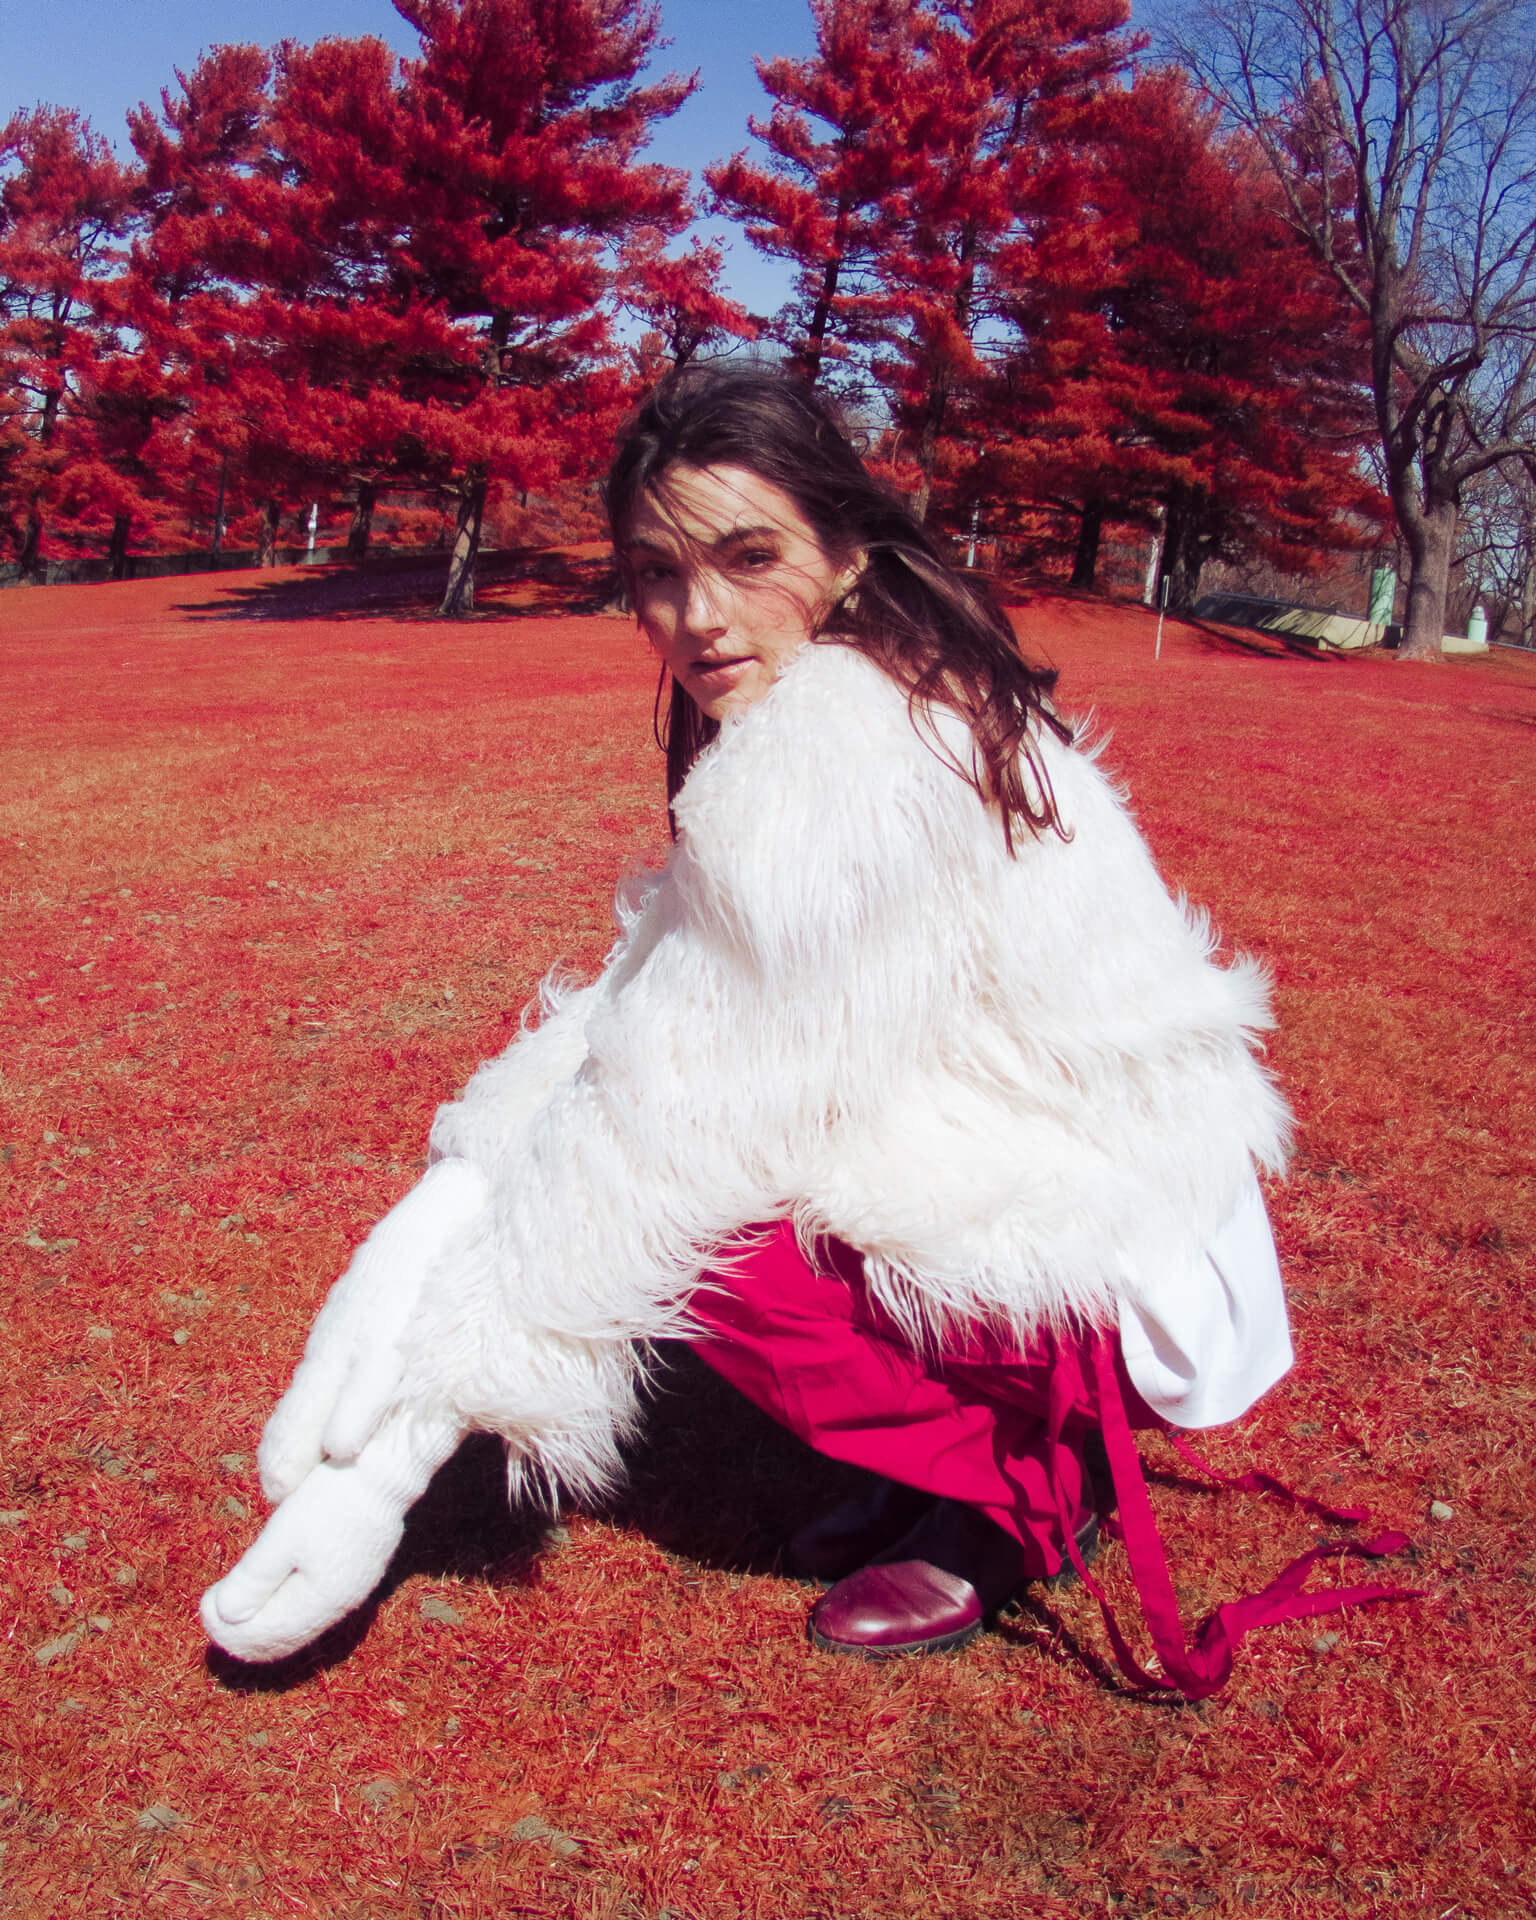
RAW-Based Digital Images
Rachel Landry on Kolari Pocket with IR Chrome Filter
RAW vs. JPEG Thoughts with Kolari Pocket
My preference between the two options above is definitively the RAW files. The DNGs preserve skin tones more accurately and control the highlights surprisingly well for the size of the sensor. The blues also stood out as deeper and richer in the RAW files!
Conclusion
I don’t think I can choose between the methods, given they both present a unique way of capturing an image informed by recording infrared and visible light wavelengths simultaneously. If I was strictly doing portraits, the digital IR Chrome filter saves tons of time and allows for more dynamic movement by the subject, which would be impossible with the film. For landscapes, I would probably lean toward the film to capture more detail and give the classic textures that one would mentally associate with Aerochrome film.
If you’ve ever wanted to give yourself a challenge or explore another tool to capture creative images with your camera, I highly recommend giving this experiment a try for yourself. If you have access to a film camera, you can be on your way after picking up a few common filters (or borrowing them from a friend!). If you’re committed or already have a full spectrum camera, all you need is the Kolari Vision IR Chrome filter to bring your dreams into reality!


