Developing your skills in the studio after learning how to make photographs in natural light may feel like a challenge. However, if you’re equipped with the right knowledge, you can hit the ground running and start creating the art you’ve always wanted.
In this post, “strobe” and “flash” will be used interchangeably. To use one, you will need a trigger to activate the strobe and sync it to your camera shutter. Cheaper ones will not possess the ability to sync at high speeds. If you’re unsure which kind you have, a shutter speed of 1/60 is a great place to start. Additionally, some triggers allow for TTL metering interaction with your camera—but it’s best to keep this functionality off as you learn to build and tweak a lighting setup in the studio.
Studio Lingo
TTL Metering: “Through the lens” metering is a method that cameras use to sense the amount of light in a scene without using an external light meter. This is common for modern cameras, and some possess the ability to communicate with a wireless trigger to calculate an exposure that is a mix of ambient light and strobe.
Key Light: The main light you use for your subject. Typically, this is the most powerful light.
Fill Light: The light you use to fill shadows and reduce contrast in your scene. The intensity can be manipulated by moving the fill closer or further away from the subject, or you can alter the power from this light source.
Rim Light: A light metered to be in the highlights of your exposure to define the edge of your subject. This light is commonly seen when subjects appear on a darker background.
Reflector: Comes in silver, white, gold, and black and is used as a fill.
Diffusion/Softboxes: These alter the character of the light and come in different shapes, sizes, and styles with different aesthetics. Parabolic umbrellas, honeycomb grids, and beauty dishes are common examples of this light modifier.
V-Flat: A large, foldable foam board that can be used as positive fill (adds light) or negative fill (removes light).
Continuous Light: Examples would be a traditional light bulb, LED light tube, or fluorescent light. More commonly used in video applications but can also be used for photography.
Strobe: Also known as a flash. Strobes have capacitors to store electrical energy and release it at once through a bulb or strobe head. Higher-powered strobes allow you to use lower ISOs for sharper photos, but they are typically more expensive and heavier to carry around.
Wireless Trigger: Connects to your camera’s hot shoe to synchronize the flash with the shutter.
Sync Cord: On older cameras, a standard (PC) sync cord provides a physical connection to synchronize the flash with the shutter.
Here are five lighting setups you can experiment with to feel confident during your next studio session!
Setup 1 — The Classic Beauty Clamshell (1 or 2 Light Setup)
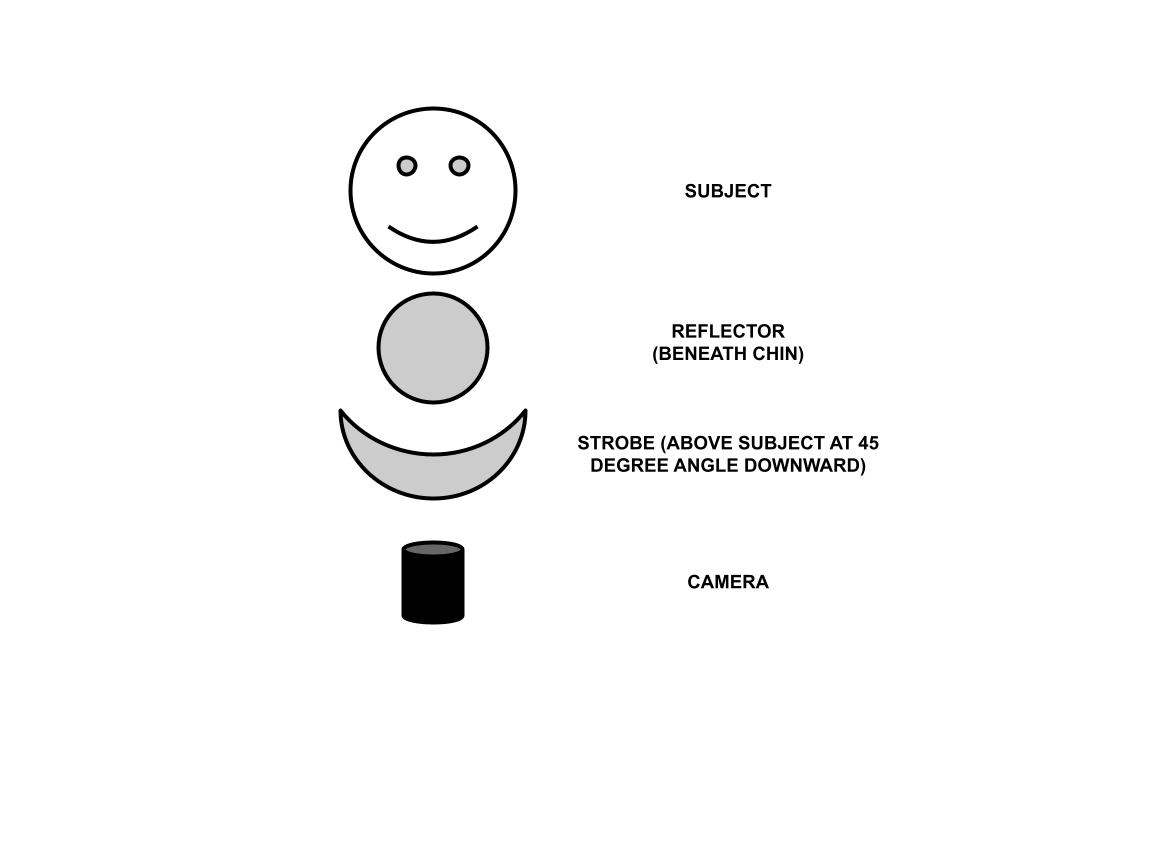
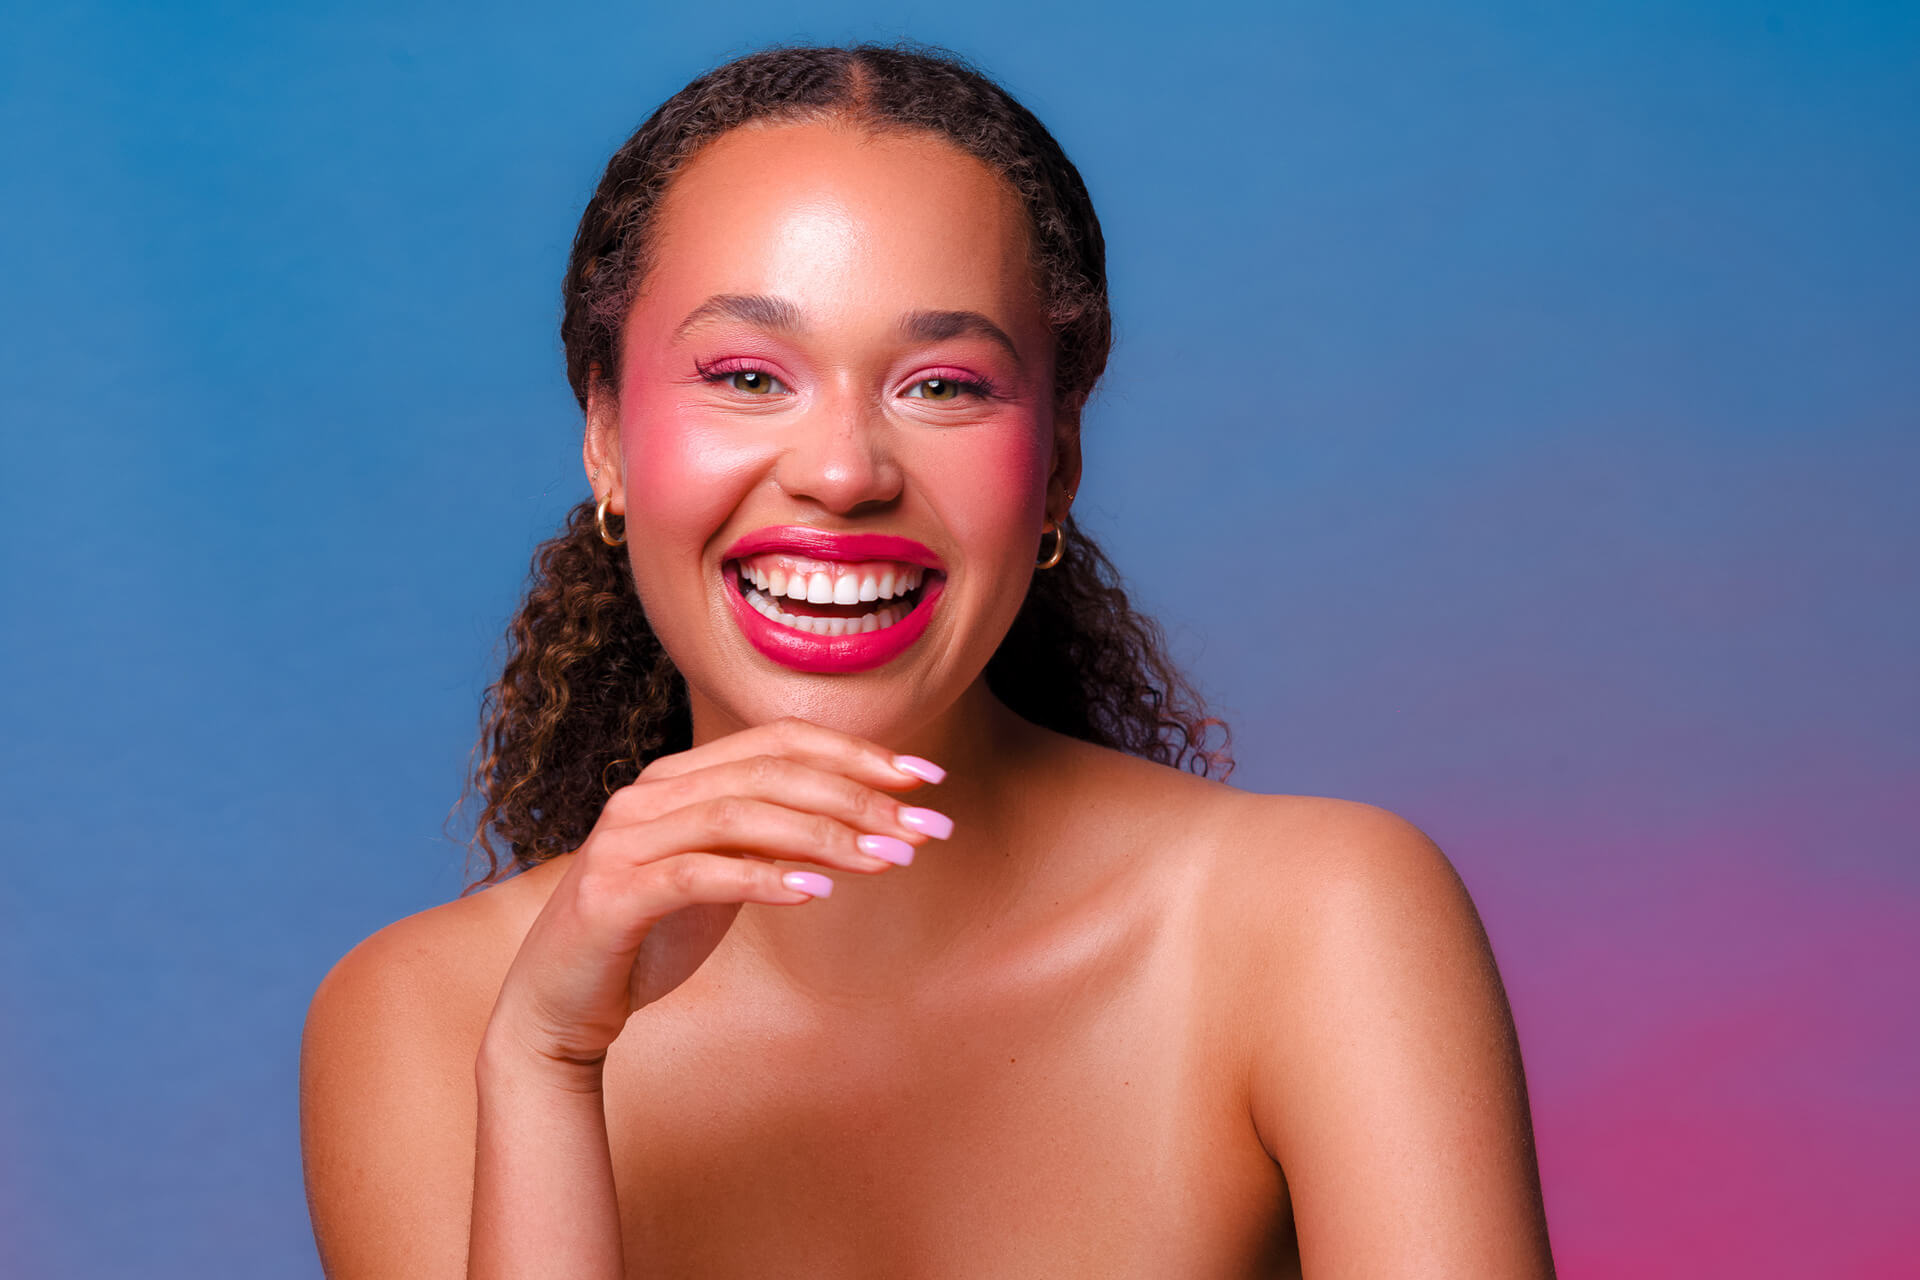
Light characteristics: Shaped and soft shadows
Common applications: Beauty photography
Equipment: Silver parabolic umbrella with double diffusion and white reflector disc beneath the chin of subject
The clamshell look can be achieved with one or two lights. With one light, you will need a reflector or bounce card to fill the light underneath the chin. With two lights, the bottom light can be adjusted to a slightly lower power than the top light.
To increase contrast and decrease fill, move the bottom light (or reflector) further from the subject. To yield a flatter image and increase fill, move it closer.
If you’d like to keep the backdrop in the midtones of your overall exposure, you can consider adding another light to fill the backdrop. Make sure to control the spill so it doesn’t create strange or irregular lighting on the edges of your subject.
Setup 2 — Basics with the Bare Bulb (2 Light Setup)
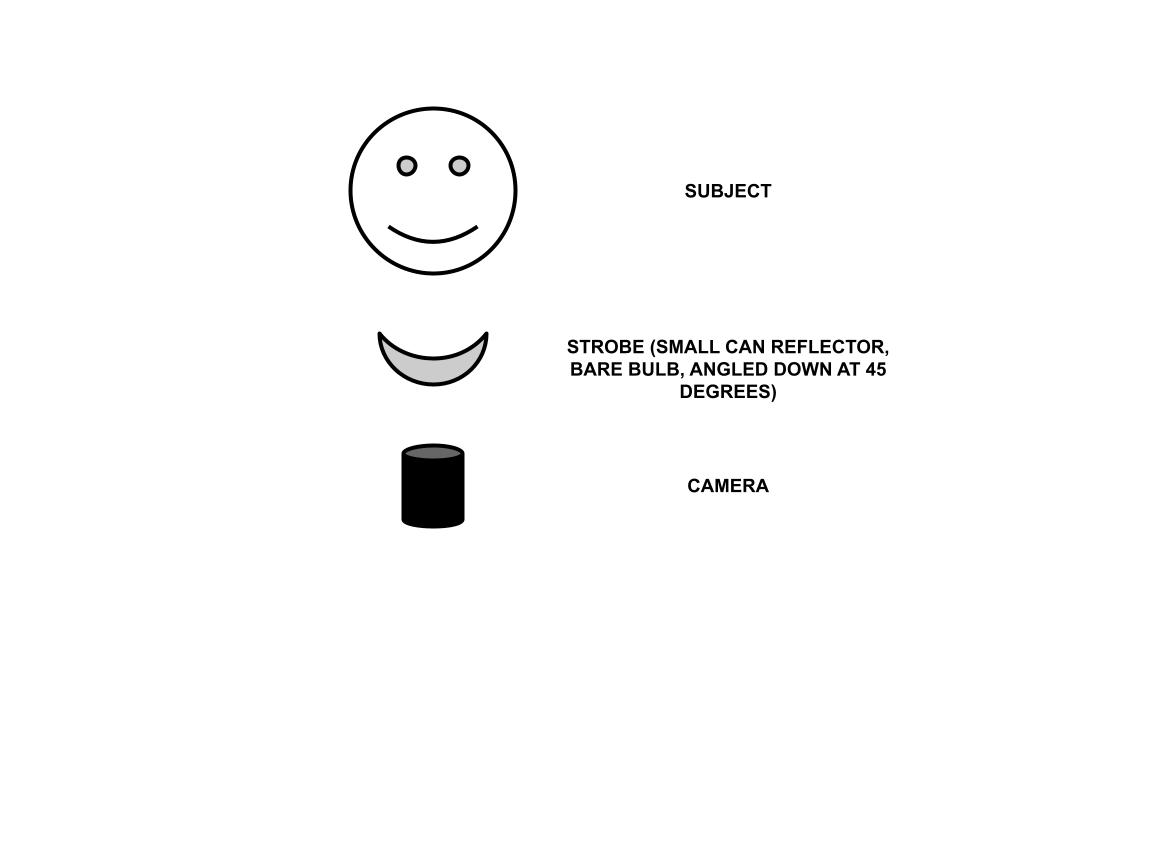
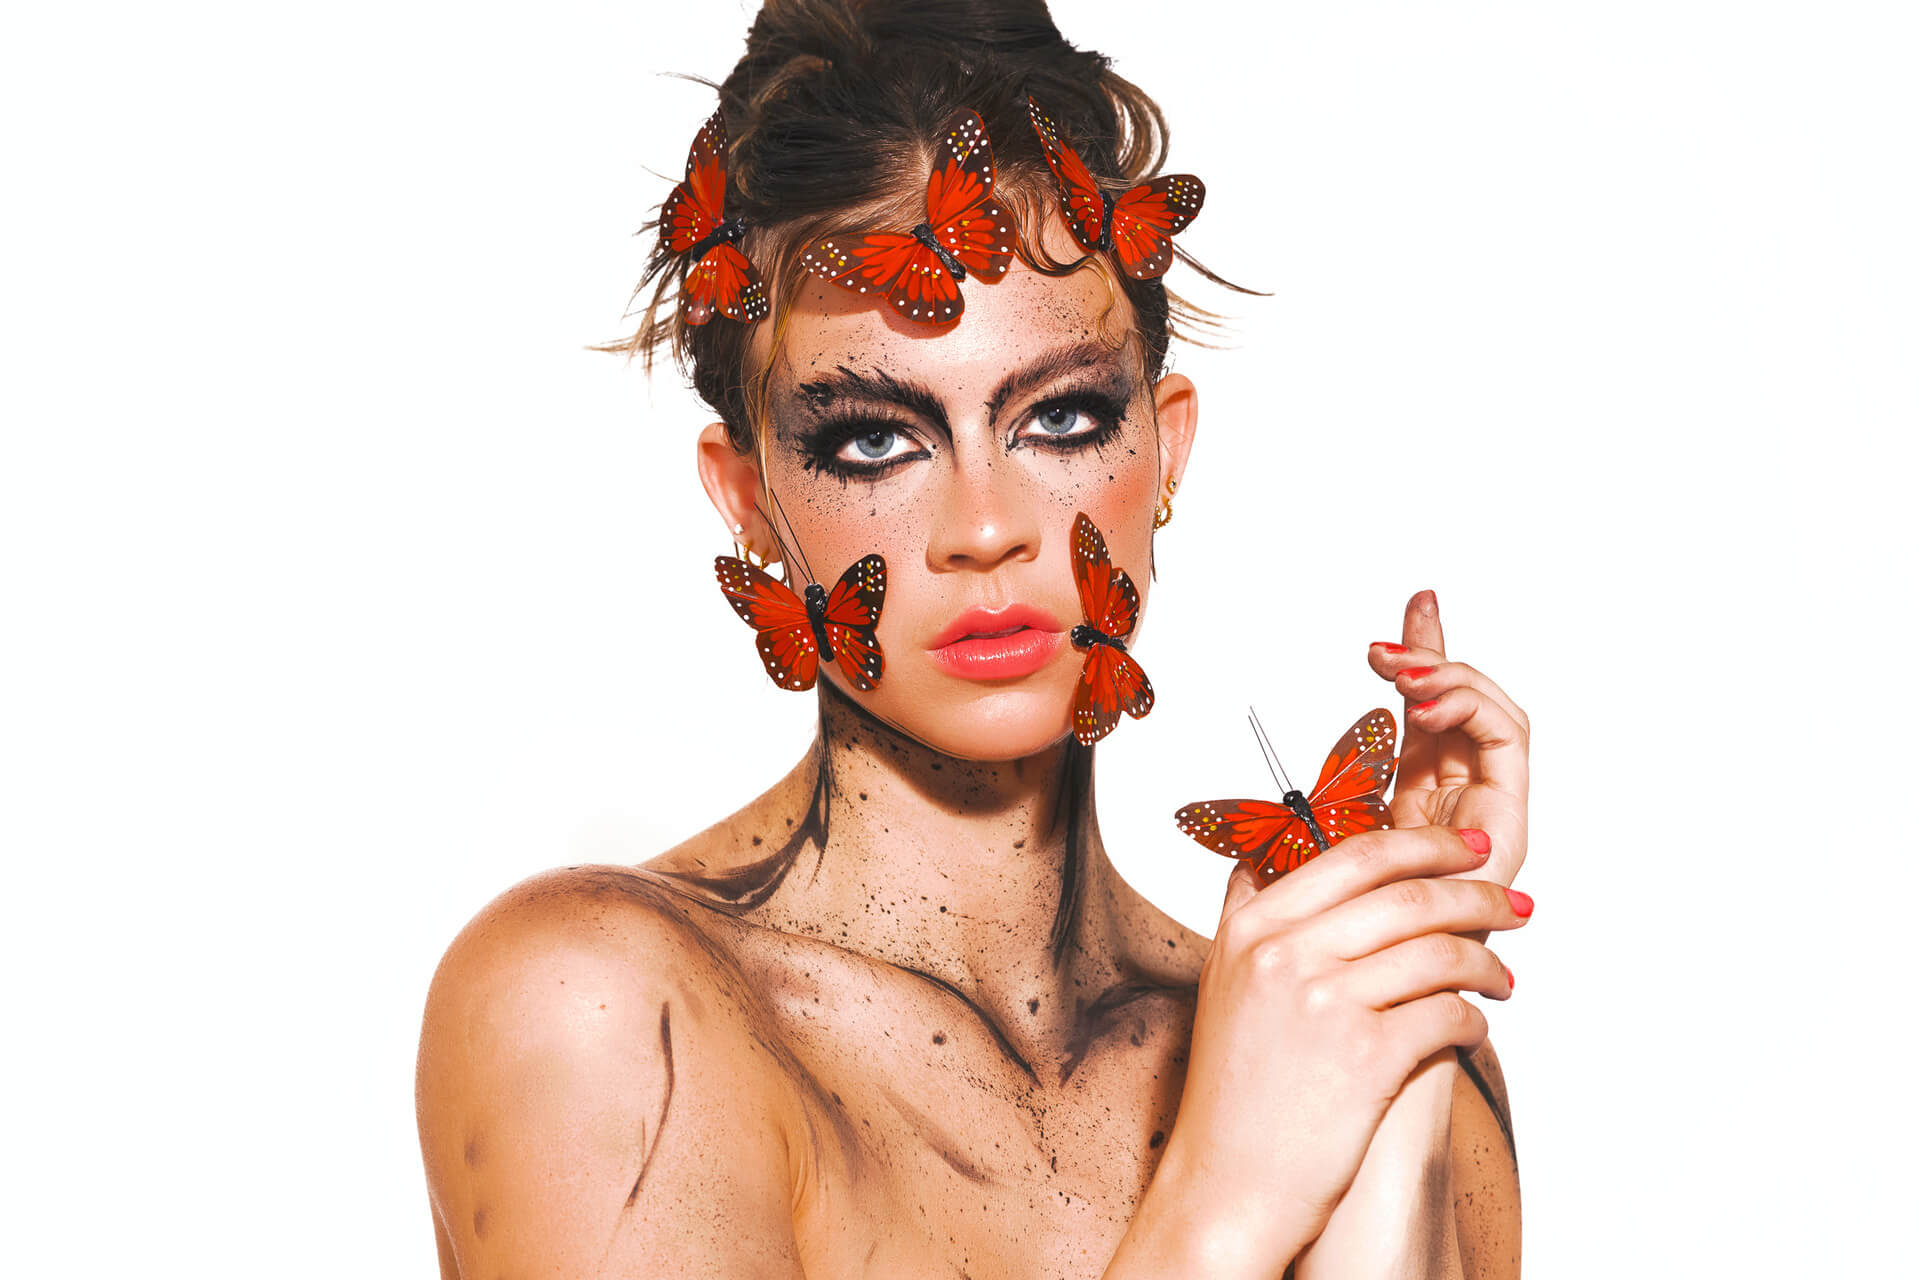
Light characteristics: Dramatic, harsh shadows
Common applications: Editorial images, food photography
Equipment: Strobe with reflector can, no diffusion (honeycomb grid optional)
Many beginners shy away from the bare bulb of the strobe head because it can blow out highlight details if not metered correctly, and it will reveal imperfections on your subject’s skin. However, it’s always a great technique to have in your arsenal to create drama and distance your images from a true-to-life look.
Adding a honeycomb grid will decrease the spread of the light from the strobe head, which will visually add shadows to the elements further away from the center of your image (if that’s where your strobe head is pointed).
Setup 3 — Parabolic White Umbrella with Fill (2 Light Setup)

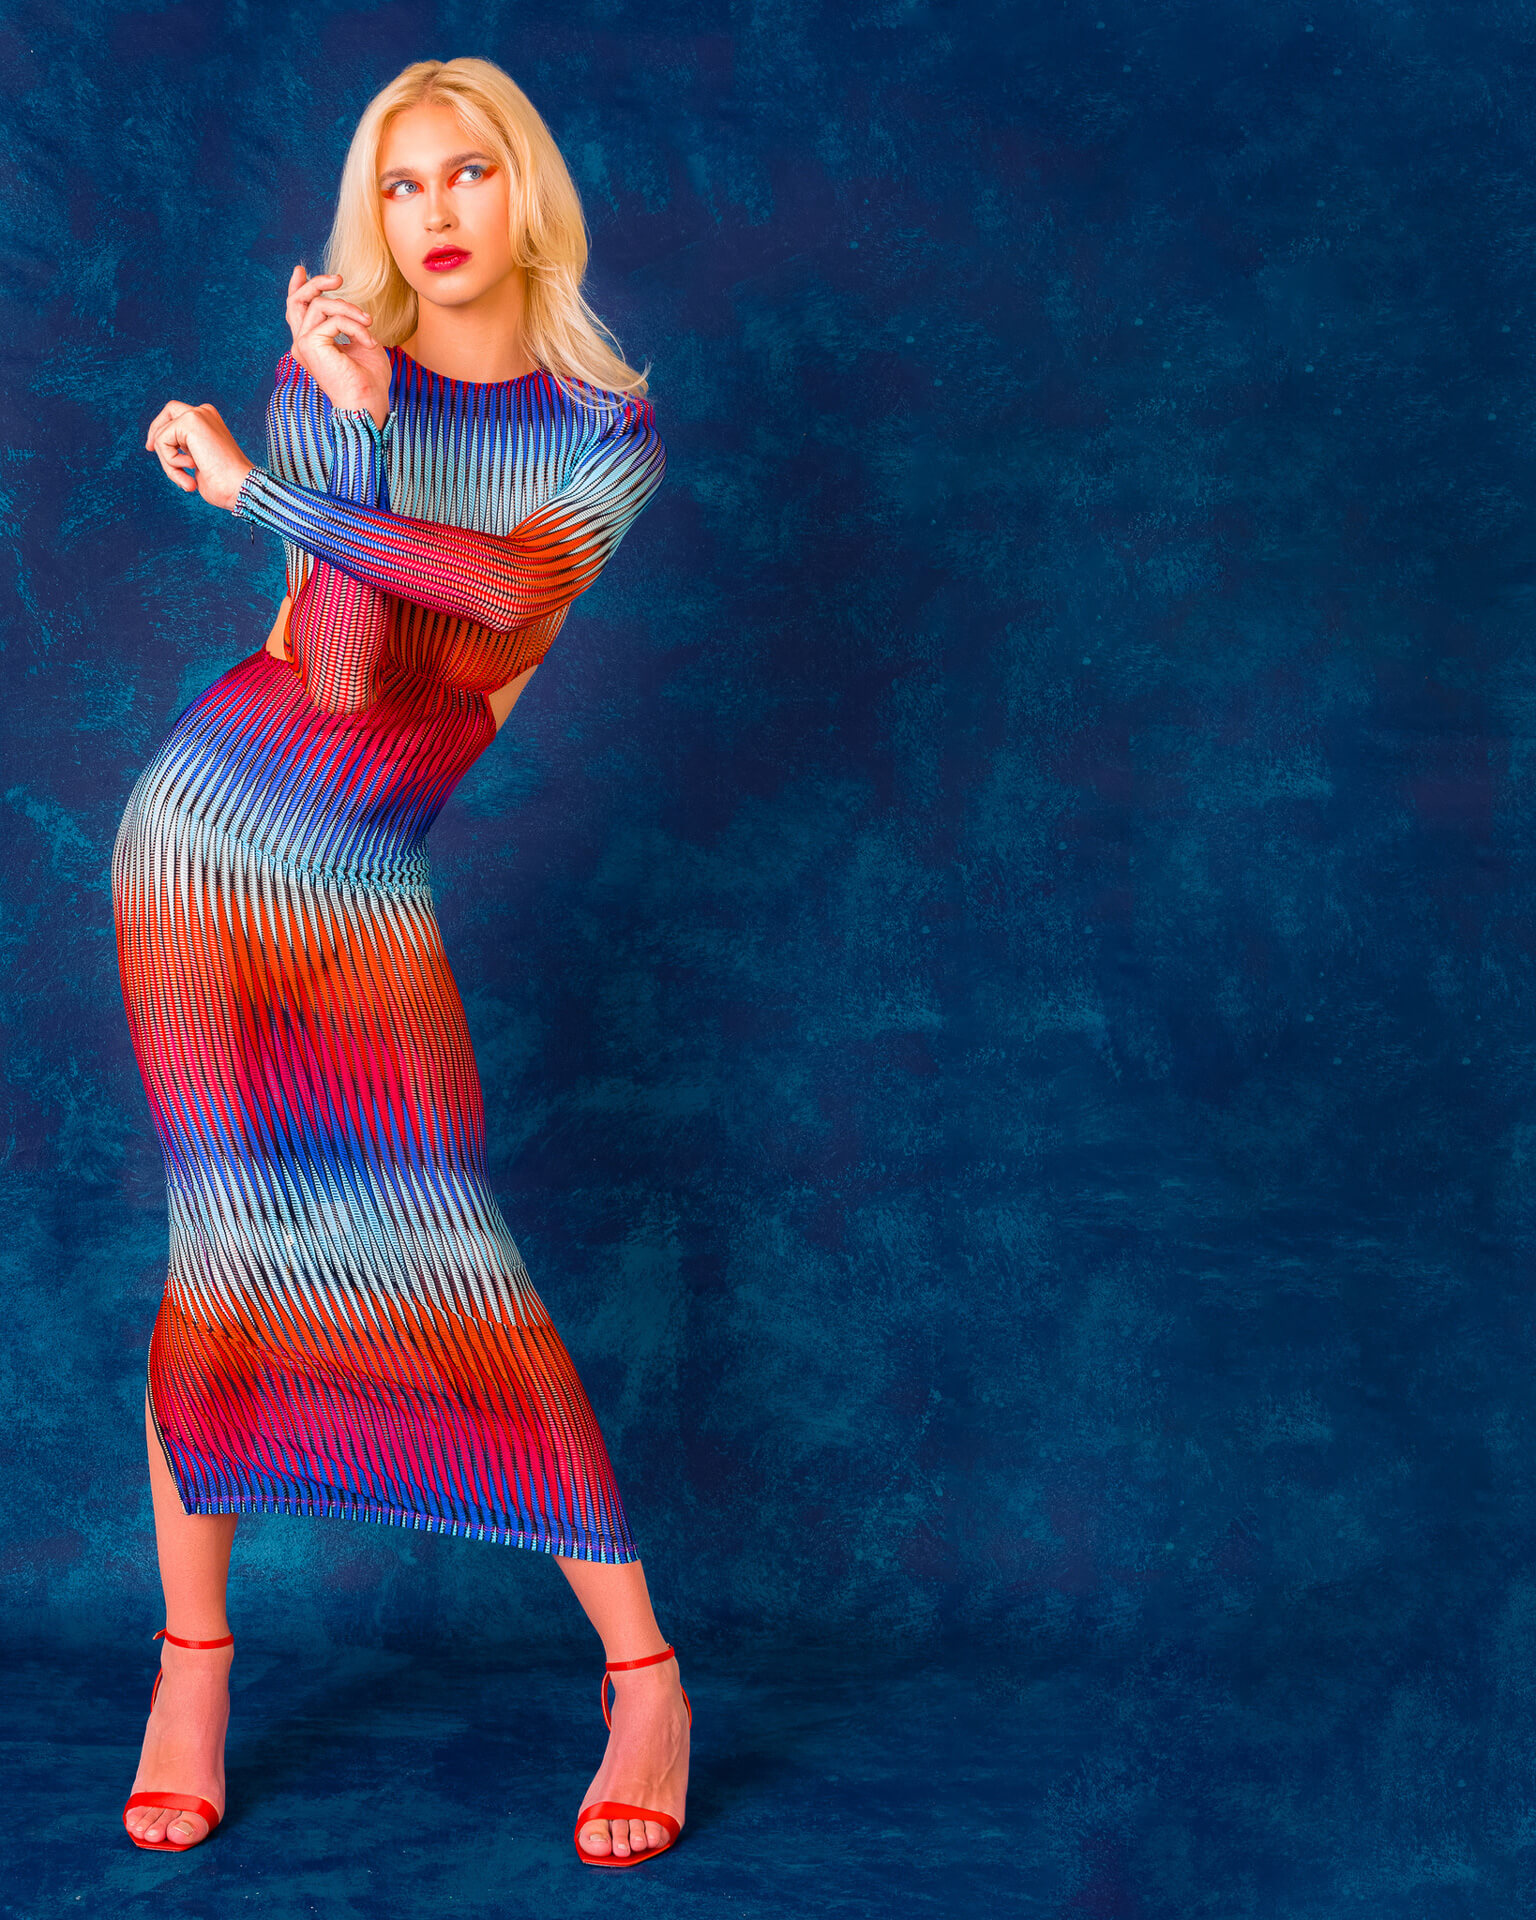
Light characteristics: Flat, broad, and diffuse
Common applications: General purpose
Equipment: Two large parabolic umbrellas, one camera left, one camera right
There are times when you want contrast in the studio, and there are times when you want to generate flat light. This setup is particularly helpful when you’re capturing a high-contrast subject and want to retain important details, like the colorful dress above.
Flat light is also amenable to shooting large groups of subjects (think musician or band cover photos), where a relatively even exposure is essential for each subject. If you don’t have two strobes at your disposal, you can nearly recreate this look with one large umbrella and strobe opposite a white V-flat as a fill.
Setup 4 — Long Exposure (1 Strobe, 1 Continuous Setup)

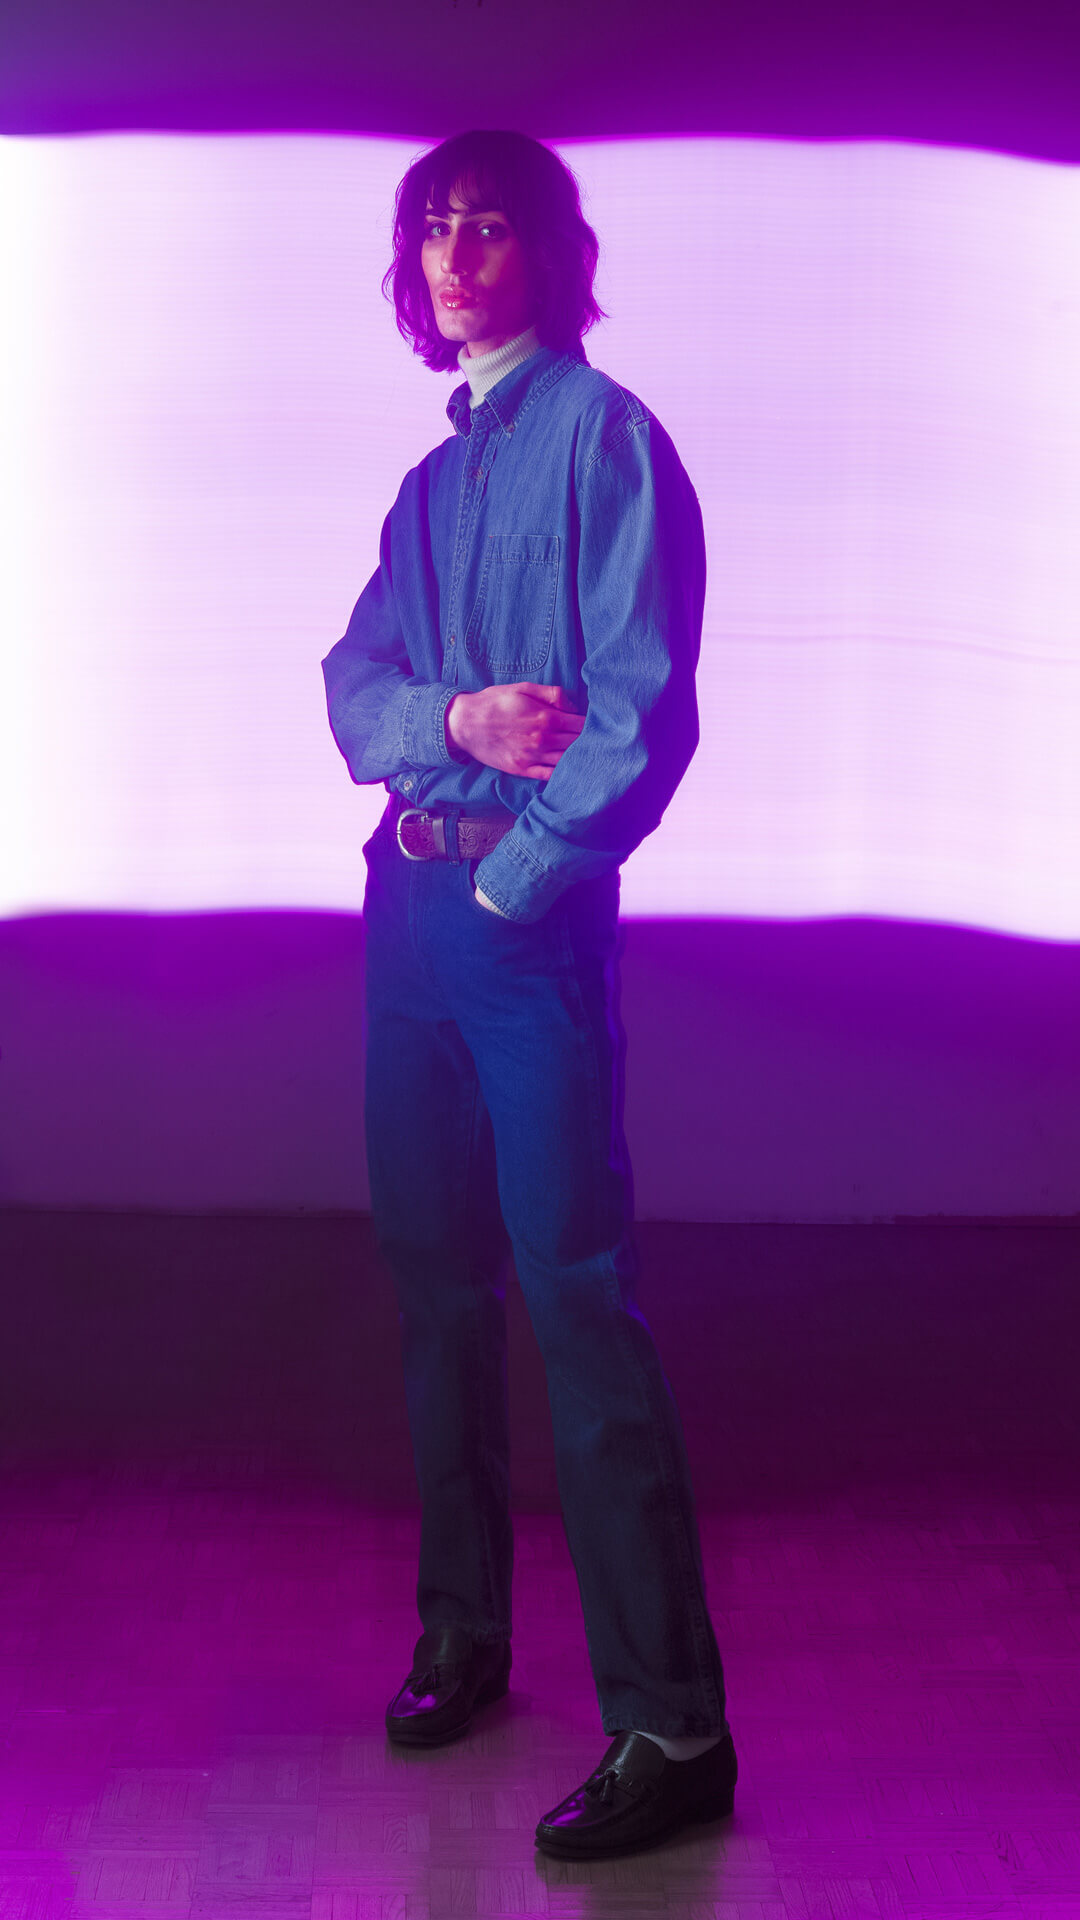
Light characteristics: Ethereal, out-of-this-world
Common applications: Creative portraits, light painting photos
Equipment: Large parabolic white umbrella and programmable LED light tube
Long exposures and strobes aren’t often thought of together, but I love to combine them for a unique look. This aesthetic builds upon the basics of a strong exposure.
For this to work, the ambient light (that you see when the flash is not fired) must be very dark and subdued. As you drag the LED tube behind your subject, it exposes your sensor with the light you choose. The amount of ambient light and strength of your LED will dictate how long your exposure will be, but typically it is on the order of 1-2s.
The subject is “frozen” by the strobe that fires at the end of the exposure, and this exposure information is layered onto the LED that had been dragged earlier when the shutter was open. It’s important to note that most strobe triggers default to “front curtain sync” — to achieve this look, you’ll need to switch it to “rear curtain sync” and balance the power of your strobe with the light input from your LED.
Setup 5 — Rim Light Done Right (3 Light Setup)
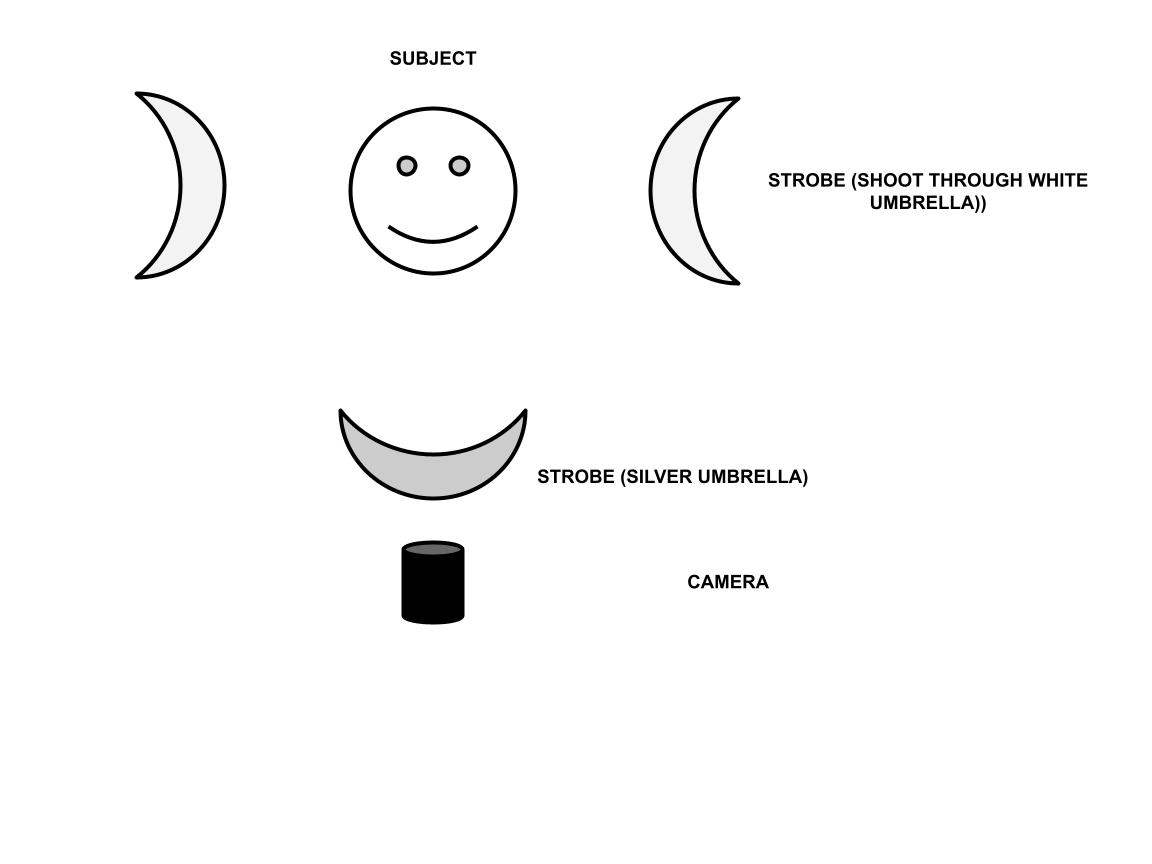
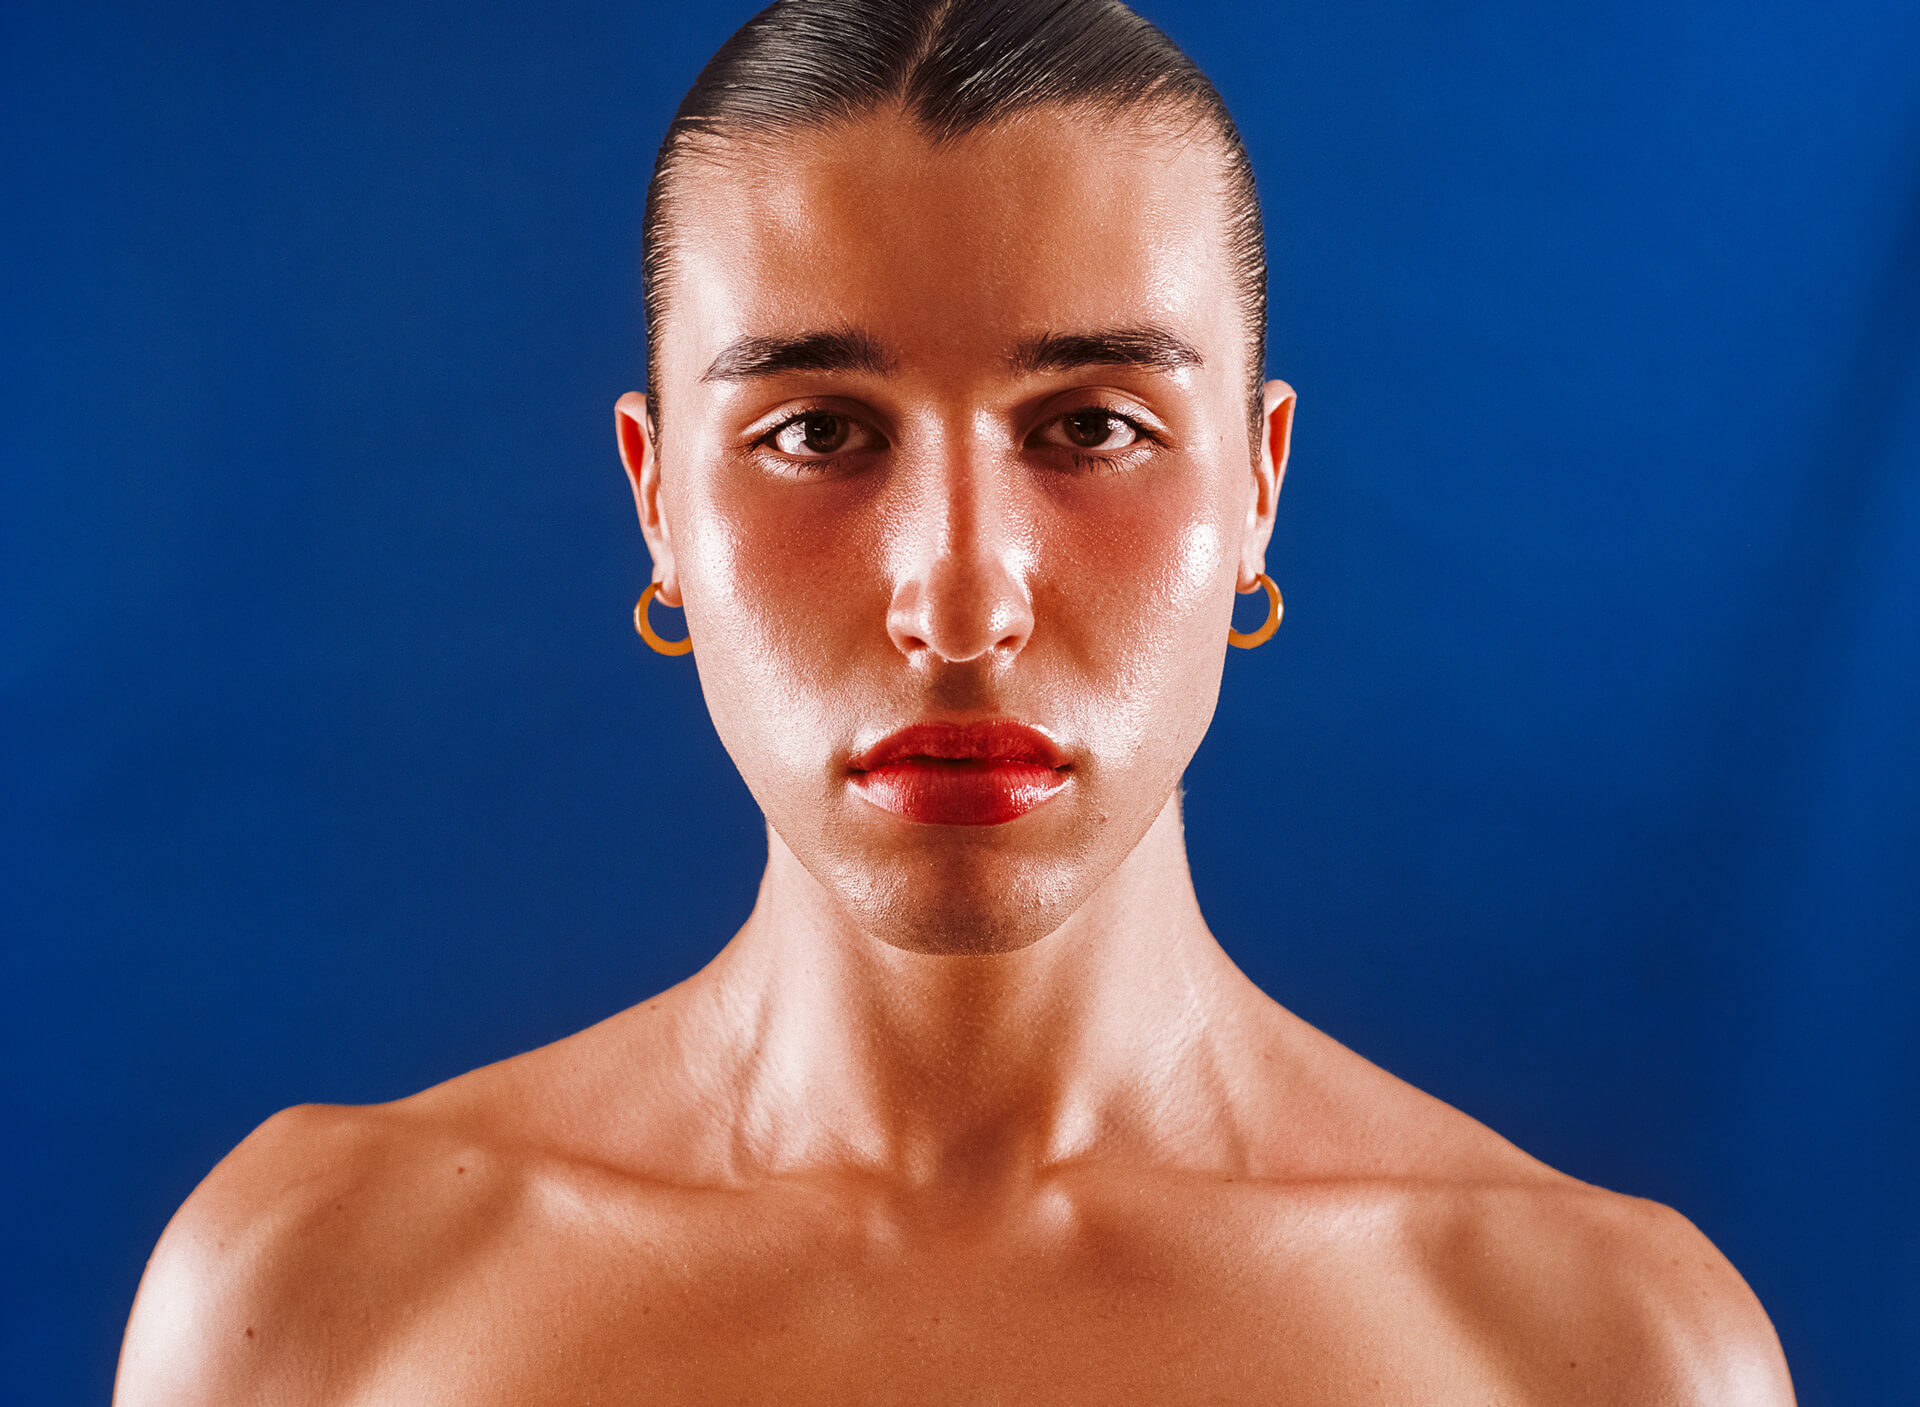
Light characteristics: Sharply defined edges and defined shapes
Common applications: Stylized sports portraits, fashion editorials
Equipment: One silver umbrella as the key light, two white umbrellas as the rim lights
Three-light setups are naturally more complicated than one or two-light setups, but not drastically more so. For this look, I have placed white umbrellas to camera right and left, giving symmetrical rim lighting along the shoulders and head of the subject. This symmetry is important because it gives equivalent exposure values to both sides of the face and creates a more pleasing picture.
To give the face a bit of natural fill, I added a third silver umbrella in front of the subject, directly above the camera lens.
This post is not an exhaustive list by any means, but more of a starting point to explore and experiment with new ideas creatively!
Studio lighting can be a challenge, but these challenges are accompanied by the opportunity for growth as an artist. The fundamentals of taking a great photograph do not change when you enter the studio; however, how you make changes to alter the overall look of a photo increases in complexity when you move past taking photos with natural light.
If you have a favorite style or setup I’ve missed or a new one you’ve experimented with, feel free to share it in the comments!
Studio Lighting Setups FAQs
What Are Good Studio Lighting Setups For Beginners?
Good beginner studio lighting setups include clamshell lighting, bare bulb lighting, parabolic umbrella lighting with fill, long exposure lighting with one strobe and one continuous light, and a three-light rim light setup. These give photographers several starting points for beauty, editorial, general-purpose, creative, and stylized studio portraits.
What Is Clamshell Lighting In Studio Photography?
Clamshell lighting uses light from above the subject and fill light from below. The article explains that it can be created with one light plus a reflector or with two lights, where the lower light is set slightly weaker than the top light.
When Should You Use Bare Bulb Lighting?
Bare bulb lighting works well when you want dramatic, harsh shadows and a less true-to-life studio look. The article notes that it can be useful for editorial images and food photography, but it needs careful metering because it can blow out highlight detail.
How Do You Use Long Exposure With Studio Lighting?
Long exposure studio lighting combines a strobe with a continuous light source, such as an LED tube. The continuous light creates motion or light-painting effects during a 1–2 second exposure, while the strobe freezes the subject at the end using rear curtain sync.
What Is A Rim Light Setup Used For?
A rim light setup is used to define the edges and shape of the subject, especially against a darker background. In the article’s three-light setup, two white umbrellas create symmetrical rim lighting on both sides of the subject, while a silver umbrella in front adds natural fill to the face.