Introduction
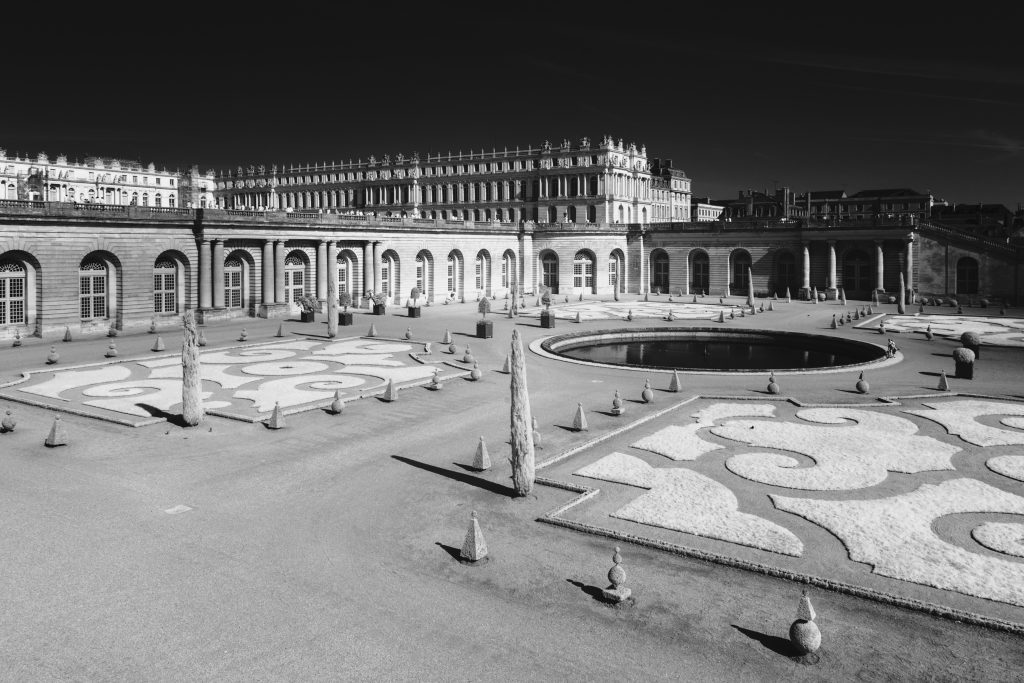
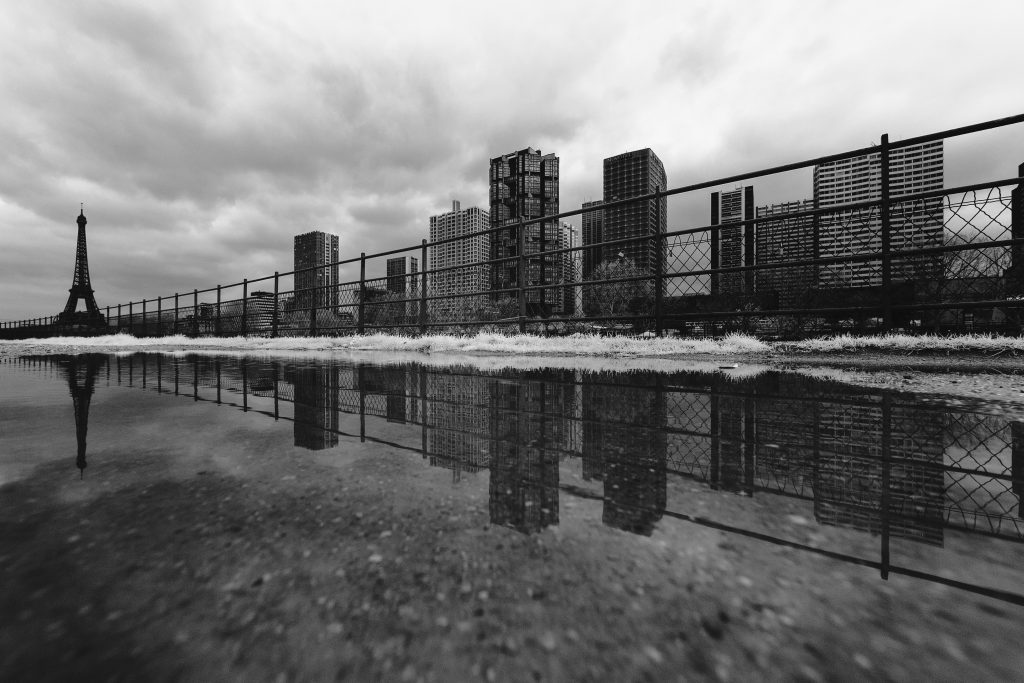
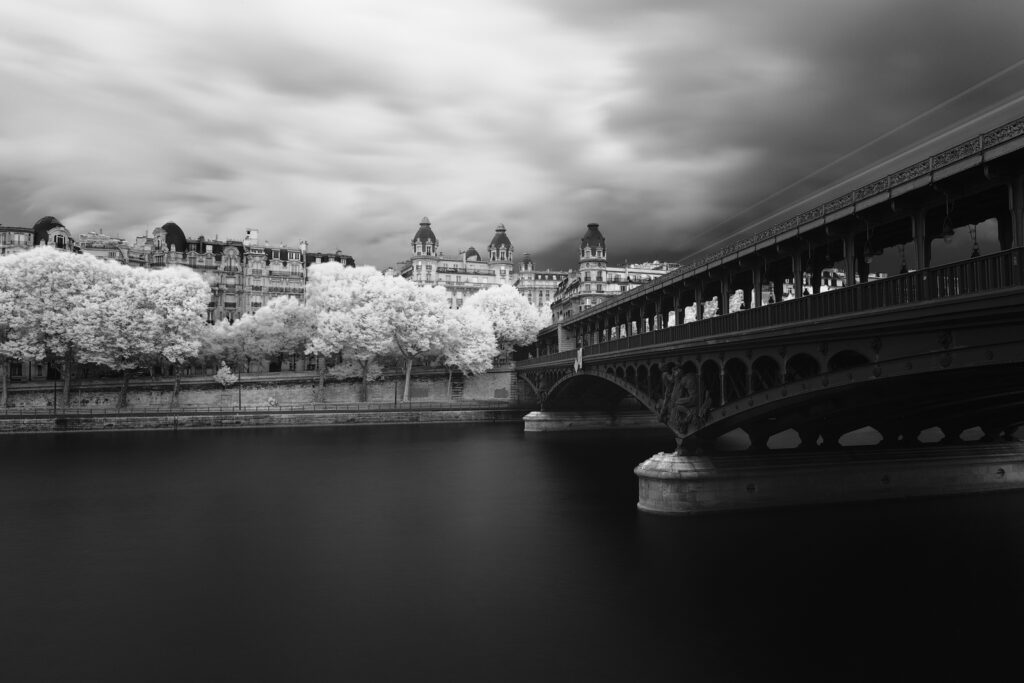
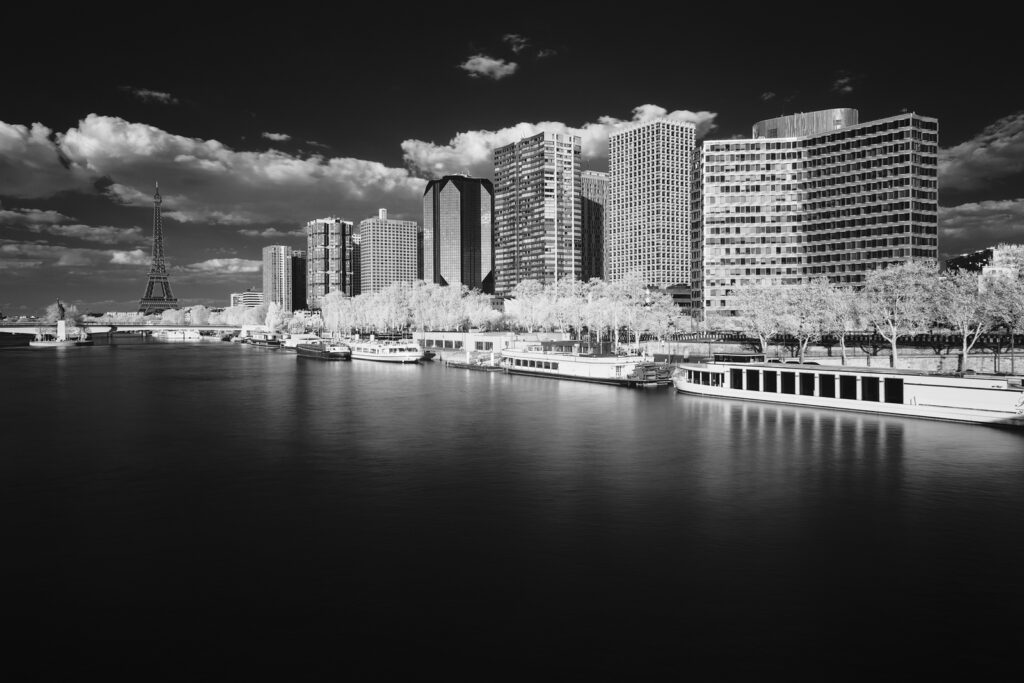
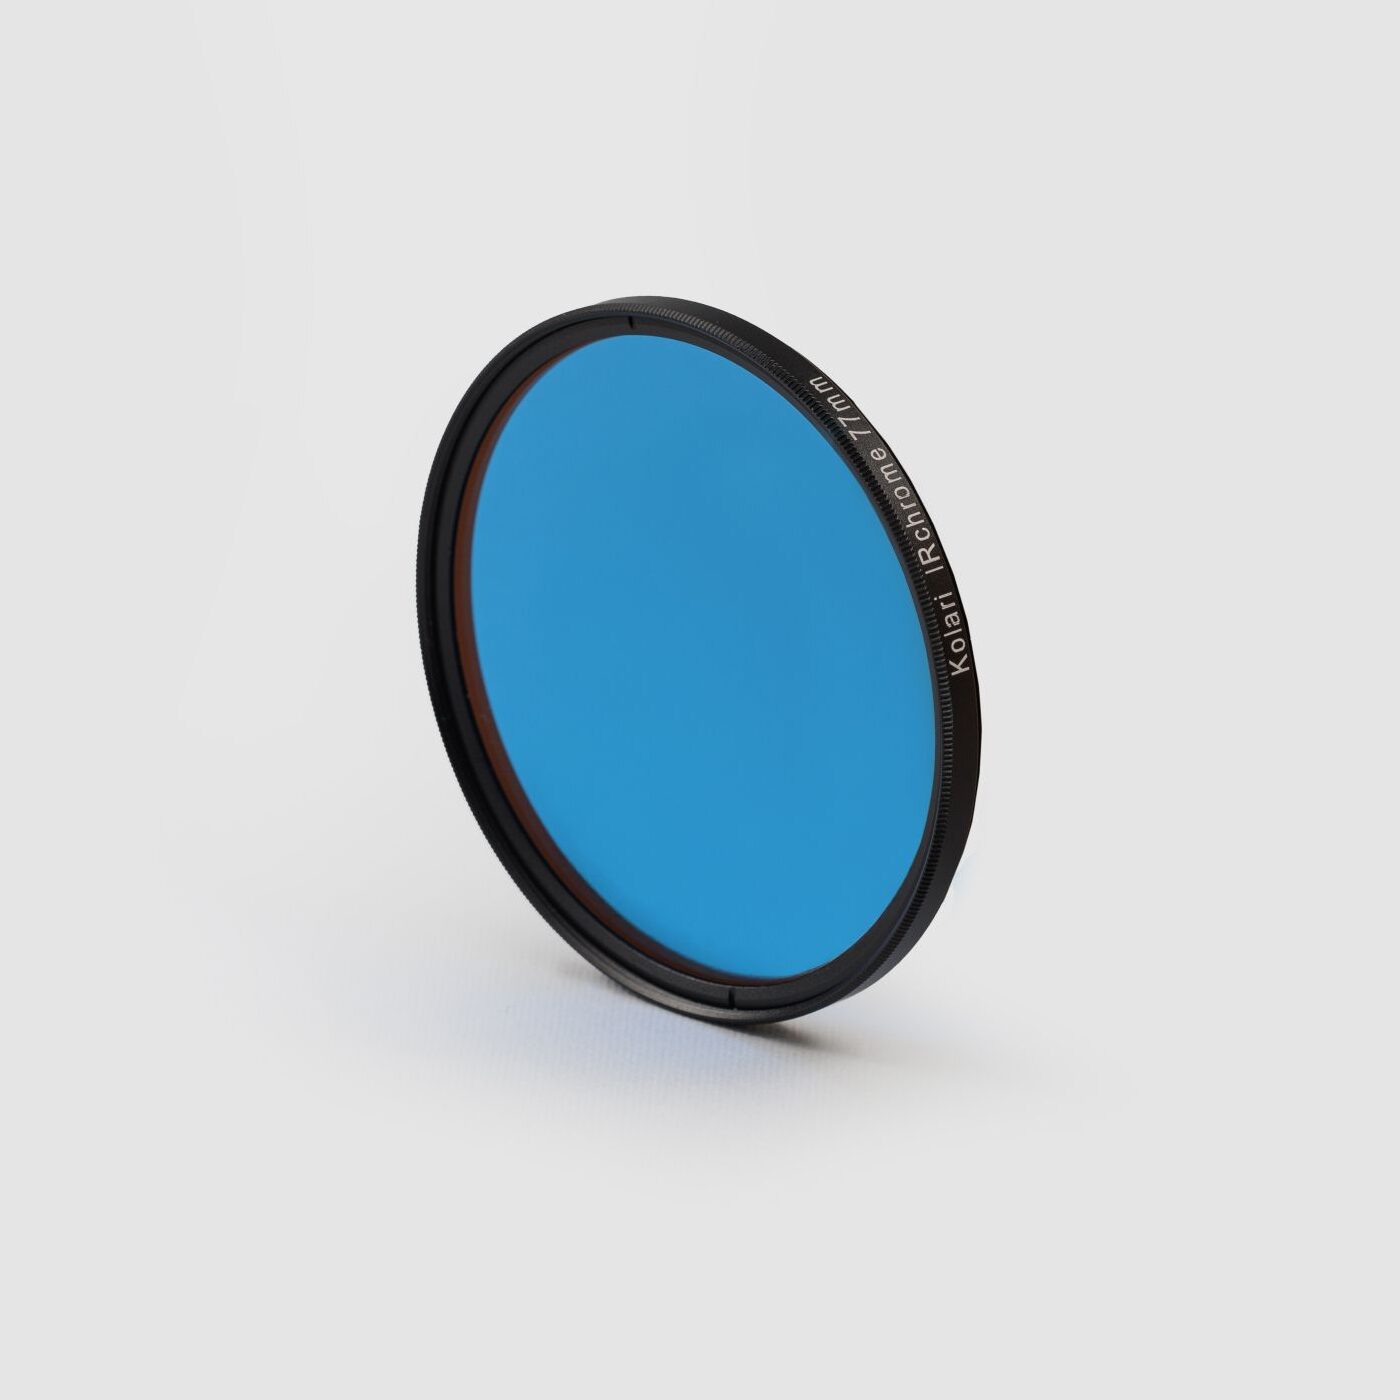
Infrared photography allows deep contrasted black and white photography, with dark sky and water in one hand and white clouds and foliage on the other. The best filter to achieve high level black and white photography within practical shooting parameters is the 850nm infrared filter. In this tutorial, we will figure out how to optimize our shooting technique to maximize the information we get with each frame, and how to process the RAW files to create the most detailed photos with the best possible contrast.
How to shoot with 850nm filter
Shooting with a 850nm infrared filter is not so different from shooting with other infrared filters: compatible lenses are the same, shooting RAW is very useful and using liveview is still the best way to compose your pictures. However, some of this filter’s specific characteristics require us to take the following points into account:
White balance:
Yes, even in black and white photography, white balance is important. It will noticeably affect the light levels of the subject. Setting a white balance with a gray chart will help you expose correctly and to capture all the information in the highlights.
Black and white mode:
Now that the white balance is set, you can see a monochromatic rendering on the screen of your camera. Though, there may be a slight blue or red tint. To increase accuracy of the live view image, change your camera’s picture mode to black and white. This will give you a better preview of your shots.
ISO adjustment:
850nm infrared photography requires more light than other infrared filters with lower cut-off wavelength. You may have to increase the ISO value to avoid underexposure of your shots if a longer exposure is not an option.
Additional ND filters:
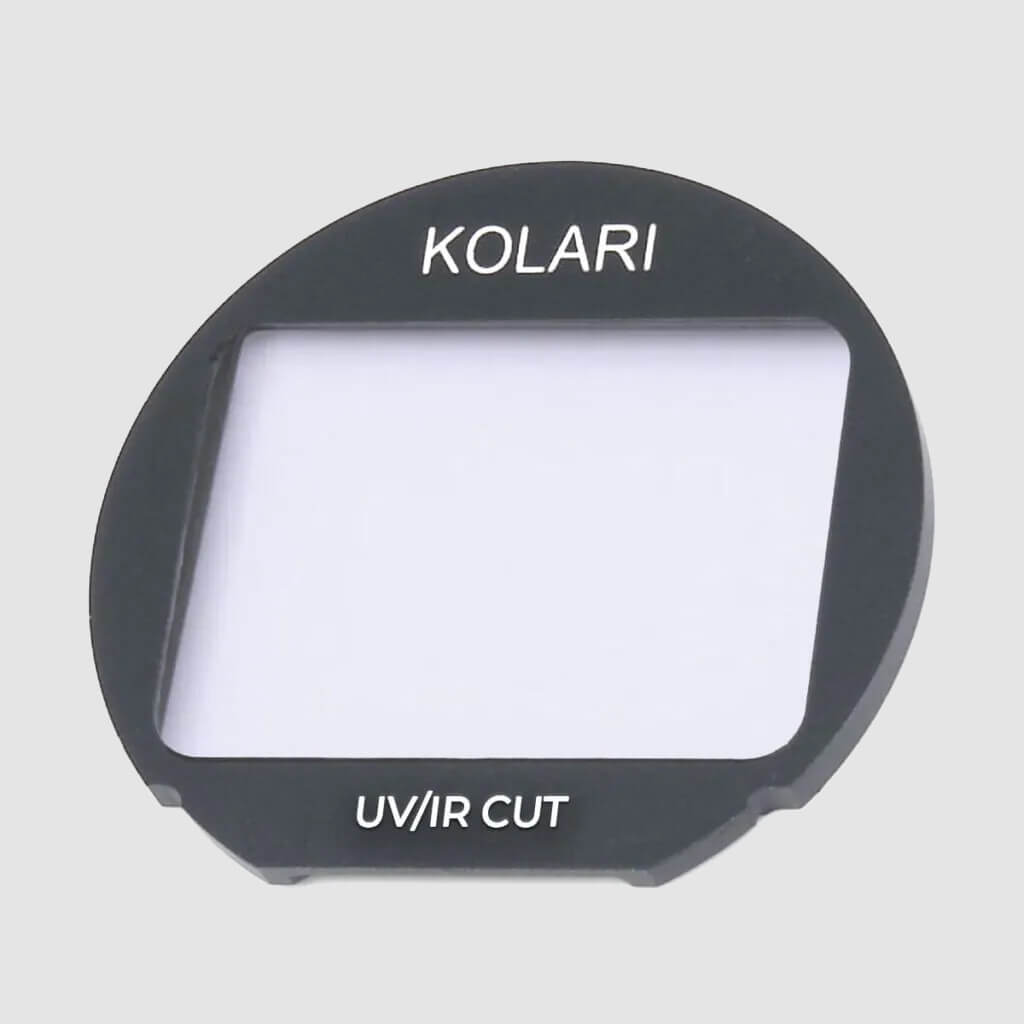
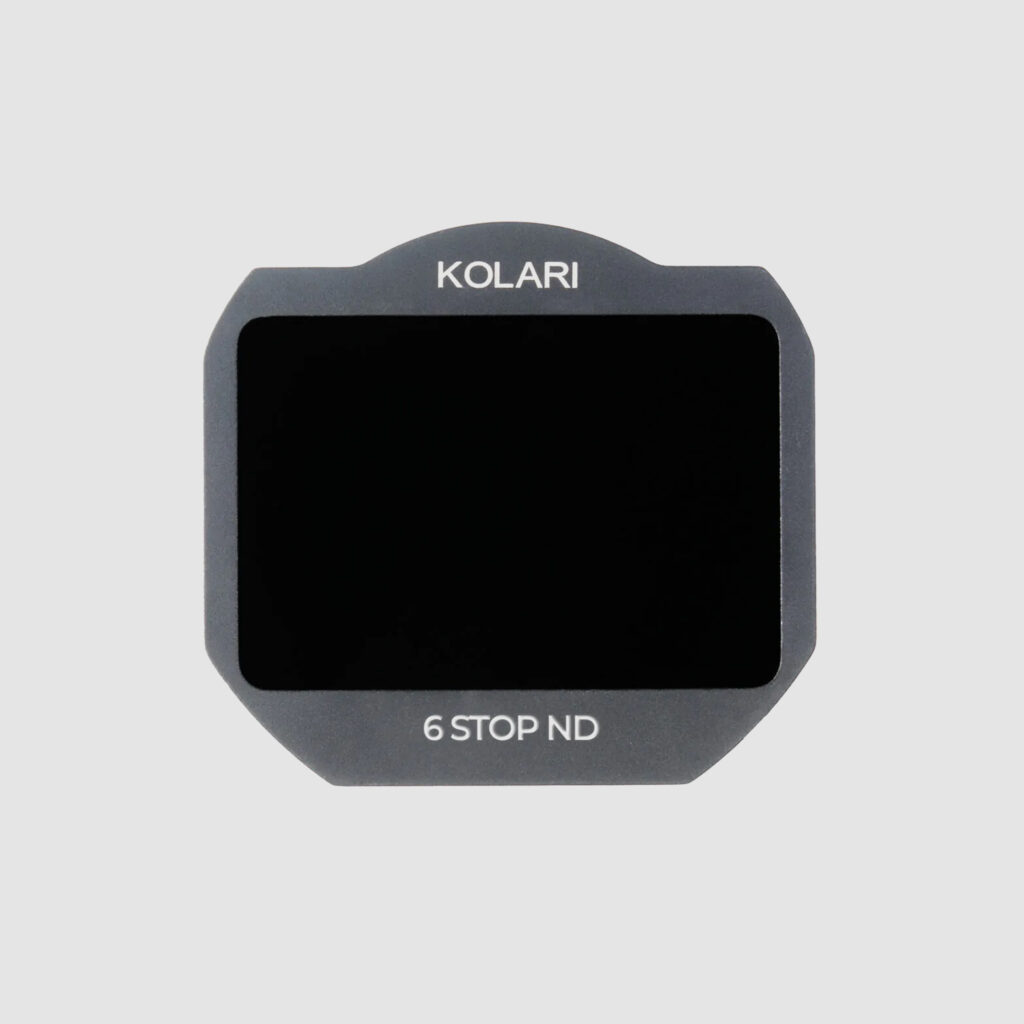
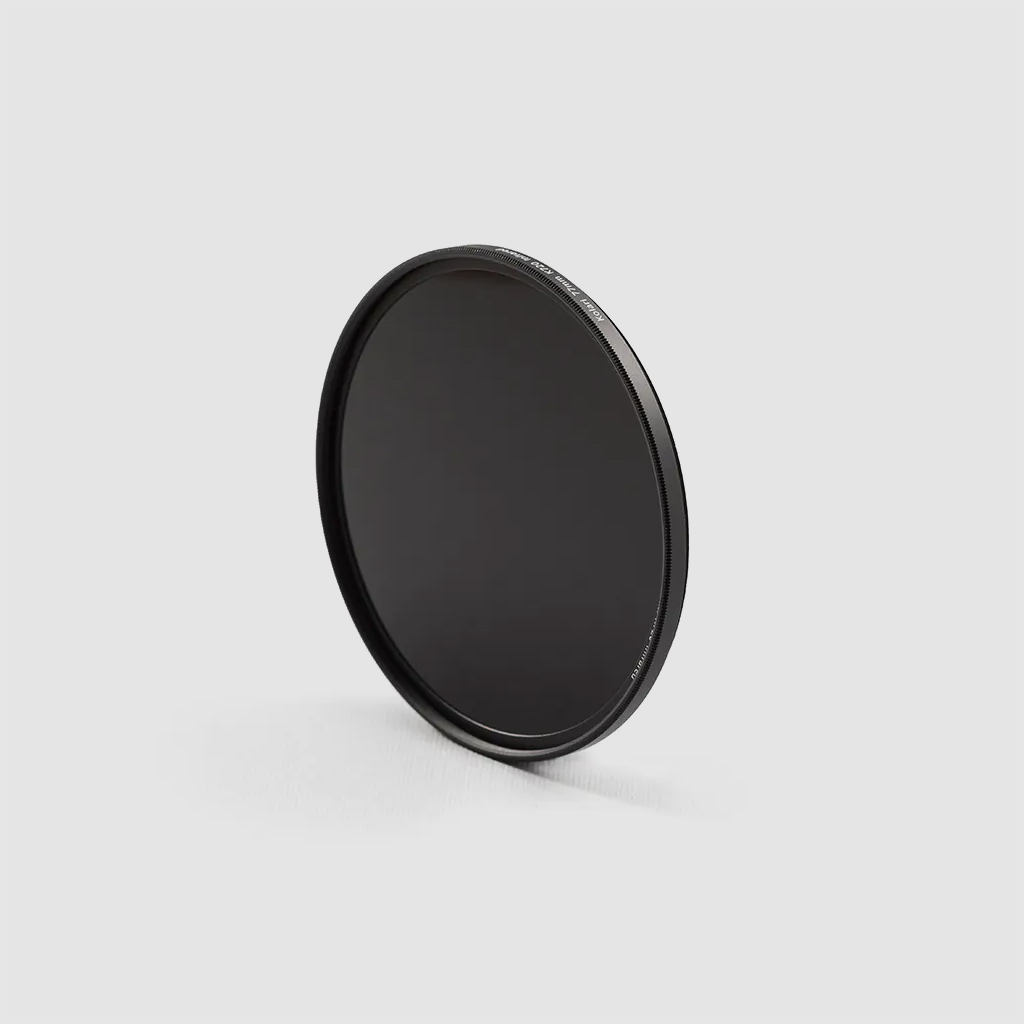
850nm infrared photography allows you to use ND filters in addition with 850nm filter to create unique long exposure shots. Since you’re shooting in black and white, the color cast added by the ND filter will not impact the final result. Just don’t forget to repeat the white balance adjustment with the ND filter AND the 850nm filter mounted in front of the camera. Kolari Vision provides a good infrared 6-stop ND filter, enough to make a 30 second exposure in daylight.
How to process 850nm infrared pictures?
Now that we have our shots, we need to process them. I will use only Photoshop CC, however most of these steps should be doable in other advanced photo editing software.
RAW processing:
The first step for every infrared RAW processing job is white balance. There is no exception here, so let’s open our RAW in Camera RAW:
First, we adjust the white balance to “As shot”. If the white balance has already been adjusted on the camera, you would normally see “Temperature” and “Tint” at their minimum value. Unfortunately, this first adjustment is limited by the algorithms of Photoshop (contrary to Darktable and RawTherapee for example) and you cannot obtain the correct rendering immediately. Just leave the white balance parameter values at their minimum and drag down the highlights:
Do not forget to convert the RAW file in 16bit and open it in Photoshop:
Photoshop CC introduces a new usefull function: “Camera Raw filter”. With this function, you can reload your file in Camera Raw without reinitializing the adjustments made at the beginning:
In this new Camera RAW window, you can finish adjusting the white balance. The goal here is to superpose the three RGB channels to obtain a neutral monochrome rendering. You have to deal with tint to align the green and blue channels, and then with temperature to align red and blue+green channels. Once this is done, center the histogram with the new exposure adjustments:
Black and white conversion:
At this point, you are working with a flat monochrome file with low contrast. The next step is to convert to black and white. The most logical black and white conversion is done using a new layer filled with white and put in “color” mode:
- 1: create a new layer
- 2: select white as foreground color
- 3: use “paint bucked” tool to fill the new layer with white
Then change the fusion mode into “color”. Now you have a pure black and white picture:
Deep contrast adjustment:
Now our image is truly black and white, but it is still very flat and dull. We’ll drastically improve the contrast using luminosity masks. Many luminosity mask generators can be found on the Internet. I will create one here.
Create luminosity masks:
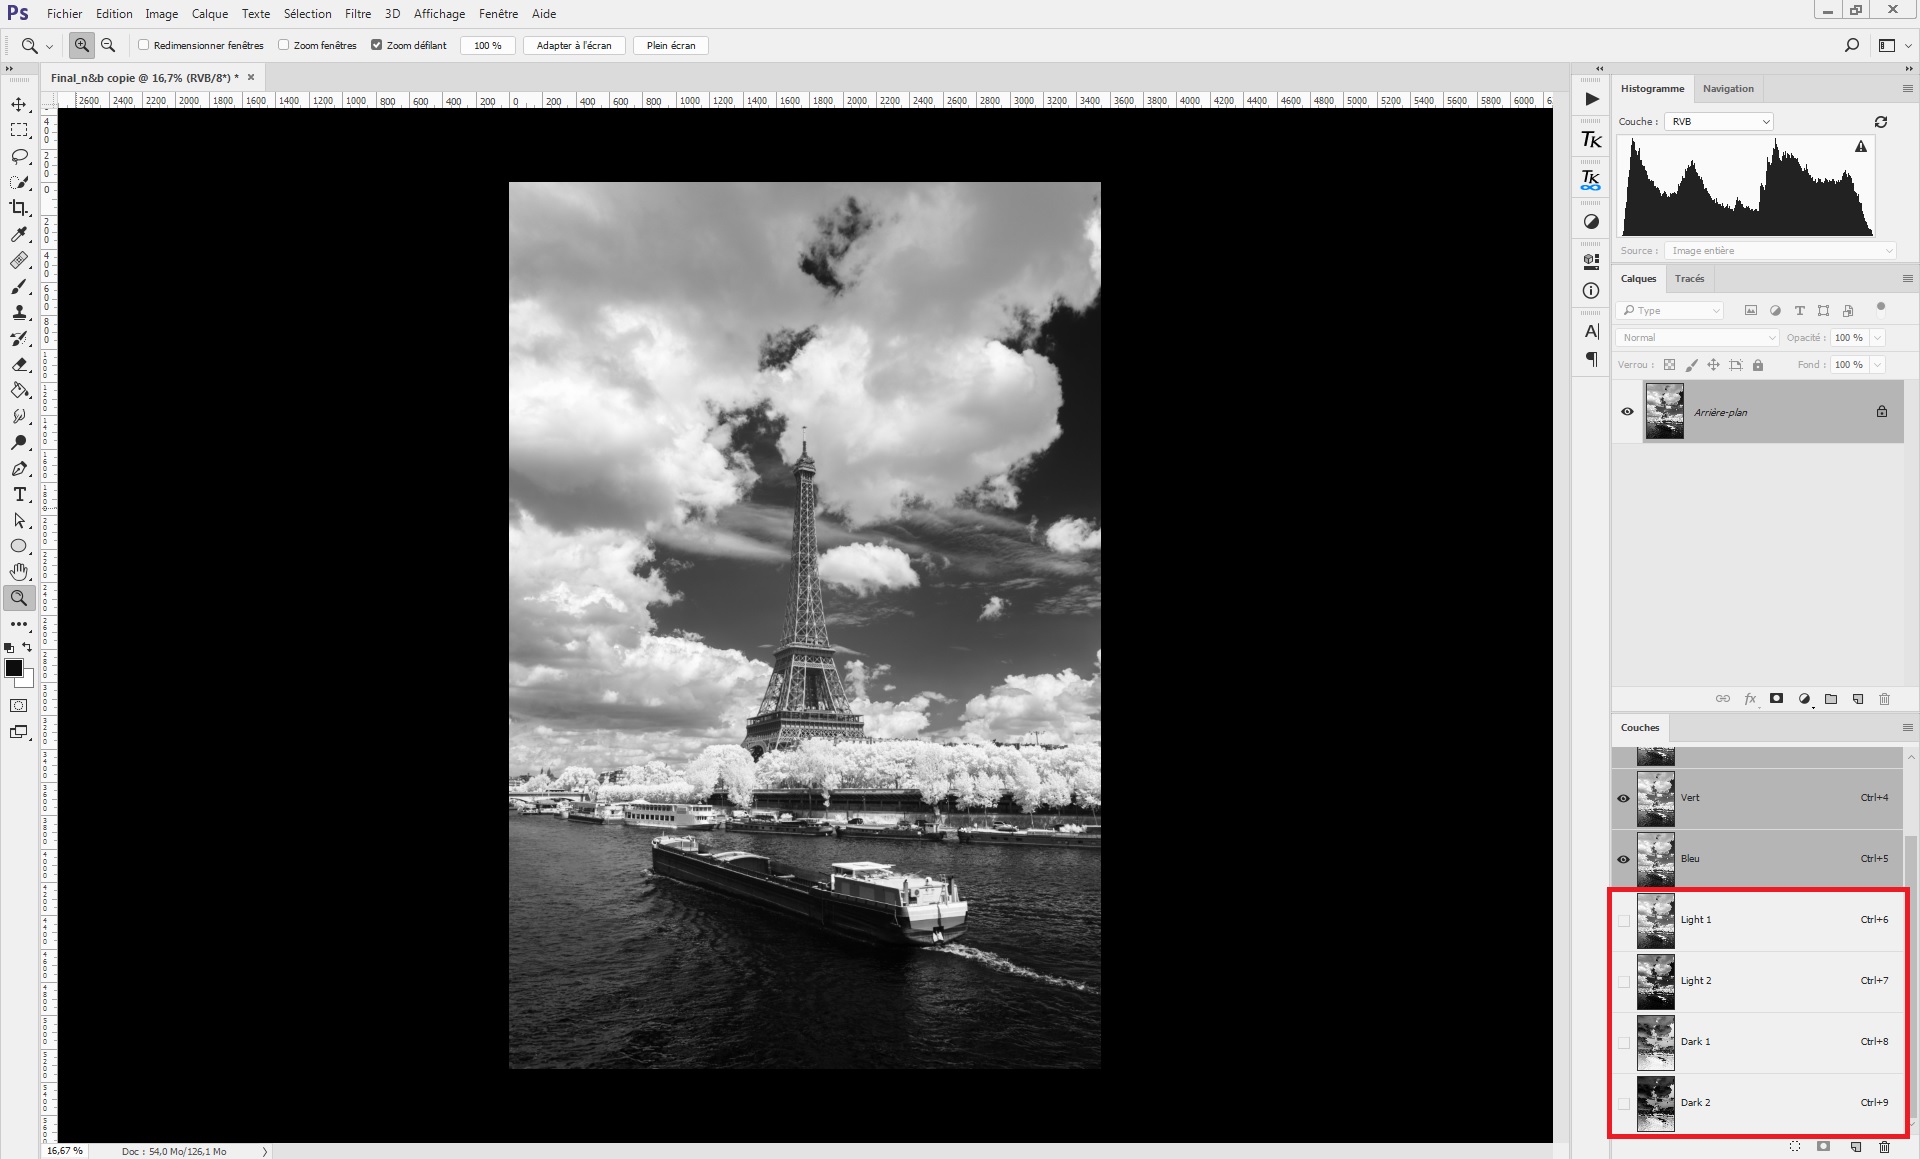
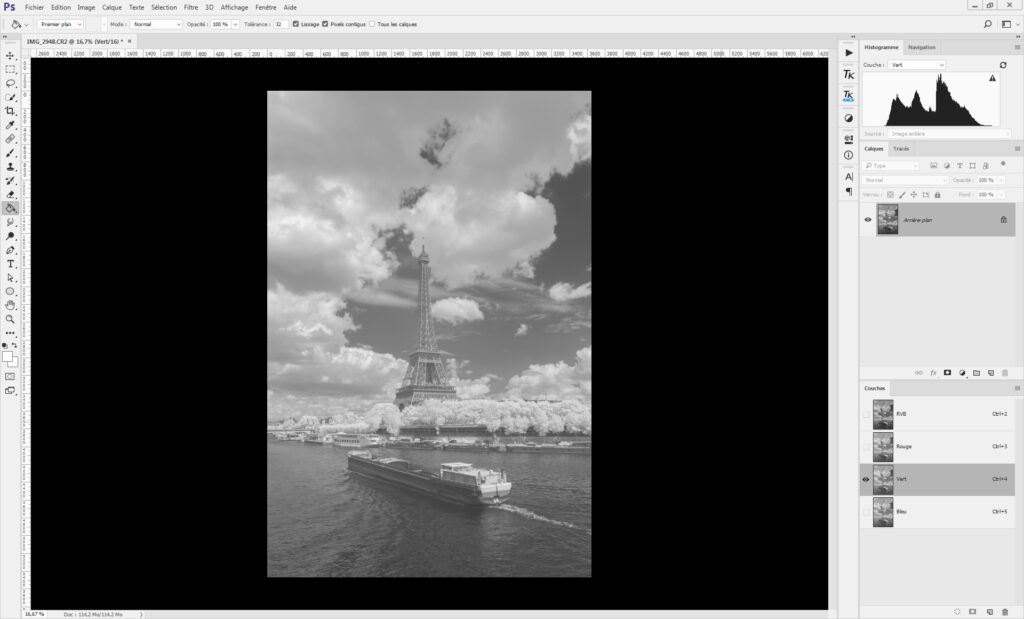
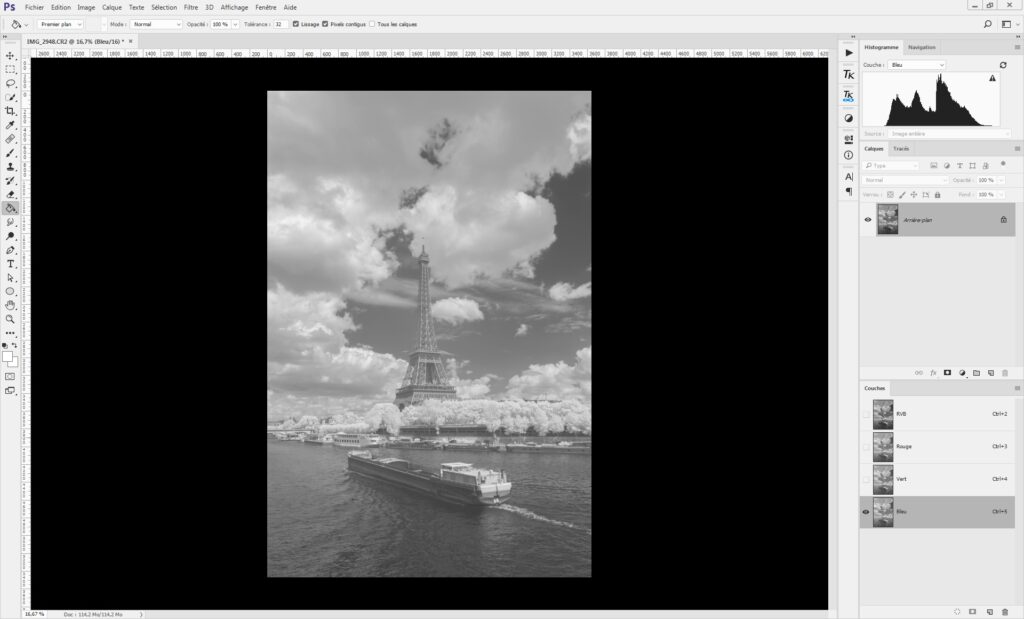
After the conversion in black and white, all the three RGB channels have the same information. To create luminosity masks, you can use whichever one you want. They’ll all give you the same selection.
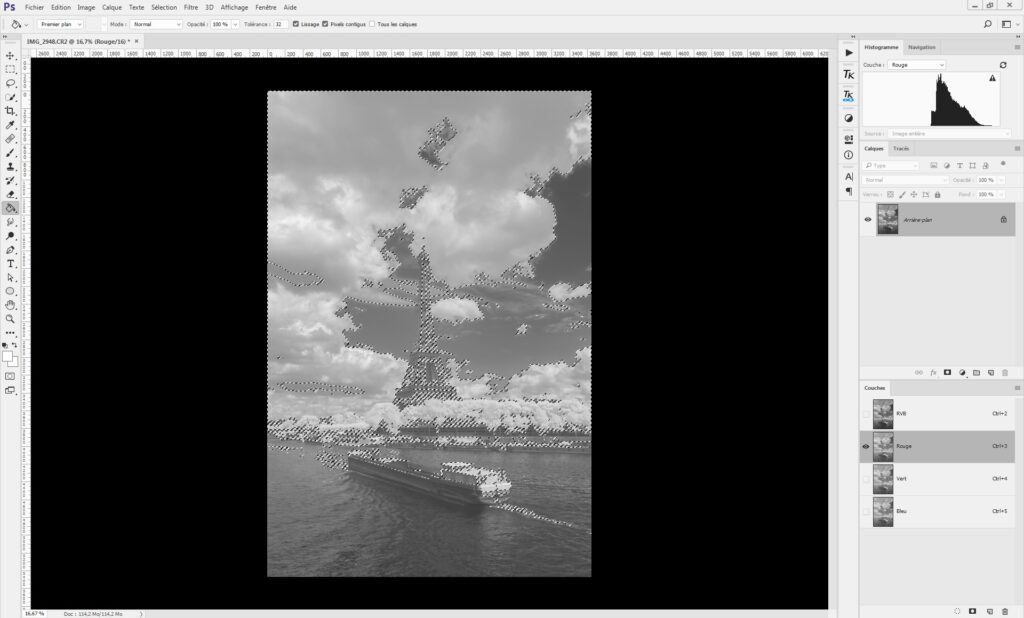
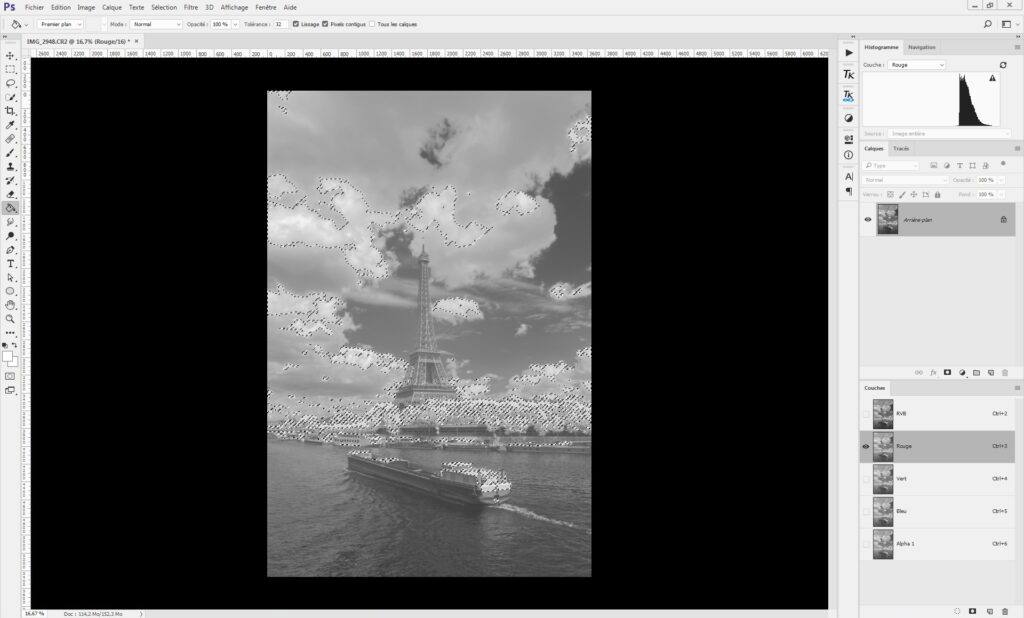
To generate the luminosity masks, I used the red channel. Then I achieved the following steps:
- Ctrl + click on the red channel to select its most luminous parts
- Create an new channel using the corresponding button
- Name it “Light 1”
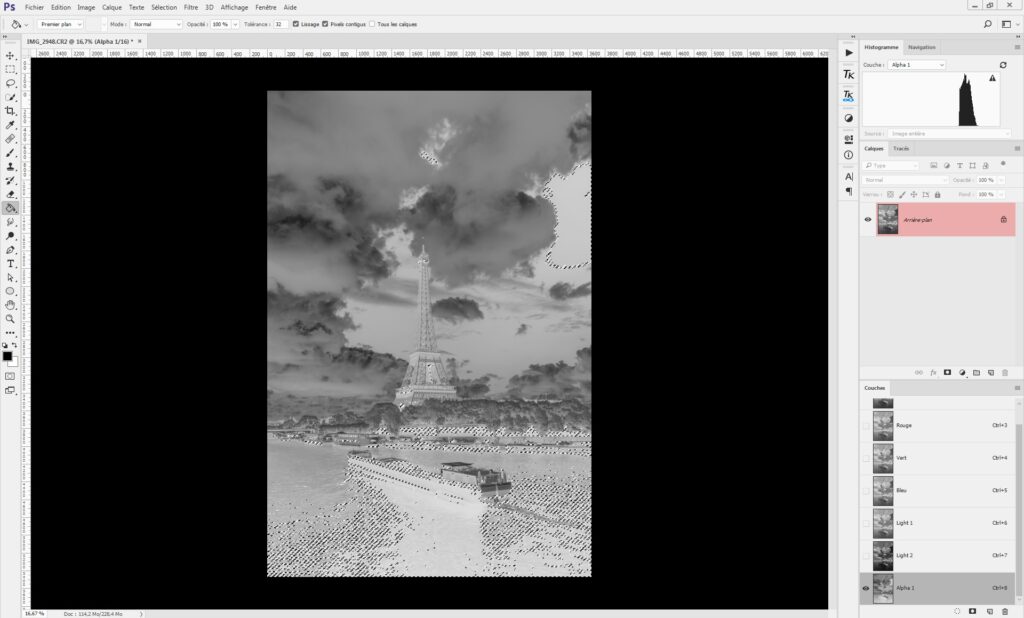
- Ctrl + click on “Light 1” layer
- Maj + Ctrl + Alt + click on “Light 1” layer. It will create a selection based on the most luminous areas of the “Light 1” layer. Name this layer “Light 2”
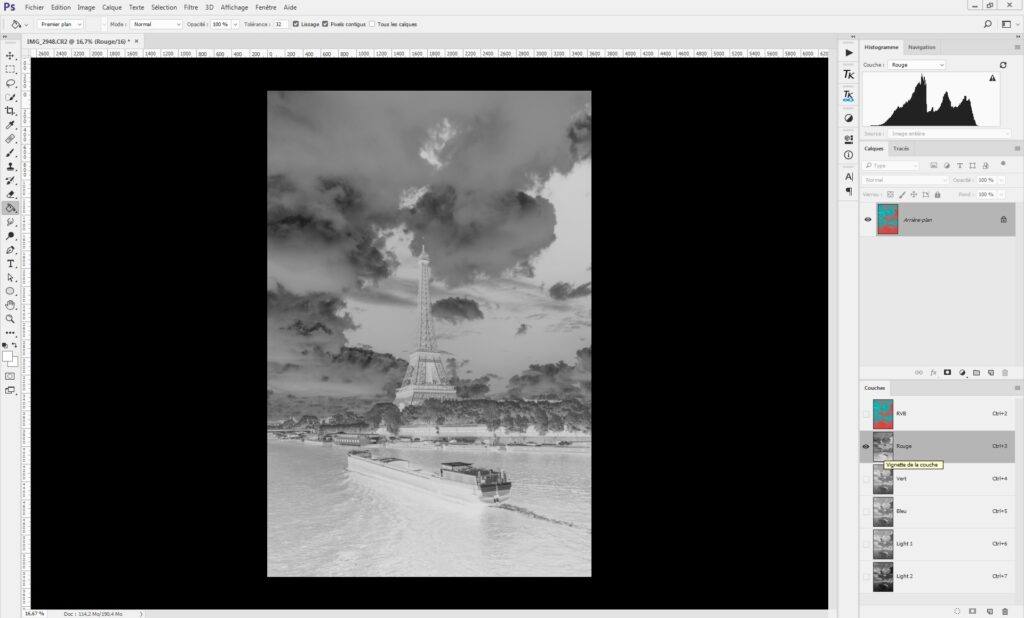
The two layers created here increase the brightest parts of the picture. To increase the darkest parts of the picture, we will create two additional layers based on the inverted red channel:
- Click on the red channel to select it
- Ctrl + i to invert the red channel
- Ctrl + click on the red channel to select the darkest parts
- Create an new channel using the corresponding button
- Name it “Dark 1”
- Ctrl + click on “Dark 1” layer
- Maj + Ctrl + Alt + click on “Darkt 1” layer. It will create a selection based on the most luminous areas of the “Dark 1” layer, corresponding to the darkest parts of the frame. Name this layer “Dark 2”
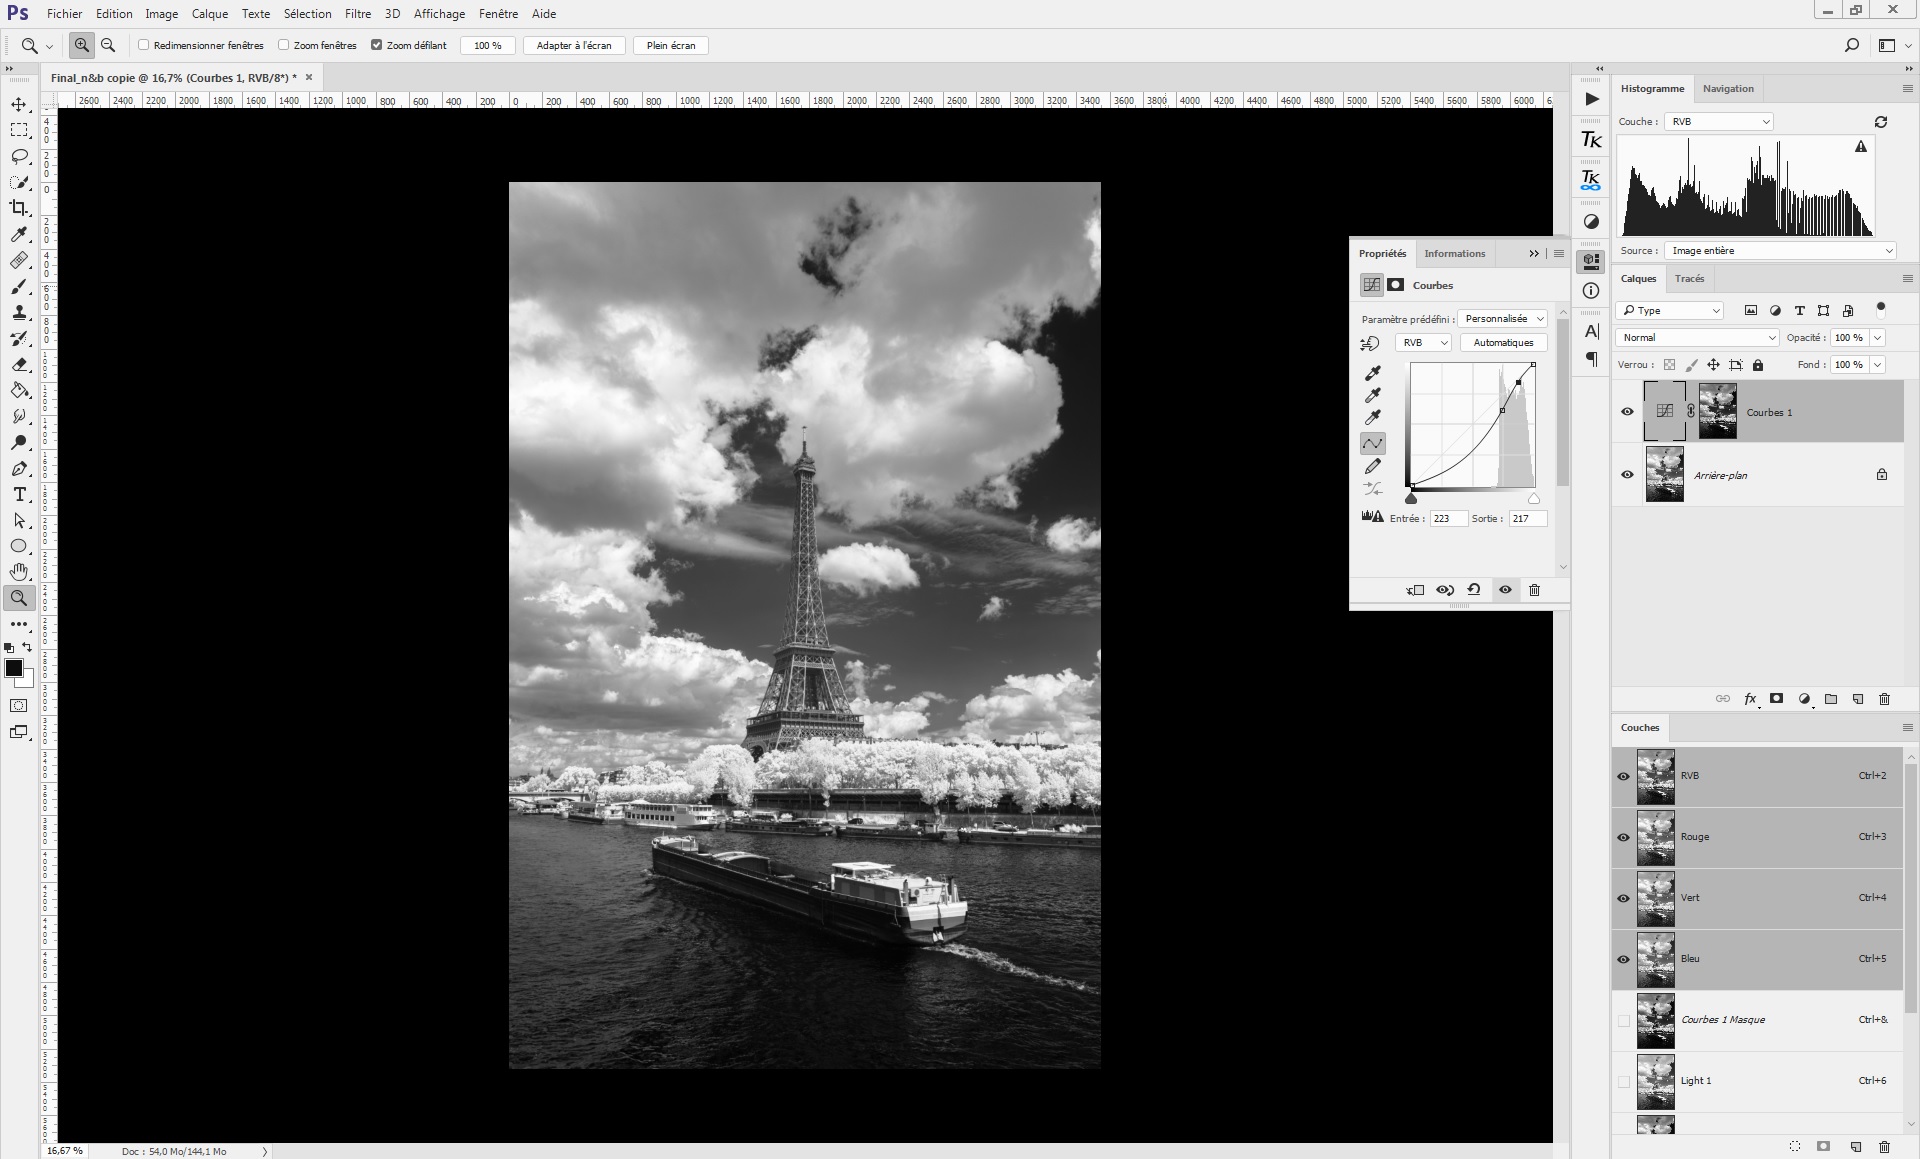
Now that the 4 masks have been created, we are going to use them to increase the contrast of the image.
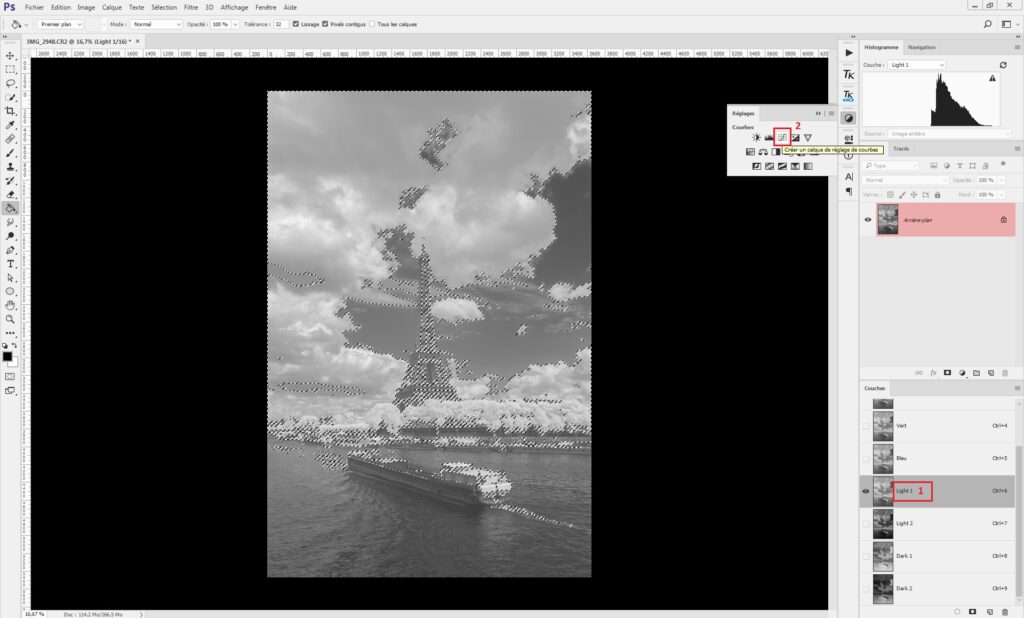
Increase the luminosity of the brightest parts:
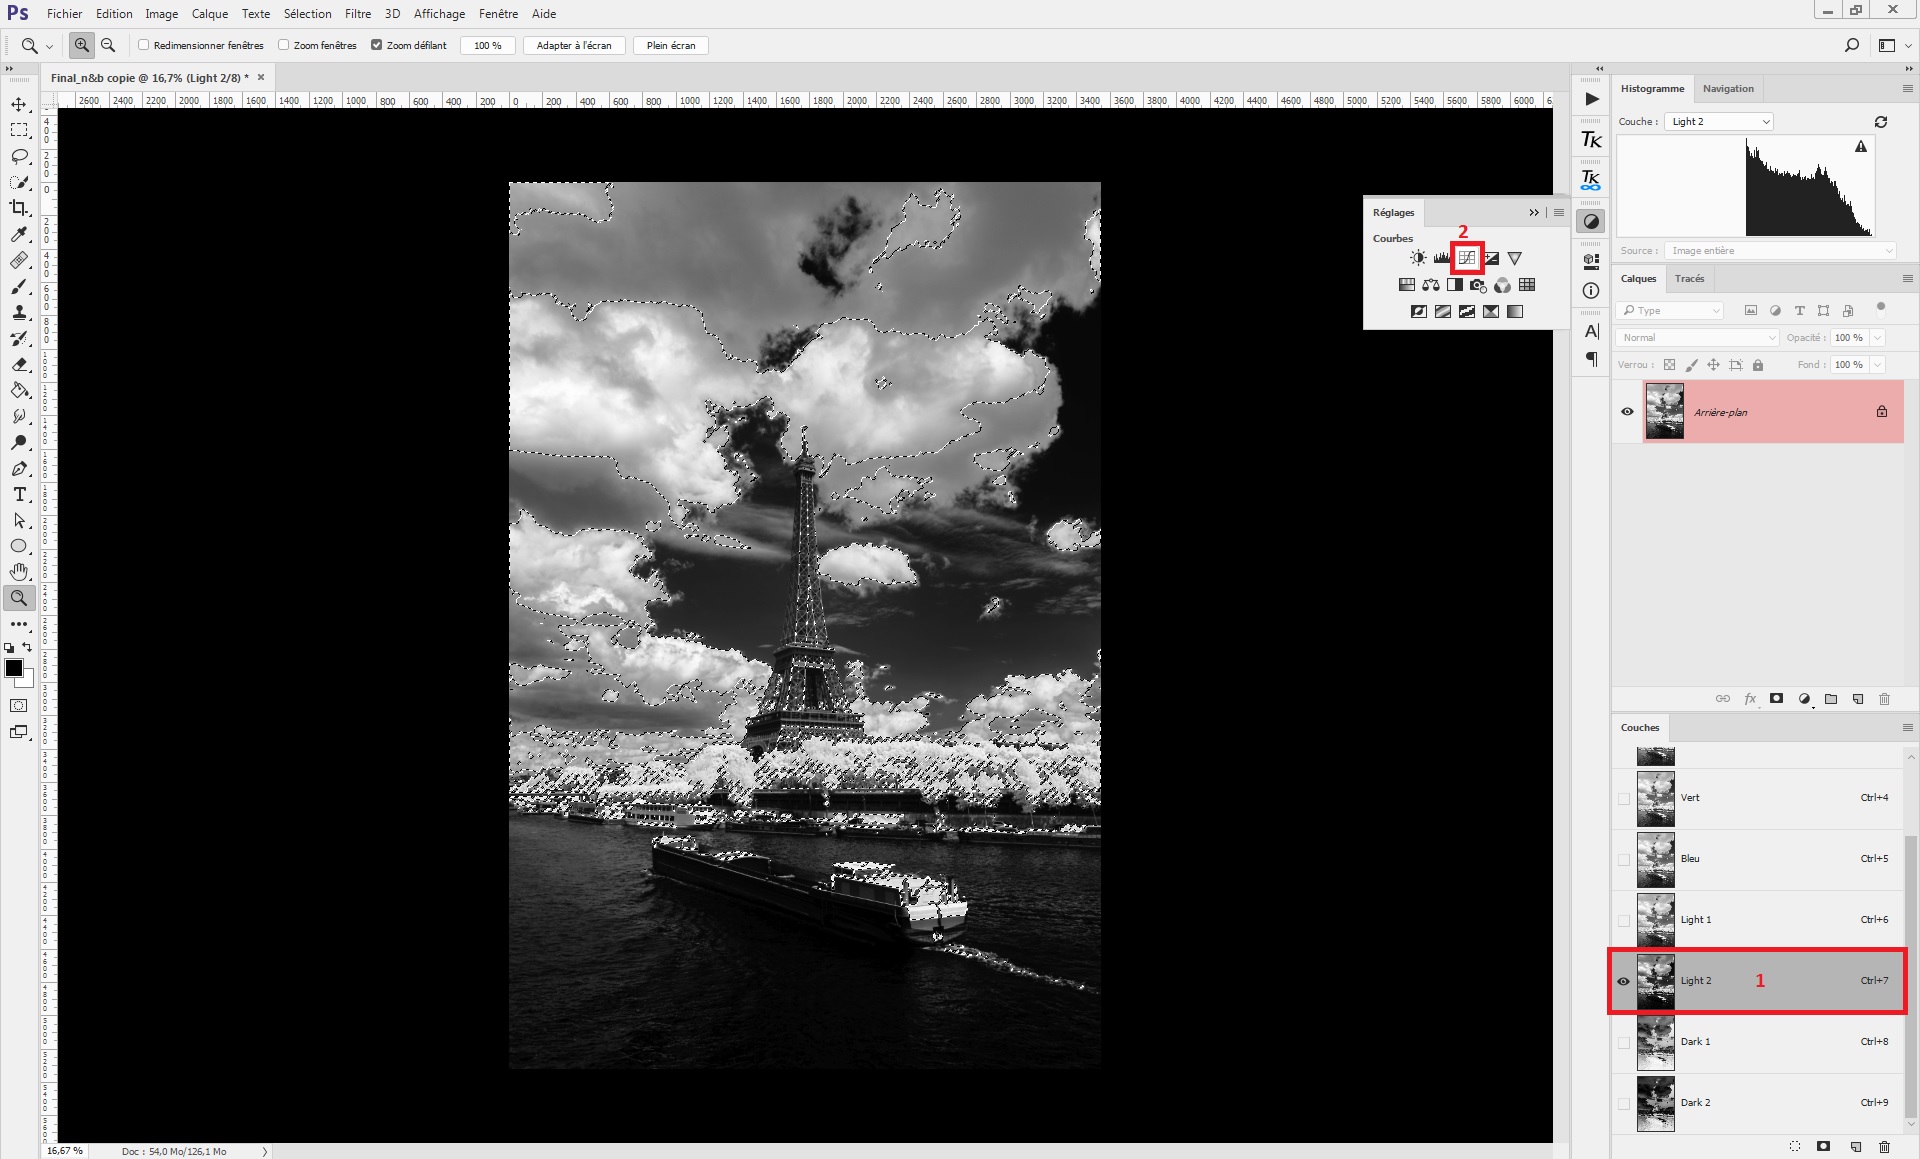
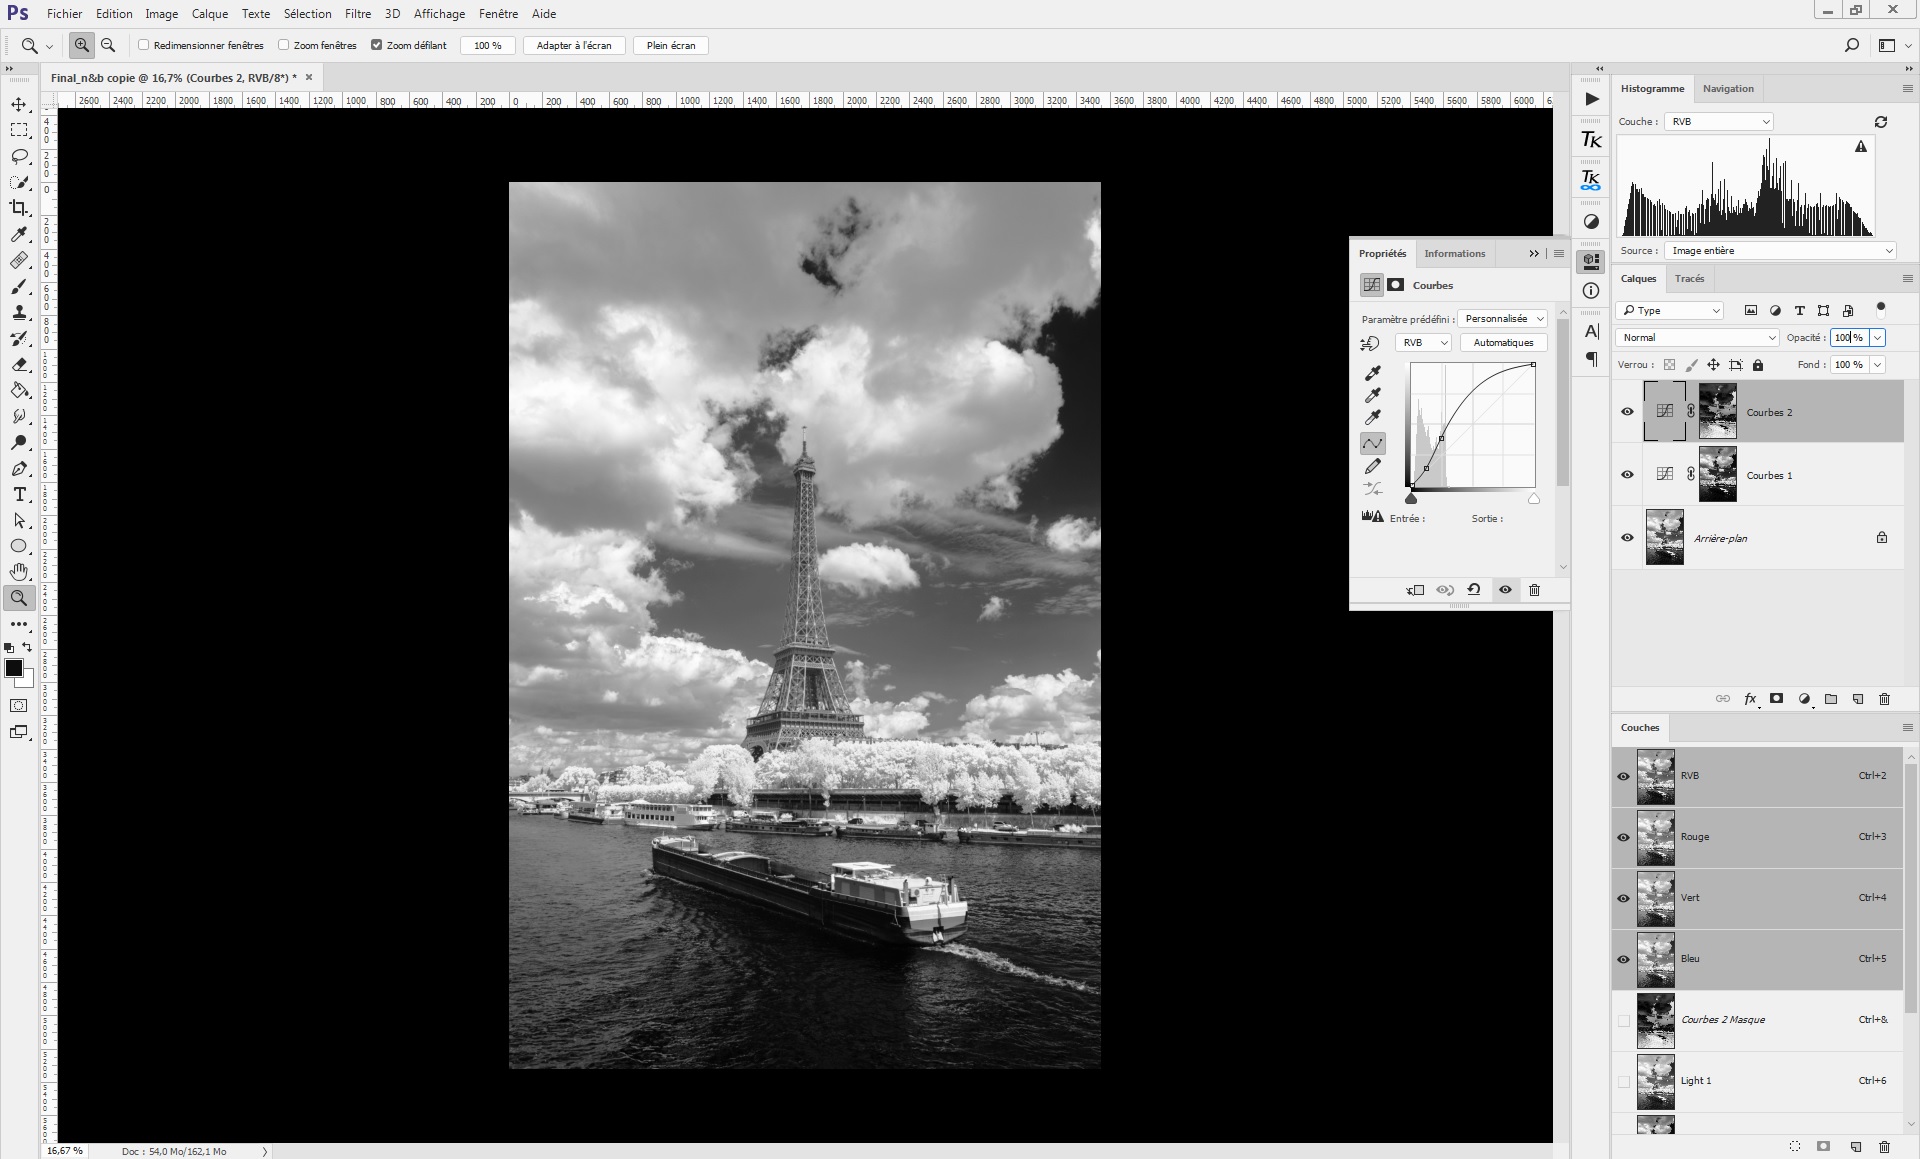
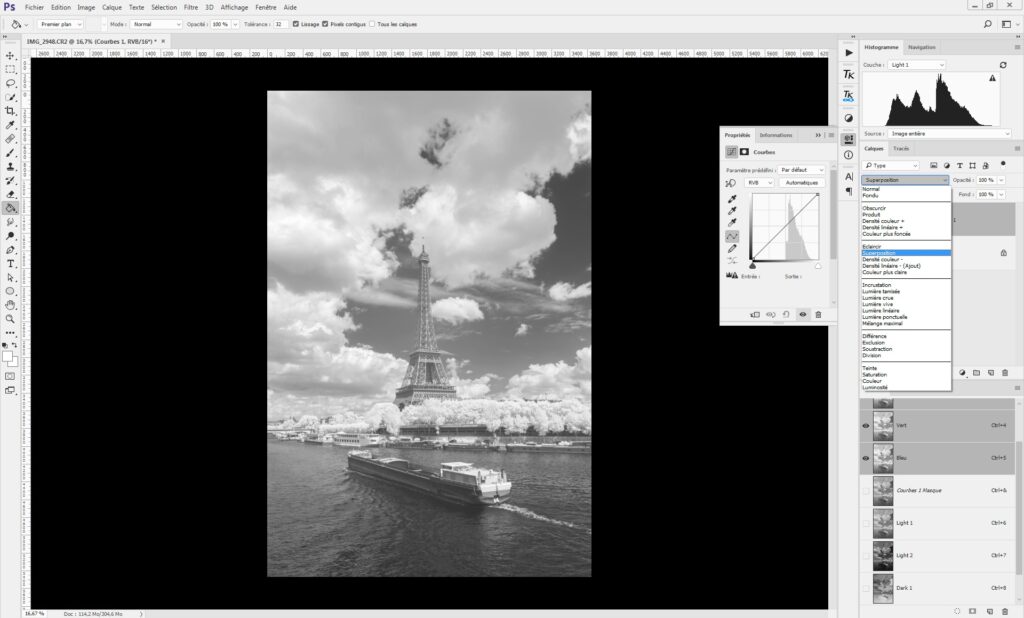
- 1: Ctrl + click on “Light 1” channel to select the corresponding areas
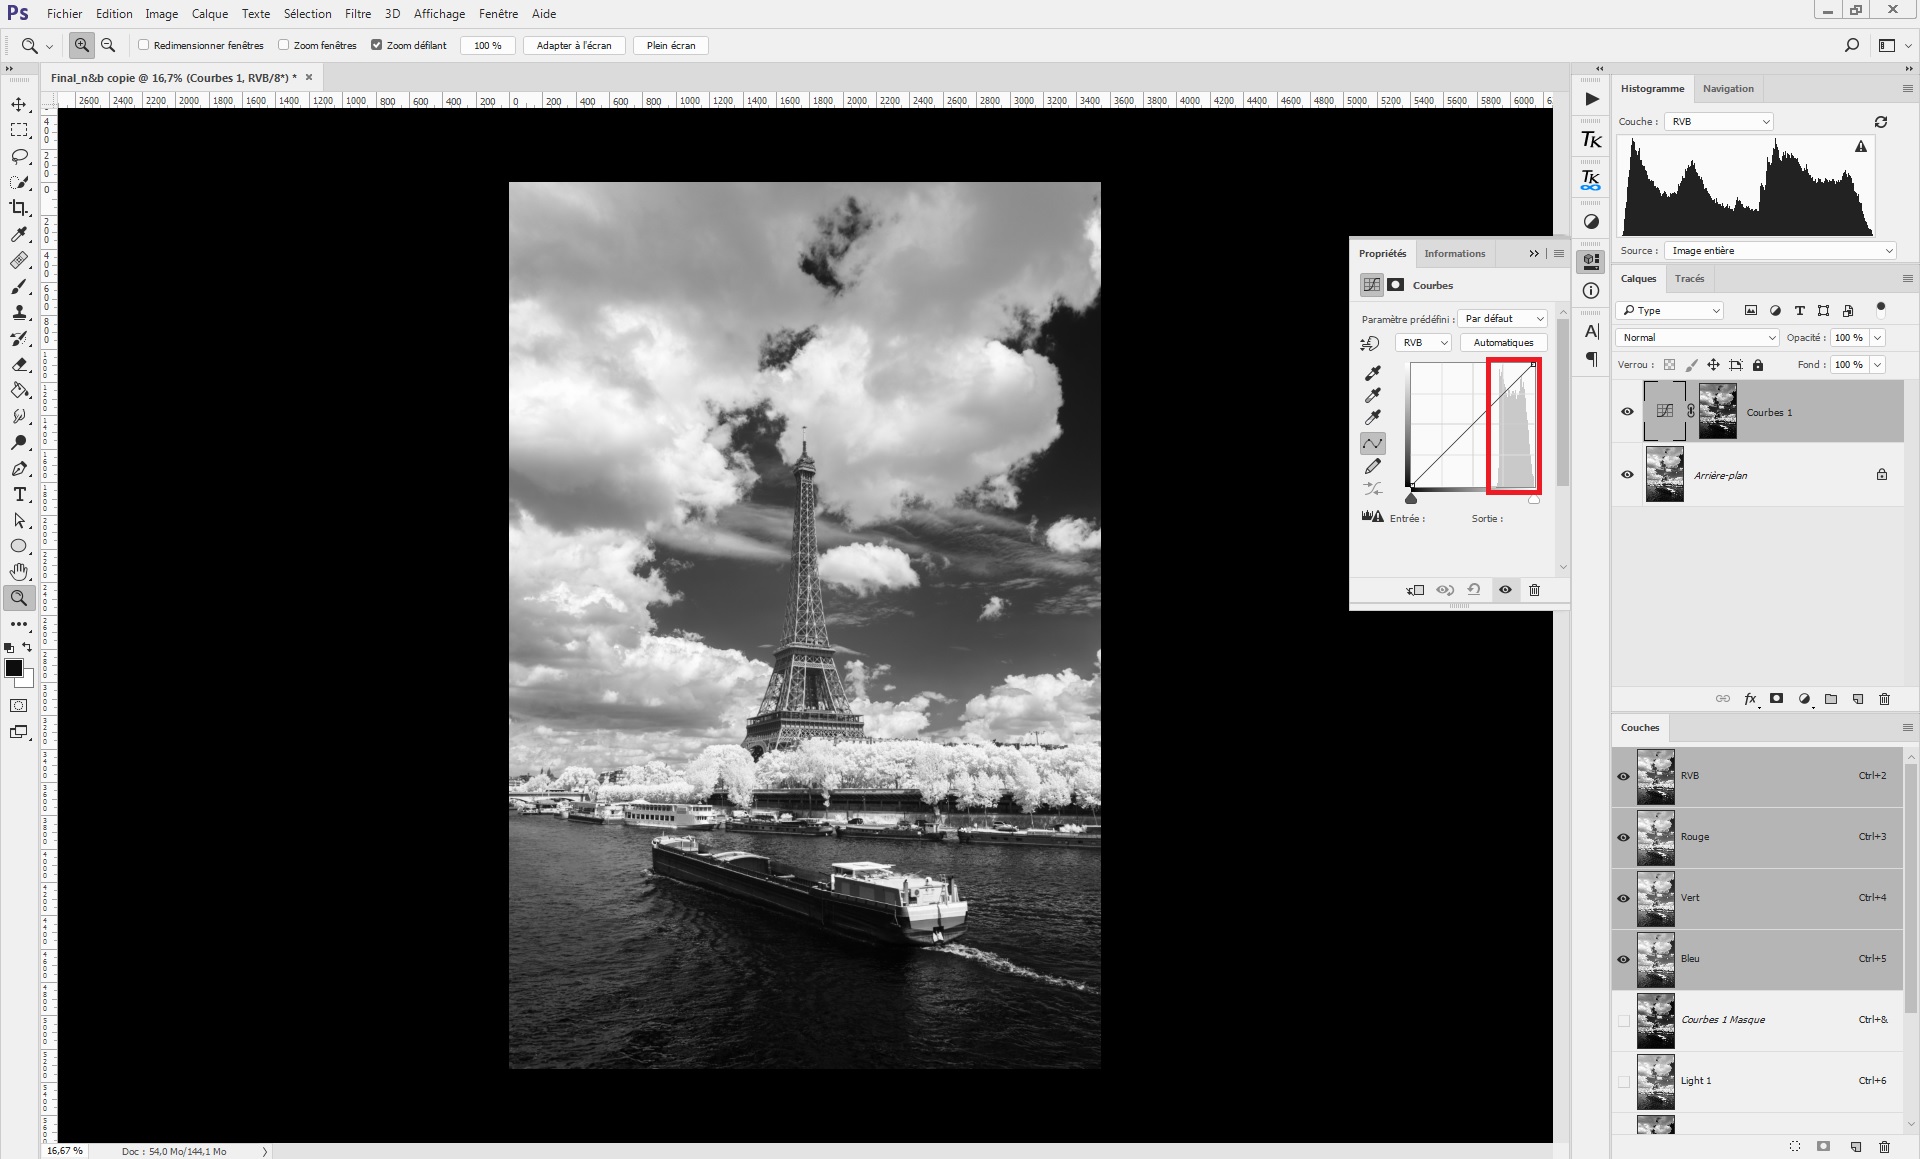
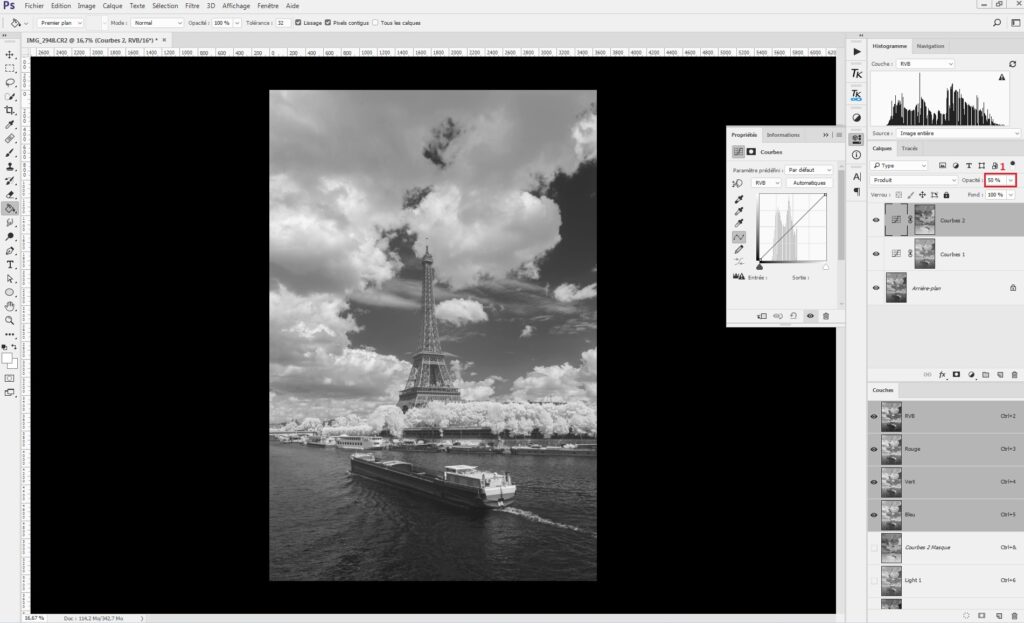
- 2: Create a curve layer to generate the mask
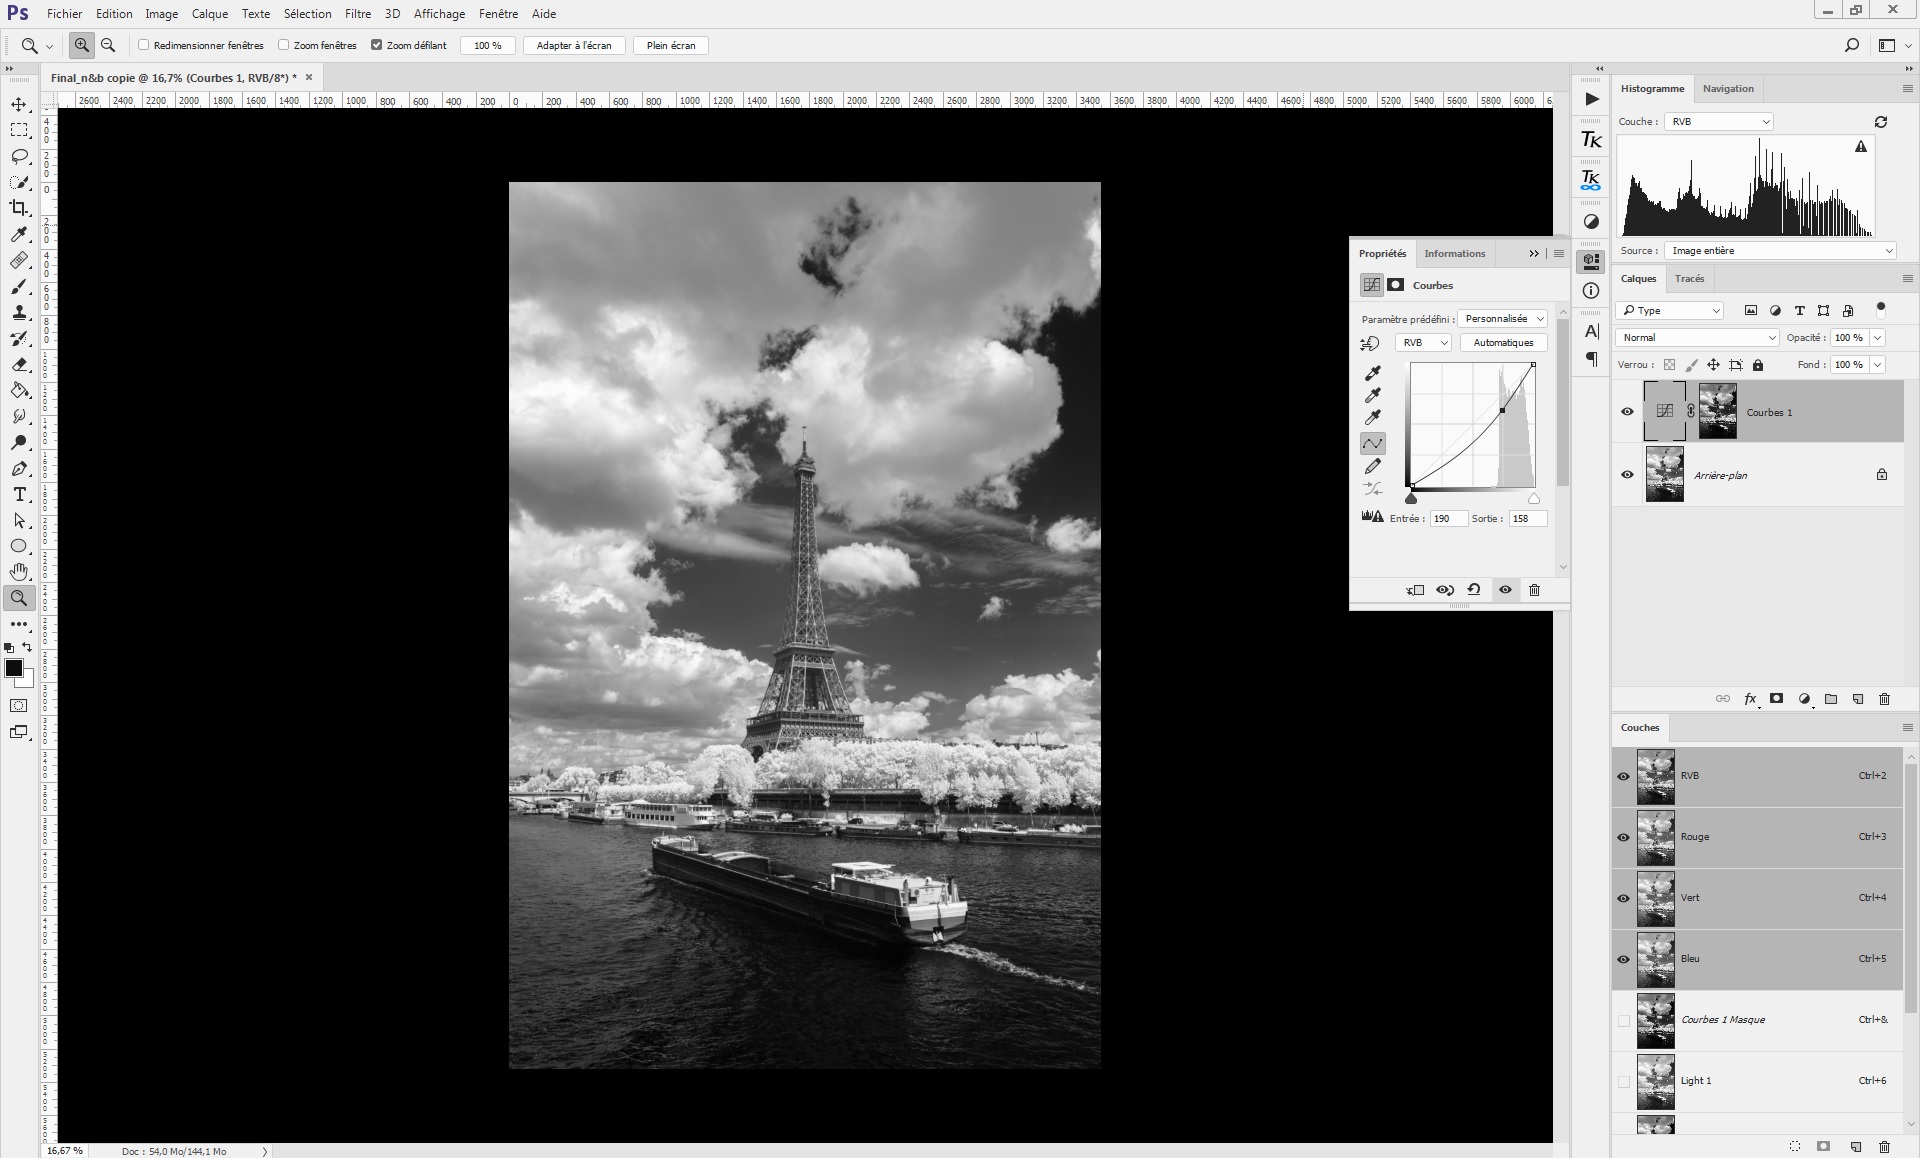
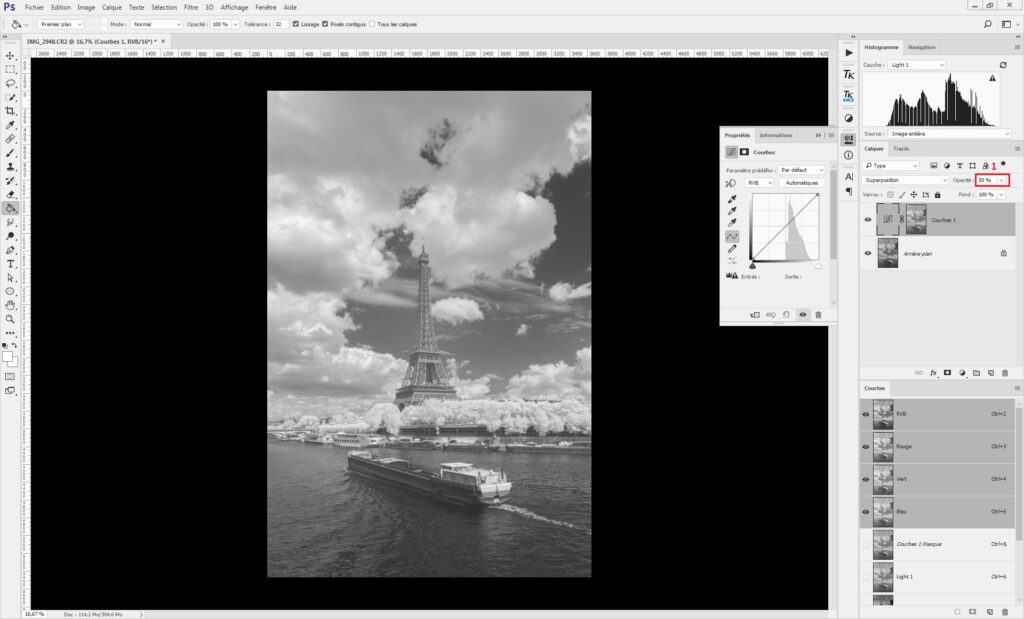
- Change the fusion mode into “screen”: the 50% brightest pixels of the bottom layer will be lightened following the luminosity mask on the top layer.
- The opacity of this first mask can be reduced by 50% to reduce the effect.
Decrease the luminosity of the darkest parts:
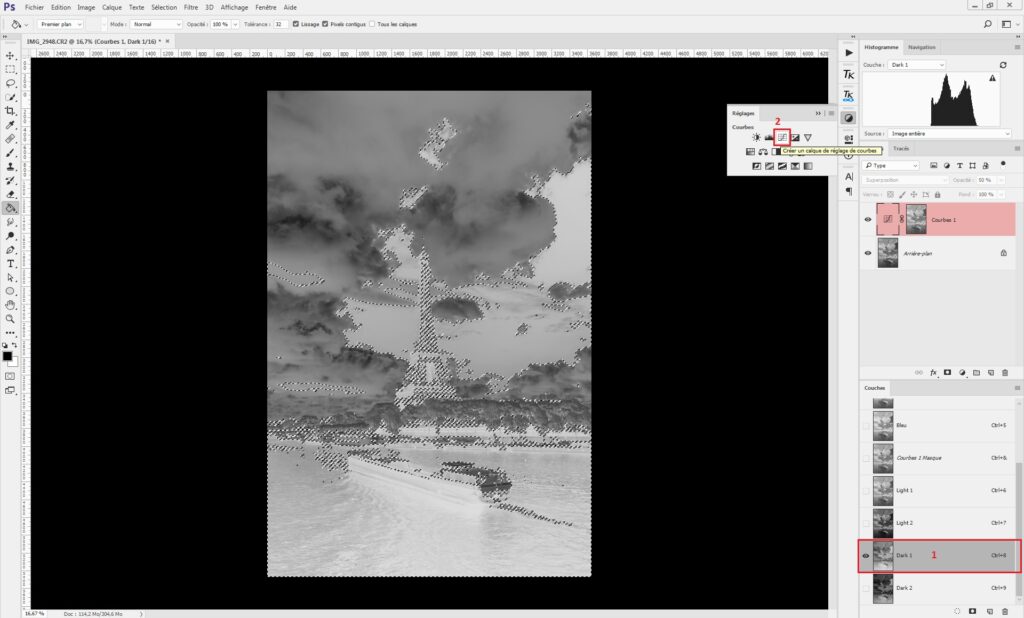
- 1: Ctrl + click on “Dark 1” channel to select the corresponding areas
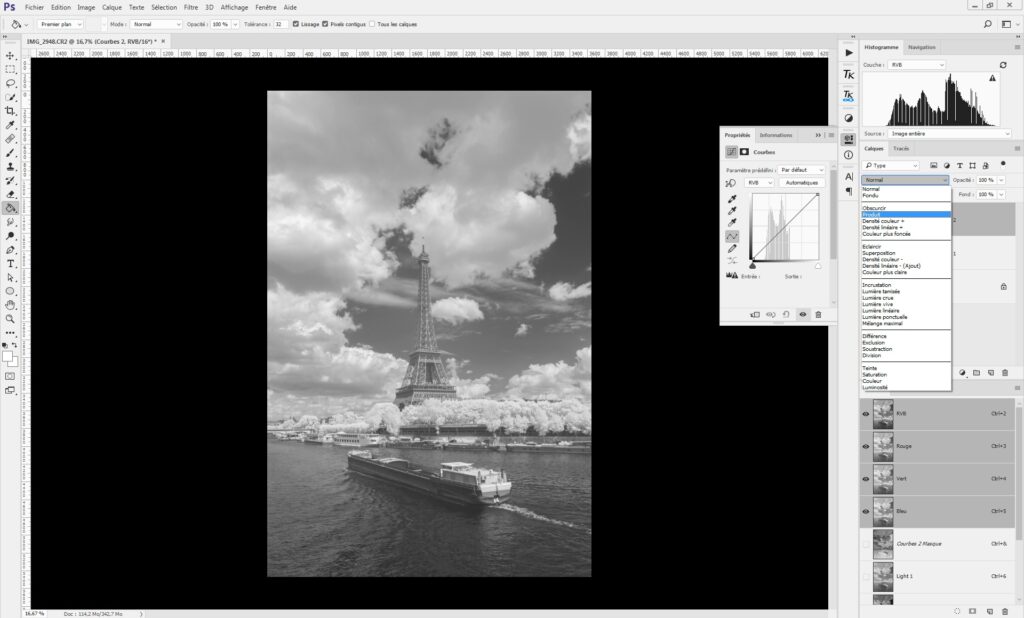
- 2: Create a curve layer to generate the mask
- Change the fusion mode into “multiply”: the 50% darkest pixels of the bottom layer will be darken following the luminosity mask on the top layer.
- The opacity of this second mask can also be reduced by 50% to reduce the effect.
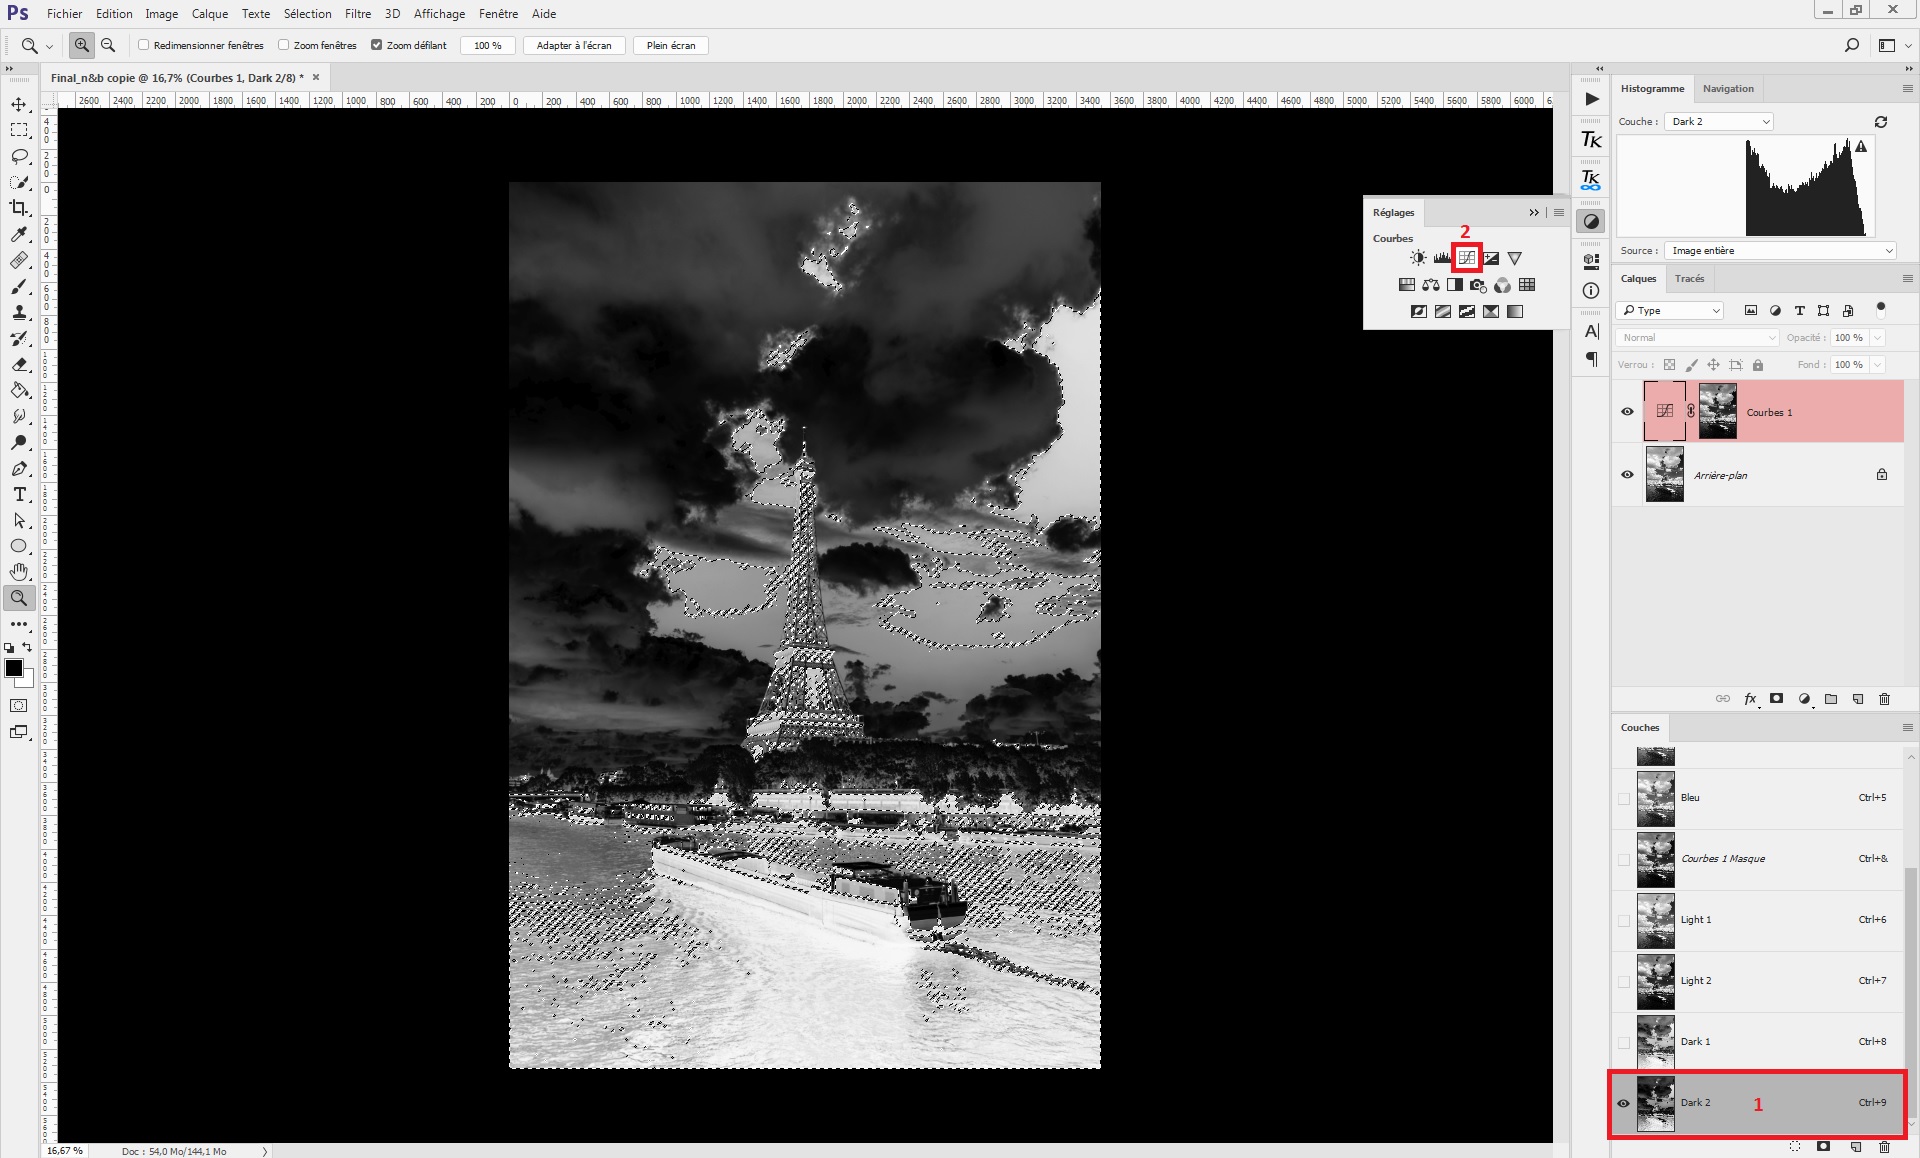
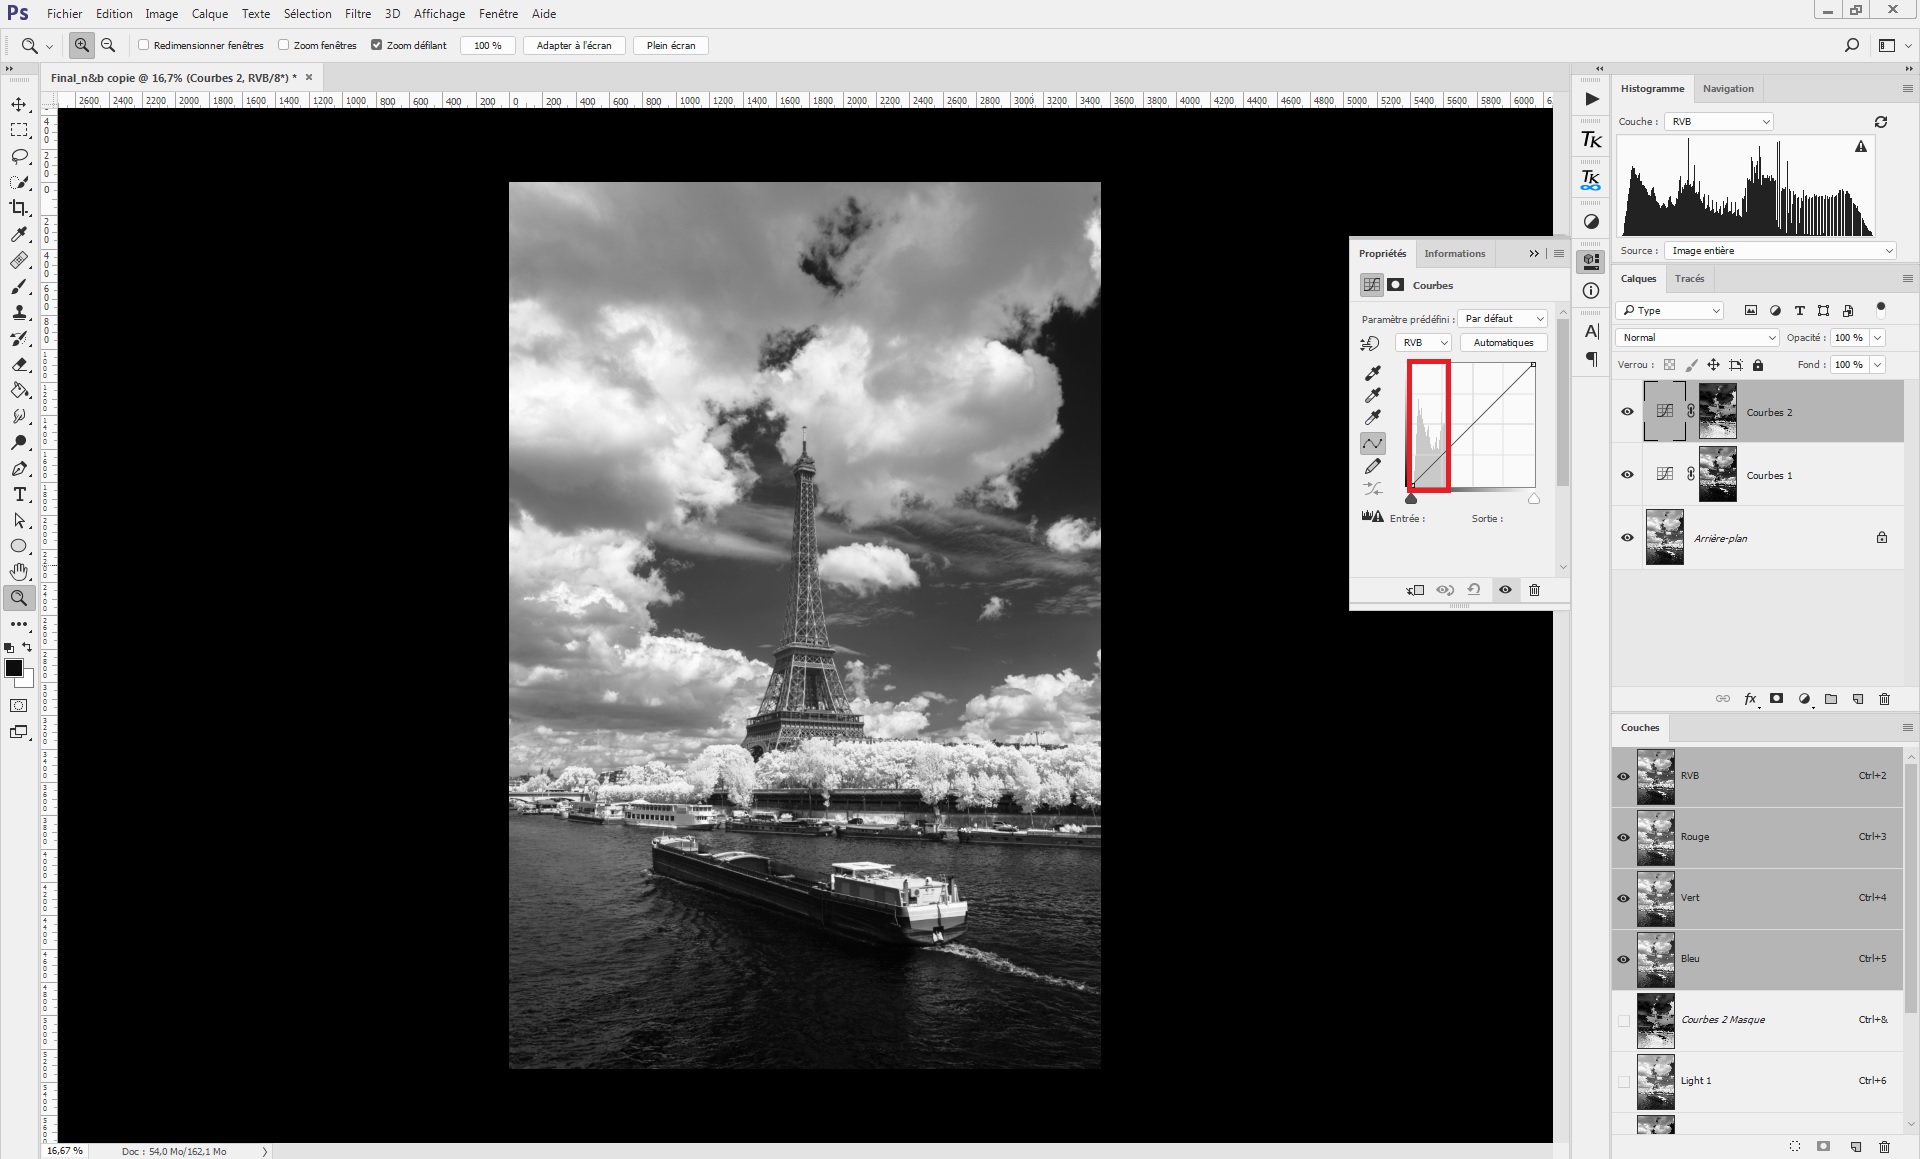
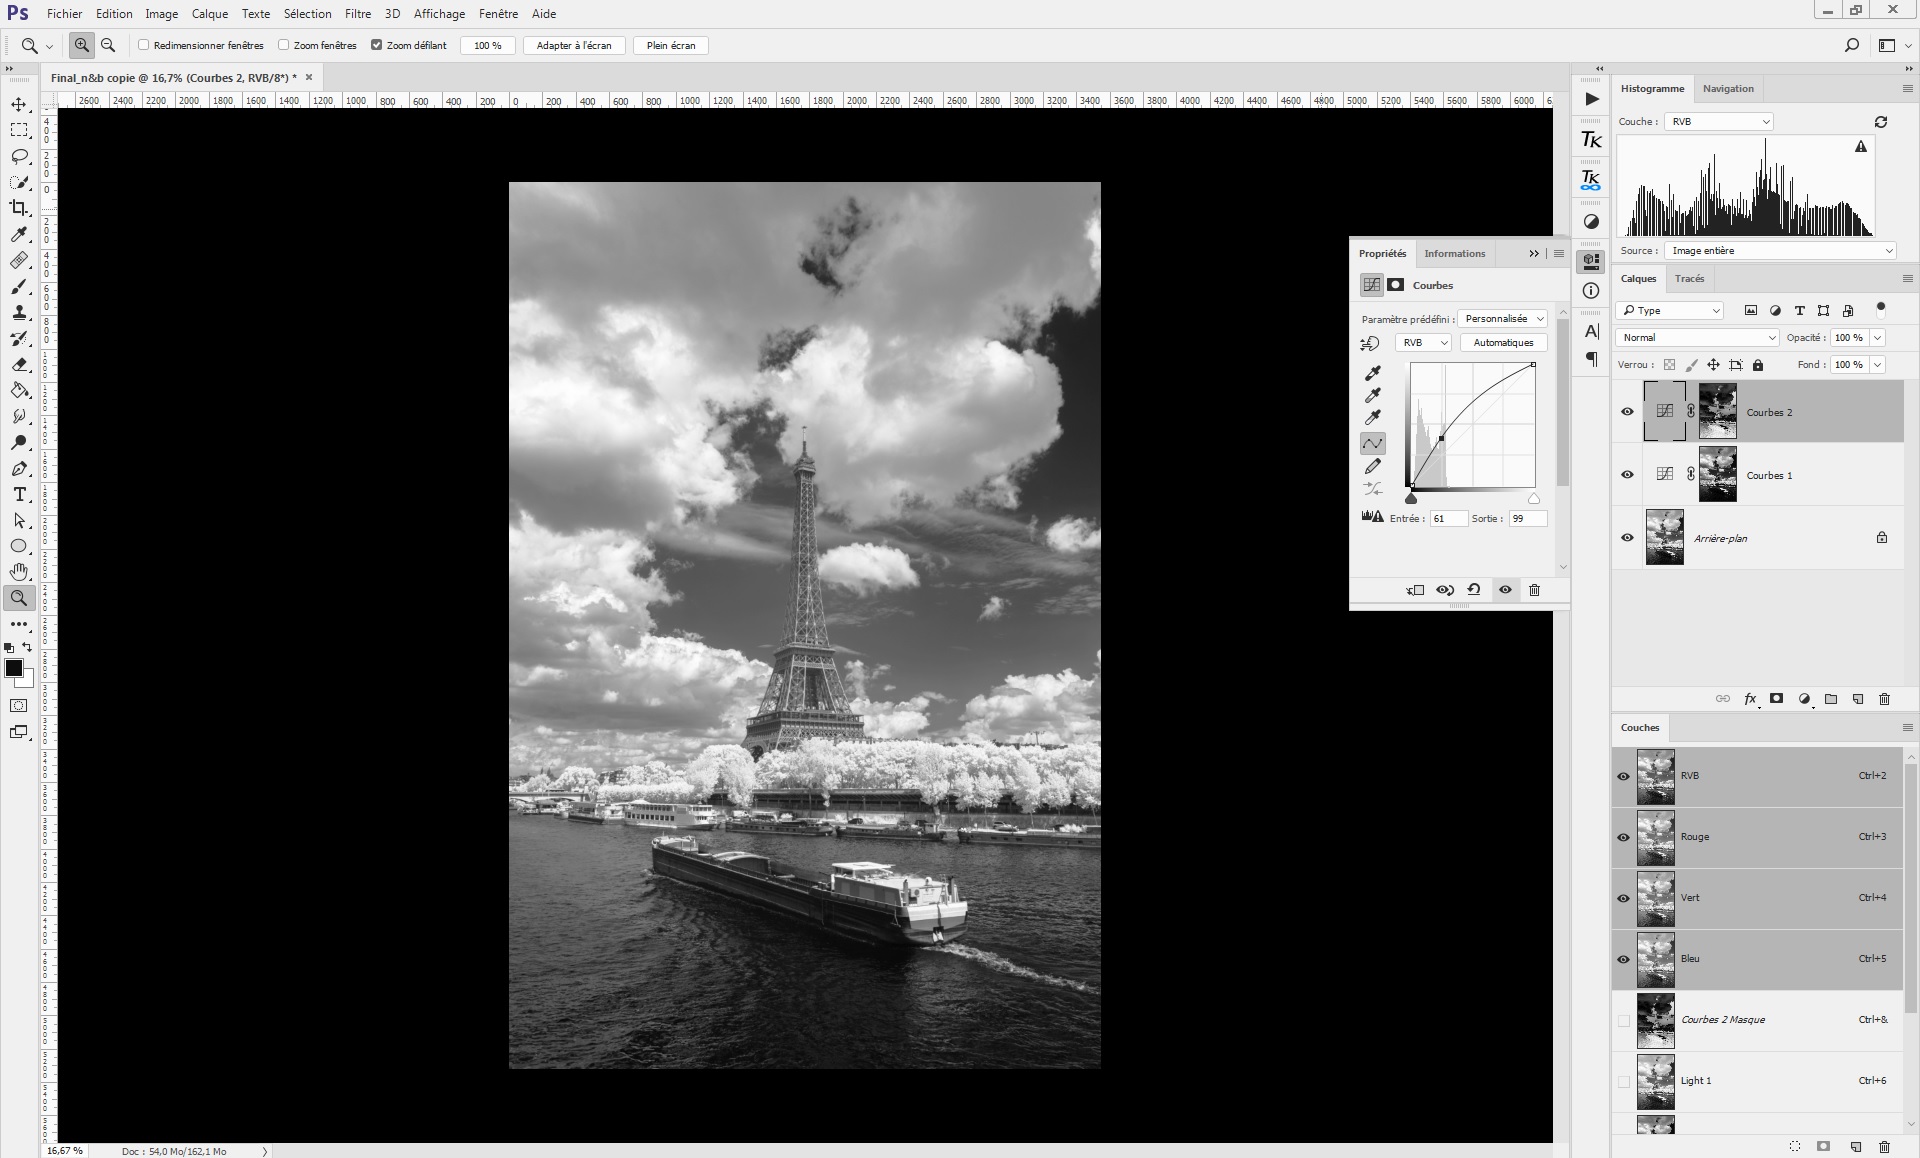
Fine contrast adjustments:
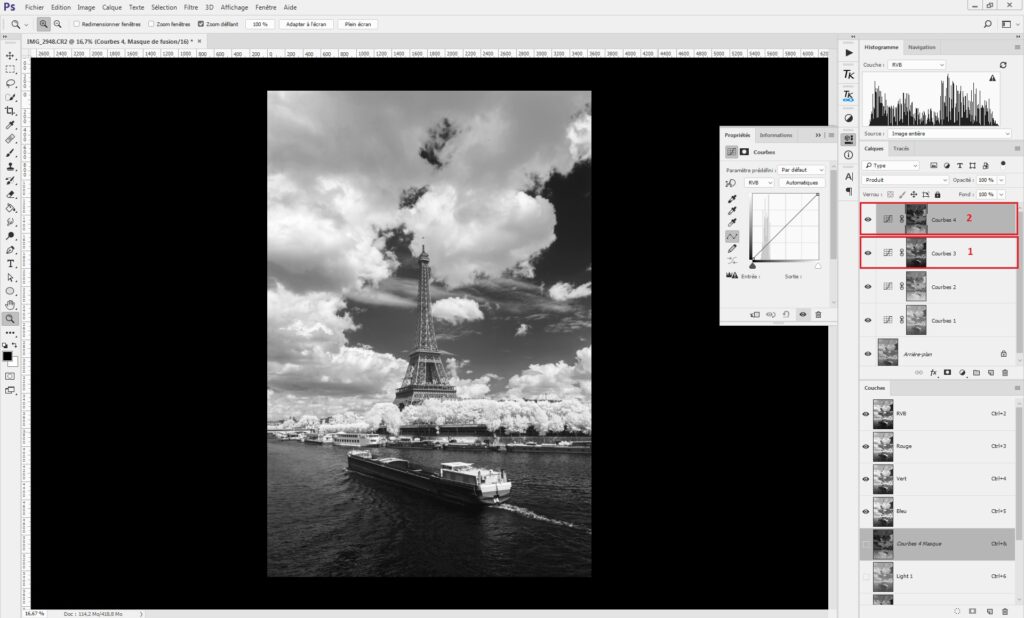
The two previous parts can be reproduced using “Light 2” (1) and “Dark 2” (2) channels to generate luminosity masks. This will allow fine contrast adjustments:
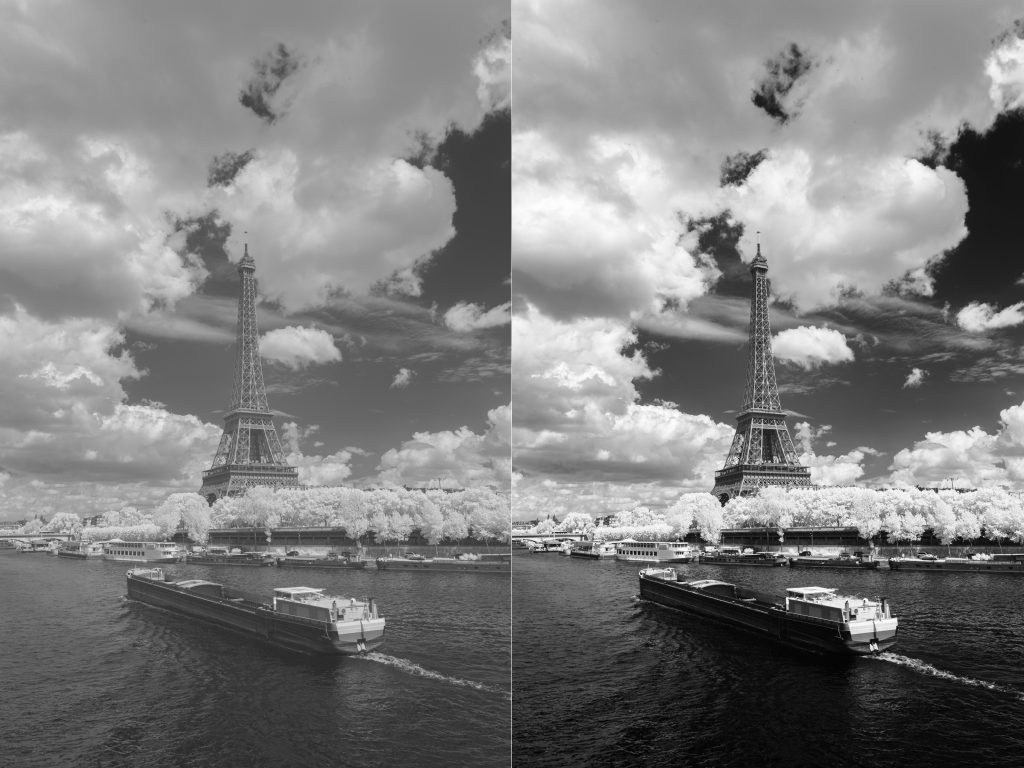
The result is a higher, finer contrast photo with deep black sky and water, and bright clouds and foliage. Here is a “before/after” comparison:


4 Responses
Do you have a link explaining how to do this:
White balance:
Yes, even in black and white photography, white balance is important. It will noticeably affect the light levels of the subject. Setting a white balance with a gray chart will help you expose correctly and to capture all the information in the highlights.