Introduction
Luminosity masks are a powerful tool for Infrared photography processing . Based on the light repartition in RGB channels, they allow precise parts of a picture to be selected. Due to the specific way infrared light is recorded by digital camera sensors, luminosity masks are also a powerful tool to process effectively and precisely the different elements of infrared photos, from the clouds to the foliage of trees.
This tutorial is divided in two parts. In the first part, we will see how to generate easily luminosity masks and how to use them depending on the part of the picture you want to edit. Then, in the second part, we will see some combinations of these masks with function layers.
Part 1: Making Luminosity Masks
In this first part, we will see how to generate luminosity masks, and most importantly, understand how the RGB channels will impact the selected areas.
You can find a lot of tutorials explaining how to create luminosity masks on the Internet, even free luminosity mask generators. This is why the main subject of this part will be to understand the importance of the RGB channel you choose to create such masks.
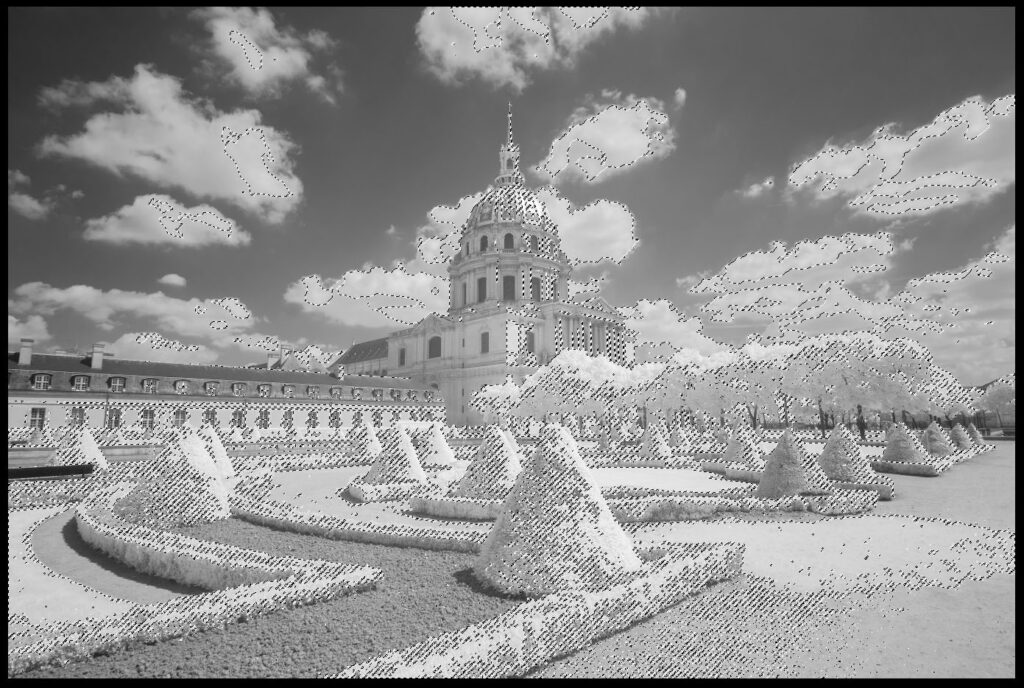
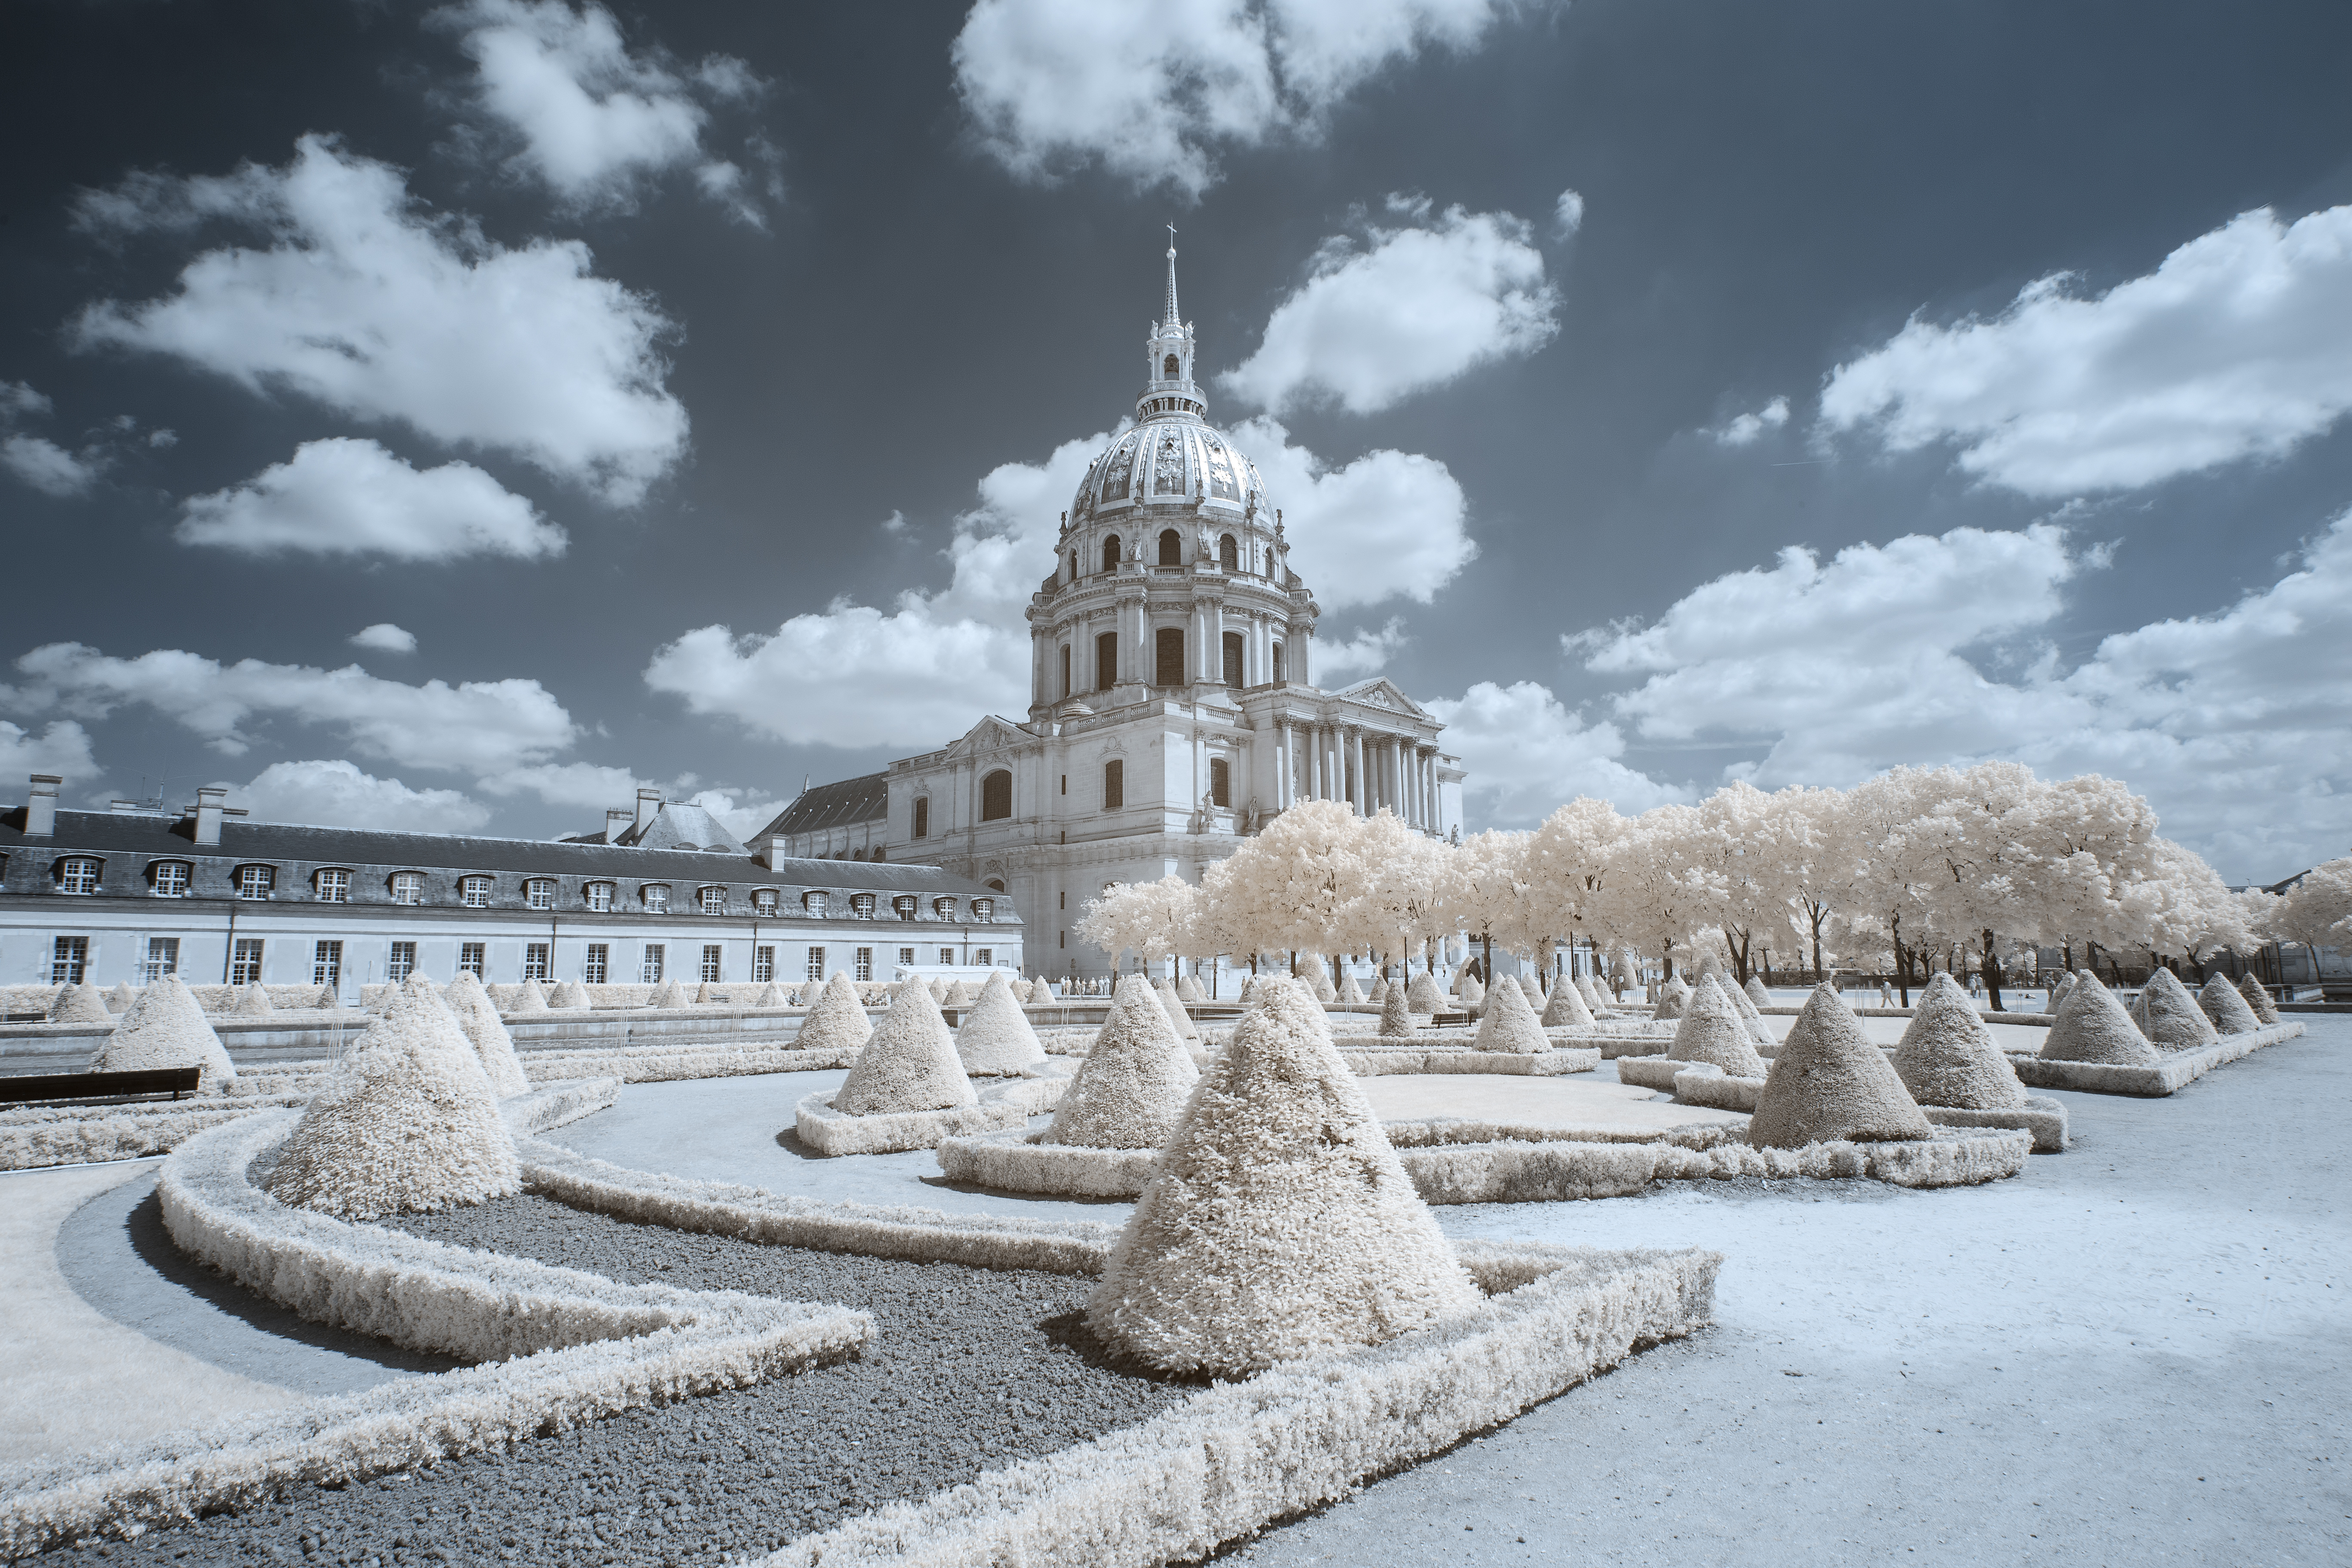
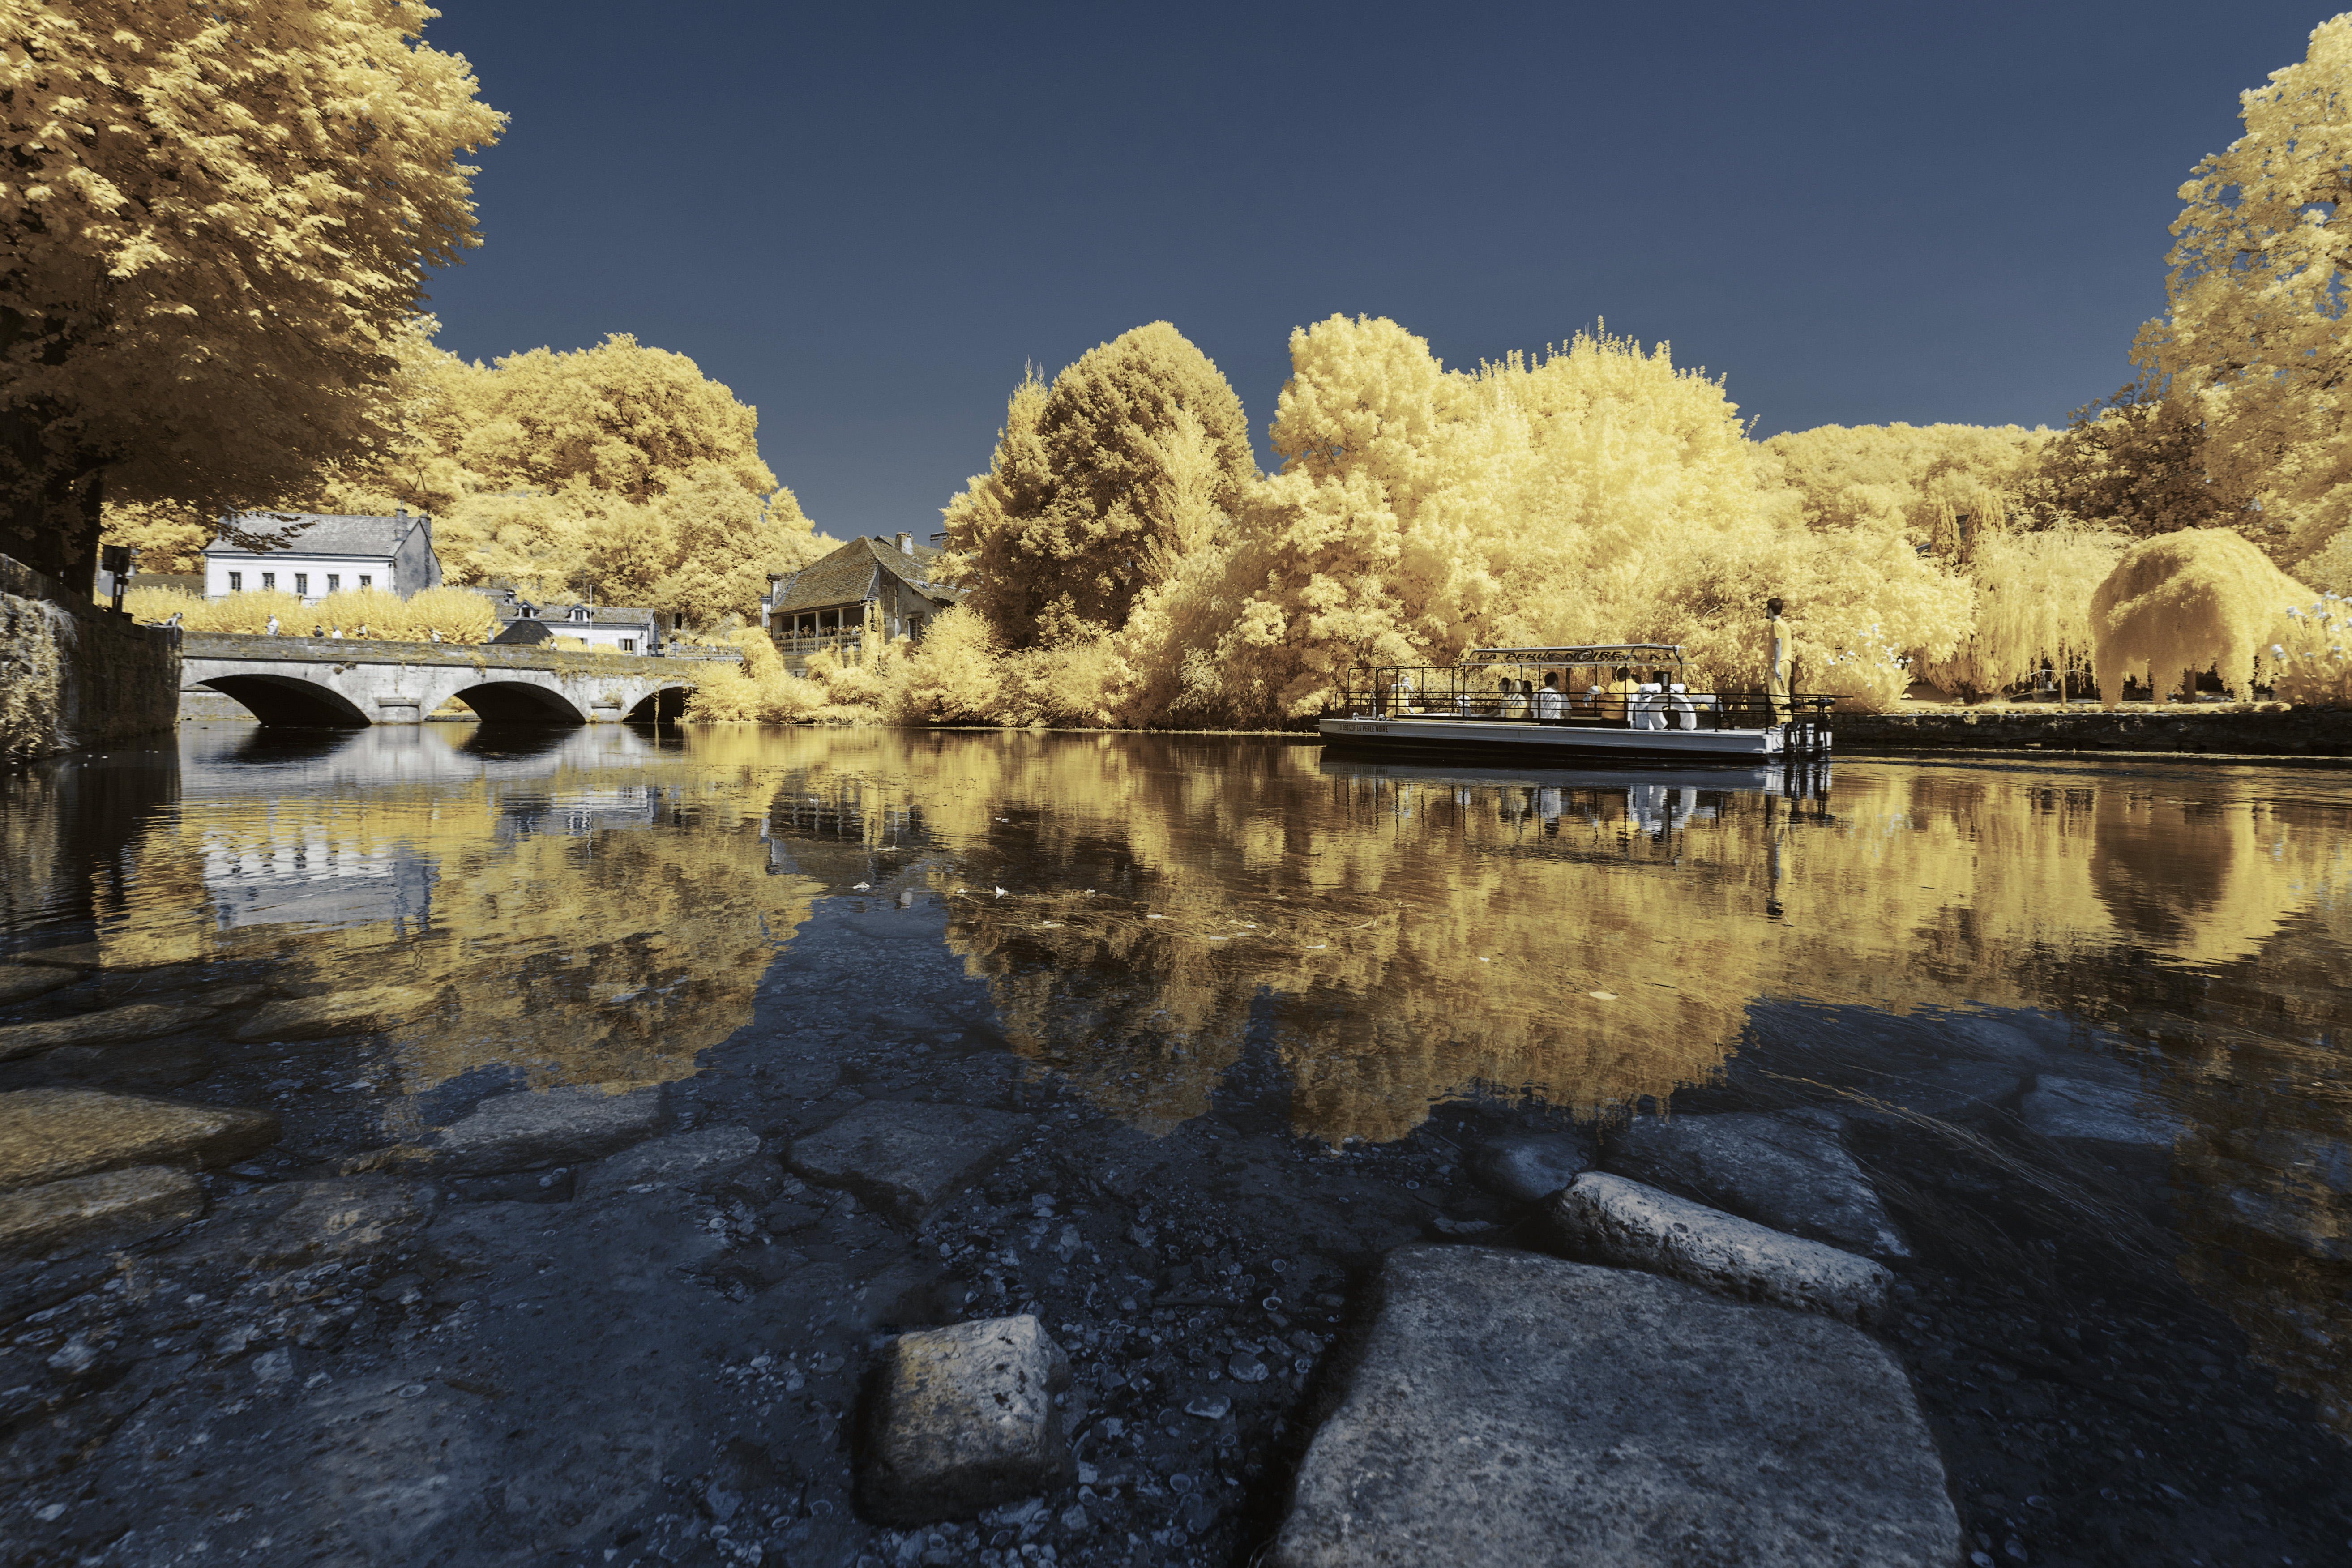
The following image will be used to illustrate this tutorial. It is a 720nm infrared picture with only a channel swap to recover a blue sky and white foliage:
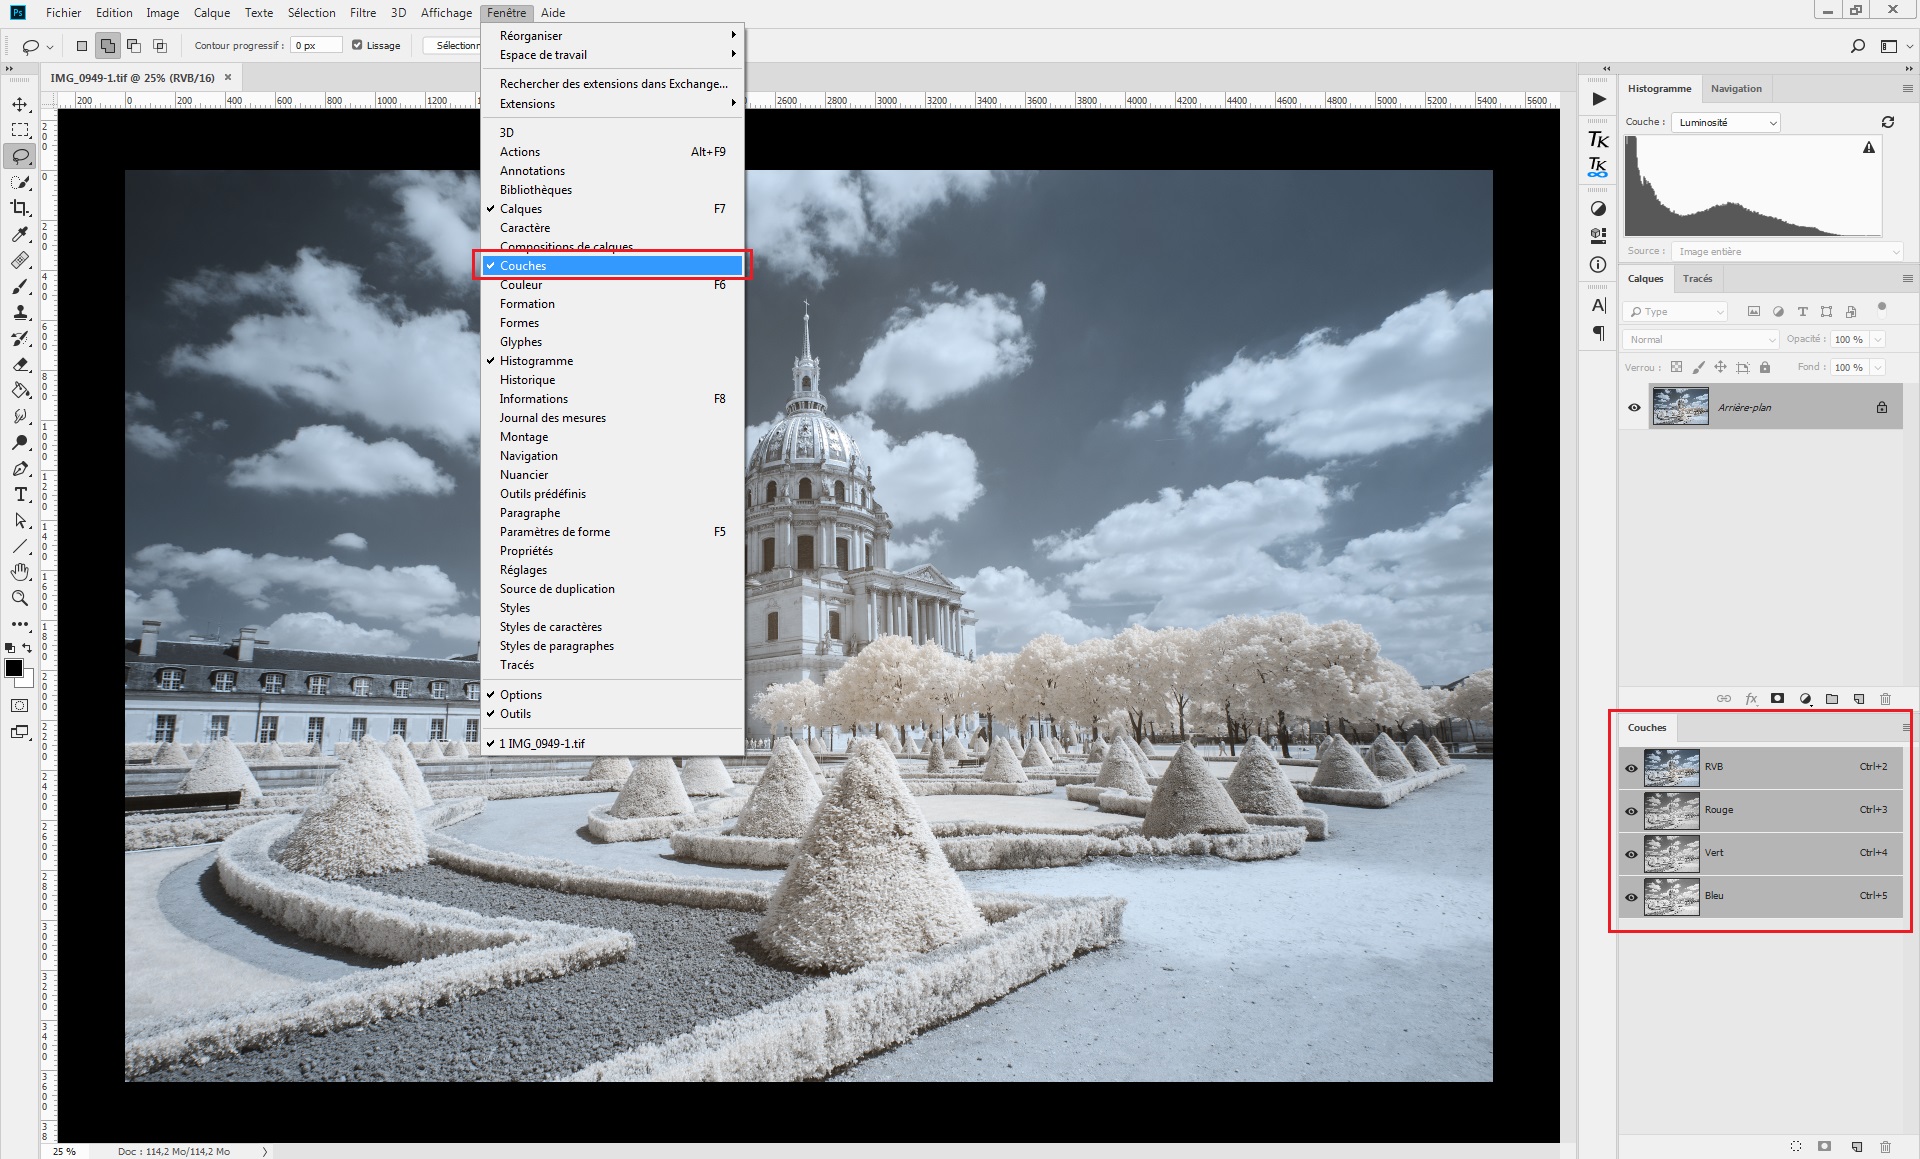
Note: as you will have to access quickly the RGB channels, the first step is to integrate the RGB window on your Photoshop panel. To achieve this, click on Windows -> Channels to place the Channels window on your panel.
Understanding Luminosity Masks
A luminosity mask is a selective mask based on the light repartition in one of the three RGB channels. The easiest mask you can generate is a simple copy of a RGB channel. On the Channels window, just click on each one of the three channels to have a preview of its selection.
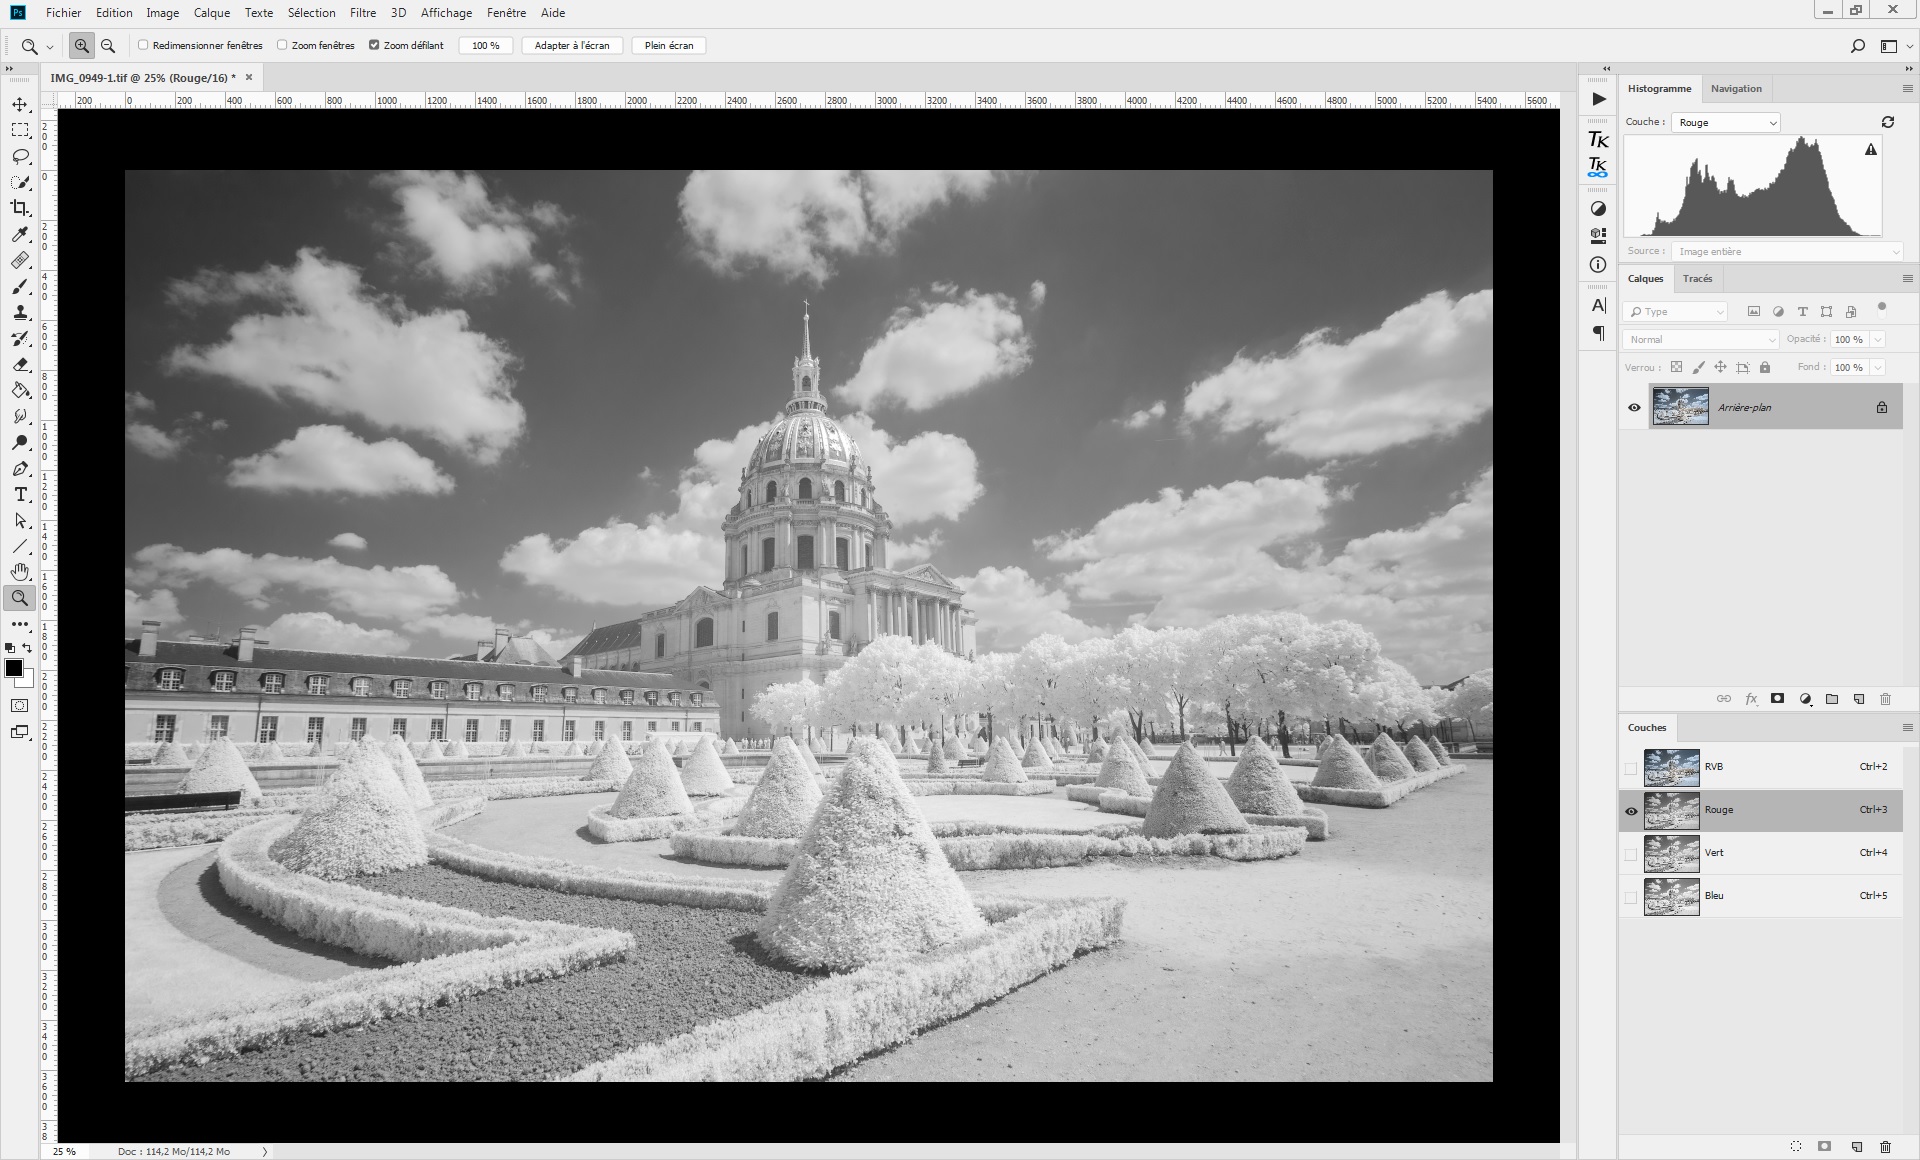

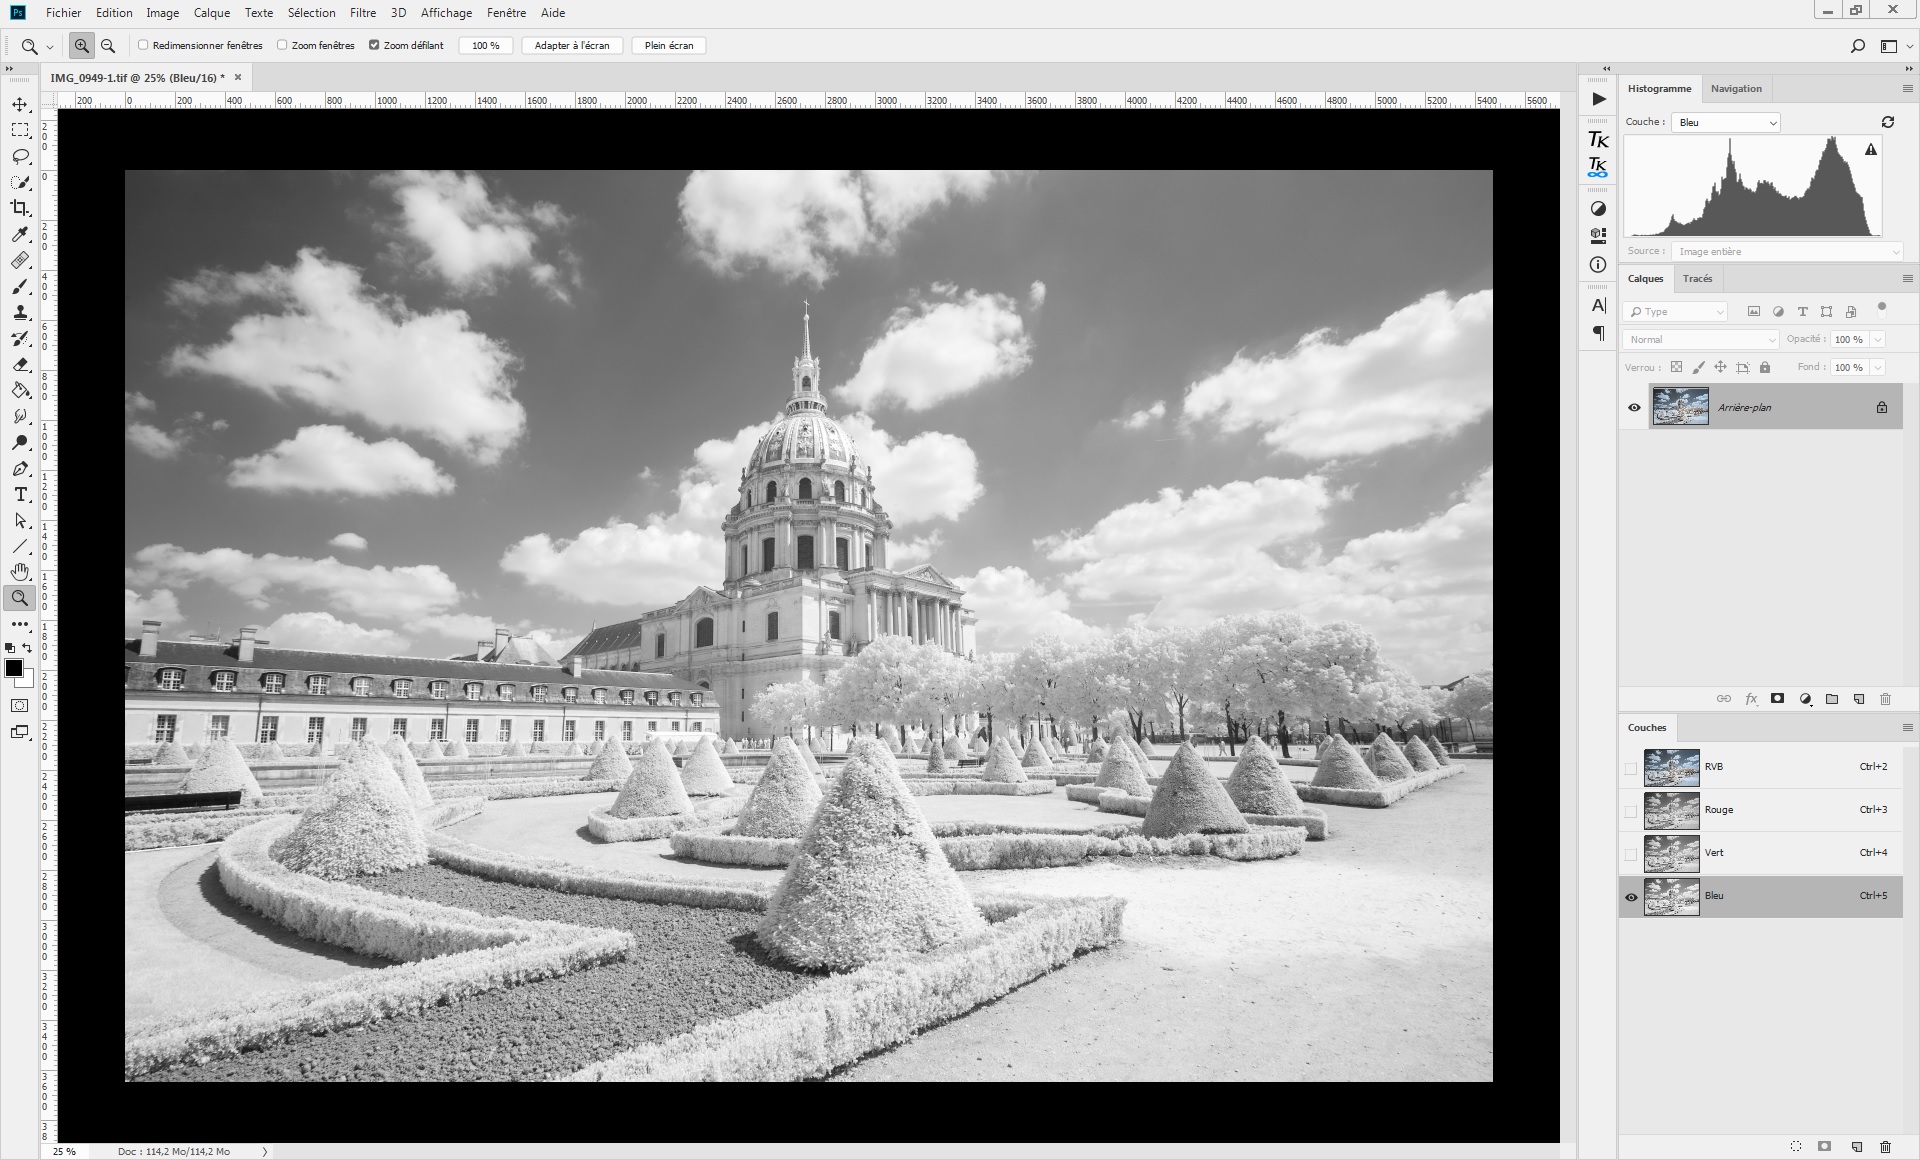
As you can see, according to the channel you choose, the mask will slightly change. A mask based on the red channel will be more focused on the infrared sensitive parts of the picture (skin, foliage) than the one based on the blue channel. With the blue channel, you will generate masks focused on the sky and clouds. The green channel will generate a balanced mask, with no focus on a particular part.
These different selections are explained by the sensitivity of the RBG matrix of camera sensors: the red channel is more sensitive to infrared light than the two other channels. At the opposite, the blue channel is the less sensitive to infrared light.
This explains why the choice of the RGB channel is important when creating luminosity masks. A basic summary could be:
- Skin and foliage process: luminosity masks based on red channel.
- Sky and water process: luminosity masks based on blue channel.
- Global process: luminosity masks based on green channel.
Generating Luminosity Masks
Now that you know what channel to choose, it is time to see how to concretely generate luminosity masks. In this part, I will use the red channel, but the steps are the same for each of the two other channels.
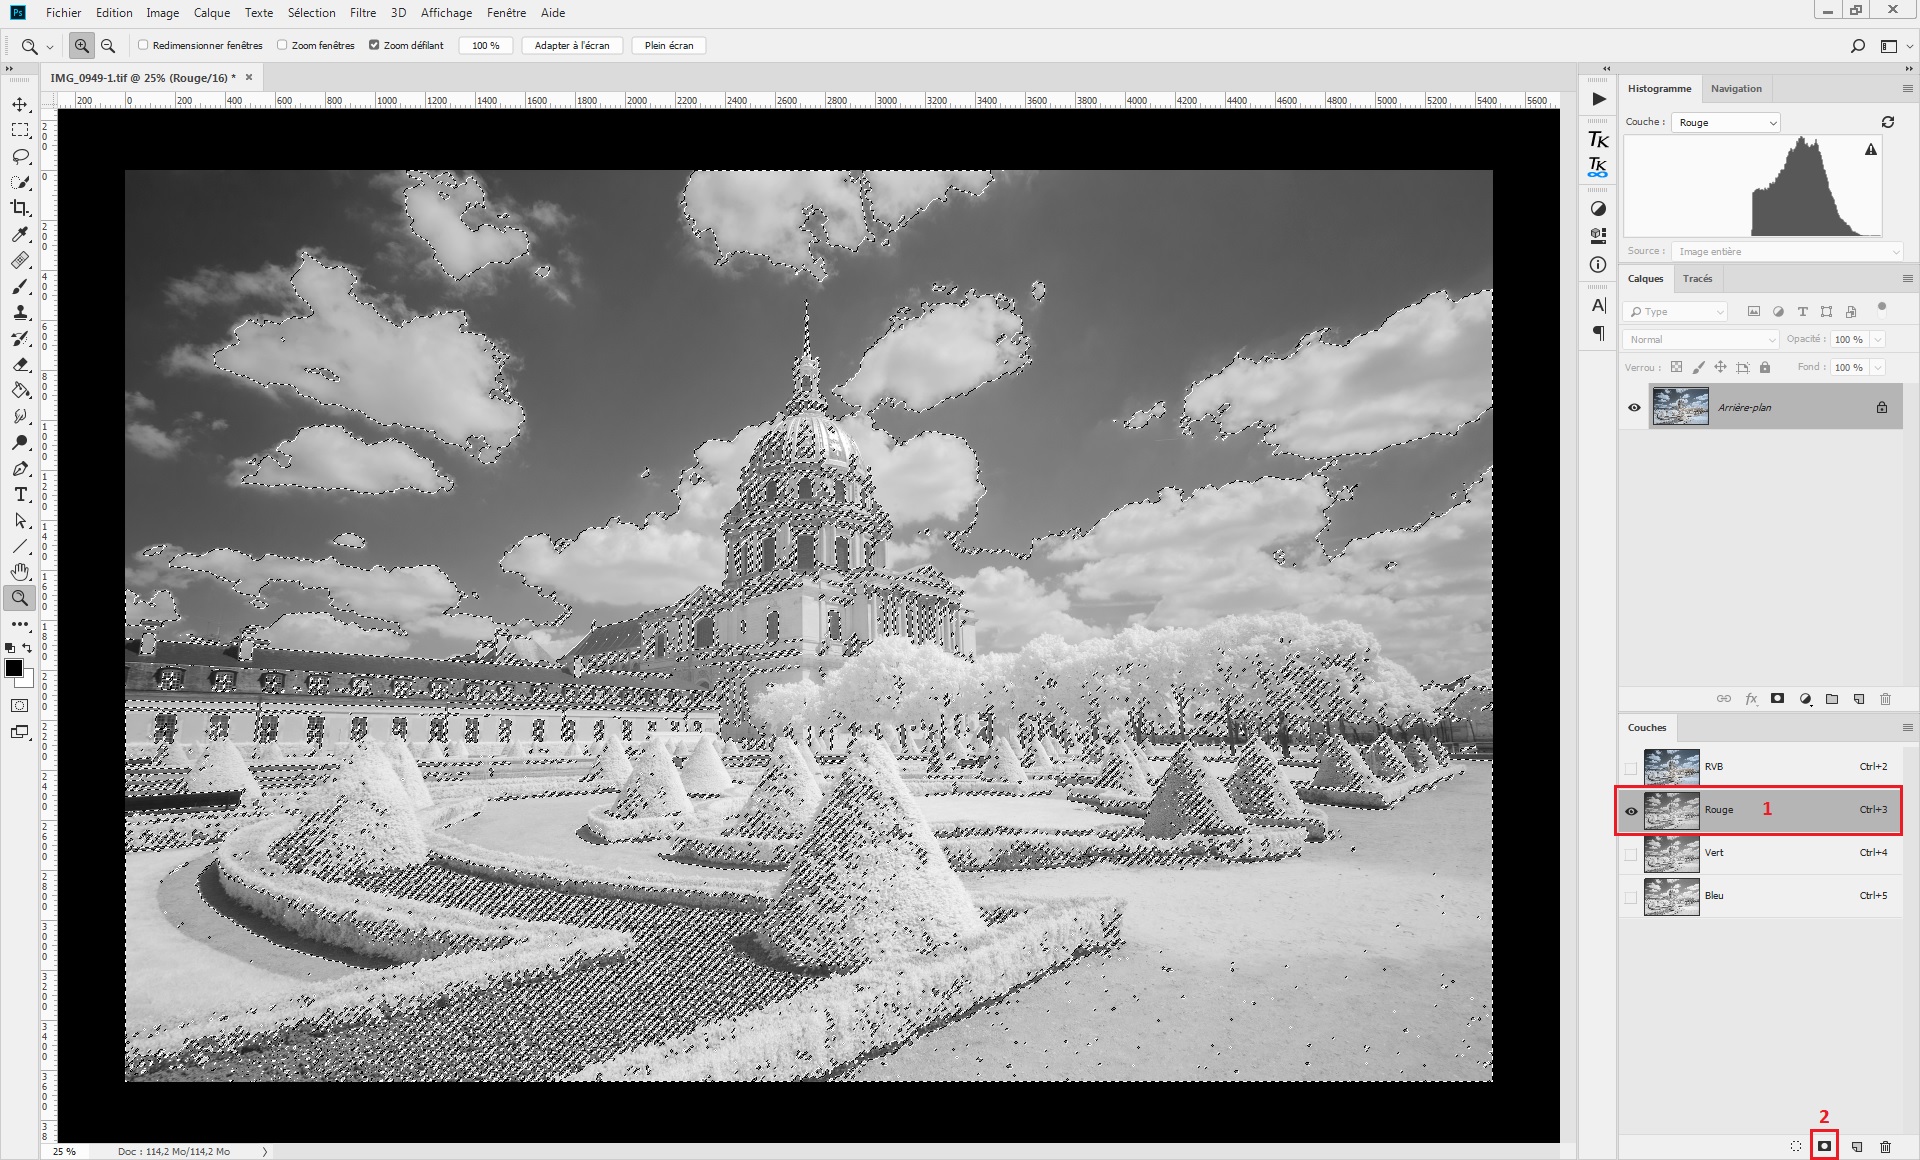
To create your first mask, do a Ctrl+click on the red channel (1) and generate a new channel based on the selection (2):
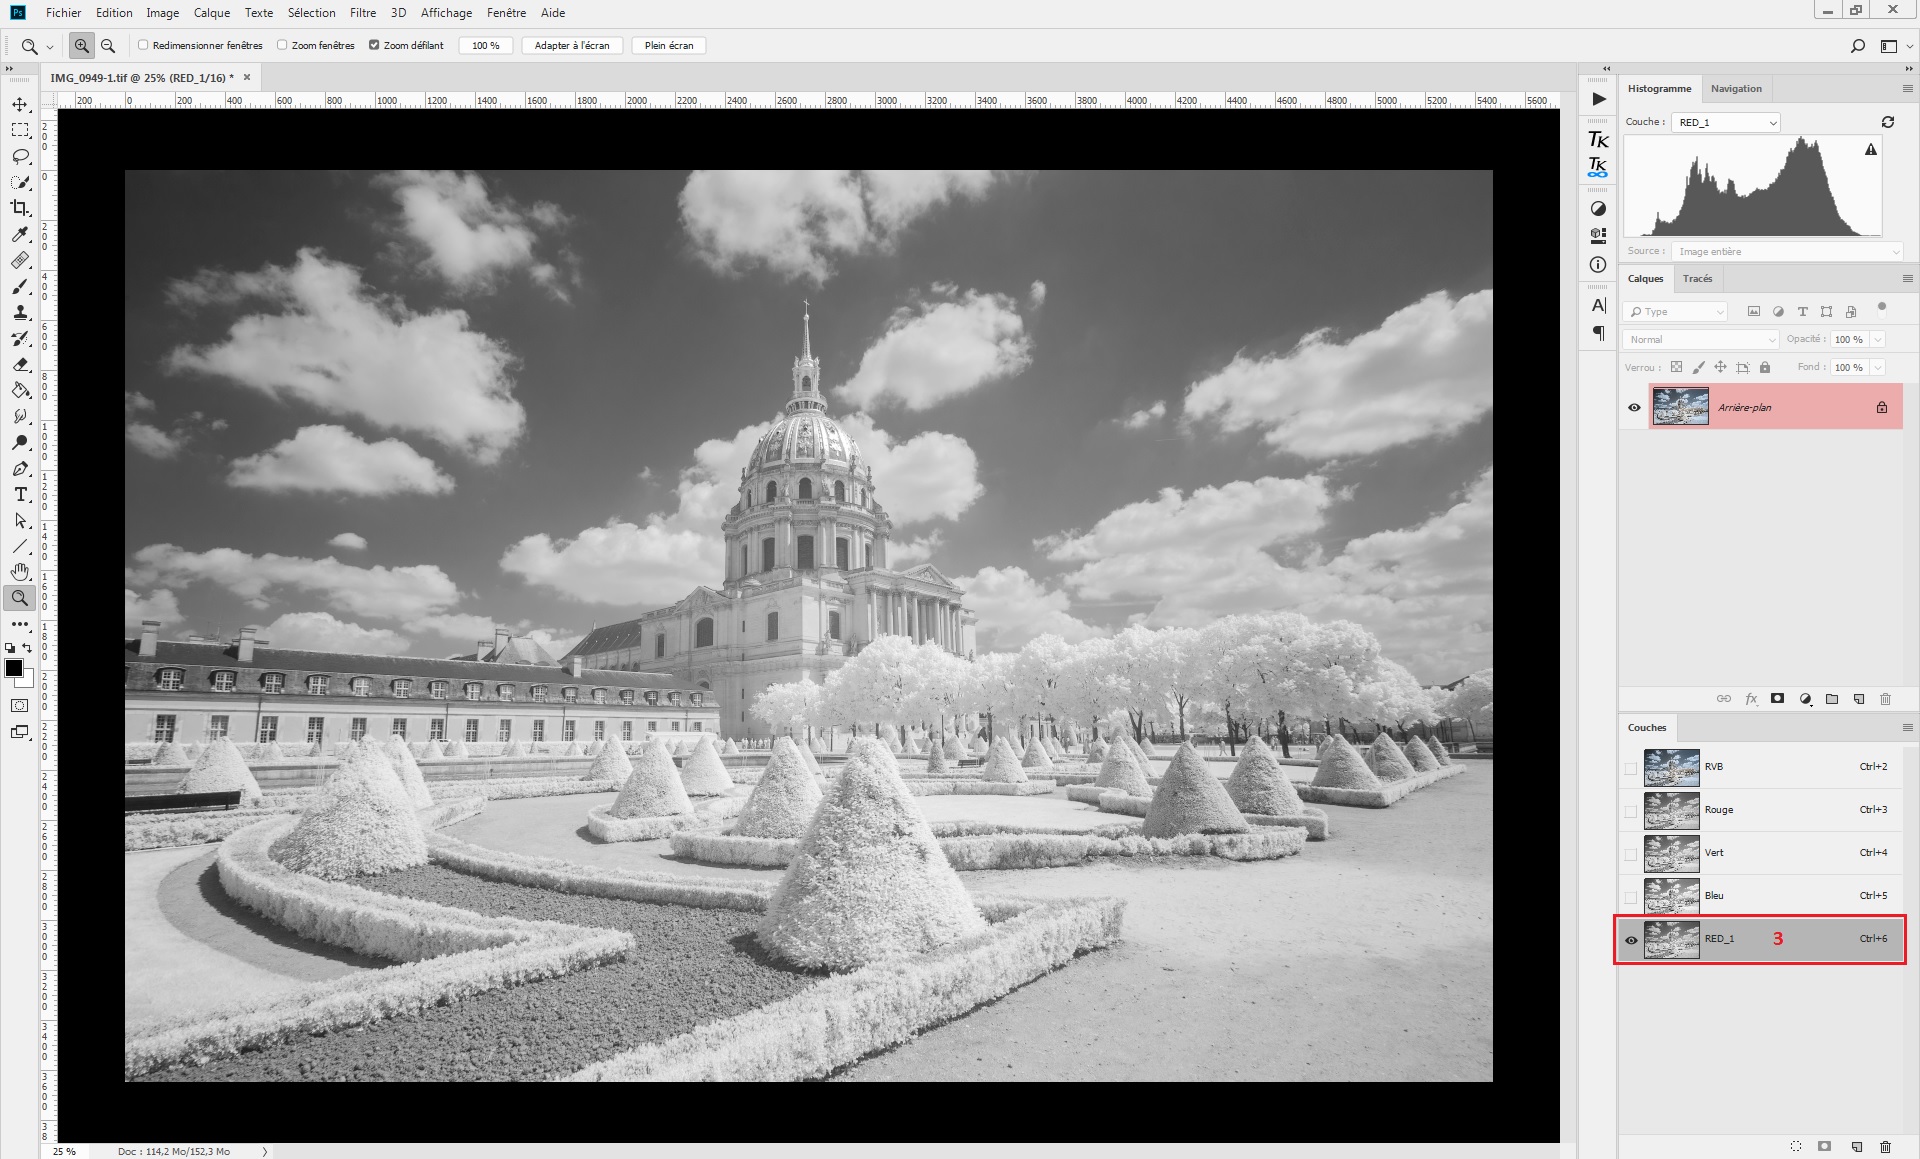
As you can see, the generated channel is a perfect copy of the red channel. We will name it “RED_1” (3).
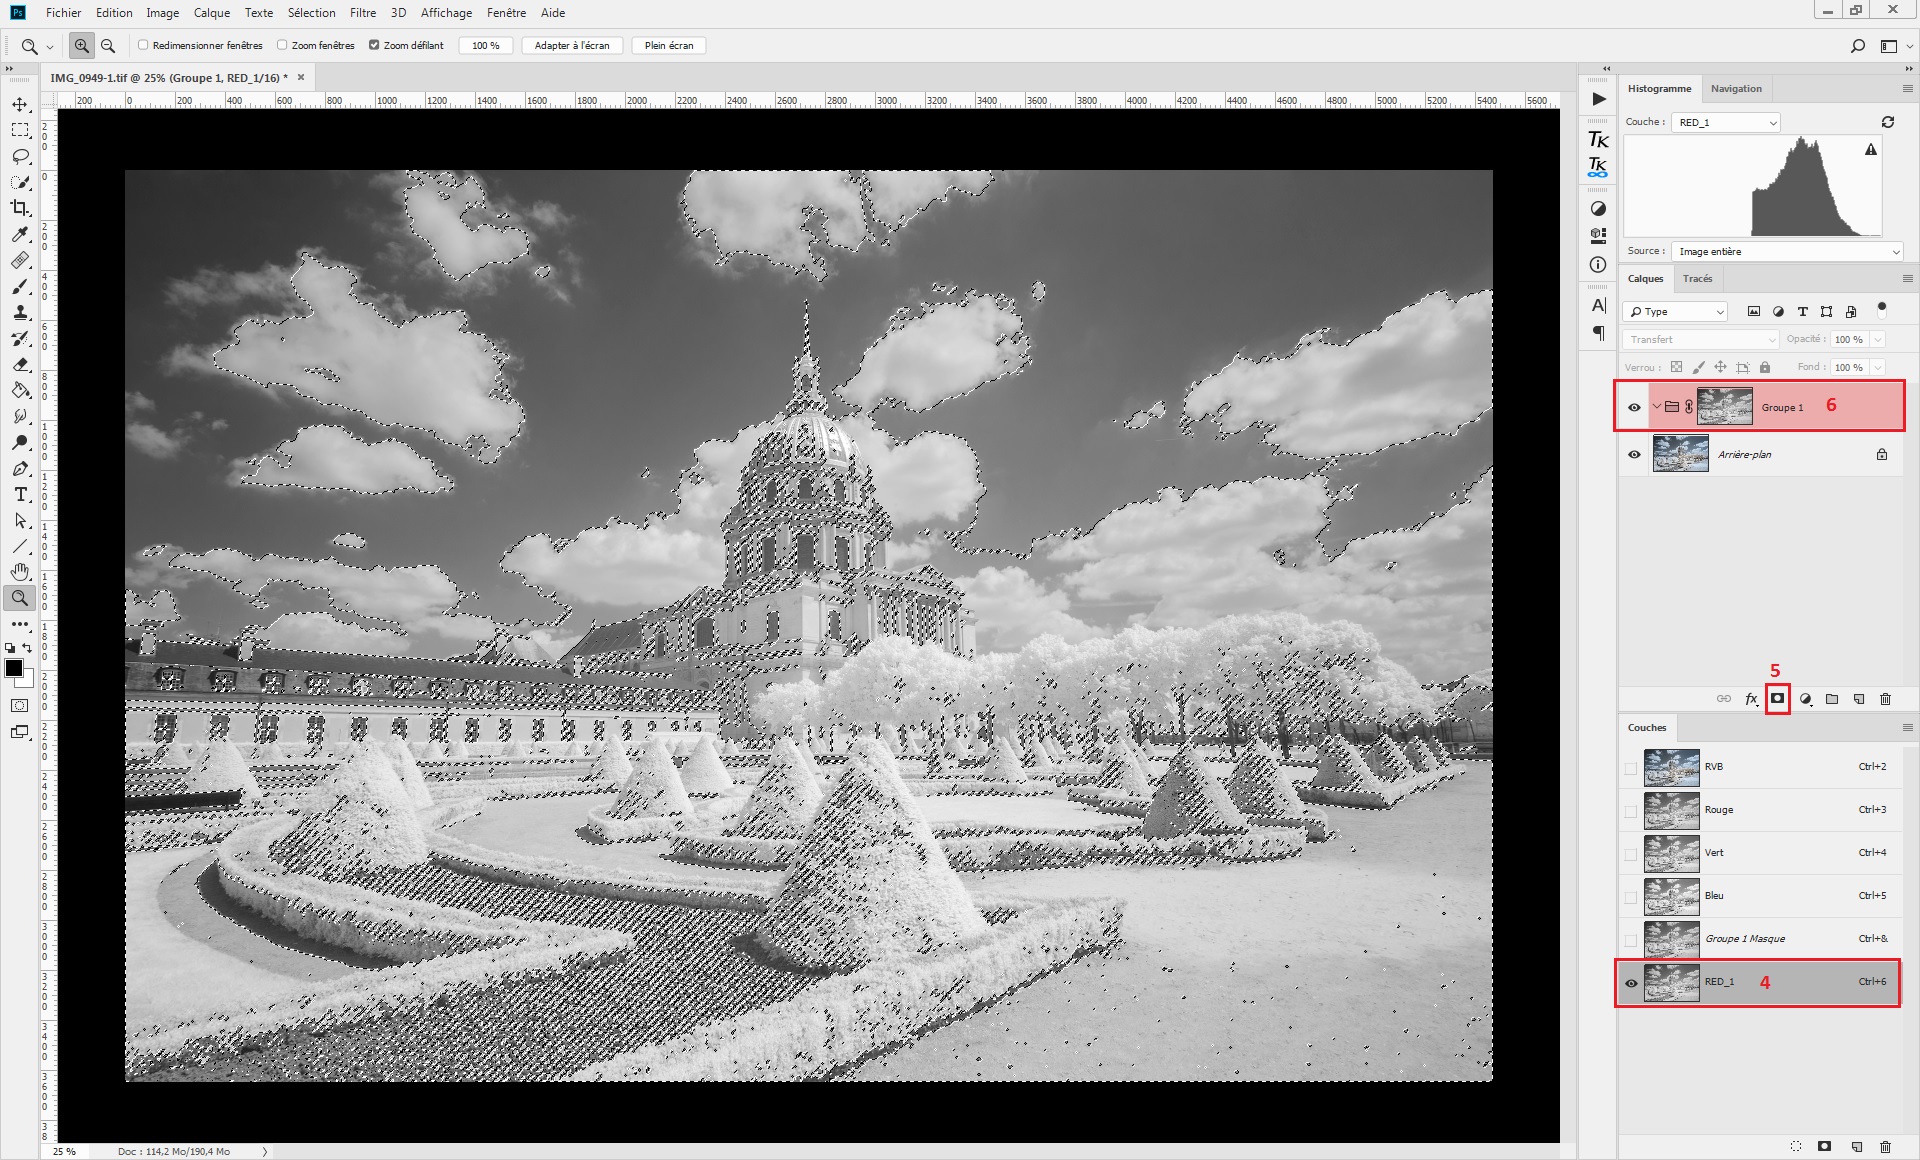
To generate a mask with this channel, Ctrl+click on it (4) and use the “add mask” button (5) in the Layers window. A mask will be created, linked to the layer selected (here, a folder) (6).
As you can see, this first selection is not very selective. The power of luminosity masks is the possibility to multiply the channel selection. Indeed, you can create a sub-luminosity mask based on a previous luminosity mask. The result is a new luminosity mask, more selective as it is based on a previous selection, not on the whole image.
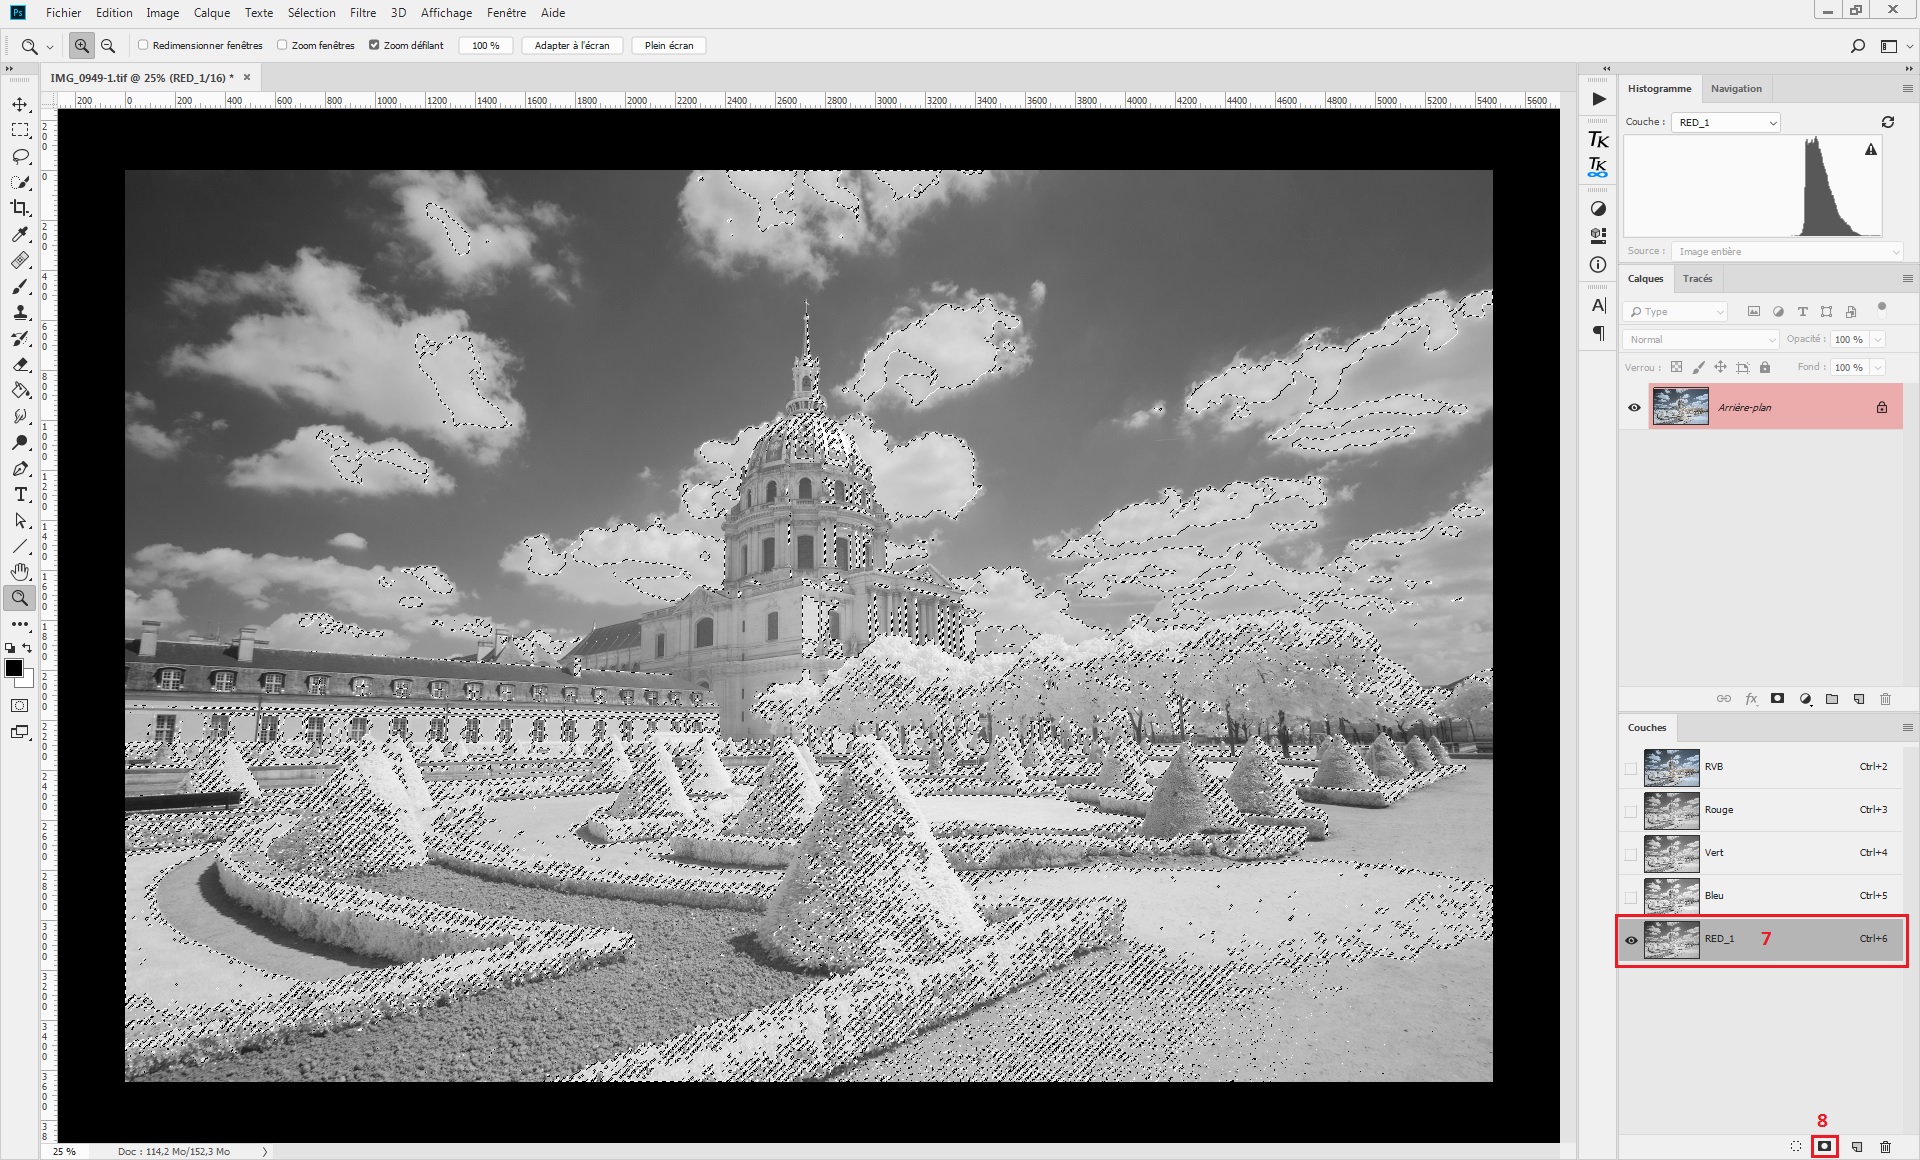
To achieve this step, select the RED_1 channel in the Channels window with a Ctrl+click, then do a Ctrl+Maj+Alt+click on this same channel (7). Normally, you will see a cross appearing under your mouse pointer when pushing the Ctrl+Maj+Alt combination. This will confirm the multiplication of the selection. Finally, generate the new channel (8).
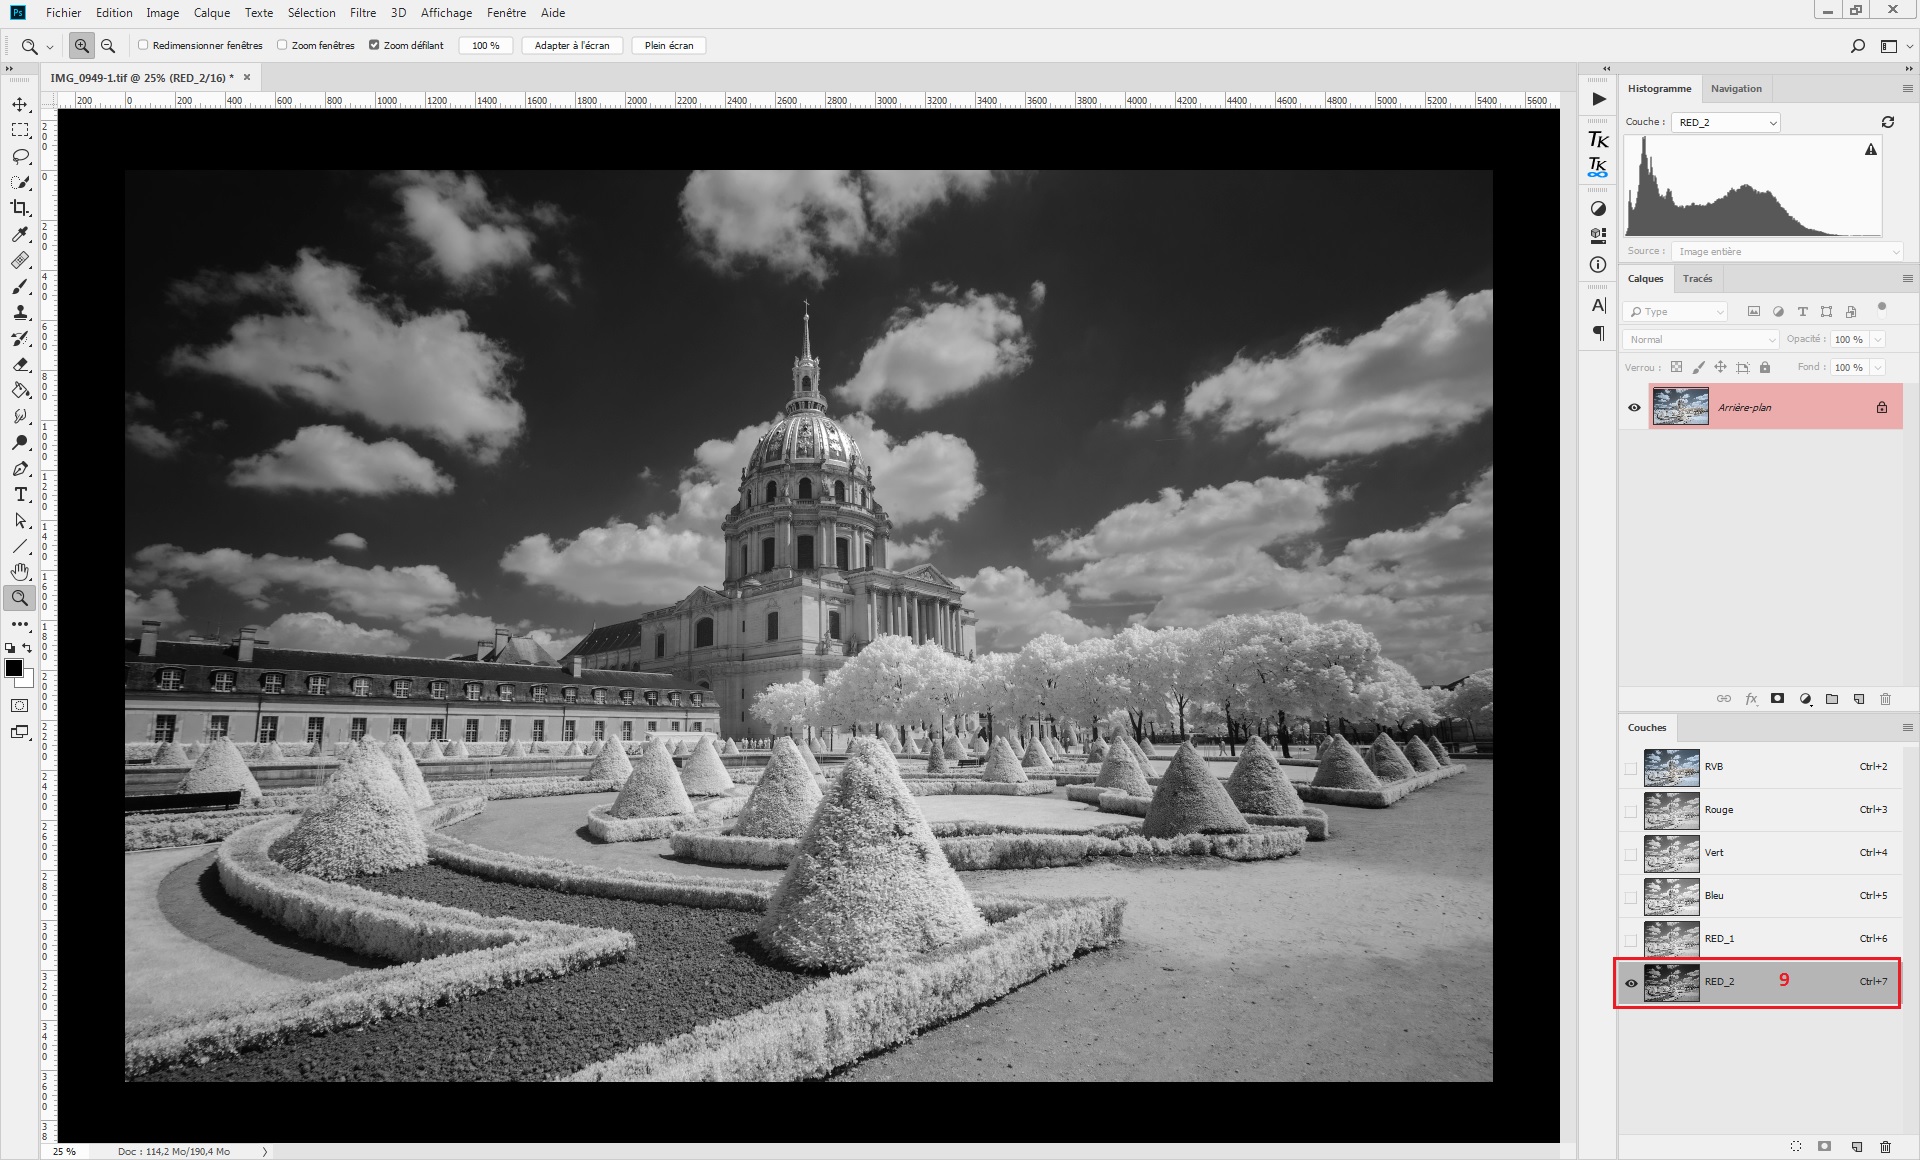
The new channel is named “RED_2” (9). As you can see, this channel allows creating a more selective mask.
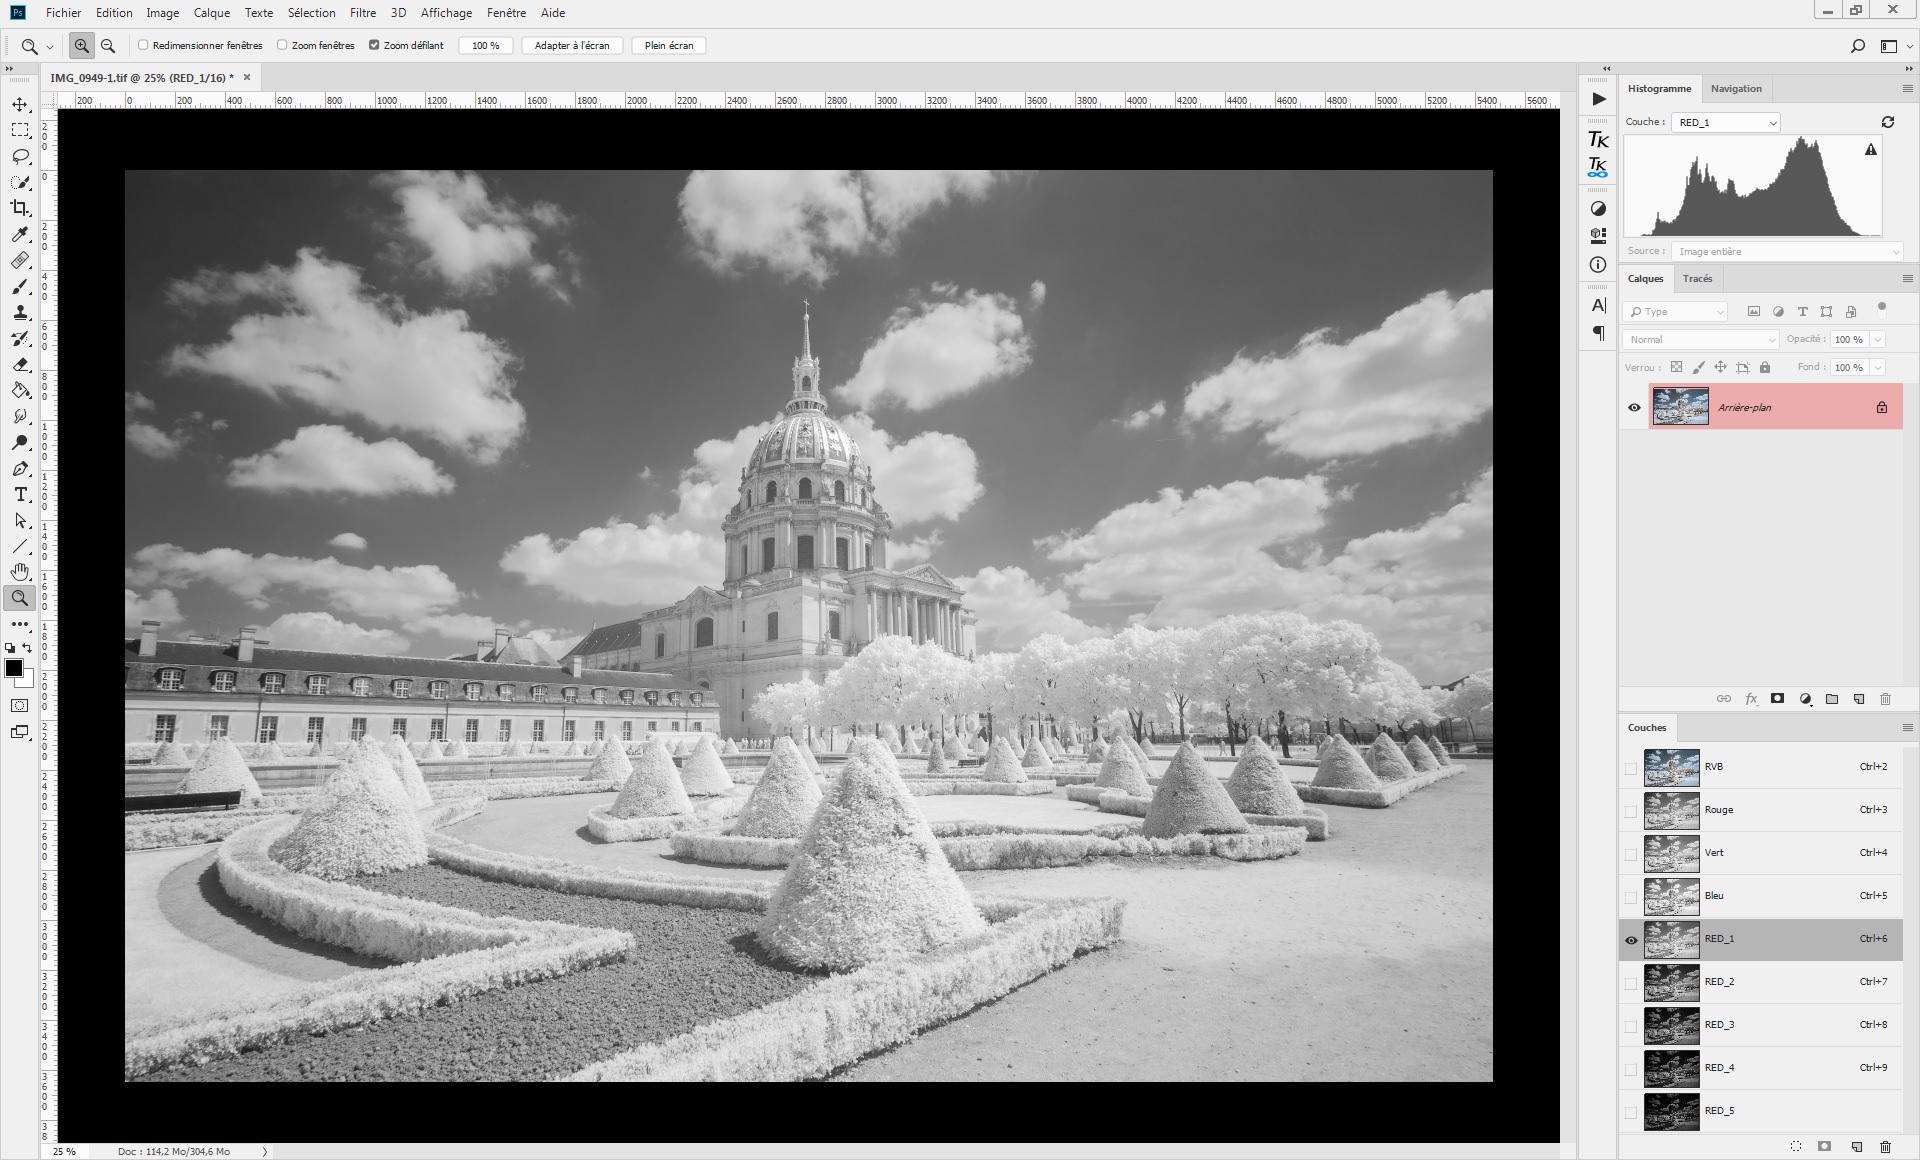
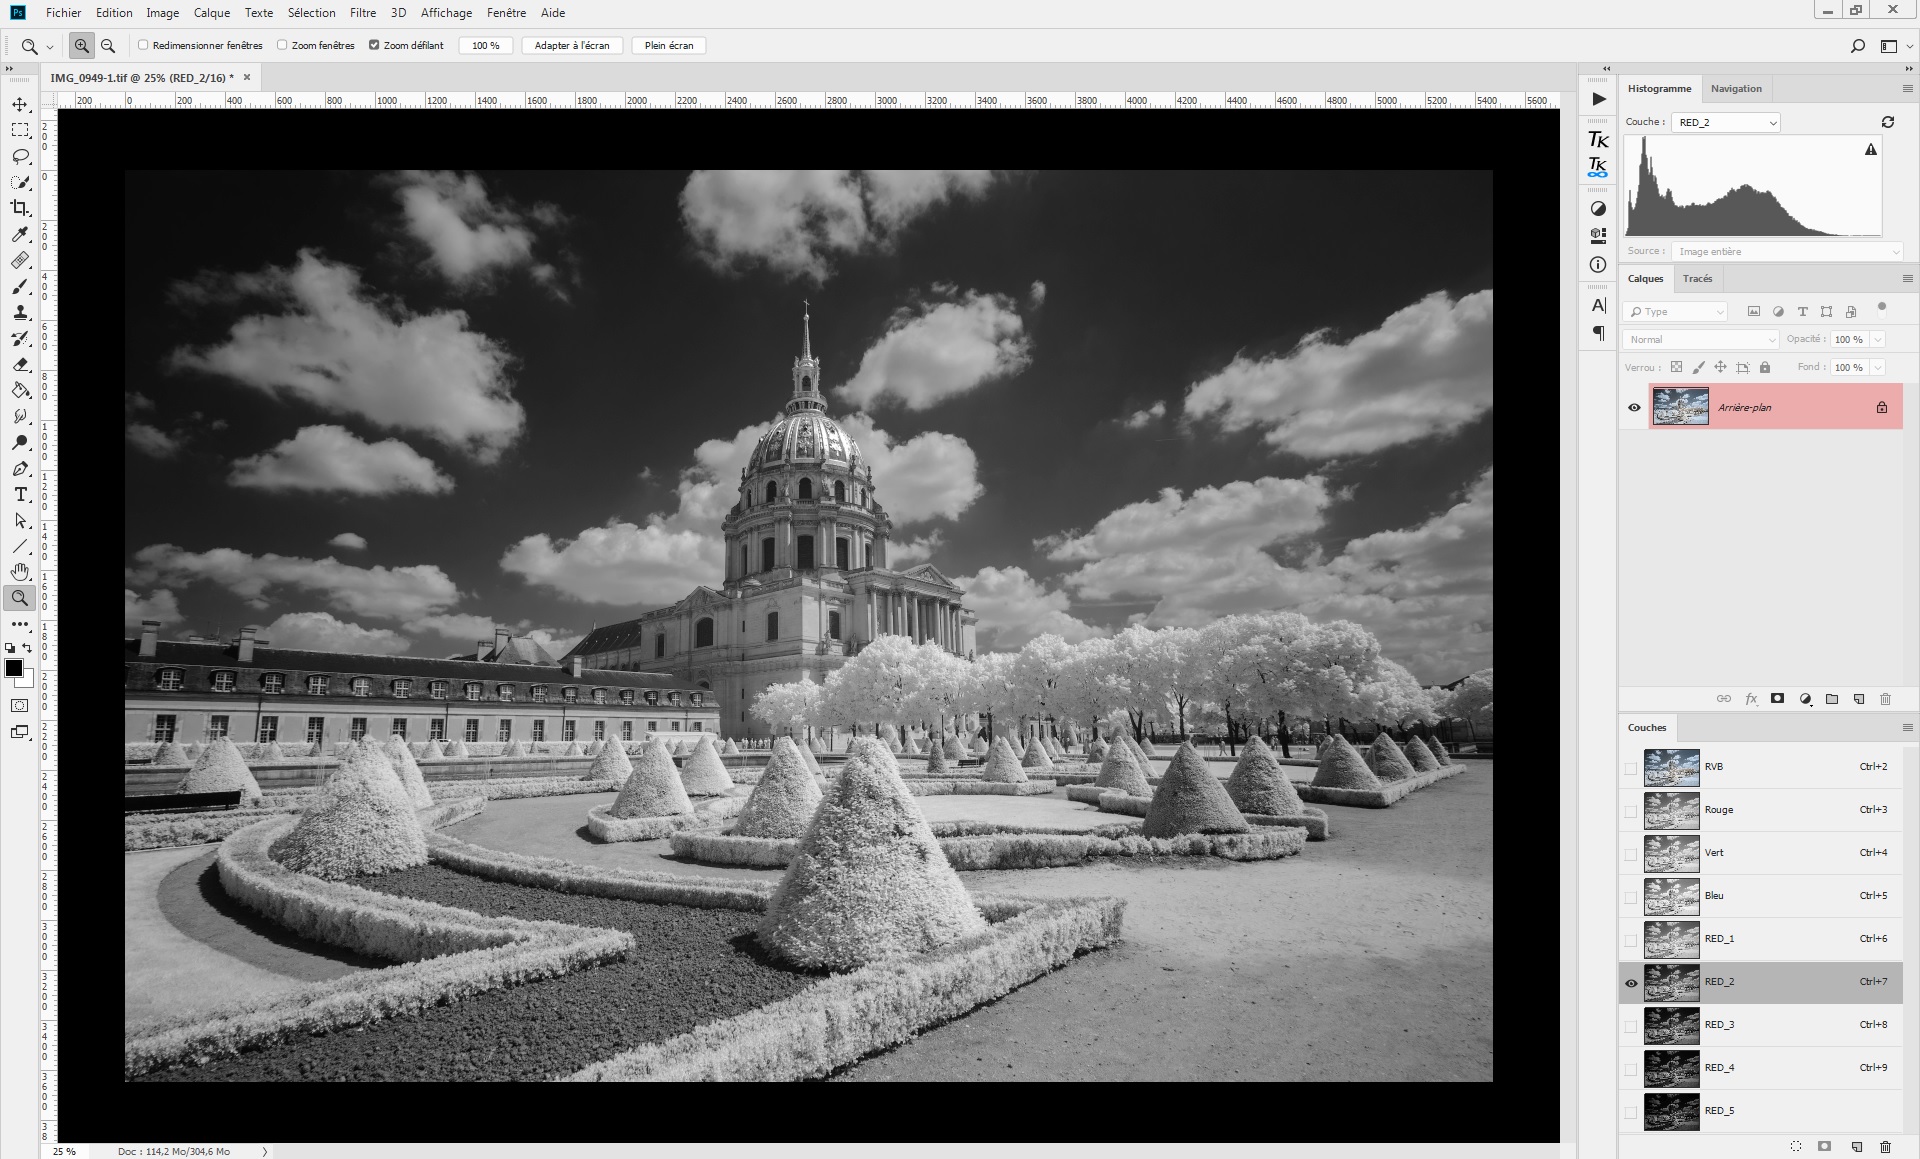
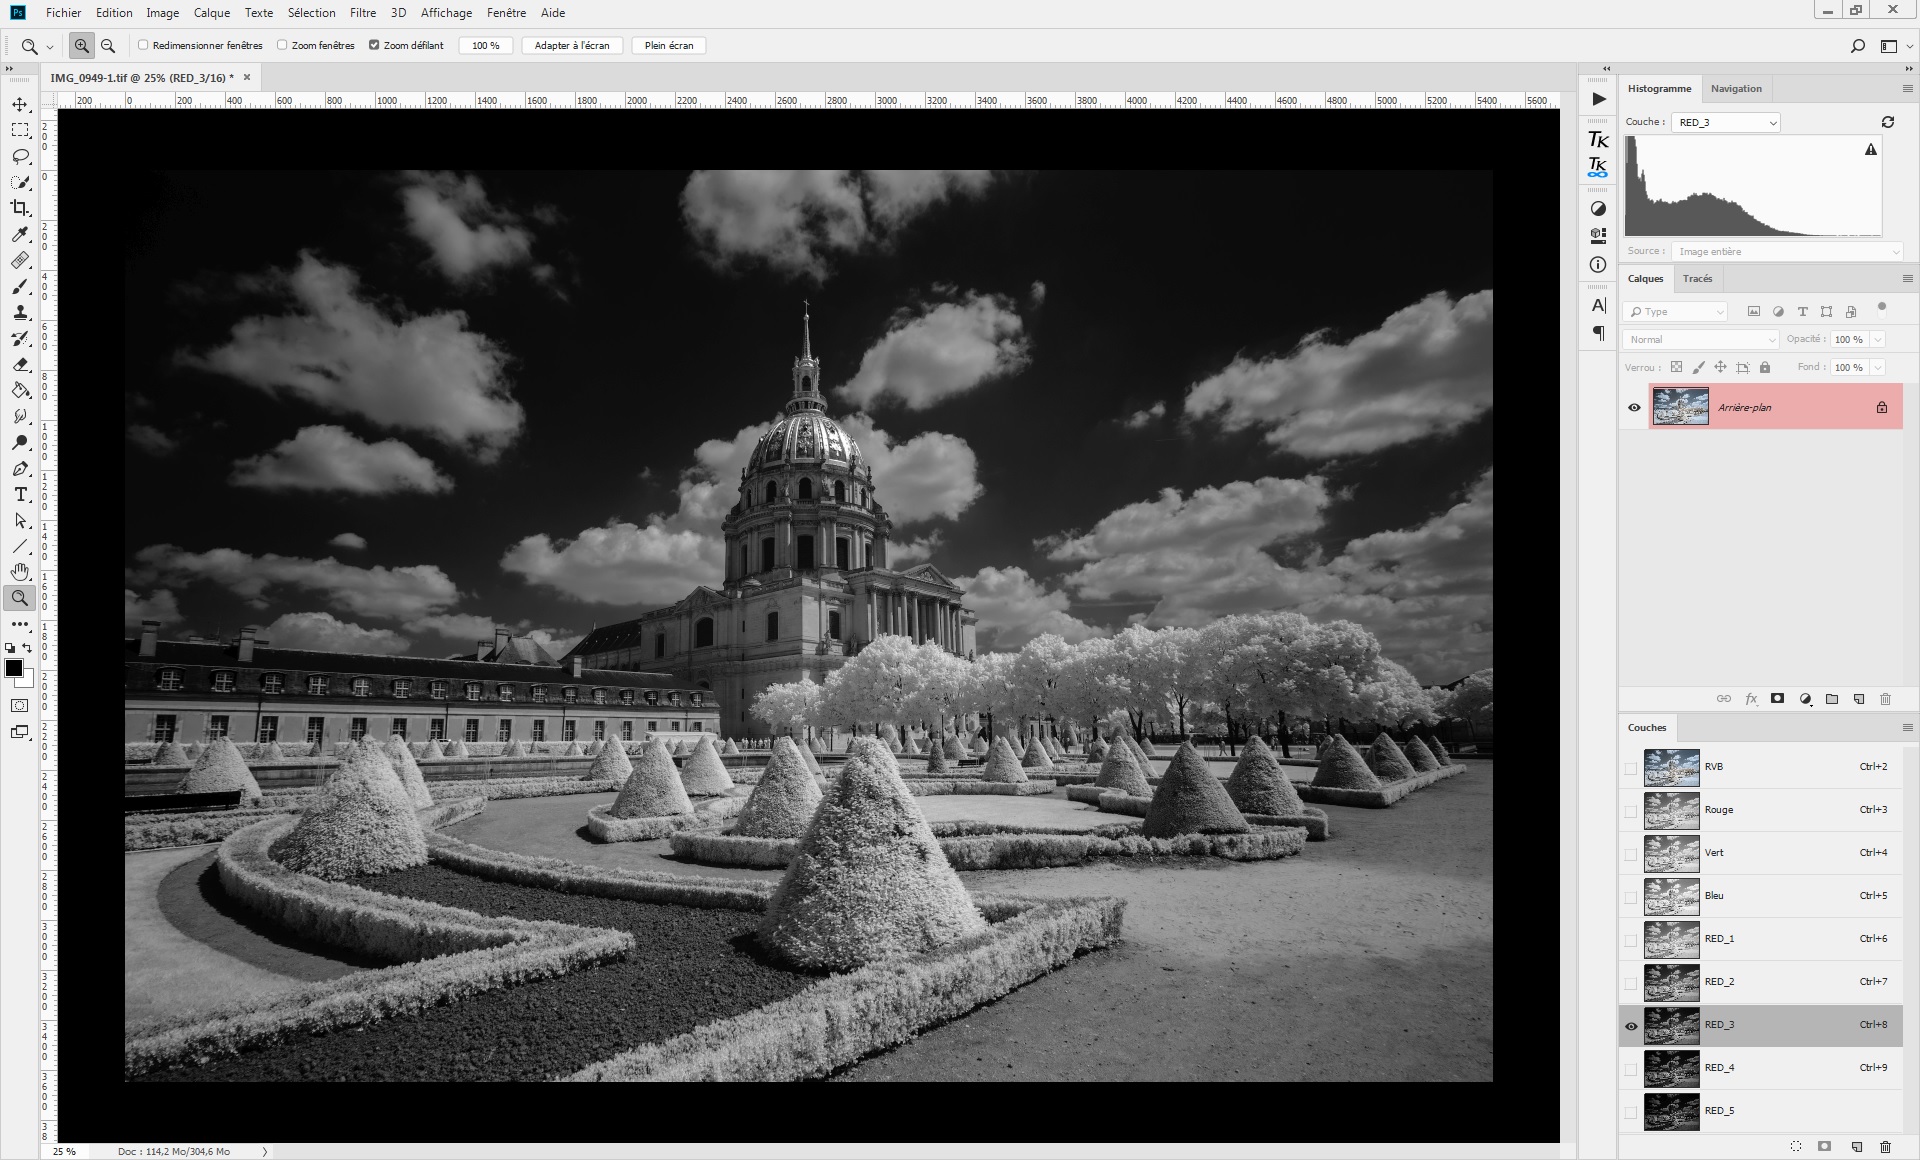
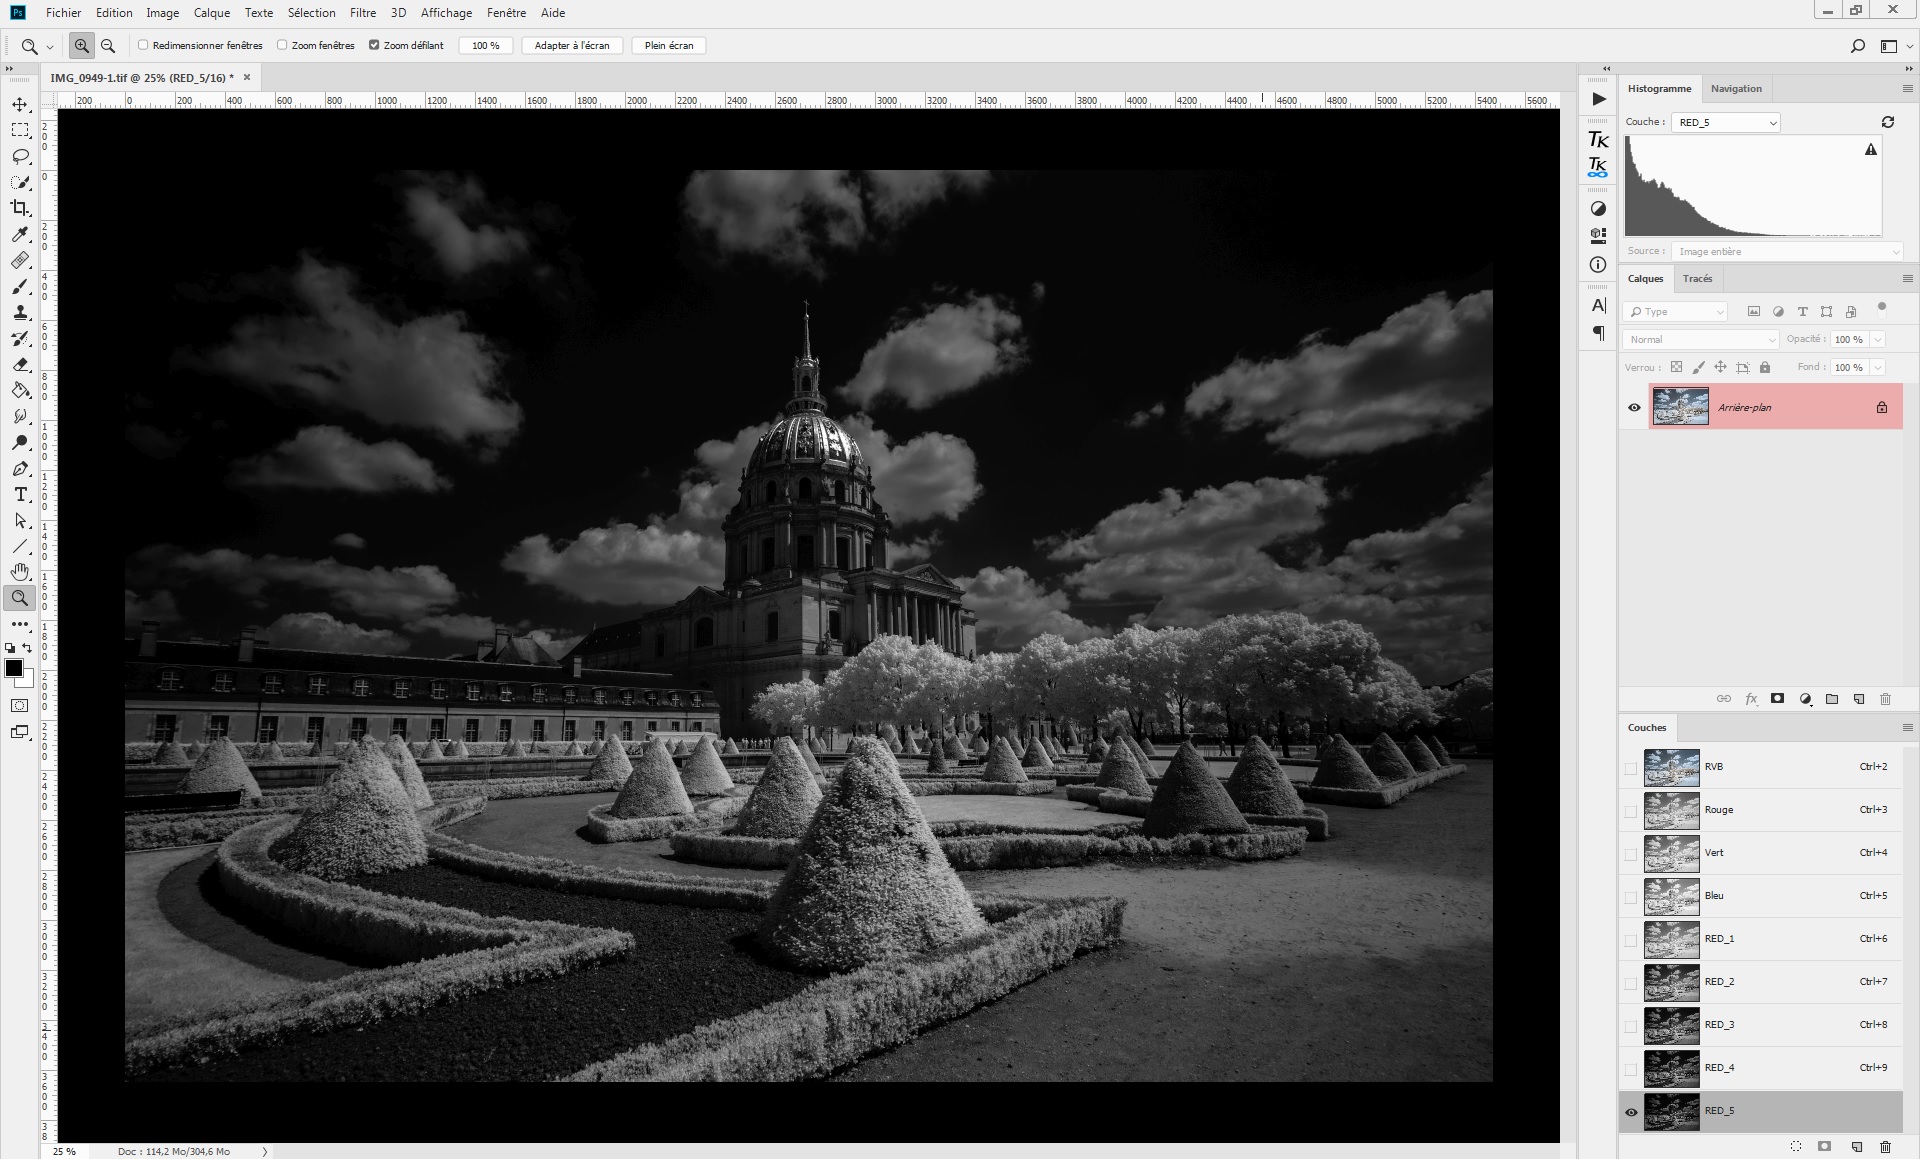
You can repeat the previous steps to create more selective channels, each time based on the previous channel. Usually, five channels (a main channel and four sub-channels) are enough to assure a good choice of masks. You can see the corresponding ones for the red channel:
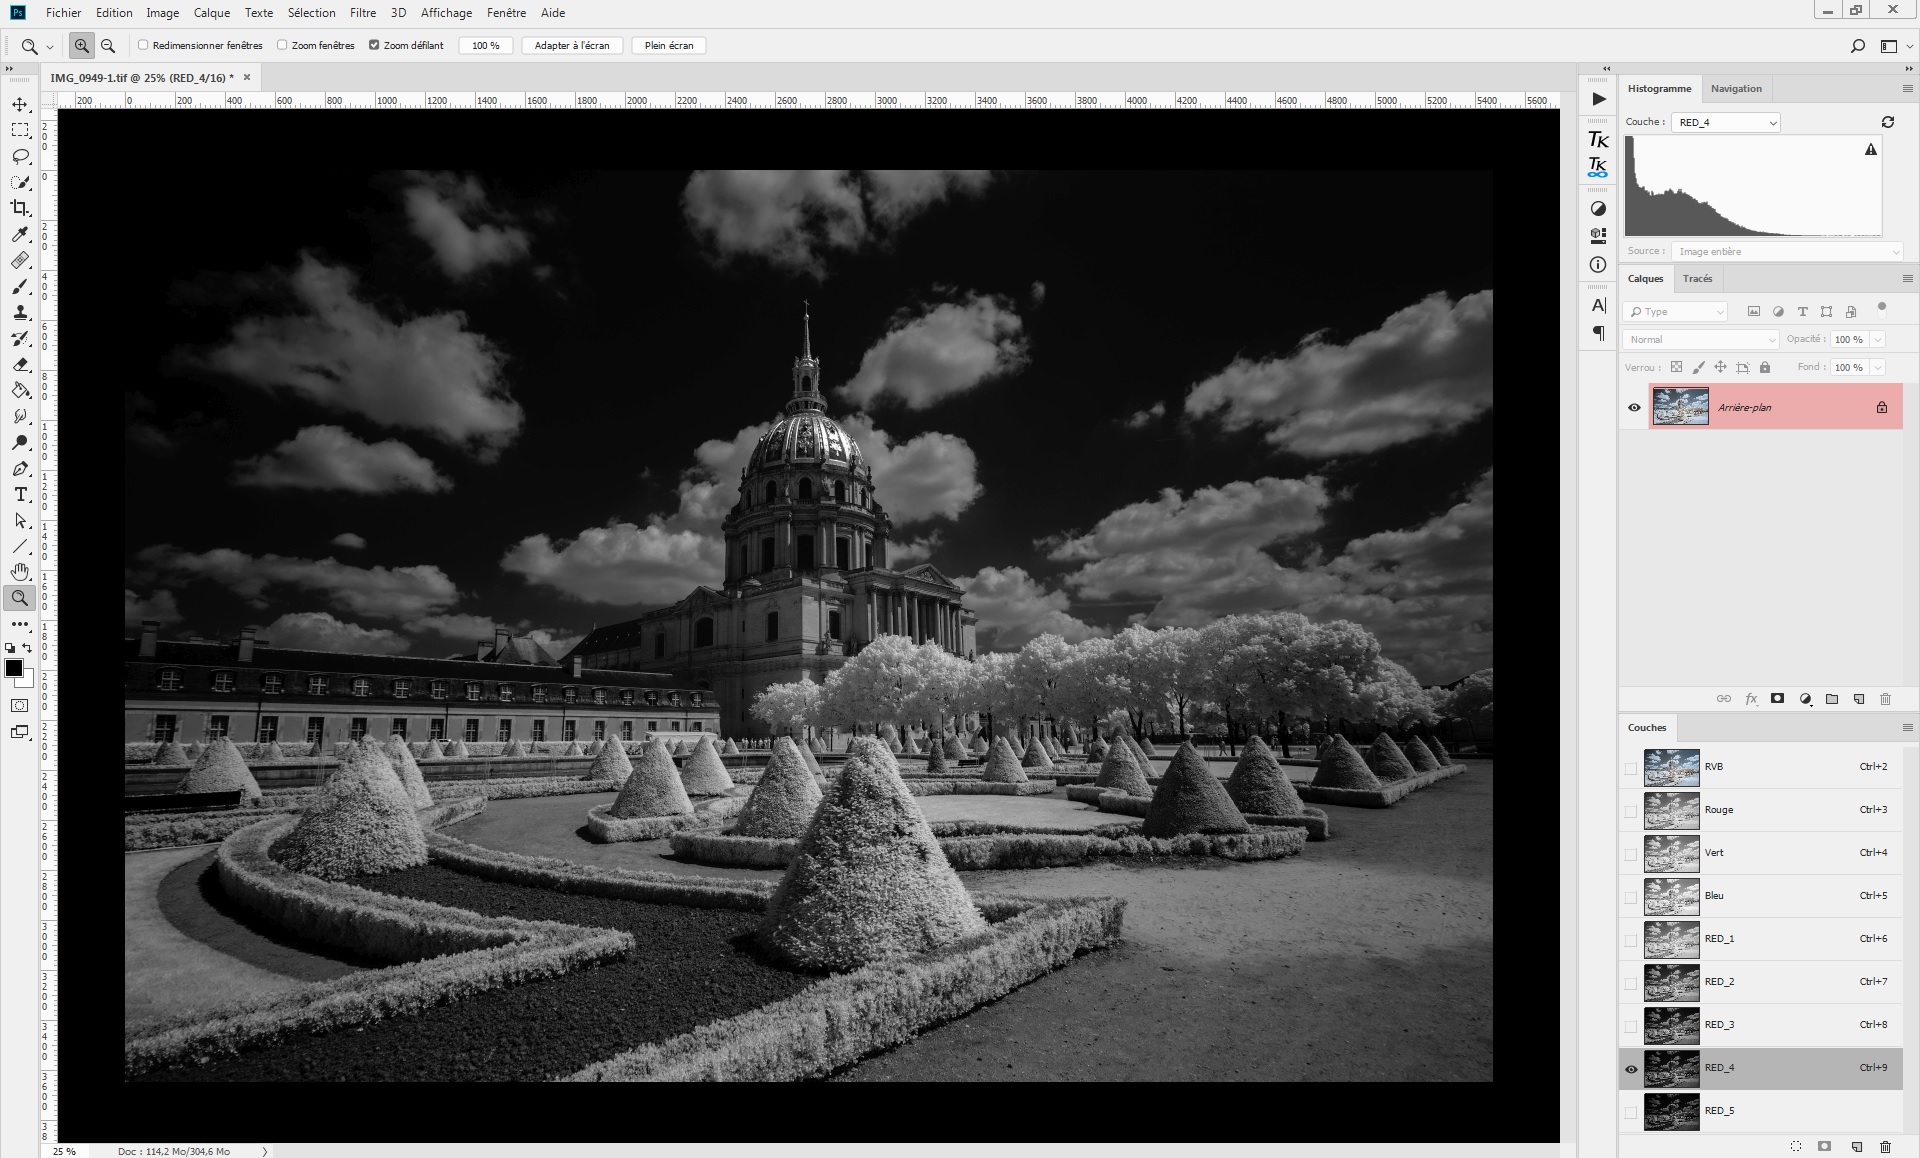
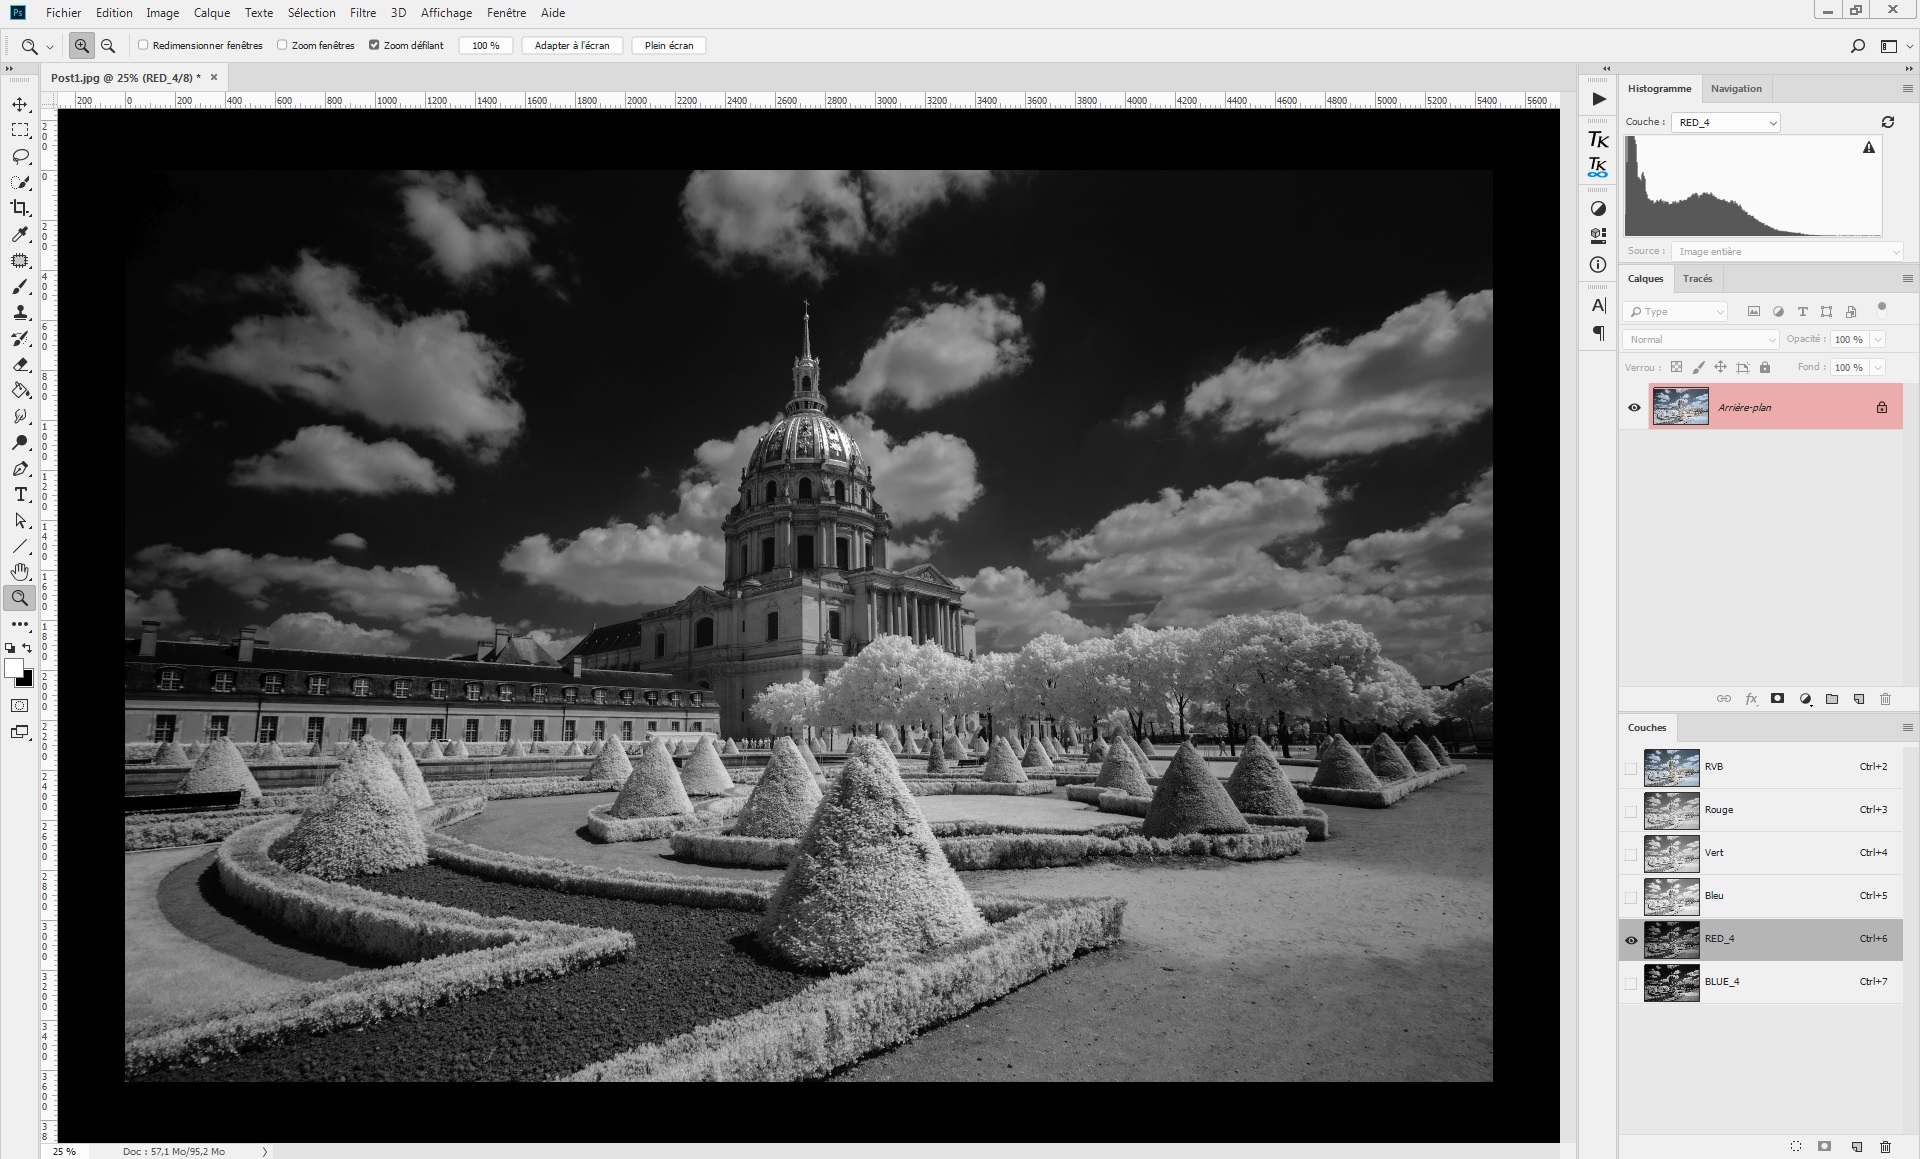
With these levels of selection, it is easier now to compare the differences between red and blue channels. The following masks are RED_4 and BLUE_4:
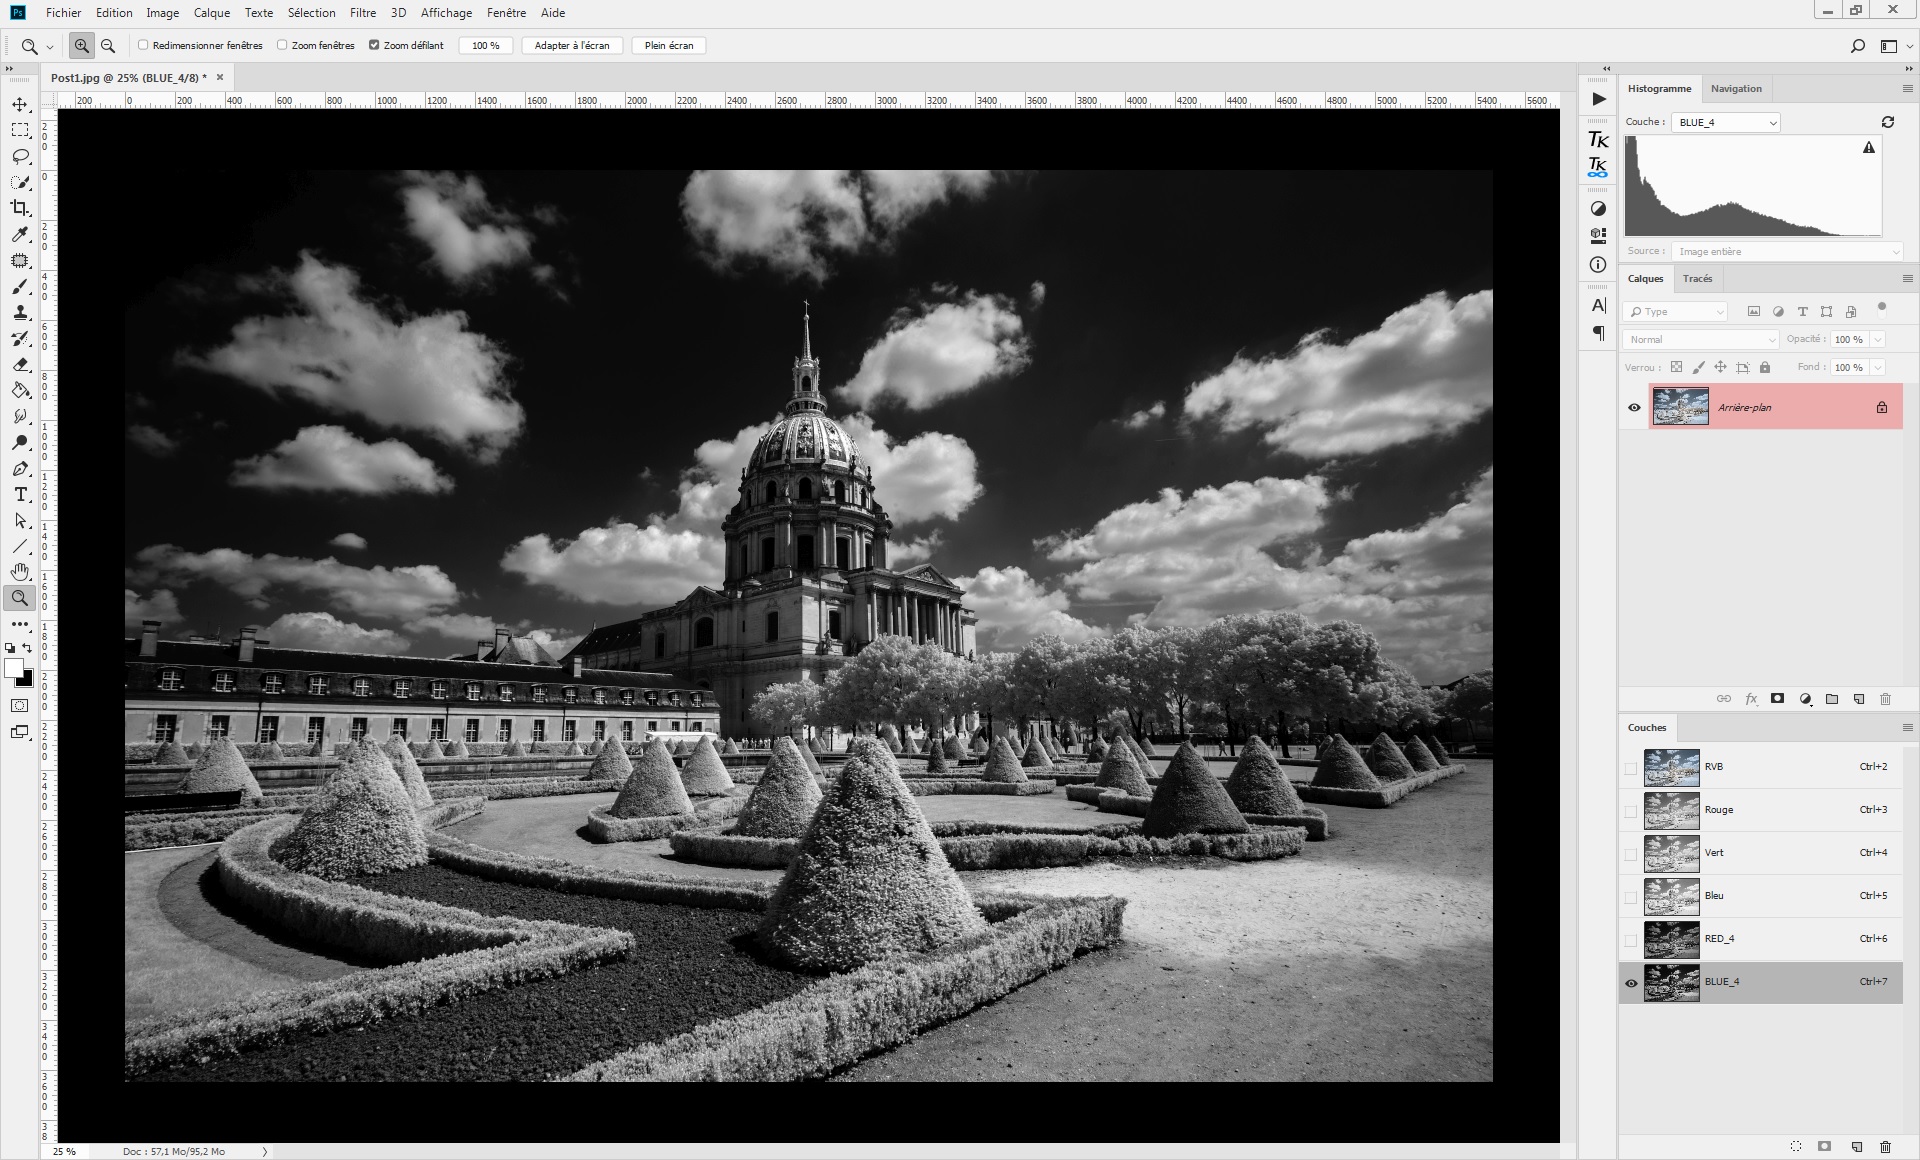
To sum up this first part, luminosity masks are generated by choosing the right RGB channel, depending on the type of elements you want to process. The selectivity of these masks can be adjusted easily by creating sub-channels.
In the next part, we will see how to combine these masks with function layers to process effectively each part of an infrared photography.
Note: in this part, the luminosity masks generated are bright masks. You can also generate dark masks using the same method, by only inverting the RGB channel you want to work with at the beginning. In the second part, we will only work with bright masks.
Part 2: Combination luminosity masks and function layers
In this part, we will see how to combine luminosity masks with function layers to improve your infrared pictures.
Combine luminosity masks with blend modes
Ones of the most powerful tools of Photoshop are the blend modes of layers. Two of these modes are very interesting to use with luminosity masks: screen and multiply.
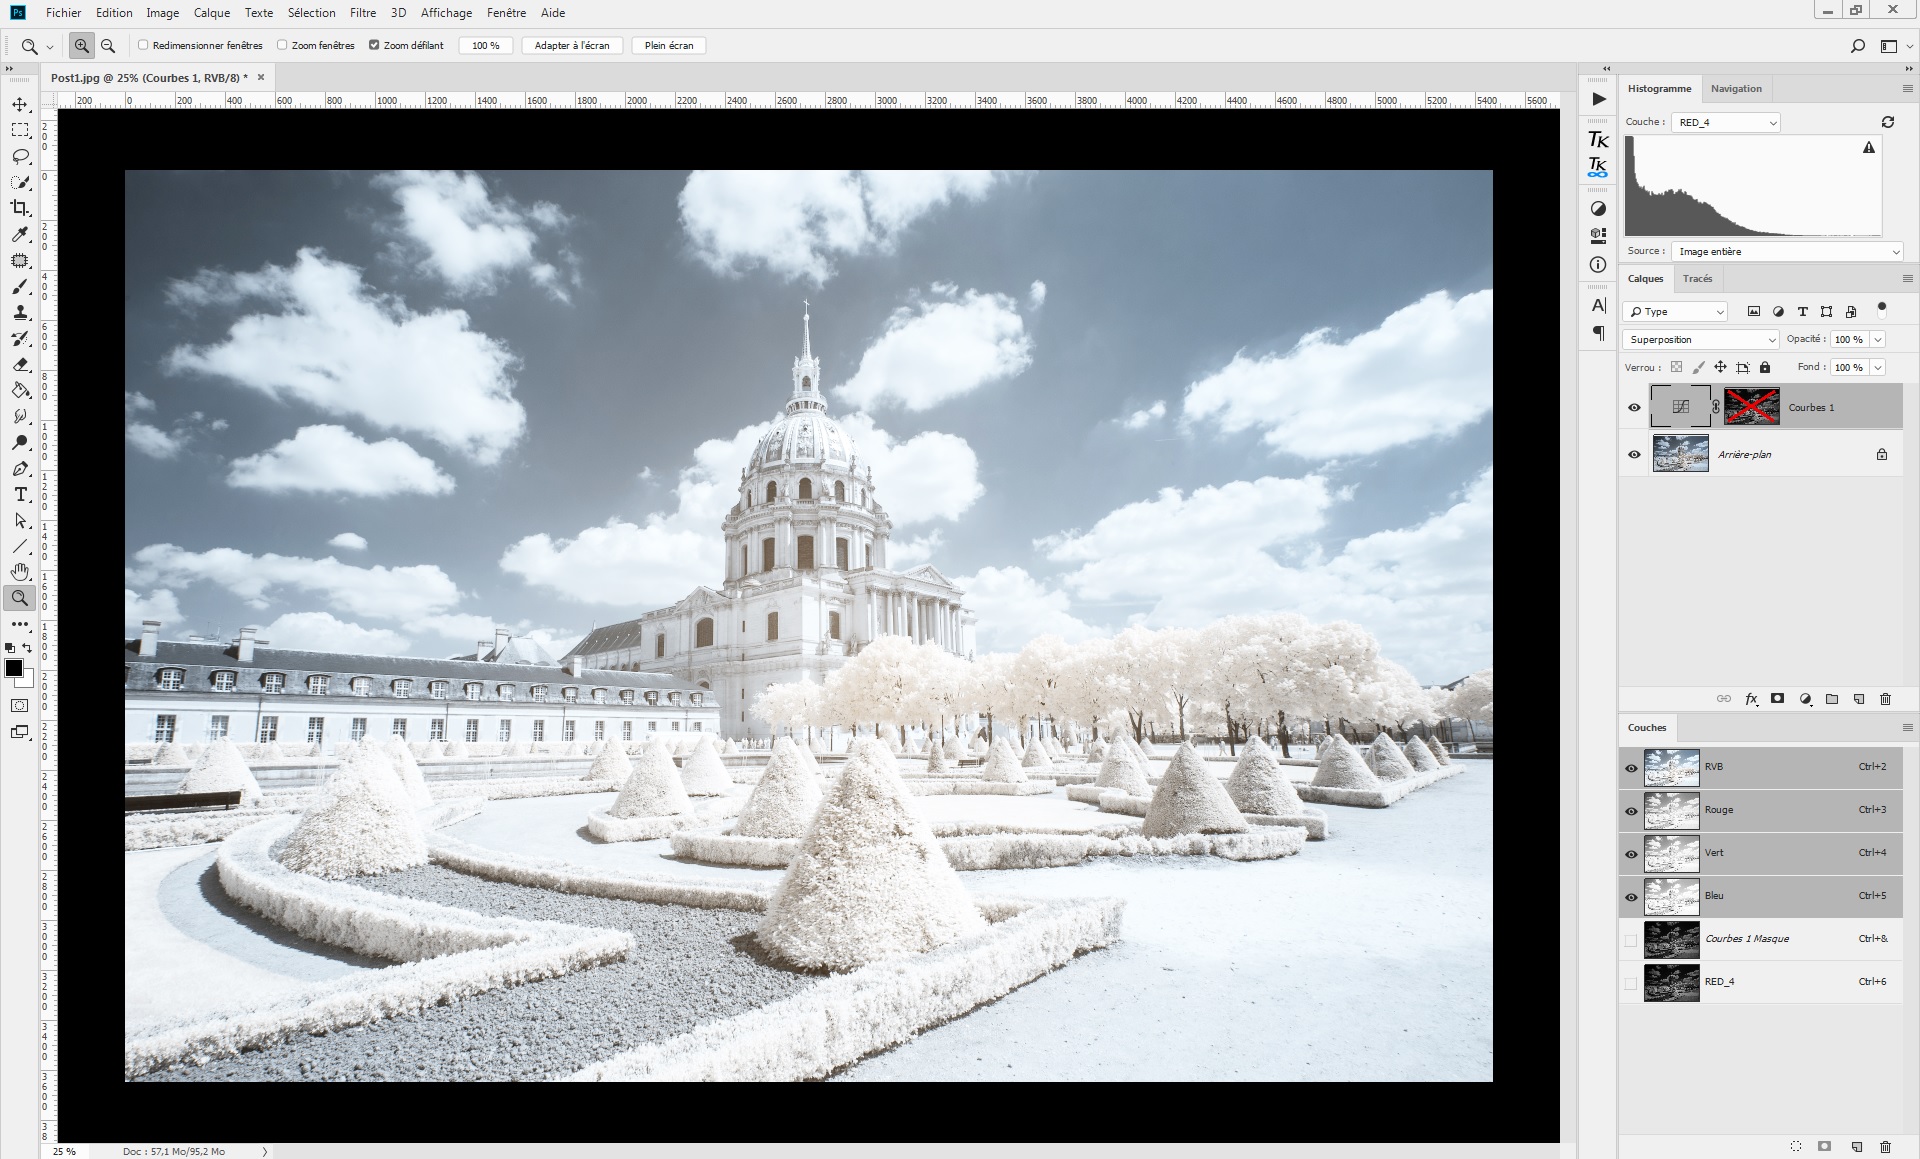
- “Screen mode”: this mode will lighten the 50% brightest part of your selection. A concrete use is to turn the foliage brighter. In the following picture, a RED_4 mask is generated with a curve layer (1).
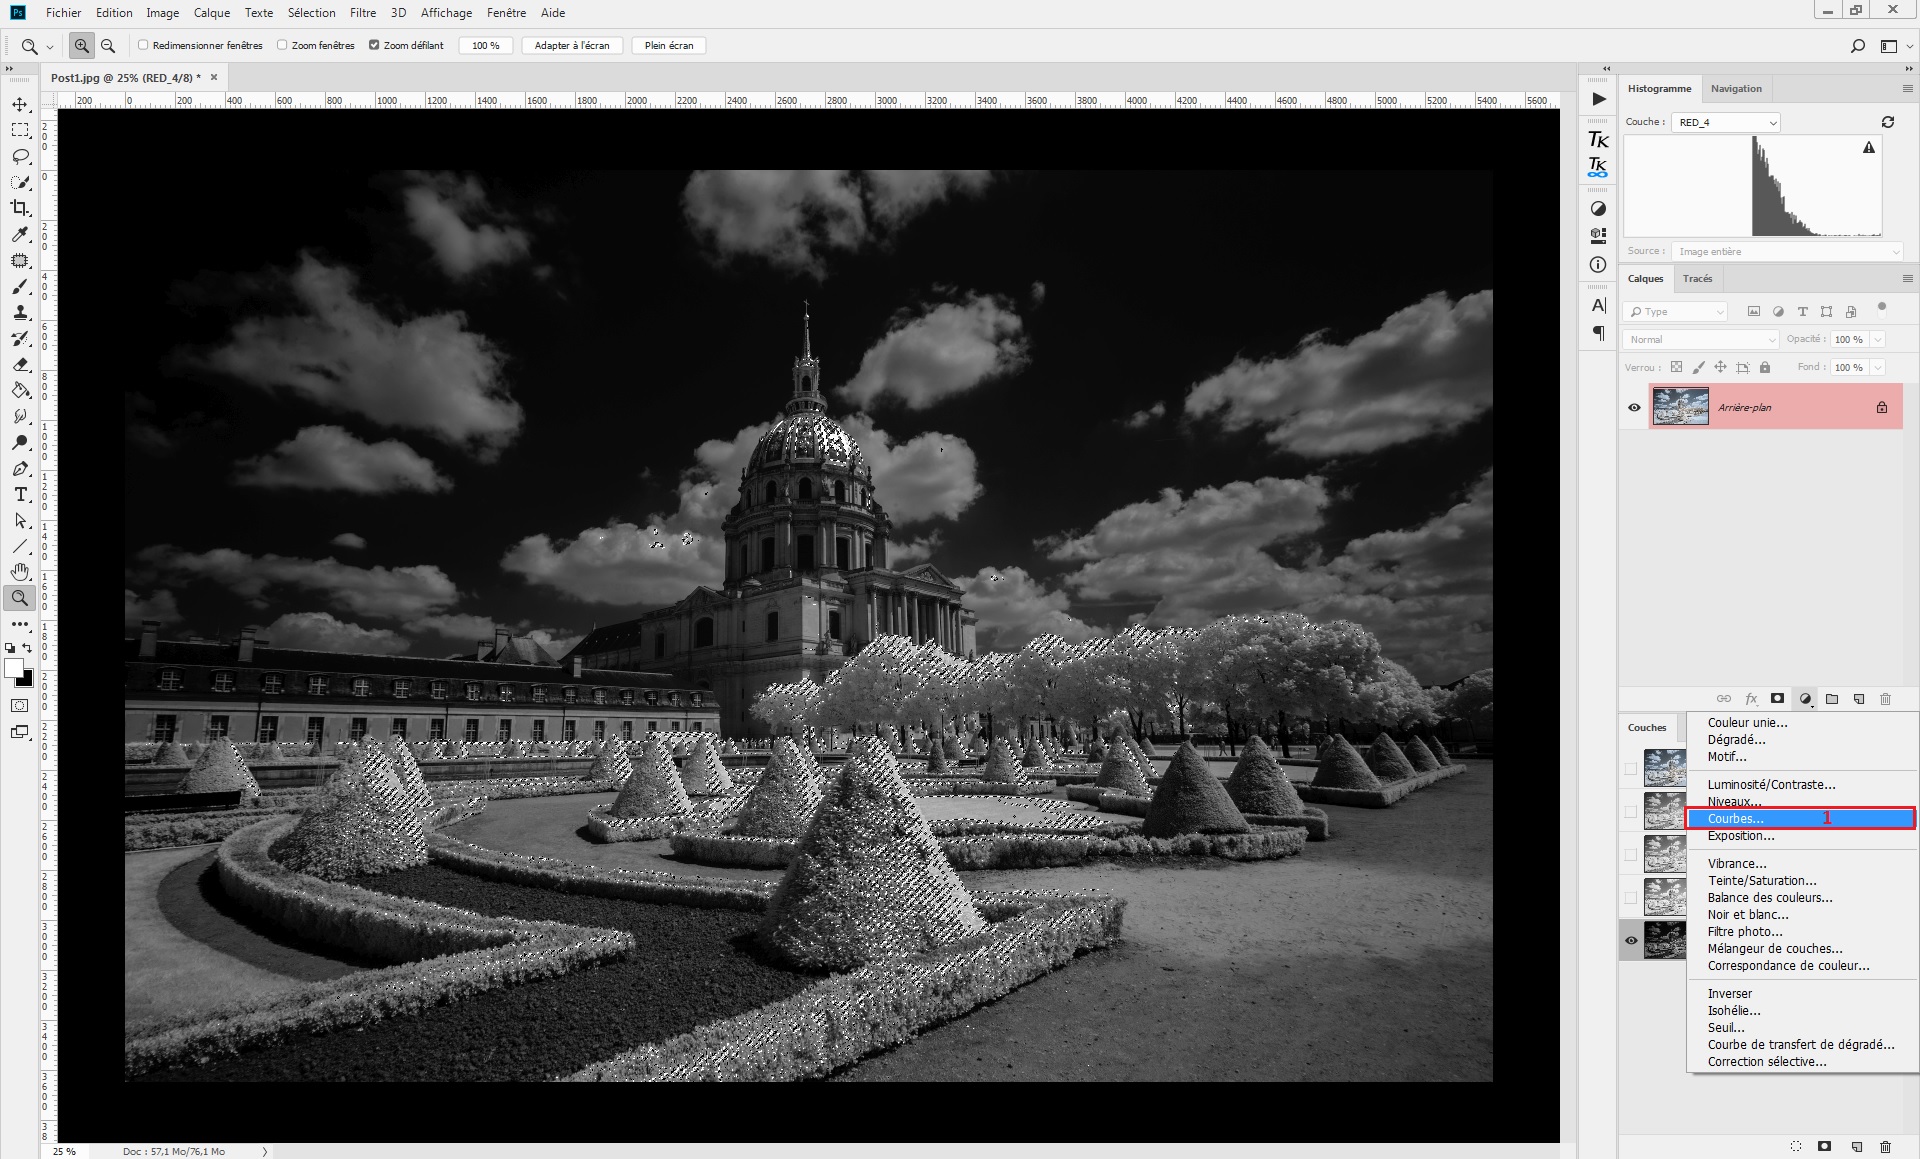
This mask allows selecting a good part of the foliage without impacting the blue sky. Then the blend mode of the curve layer is turned to “screen” (2).
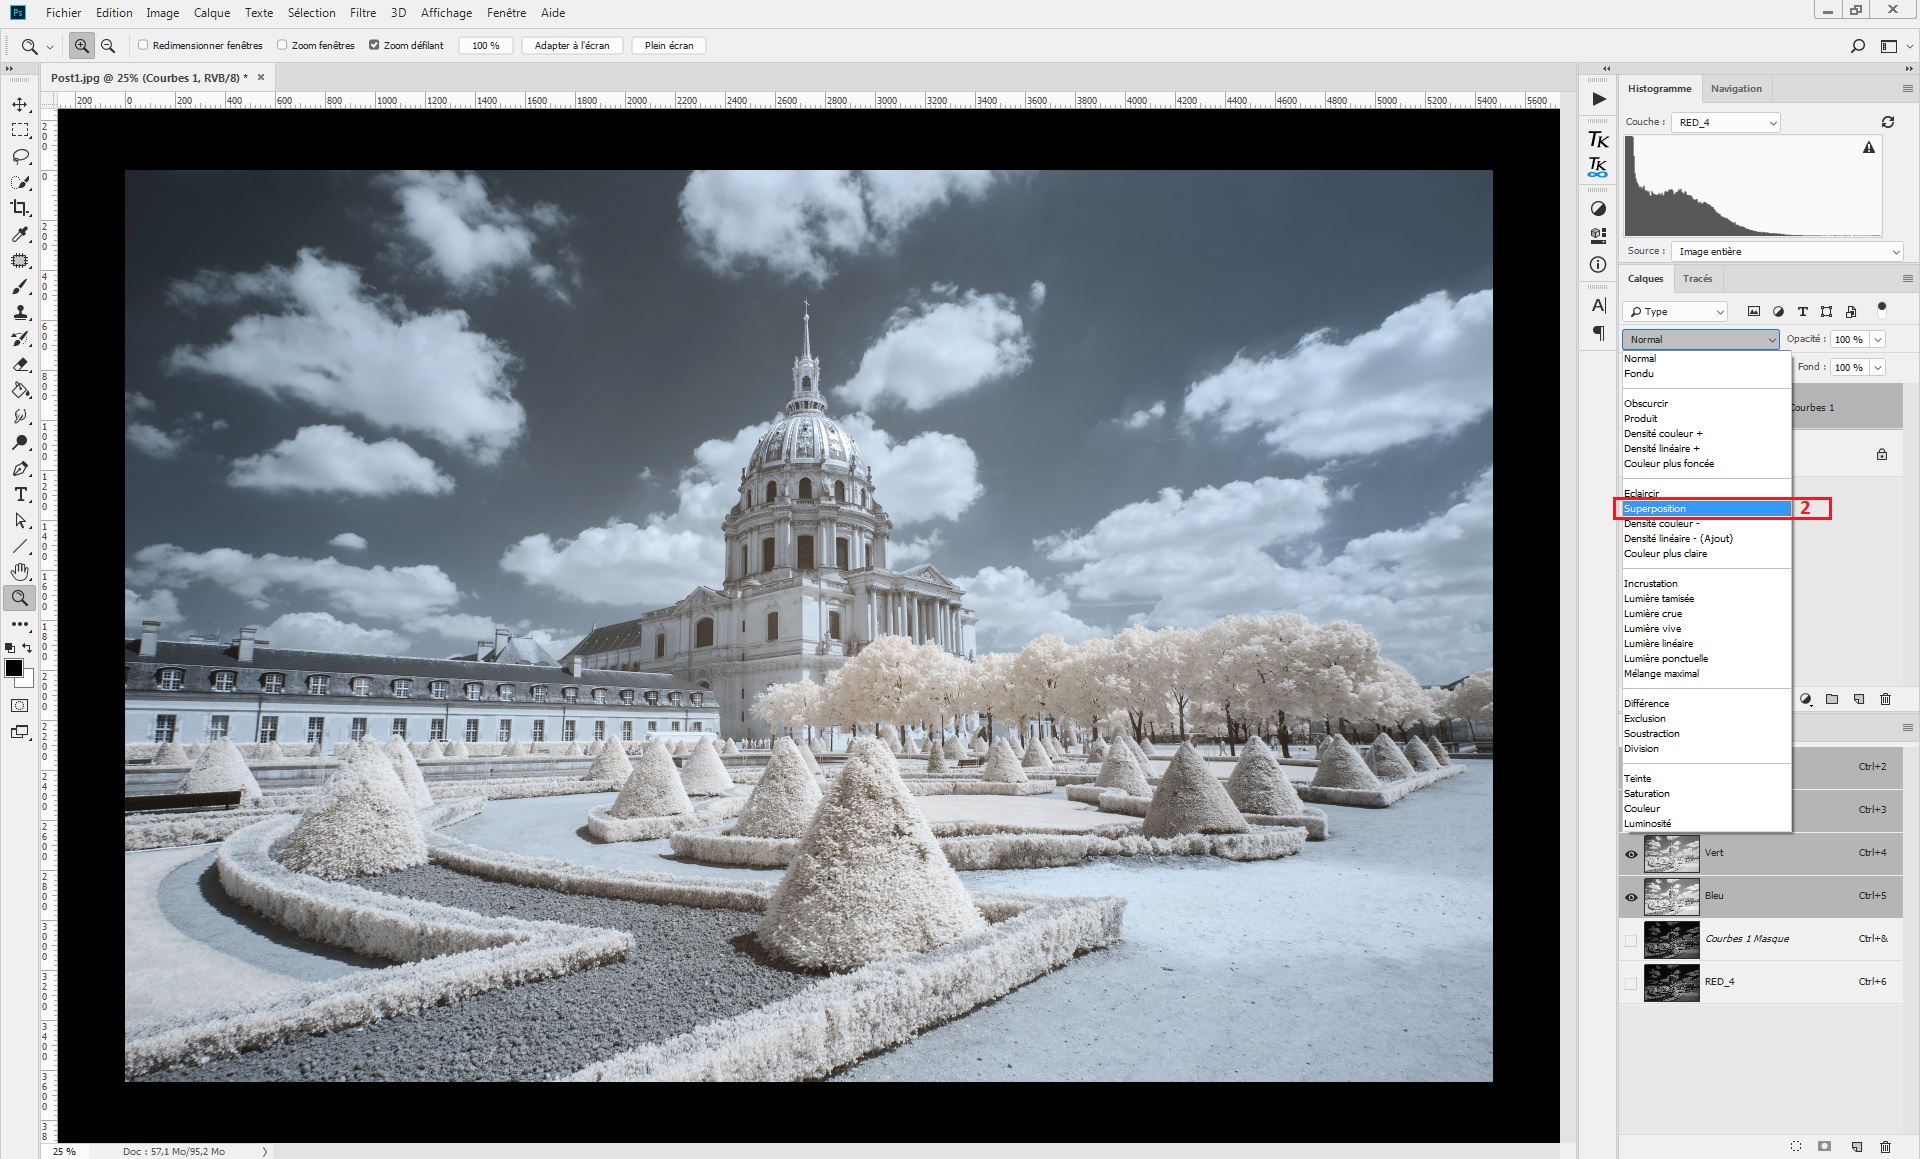
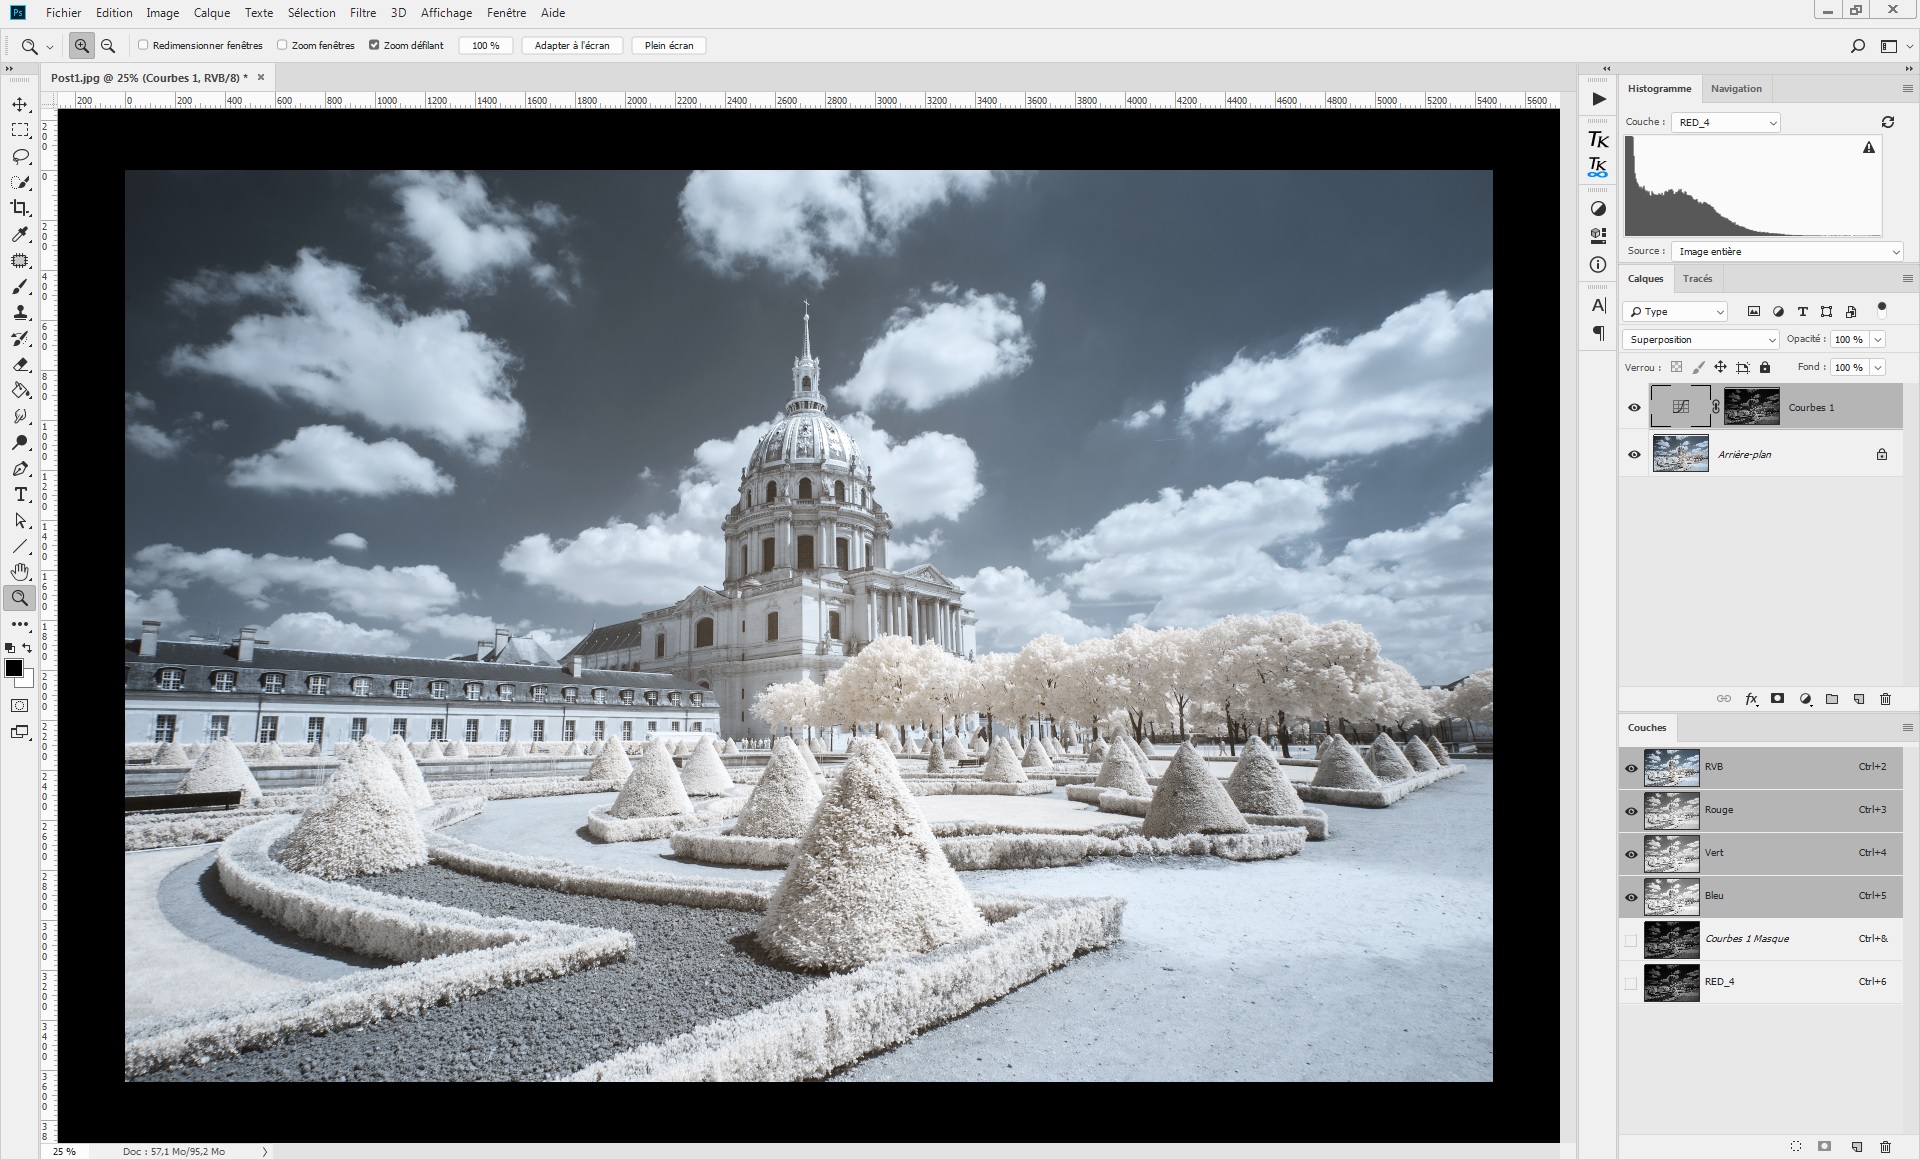
The result is a picture with brighter foliage, with no impact on the dark sky.
As a comparison, here is the same operation without luminosity mask:
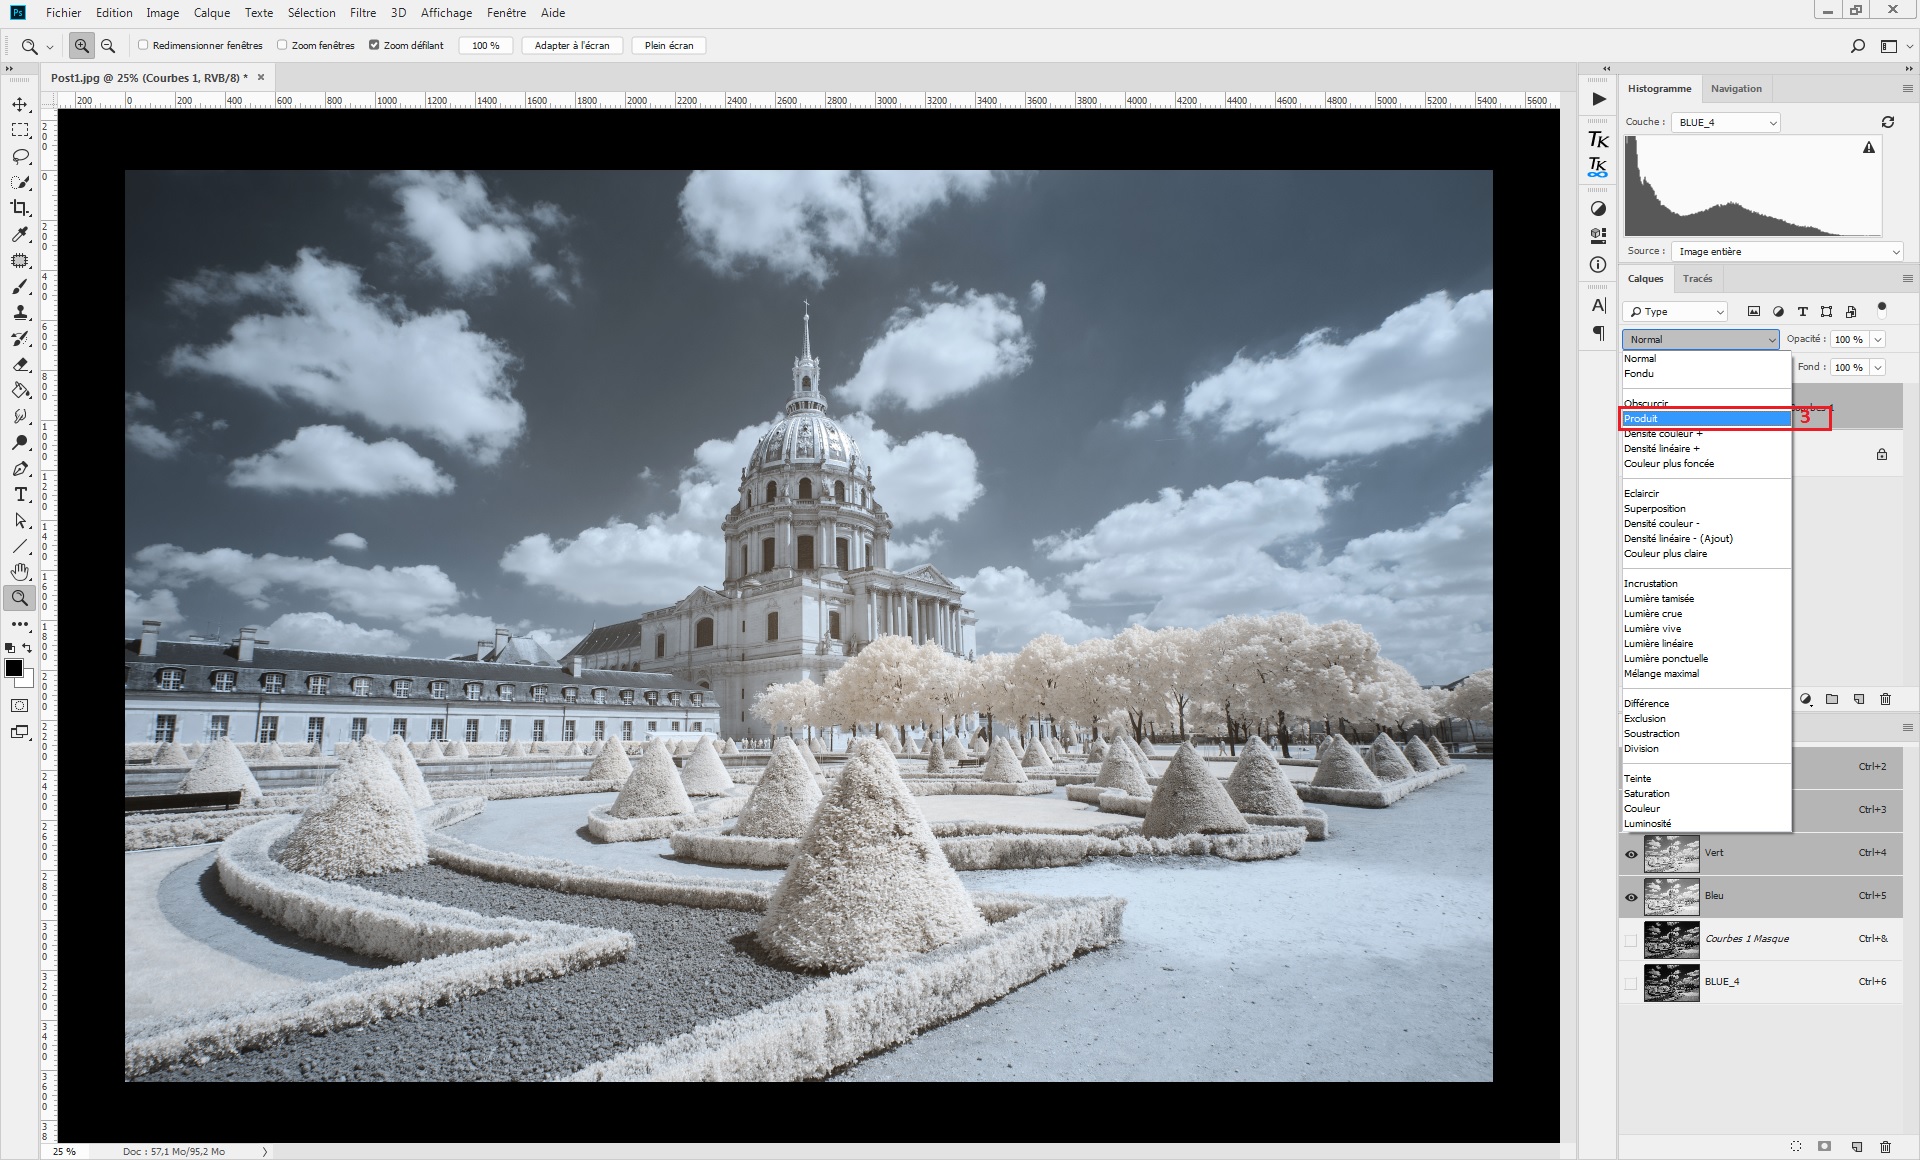
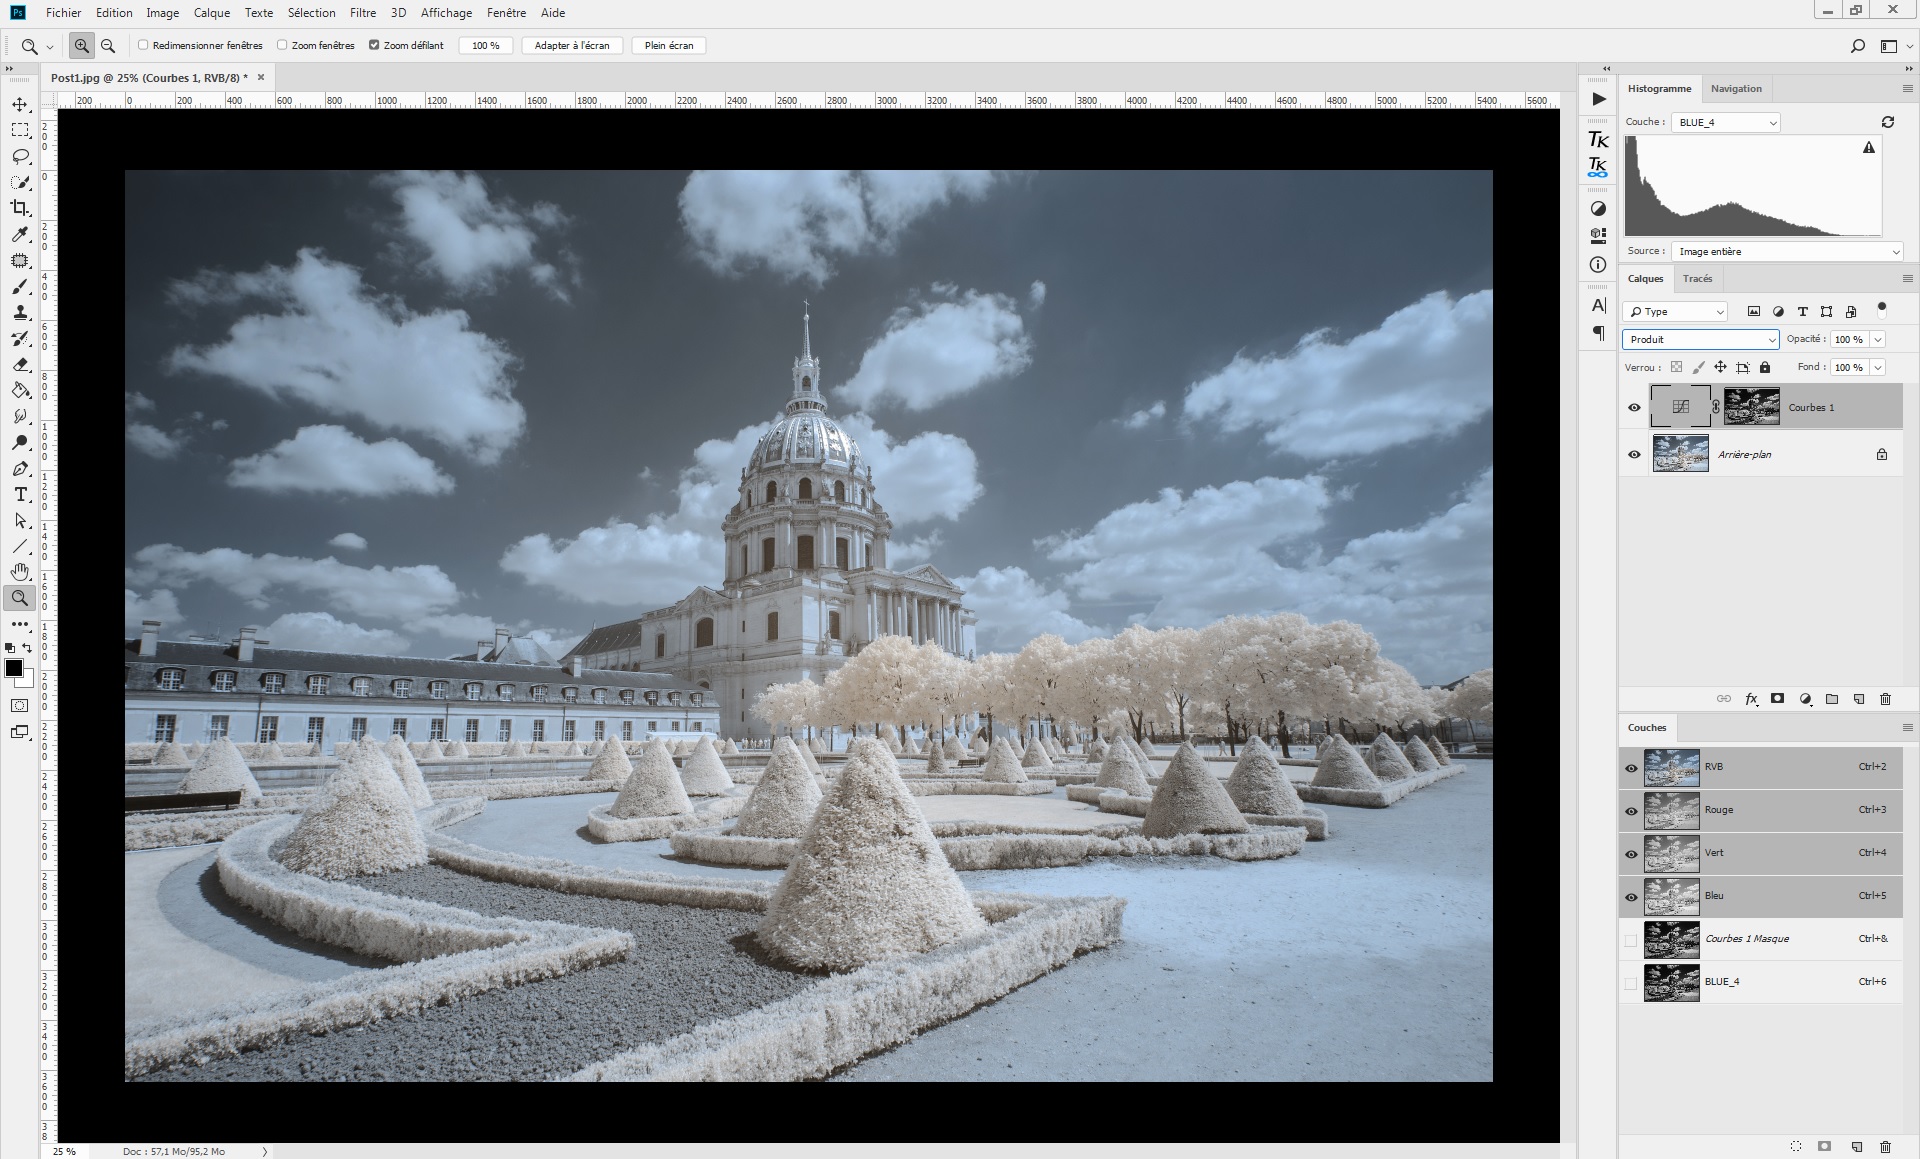
- “Multiply mode”: this mode will darken the 50% darkest part of your selection. A concrete use is to turn the clouds darker. In the following picture, a BLUE_4 mask is generated with a curve layer. Then the blend mode of the curve layer is turned to “multiply” (3).
The result is a picture with darker clouds, ground and walls, with less impact of the foliage:
As a comparison, here is the same operation without luminosity mask:
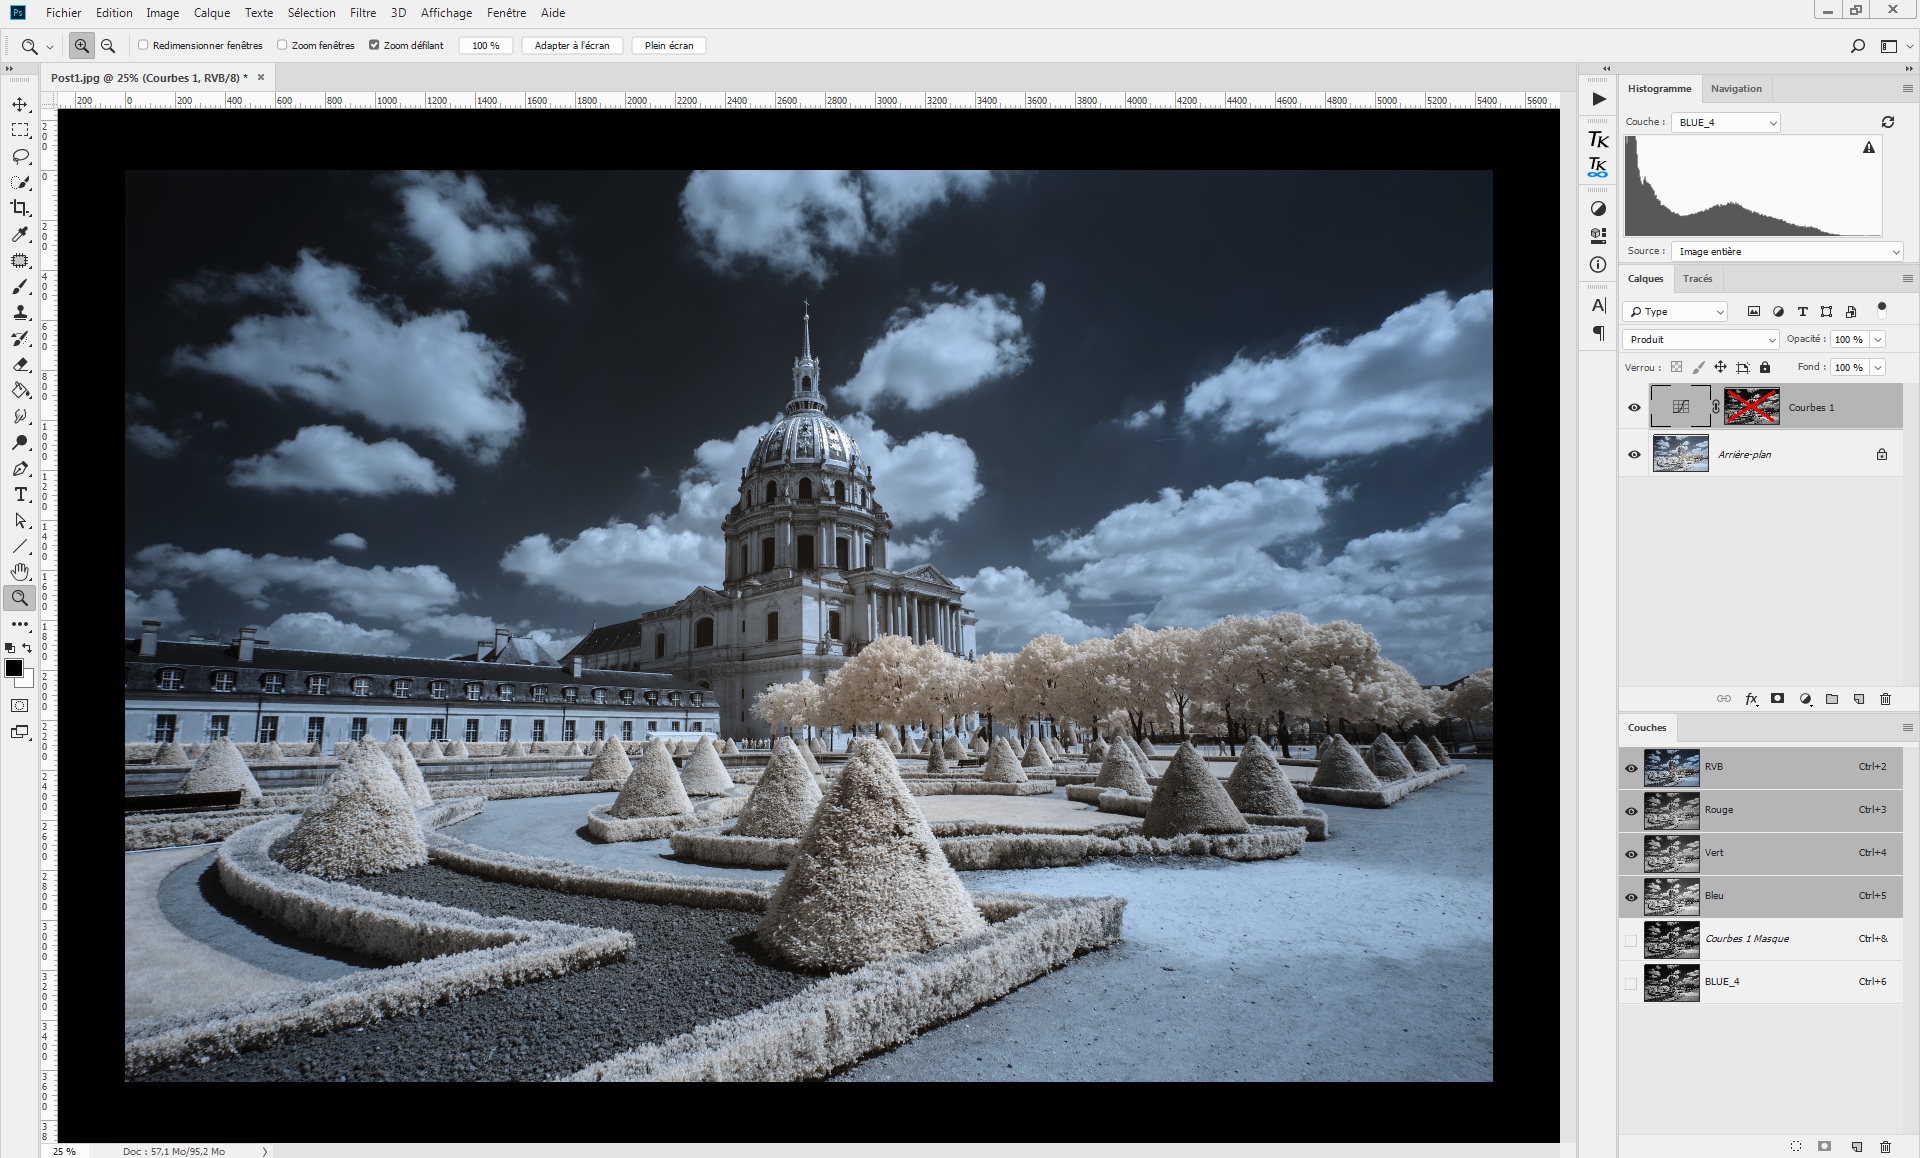
Finally, you can combine the two previous steps to obtain the following result:

Combine luminosity masks with curve layer
Curve layer is a very useful function of Photoshop. It is used here to add shades in the sky and foliage. To illustrate this ability, let’s start with the result of the previous part.
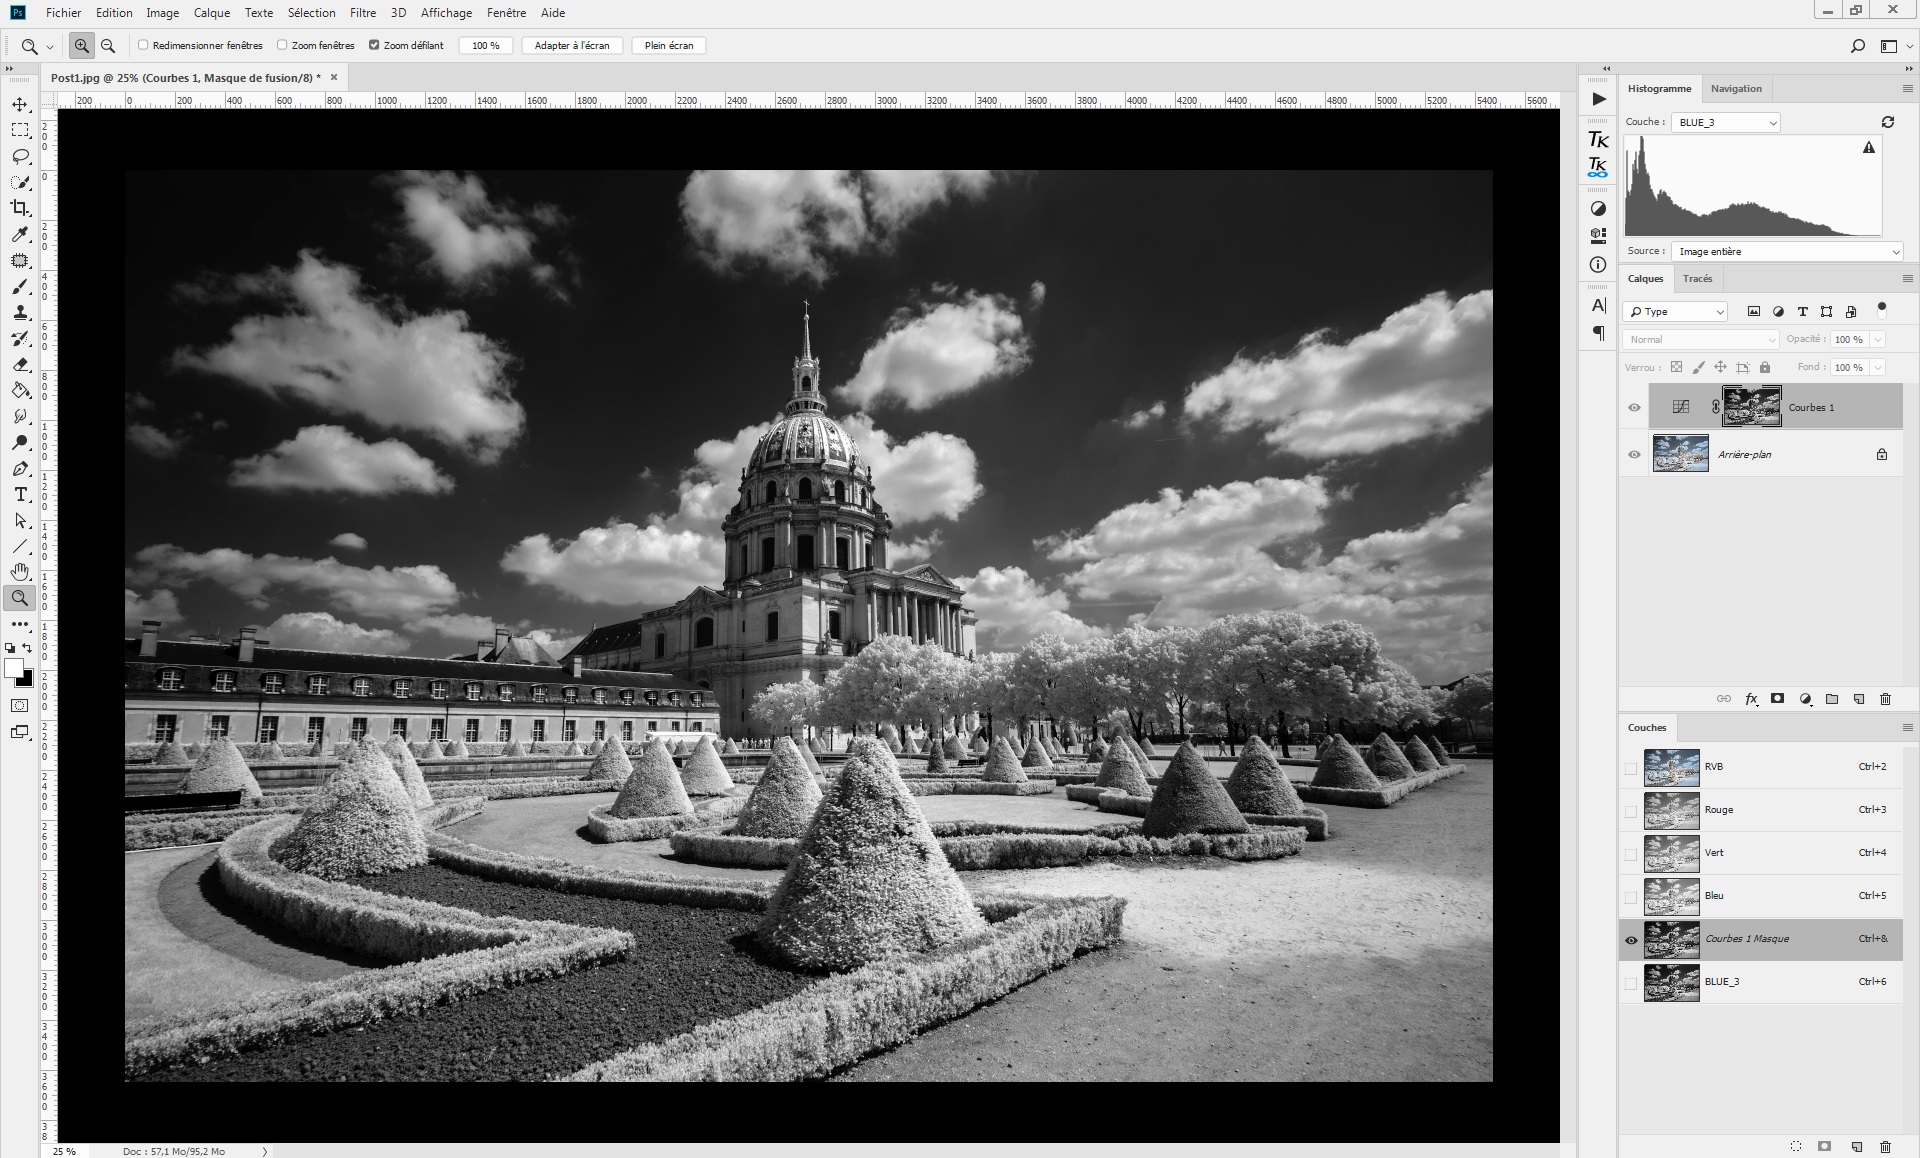
First, we will add more contrast and shade in the clouds. The BLUE_3 mask is used here, combined with a curve layer:
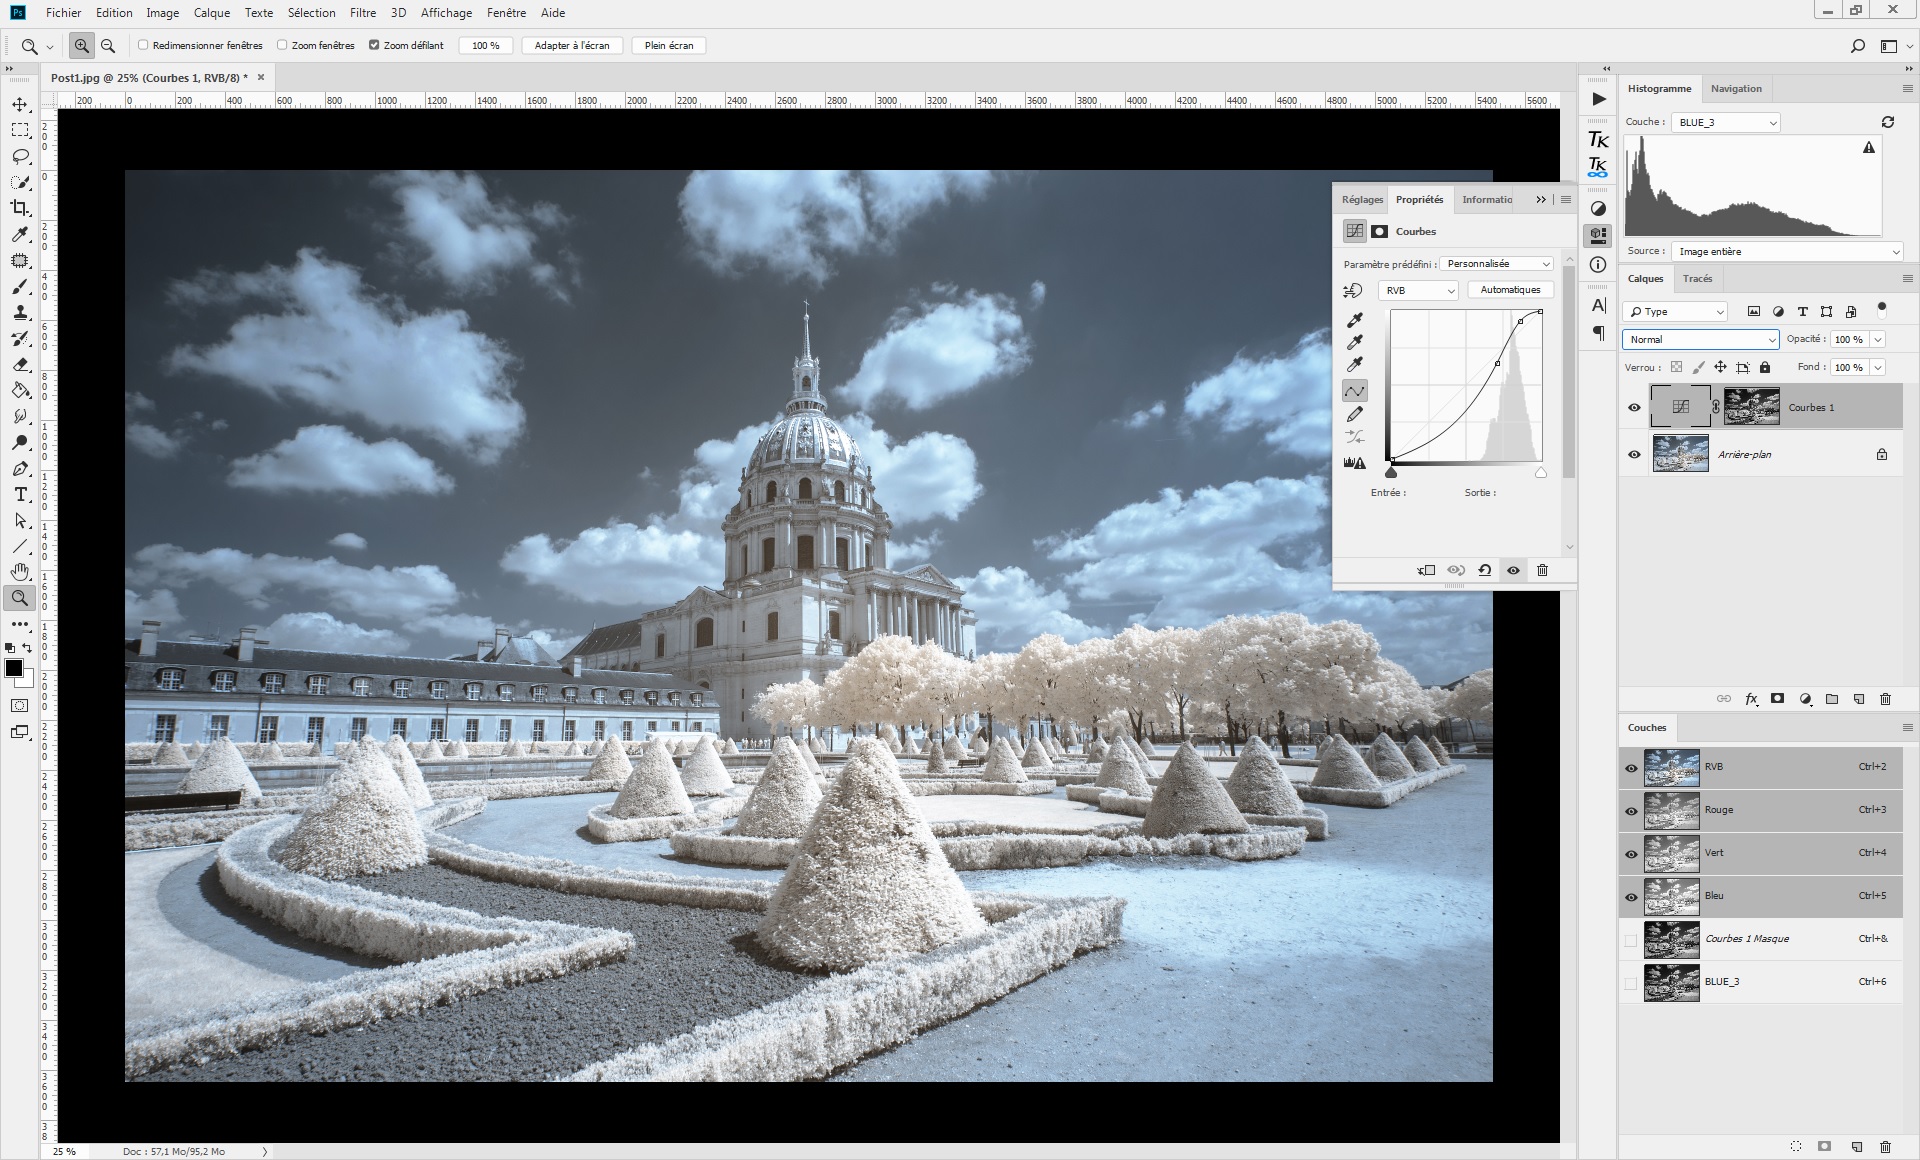
In the curve adjustment, create an “S” curve to accentuate the contrast of the clouds:
To avoid a change of color, you can set the blend mode of the curve layer to “luminosity” mode (4):

This way, only luminosity will be affected by the curve, not the color:

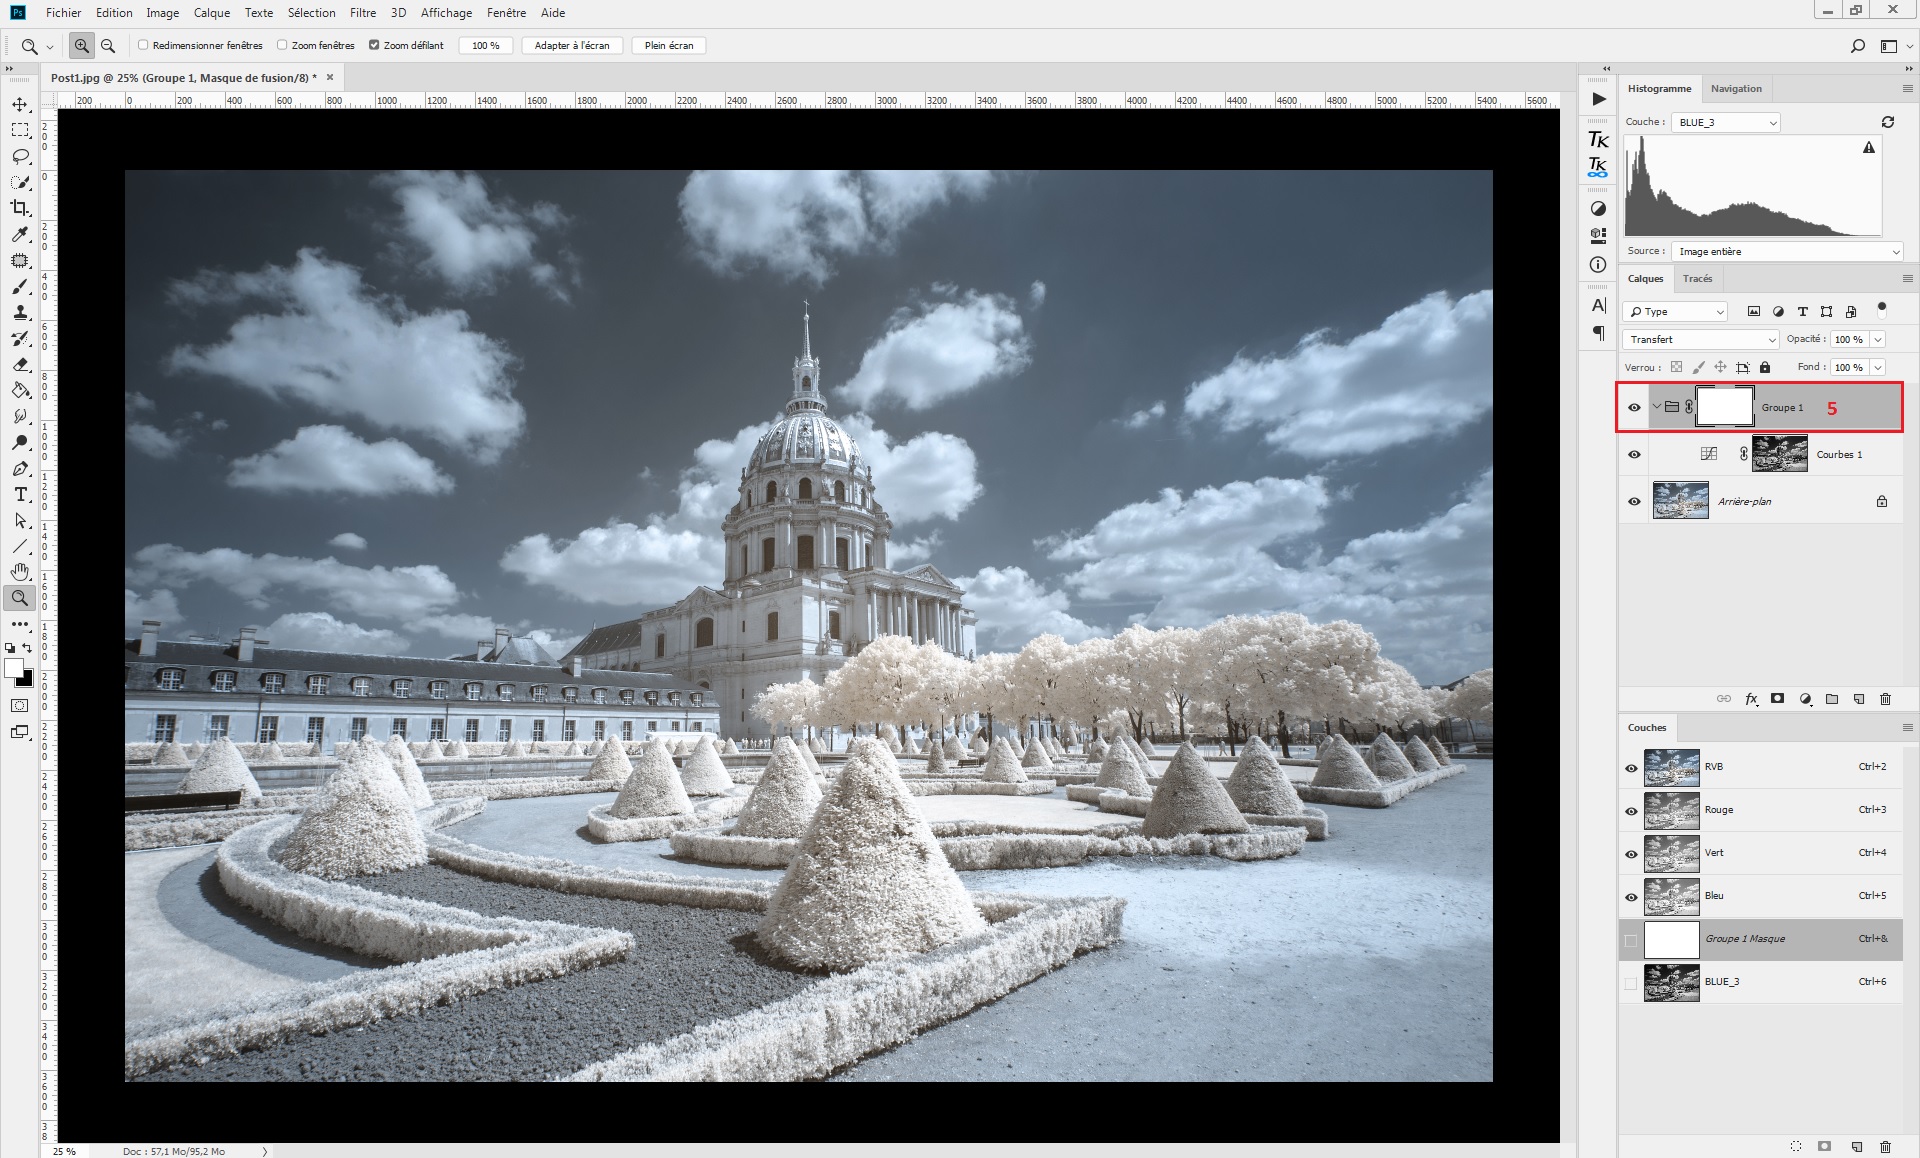
At this step, the impact of the luminosity mask is also affecting the foliage. As we are working with layer masks, it is possible to paint on these masks. In this example, the curve is placed on a folder with an attached neutral mask, and the clouds are painted in this new layer (5).
As we are painting on a luminosity mask with great selectivity, this additional mask has not to be over-precise.

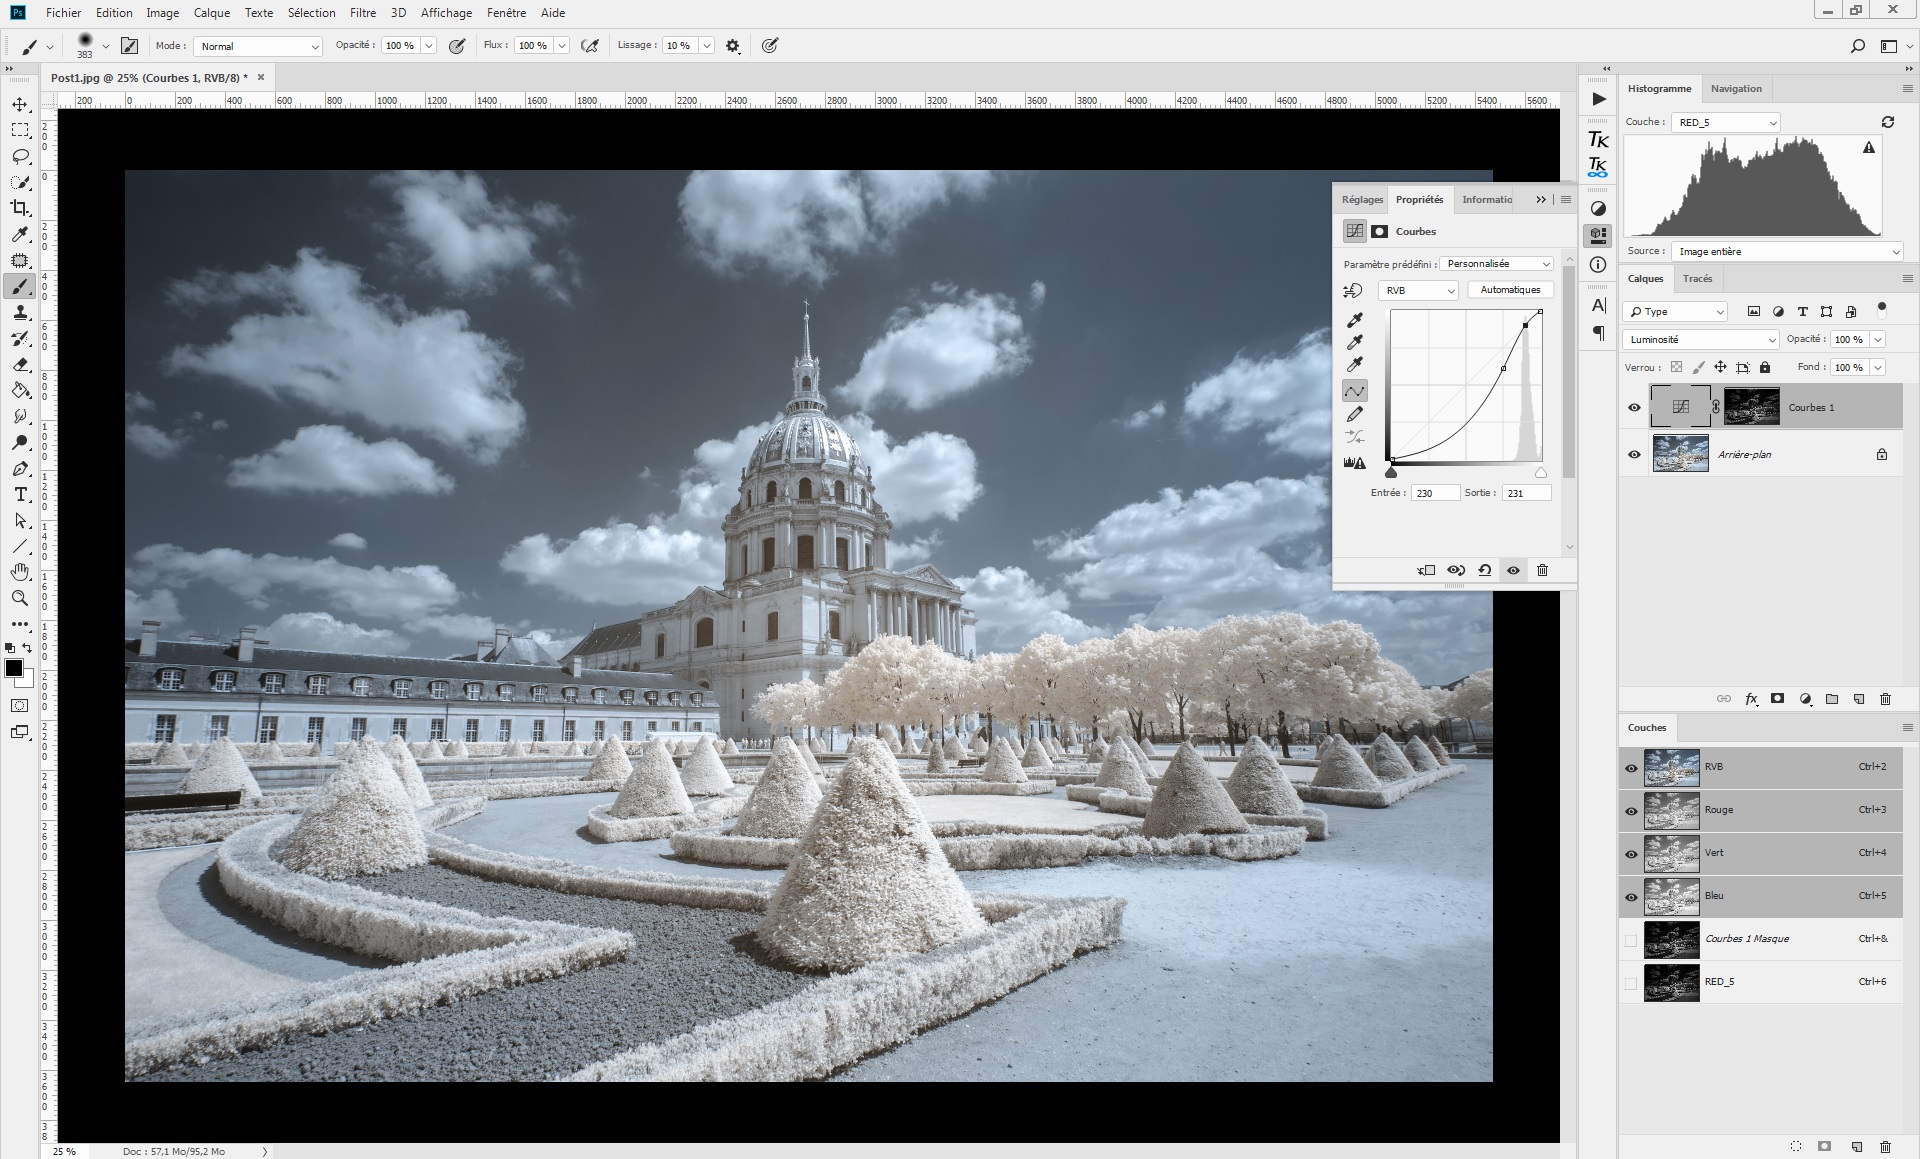
Once the sky is processed, we can add more bright shades in the foliage. To achieve this effect, a “RED_5” mask is applied to a curve layer (6), still in “luminosity” mode:
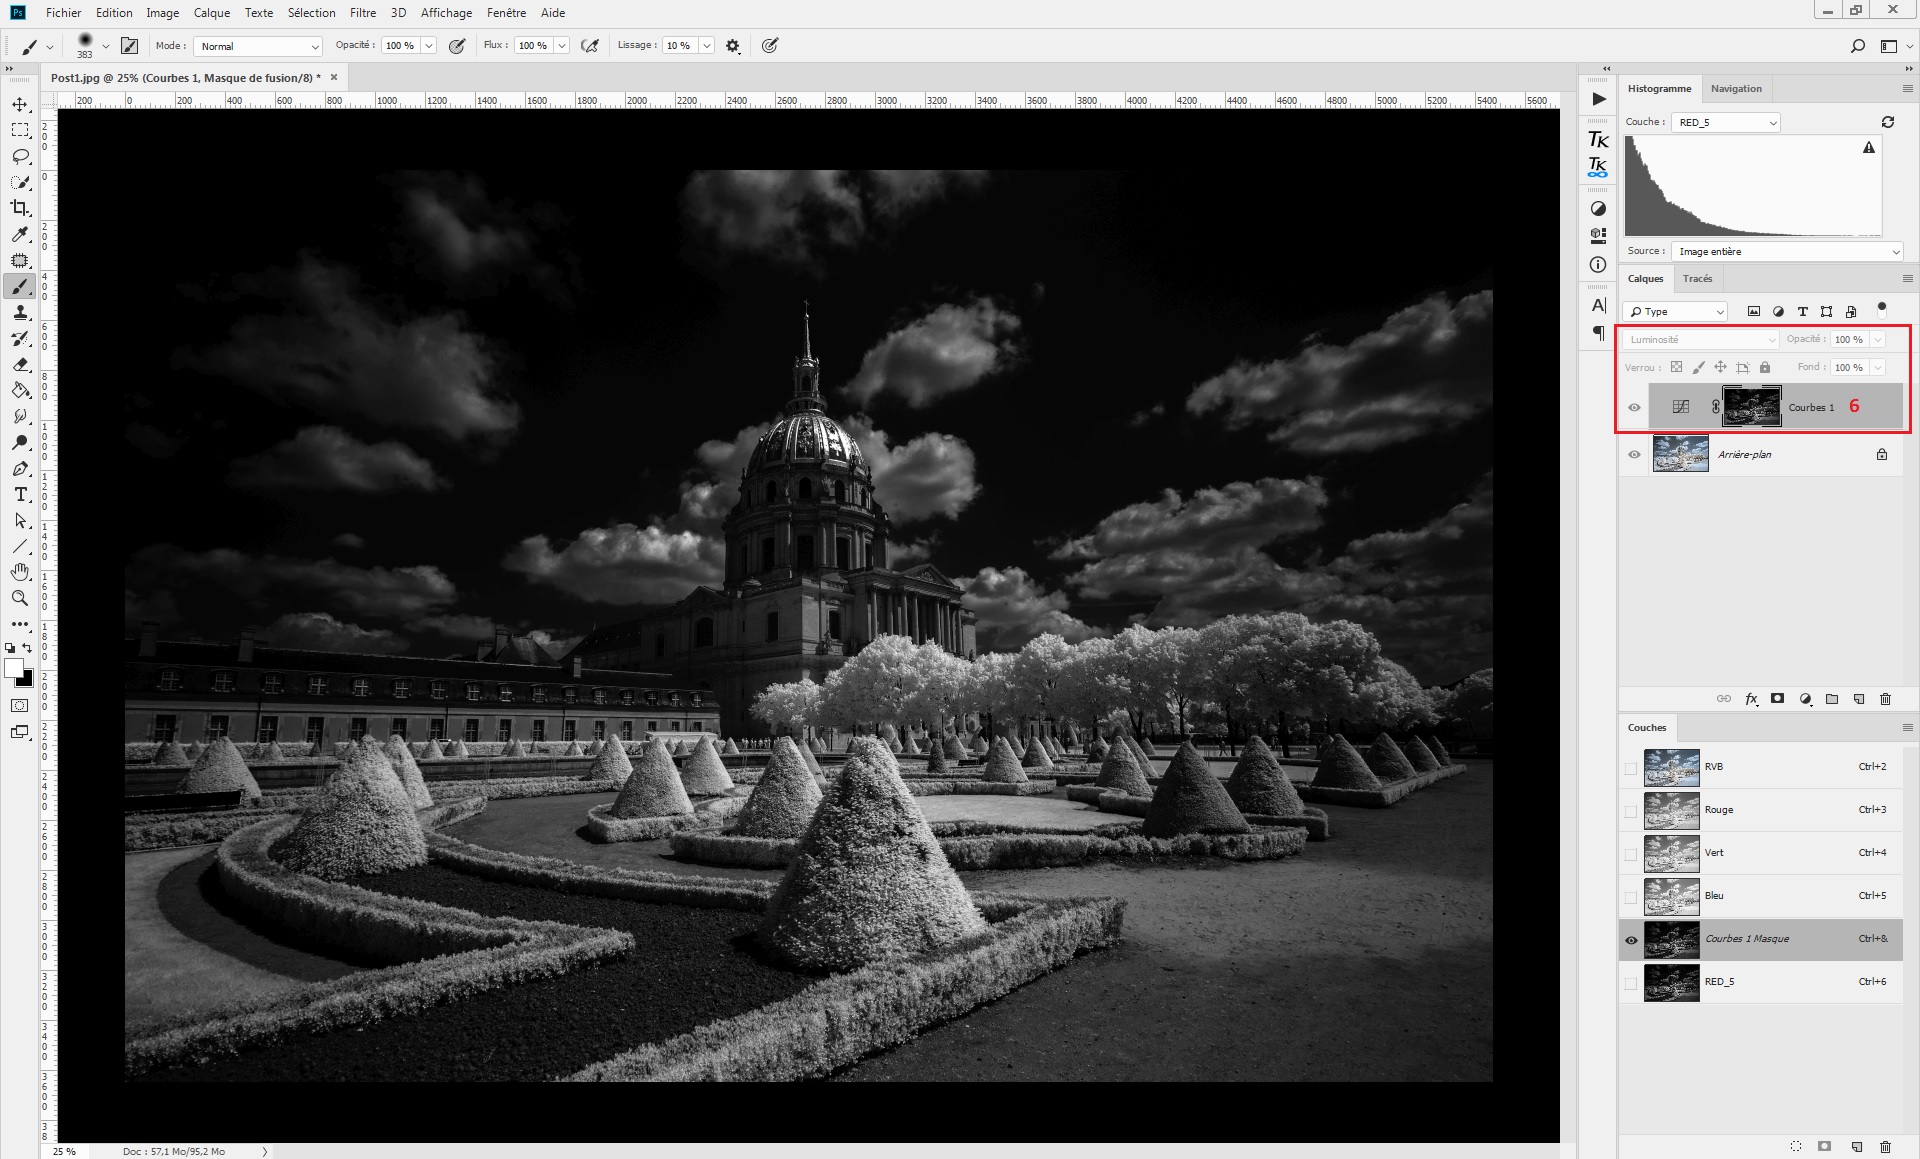
As you can see, the mask is very selective on the brightest parts of the picture. The curve is adjusted here to reduce the luminosity of the first quarter of the histogram and to keep the brightest part at its initial level. This way, the brightest part of the histogram will be widened without impacting the extreme luminosity level.
At the end of this step, the image is more contrasted selectively thanks to the combination of luminosity masks and curve layer.
Combine luminosity masks with selective color layer
The selective color layer is the best tool to adjust precisely the color saturation of the picture. Combined with luminosity masks, it can desaturate the clouds and ground without impacting the blue sky, and enhance the saturation of the foliage.
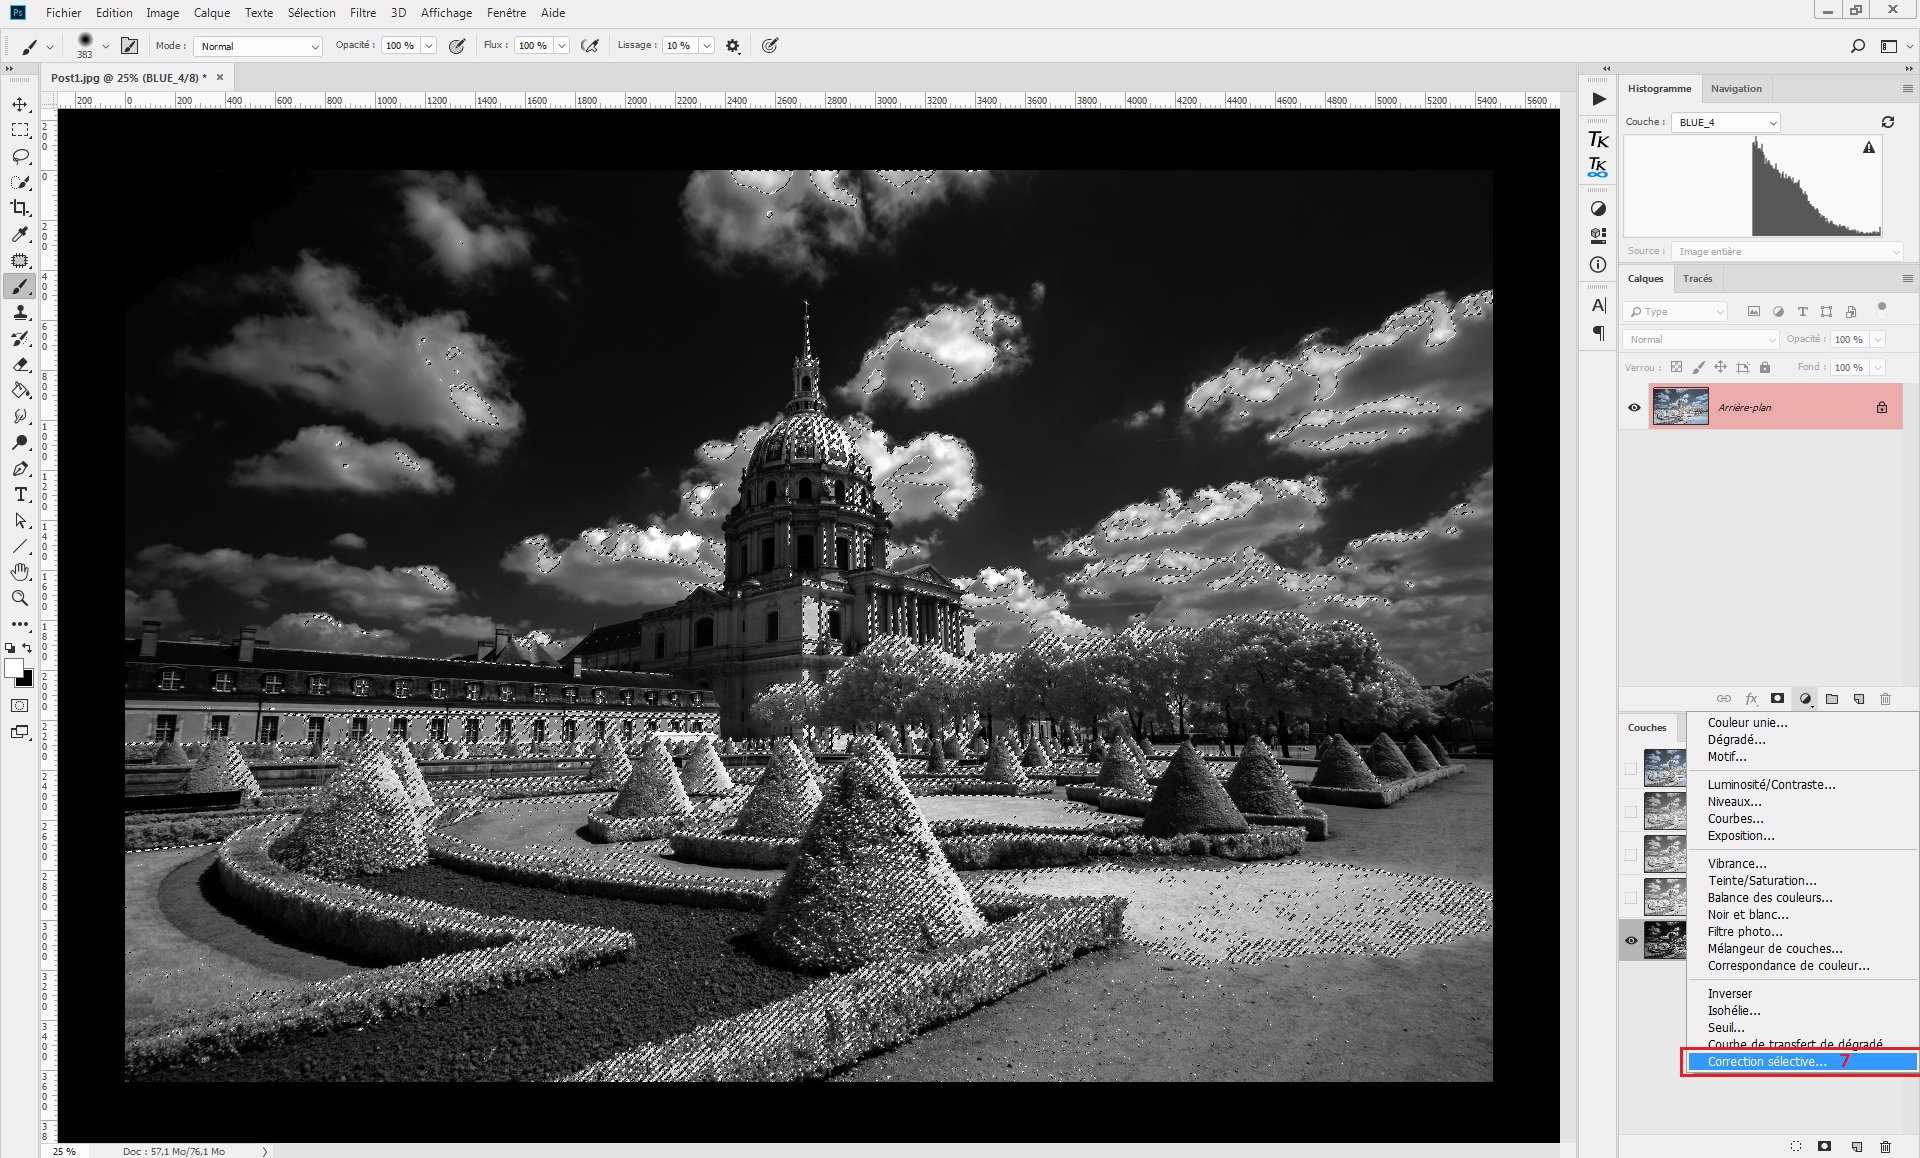
- Blue desaturation of the clouds and ground: one of the typical issues encountered with 720nm filters is the blue color pollution of the clouds and ground. To deal with this problem, a BLUE_4 mask is generated and applied to a selective color layer (7):
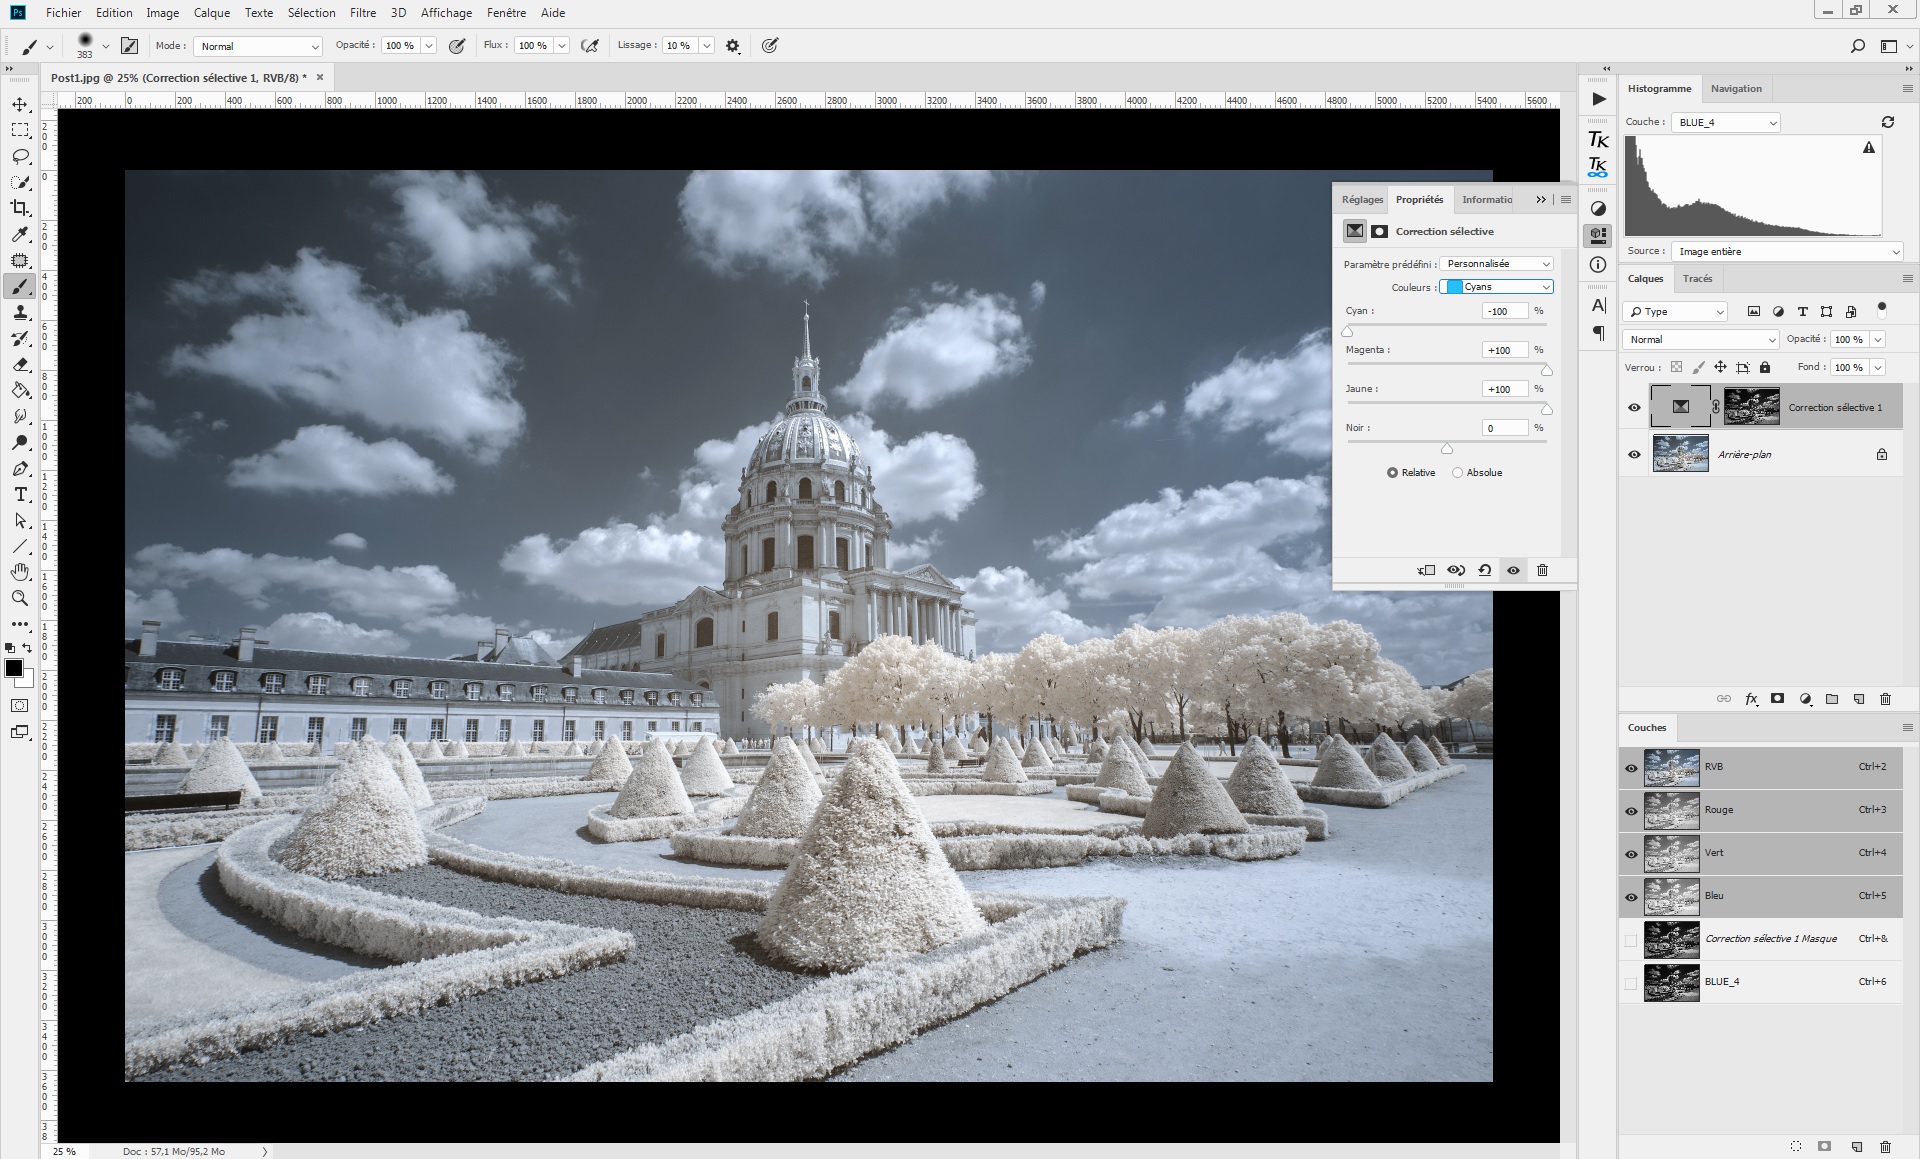
The choice of the blue channel is obvious now, as we want to process the clouds and ground. However, be sure to use a luminosity mask that does not affect the blue of the sky to avoid its desaturation. Here the blend mode has to be set on “color”, as we just want to affect the color of the selection (8).

To reduce the blue color cast, apply the following adjustments:
- Cyan:
- Cyan: -100%
- Magenta: +100%
- Yellow: +100%
- Blue:
- Cyan: -100%
- Magenta: -100%
- Yellow: +100%

At the end of this step, the blue color cast is reduced. To amplify the result, you can duplicate the selective color layer. Here is the result with six selective color layers:
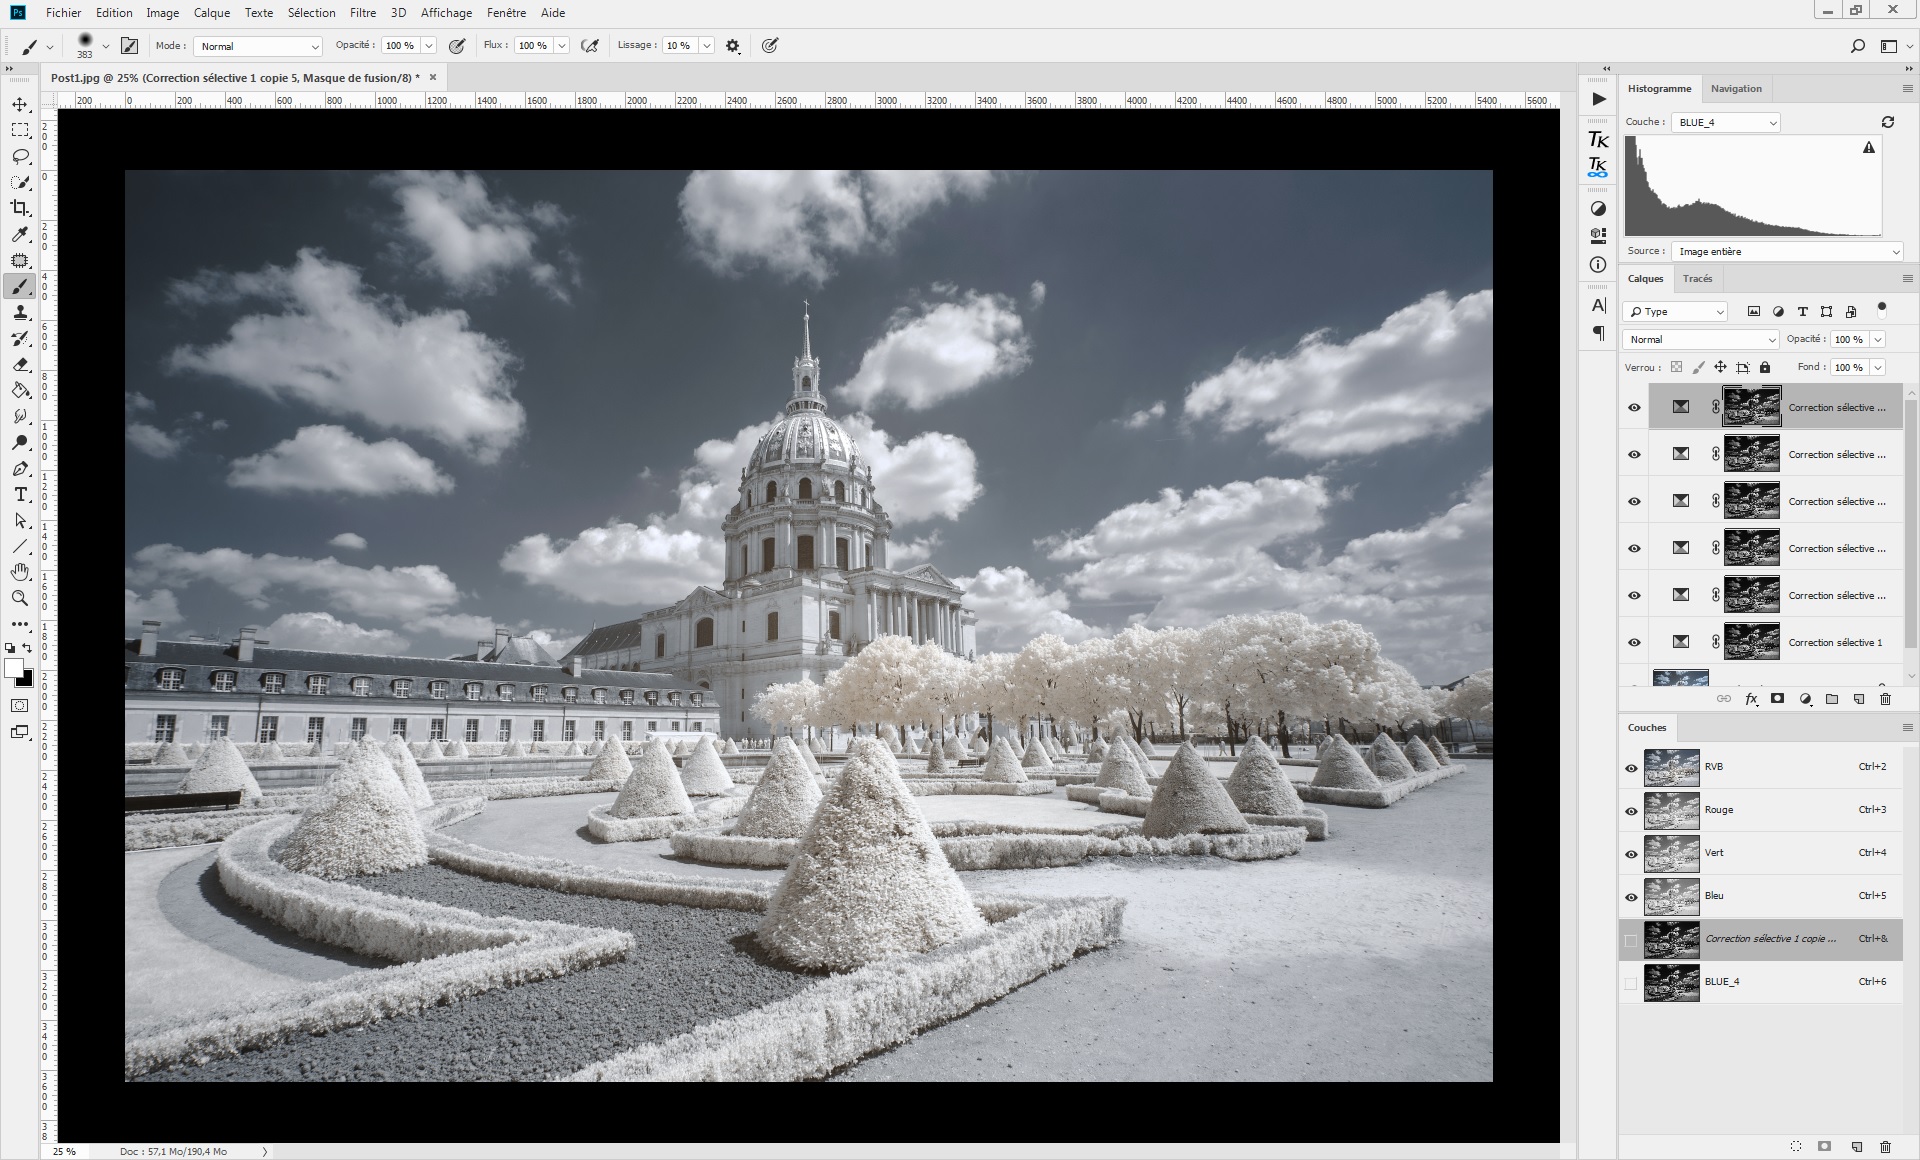
The blue color cast has completely disappeared from the clouds and ground.
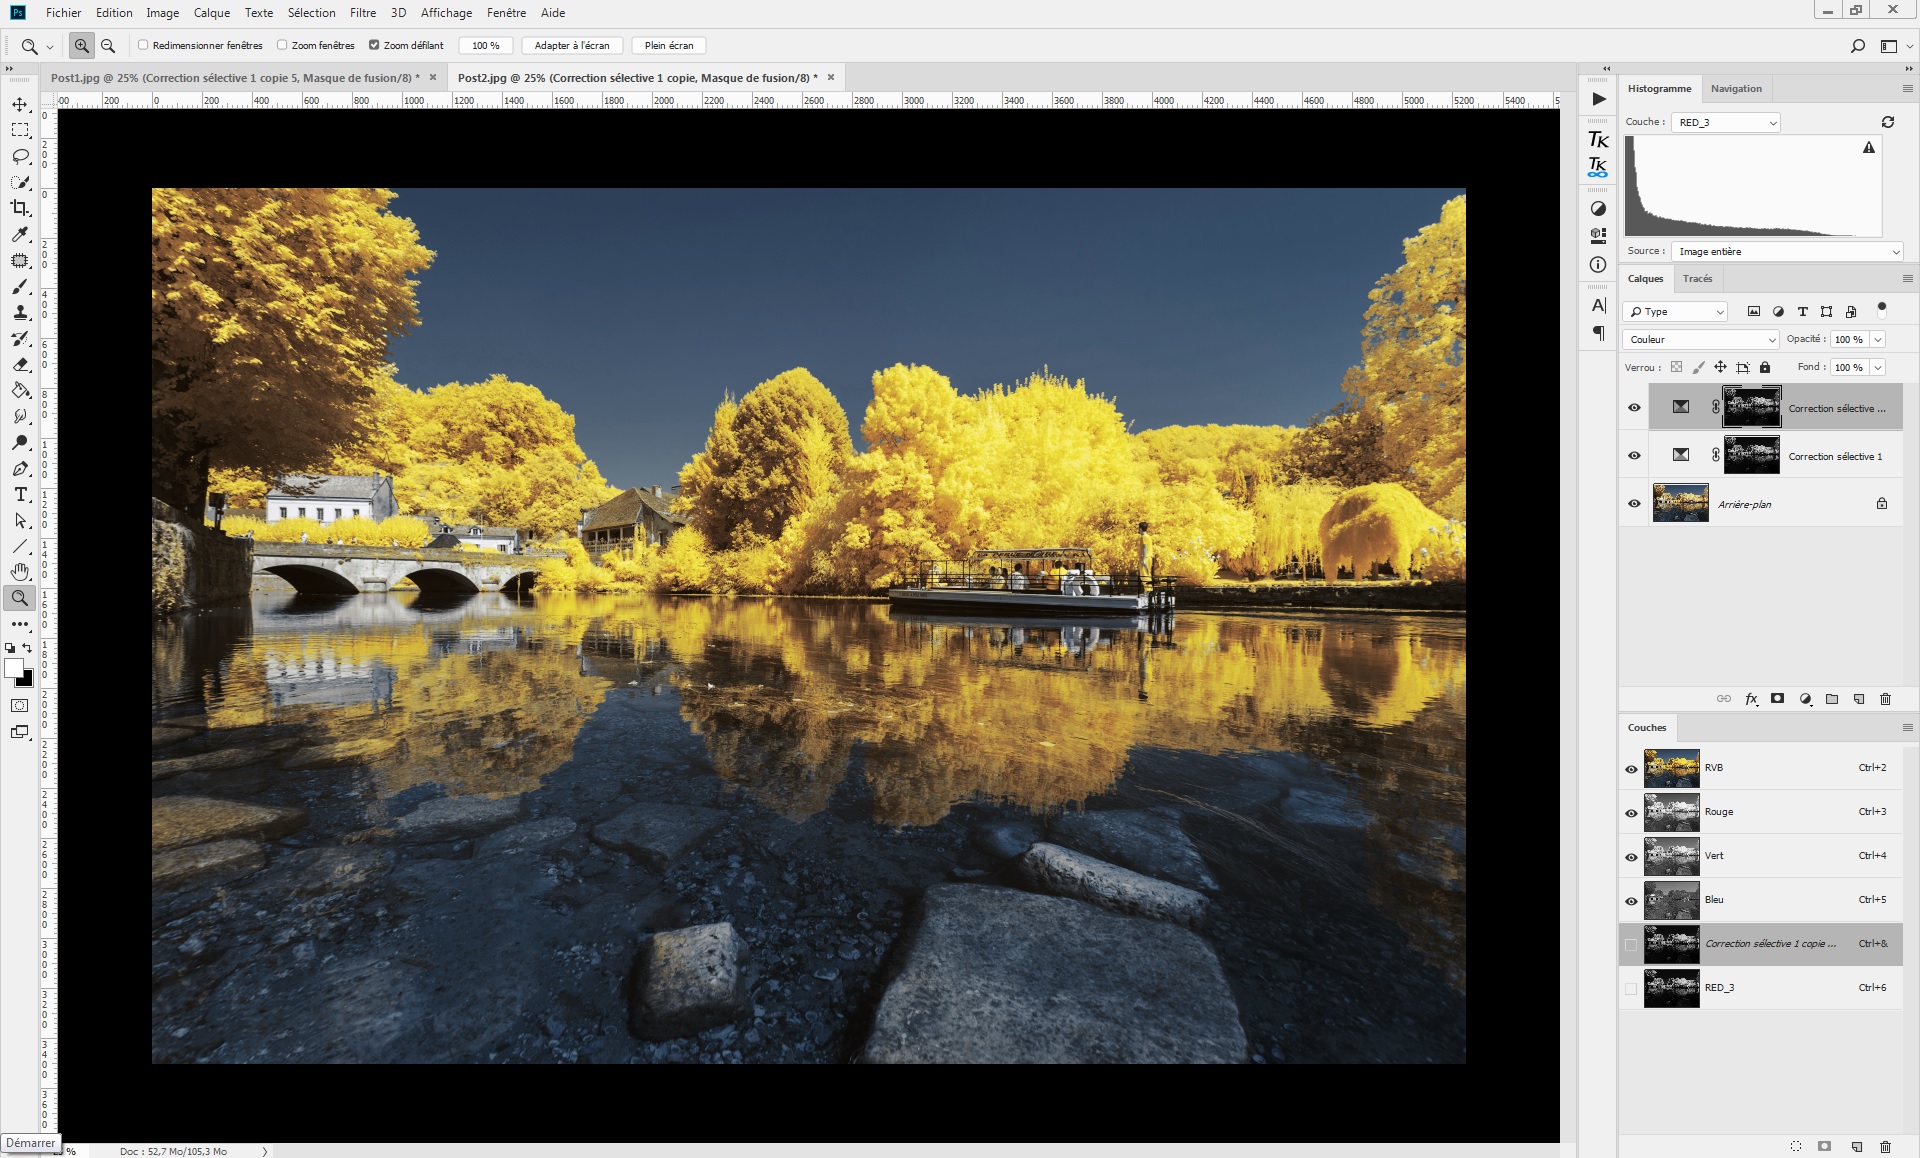
- Saturation of the foliage: when you use infrared filters between 550nm and 665nm, you typically obtain yellow foliage. A common mistake is to adjust the saturation in a global way, impacting the shadows. Here is an example shot at 665nm:
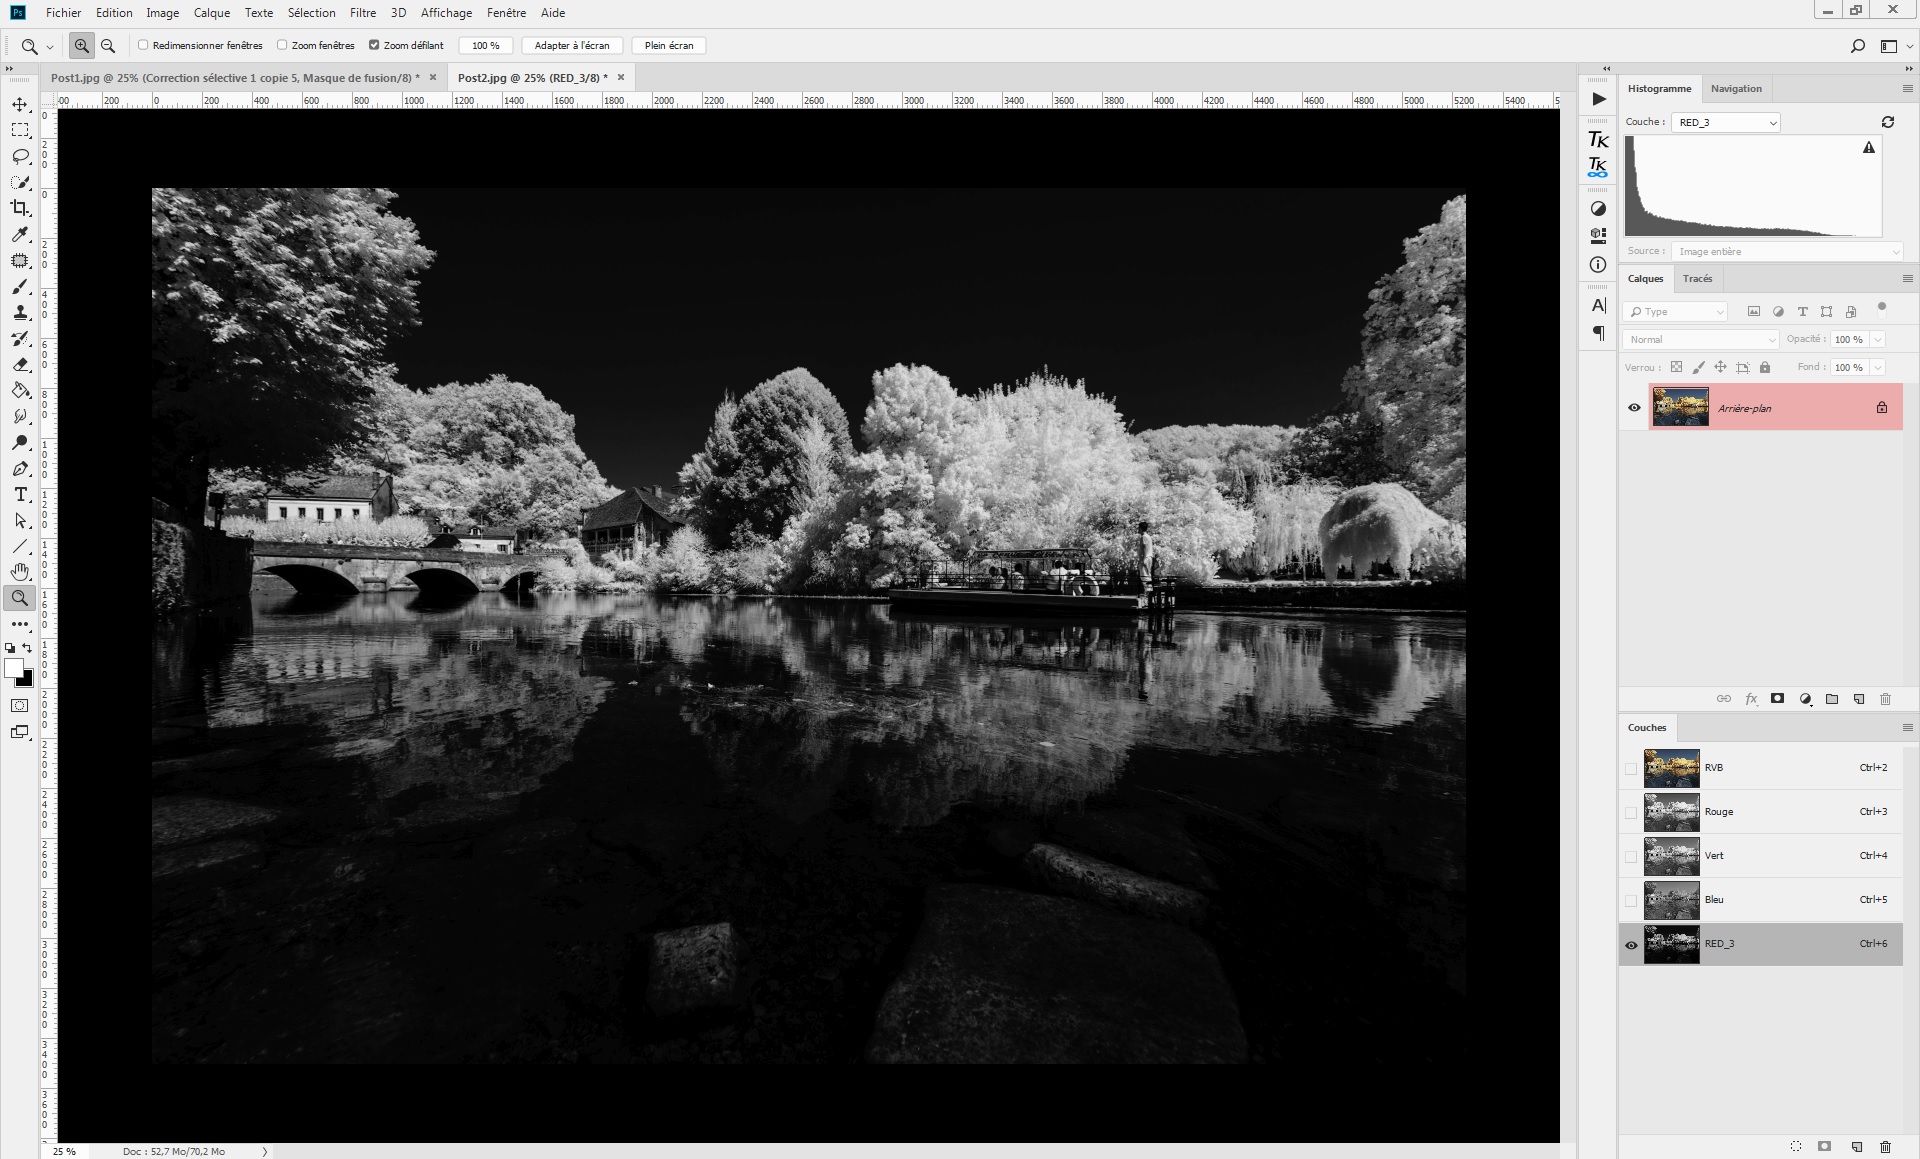
The channel used here will be the red one. By creating a RED_3 channel, we can see that the selected area is focused on the bright foliage: sky and shadows are totally preserved.
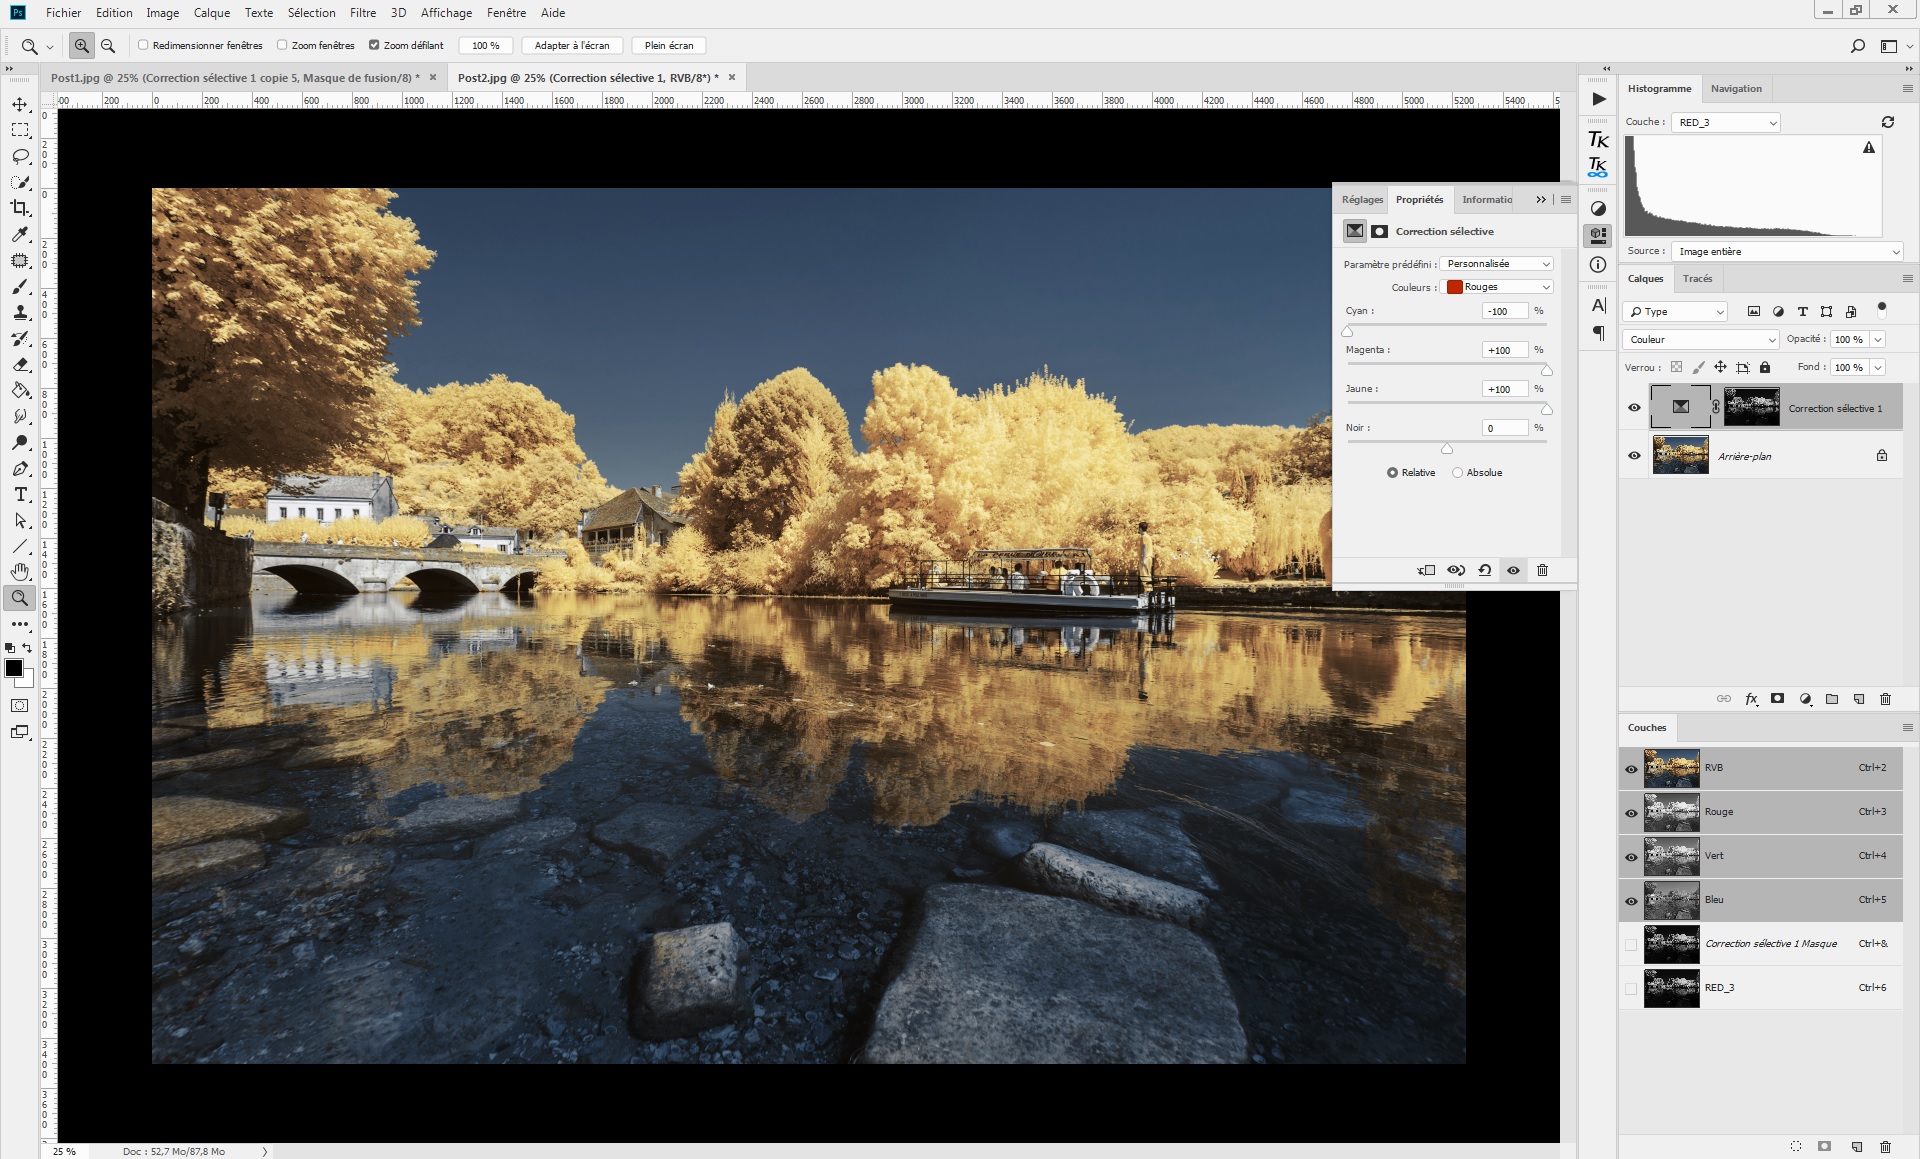
Then a selective color layer is generated with this selection, and the blend mode is set to “color”.
To saturate the yellow foliage, apply the following adjustments:
- Red:
- Cyan: -100%
- Magenta: +100%
- Yellow: +100%
- Yellow:
- Cyan: -100%
- Magenta: -100%
- Yellow: +100%
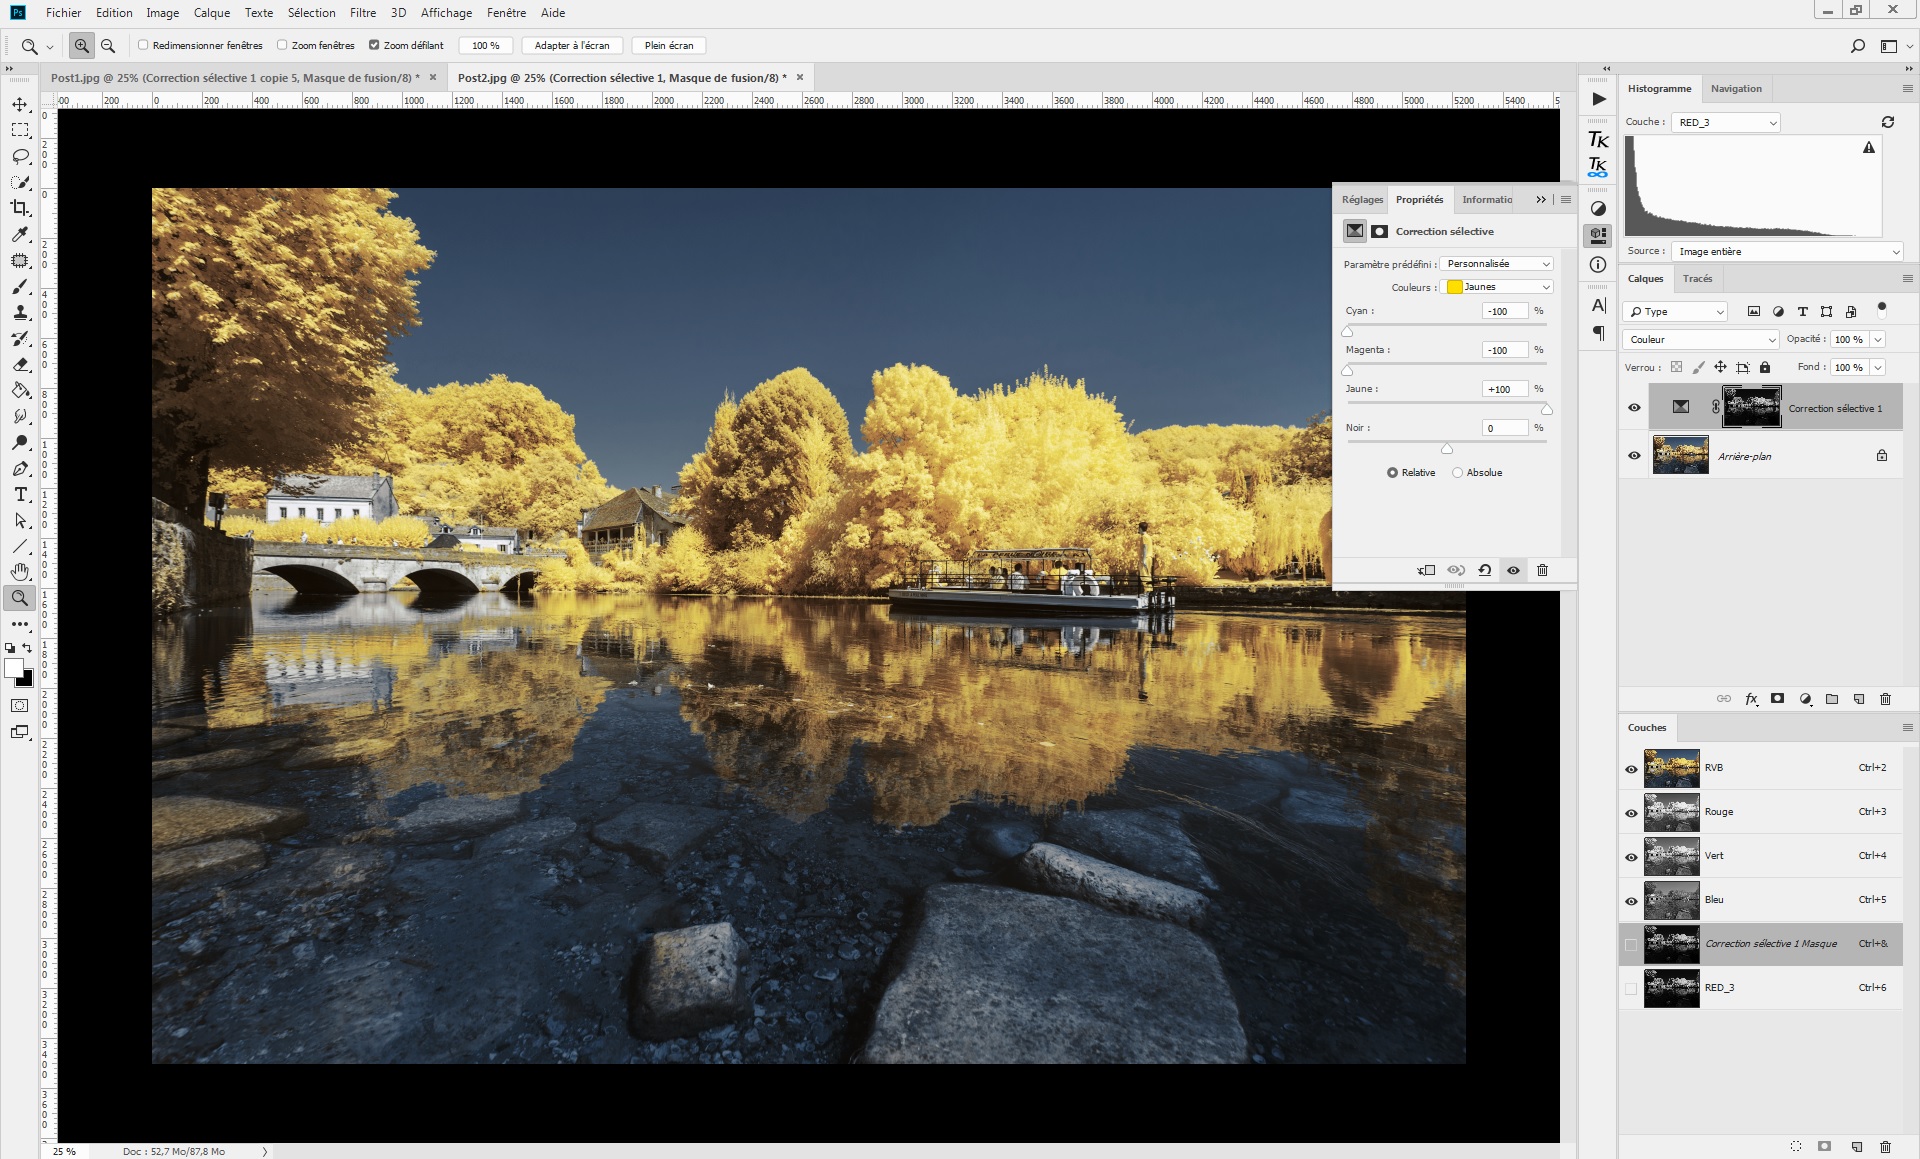
The saturation of the foliage is clearly improved. To make it even more visible, the selective color can be duplicated:
To show how the shadows have been preserved from the saturation adjustment, here is the result that could be obtained without luminosity masks:
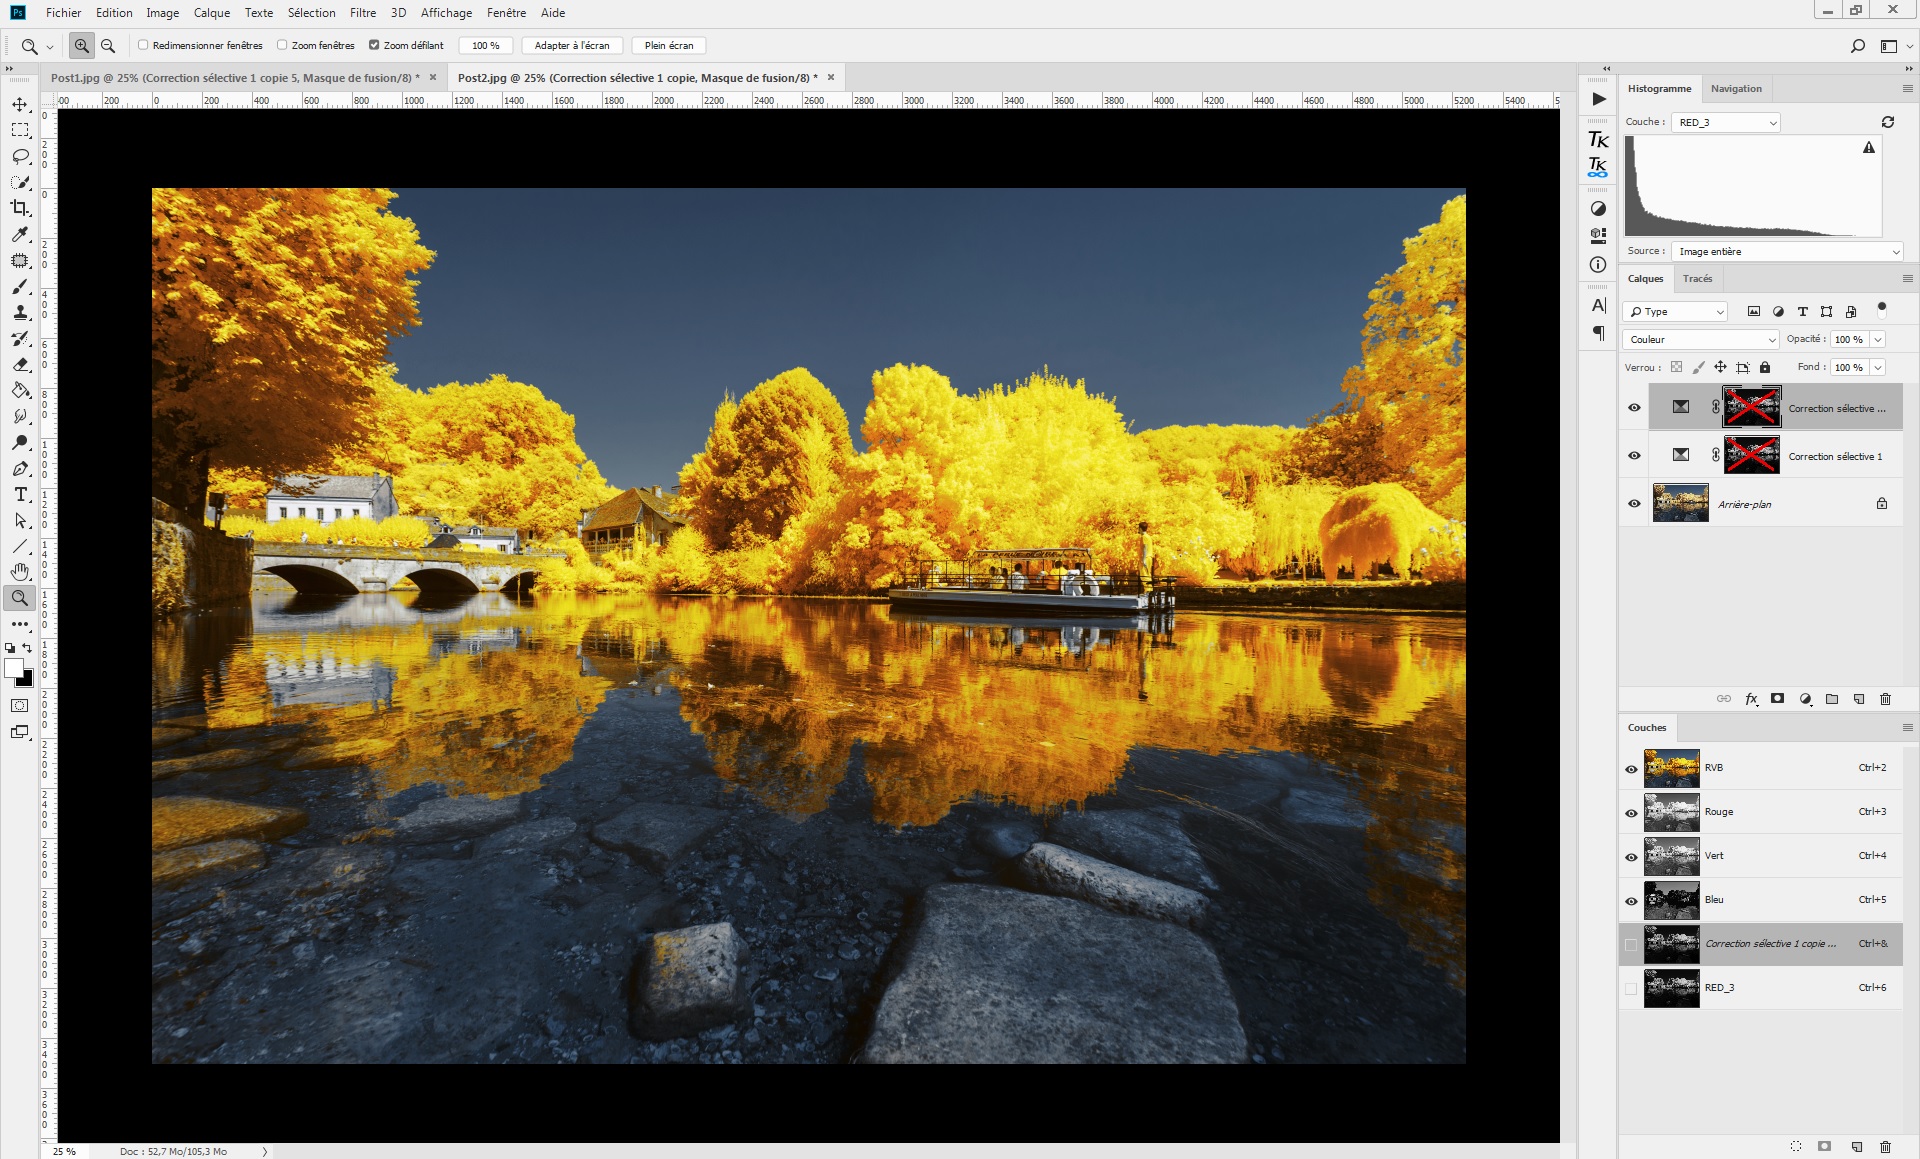
The use of luminosity masks provides far more subtle result.
Conclusion
Luminosity masks are a powerful tool to precisely adjust contrast, luminosity, and saturation of different parts of a picture independently. Main things to keep in mind are how the red channel is used to process precisely the foliage and skin, and the blue channel is used to process precisely the clouds and ground. The choice of the function layers to combine with these luminosity masks is up to you. For me, curve and color selection layers are the most effective function to deal with contrast, shades and saturation.


7 Responses
Hello –
Very informative article. However I am Mac based and do not understand your command “Ctrl+Maj+Alt+click”, especially the “Maj” key. Please clarify. Thanks.
Very useful instructions. Thanks for sharing.
Thanks, I am glad this content is useful for you!
I am having great difficulty getting this to work. It appears you are using Photoshop for windows. I am using Photoshop CC 2019 for the Mac and nothing is working the way it should for me. I cannot even get past the first steps and I think it is the difference in Windows and the MAC versions requiring different keystrokes ( for instance, what is the Ctrl+Maj+Alt combination) I really think this method would greatly improve my post processing of my IR photography. Is it possible to call and talk to you concerning this? What you are showing is fantastic if I could only get it to work. Thanks in advance for your assistance. Have a great day!