Hi, my name is David. I am an infrared Photographer from Austria, and in this article I will explain you the basic steps for processing infraed photography taken with the 550nm filter. This specific filter has a lot of creative advantages compared to higher cutting longpass filters, but also some disadvantages that you will have to keep in mind. I will try to explain both the basic postprocessing of the filter, as well as how to deal with its specific quirks and disadvantages.
The photos I am going to use as examples are taken with a Nikon D3100 converted to 550nm as well as with a Nikon 1 V1 with full spectrum conversion and a 550nm lens filter.
Important things to know:
I am neither a professional photographer nor a Photoshop specialist of any kind, I therefore don’t claim that my methods are either the best or only ways to achieve good results with an infrared camera. I mainly want to show you how I achieve my results and give you some help when choosing the 550nm filter.
Advantages and Disadvantages:
- First of all, a 550nm Filter has all the benefits of other filters, that means a camera that is converted to 550nm can use any other higher cutting longpass filter as lens-filter. So if you choose a 550nm conversion, you can still use 590nm, 630nm, 720nm, etc. screw-filters on your lenses! Please consider the dark viewfinder if using a lens filter, a camera with live view or electronic viewfinder is highly recommended in this case!
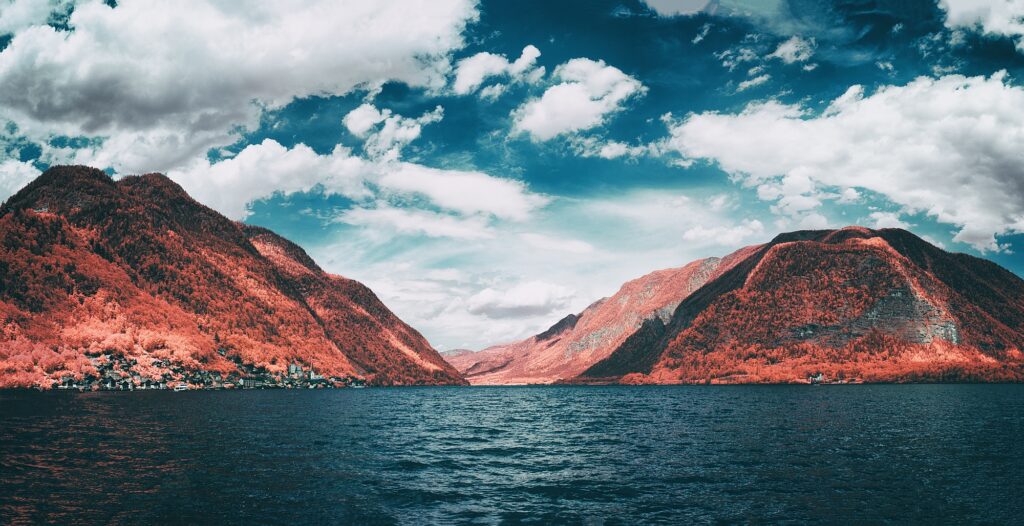
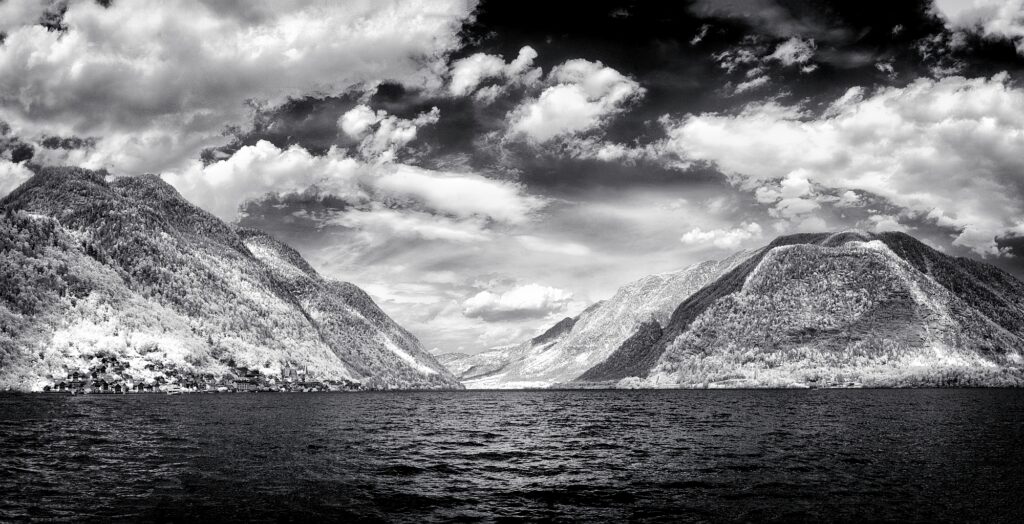
- With a 550nm Filter you can achieve results similar to analogue Aerochrome Film, as well as striking black & white photos! To demonstrate the possibilities, I added some processing examples further down the article.
- You are no longer restricted to using your infrared camera in the warm seasons! 550nm cameras can give stunning results even during the winter months!
- Lens hotspots that are usually associated with infrared photography are less of a problem with the 550nm filter, but chromatic aberrations or color fringing can still happen.
It is therefore important to test your lenses and choose them wisely. I got very good results with the Nikon standard zoom lenses and primes (18-55VR / VRII, 35mm f1.8 on D3100 and the 11-27.5 / 10-30 on the V1).
- 550nm filters in general are difficult to white balance! This means even if a camera is able to measure PRE white balance with a 720nm Filter, this doesn’t necessarily mean it is going to achieve a white balance with a 550nm filter.
While my full spectrum Nikon 1 V1 whitebalances easily with any filter I use, my Nikon D3100 has a very hard time balancing the 550nm filter. If you have problems doing a PRE measurement, try pointing your camera at a LCD computer monitor with blue, red or green colored screen while doing the measurement. This way my D3100 is able to achieve perfect whitebalance after a few tries. If this doesn’t work, try using a standard ND filter on your lens while doing the measurement, this can sometimes help. If no matter what, you are not able to achieve whitebalance, use the “tungsten” whitebalance setting of your camera and shoot in RAW file format. This way, you will at least be able to use your cameras screen to check your photos, but will still have to adjust whitebalance in postprocessing. I always do an in camera whitebalance, that’s why I won’t be explaining whitebalance postprocessing or custom profiles for RAW conversion in this tutorial, but you can easily find tutorials for custom profiles in the internet. It is basically the same procedure as with 720nm filters.
- For my postprocessing workflow I mainly use these tools:
Adobe Photoshop CC
NIK/Google – Color EFEX Pro 4 Plugin for Photoshop
Basic 550nm postprocessing step by step:
Straight out of camera with a basic PRE whitebalance, your picture should look something like this:
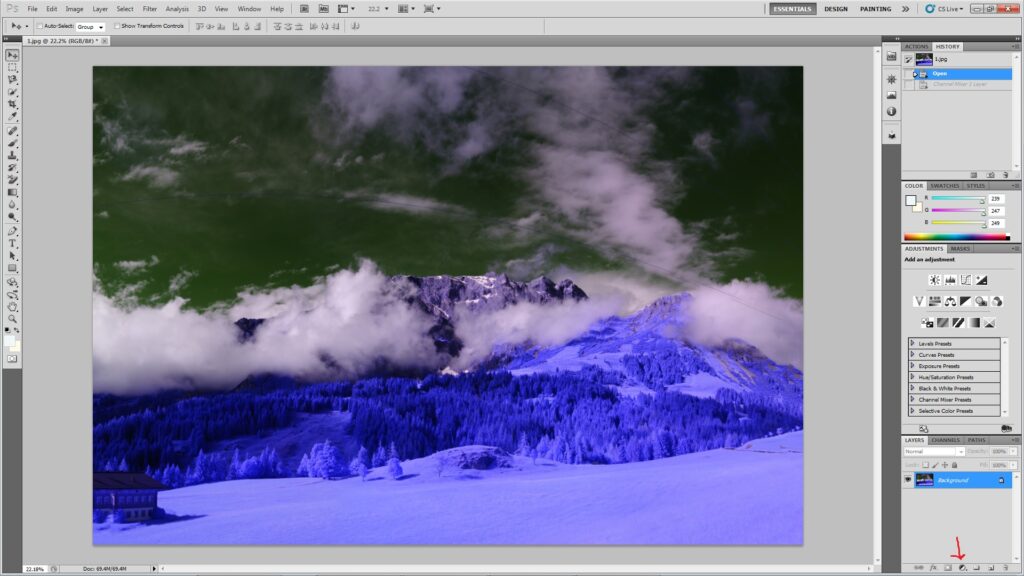
Our goal in the beginning is to achieve a result similar to Aerochrome, this means blue sky and red foliage! For this, we are going to do a basic channel swap, first red- blue to get red foliage and then blue- green, to get blue sky!
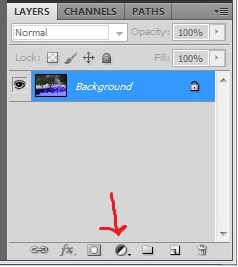
First create a new layer by clicking on the marked symbol, then choose –channel swap-
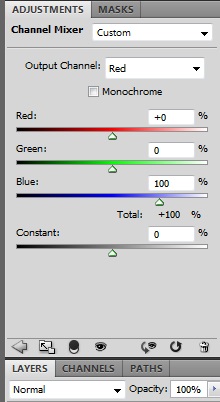
For the red- blue swap, set red to 0 – 0 – 100 and blue to 100 – 0 – 0
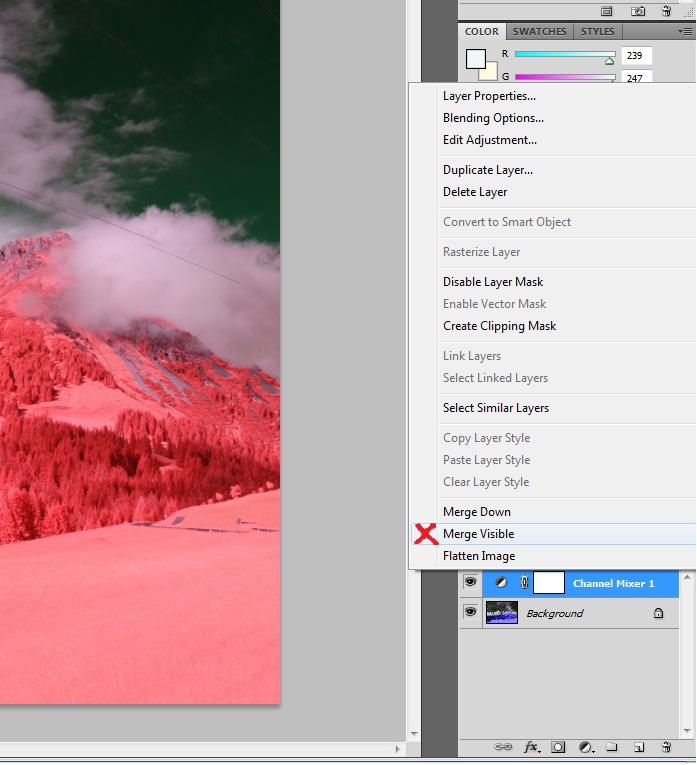
Next step – merge the layer down to visible by right- clicking on it and select – merge visible-
Now you have red foliage and green sky!
So in the next step we going to do a blue – green swap. Proceed the same way as shown before with these settings this time:
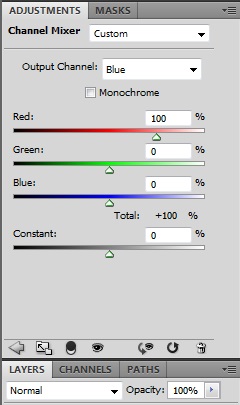
Create a new layer – channel swap – and set blue to 0 – 100 – 0 and green to 0 – 0 – 100
Again, merge down to visible and voila, we got something to work with!
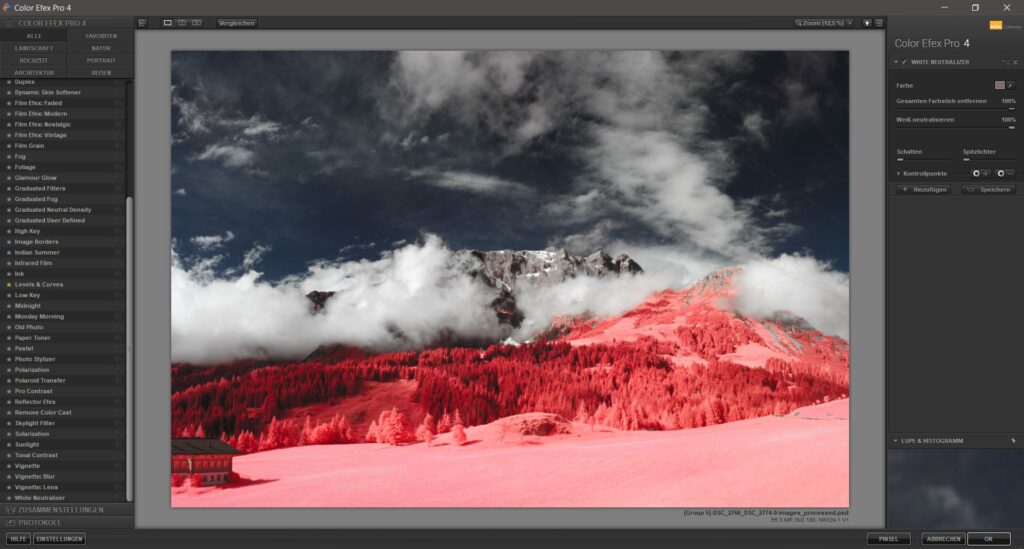
Next thing I usually do is adjust the whites by using –color efex- -white neutralizer- on the clouds. This removes color casts. You can also try autotone in Photoshop, but I prefer this method, as it gives better results.
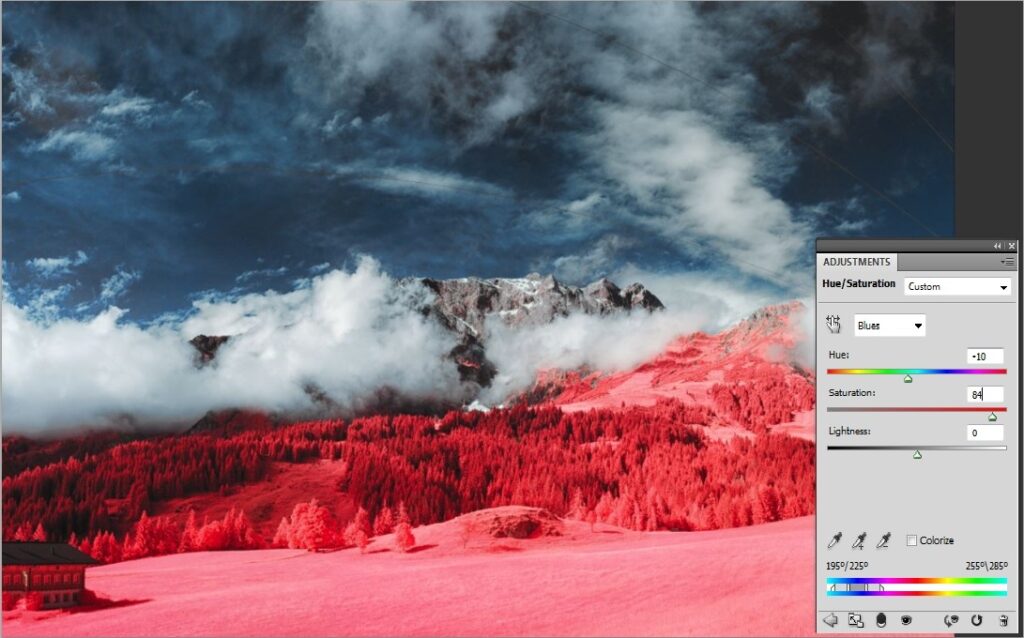
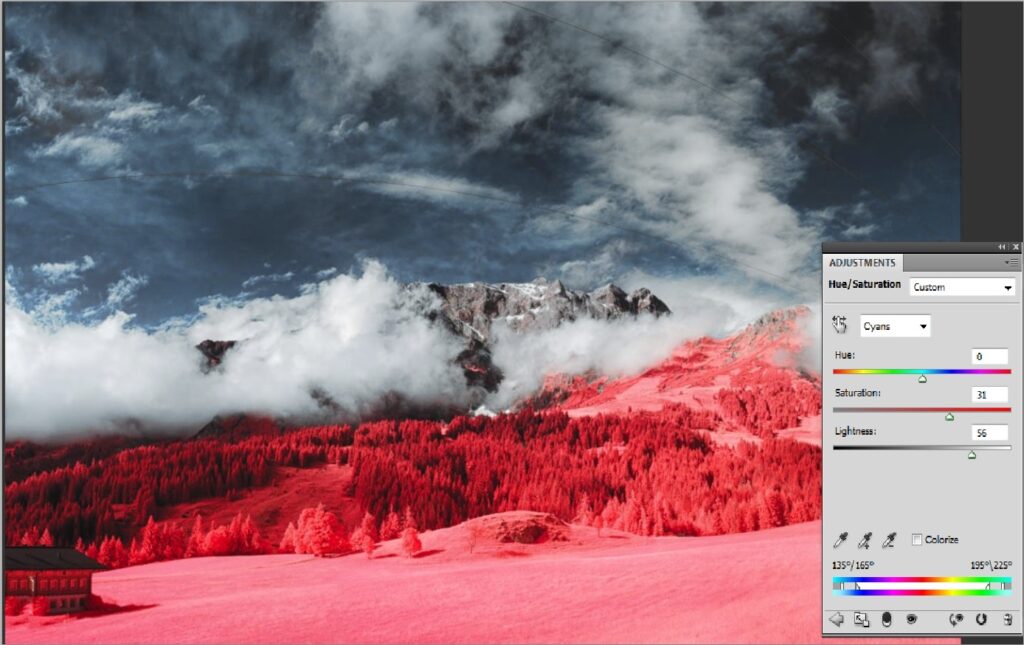
To get a more natural looking sky I created a layer – hue/saturation – to adjust the blues and cyans.
First the blues:
Next step cyan:
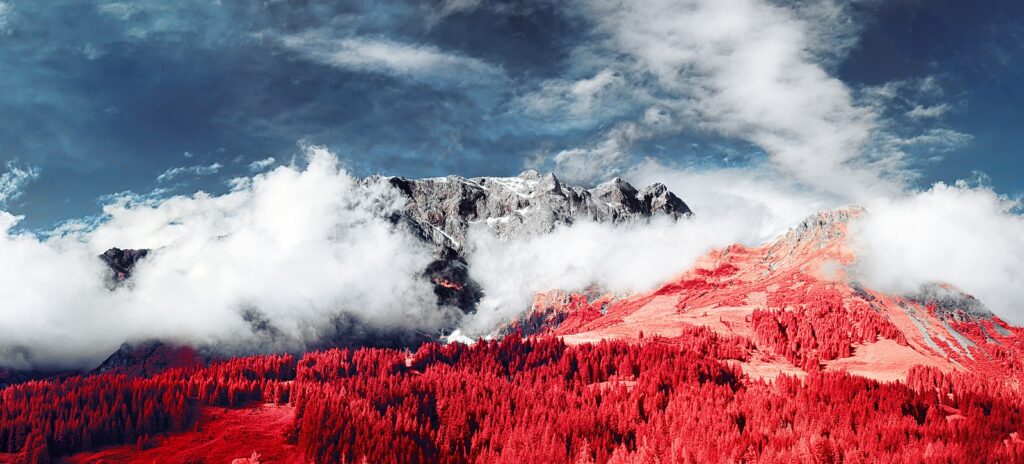
- From here I usually adjust the colors further to my liking, or use some –NIK color Efex filters – like for example darken/lighten center, cross processing, or do some selective dodge & burn.
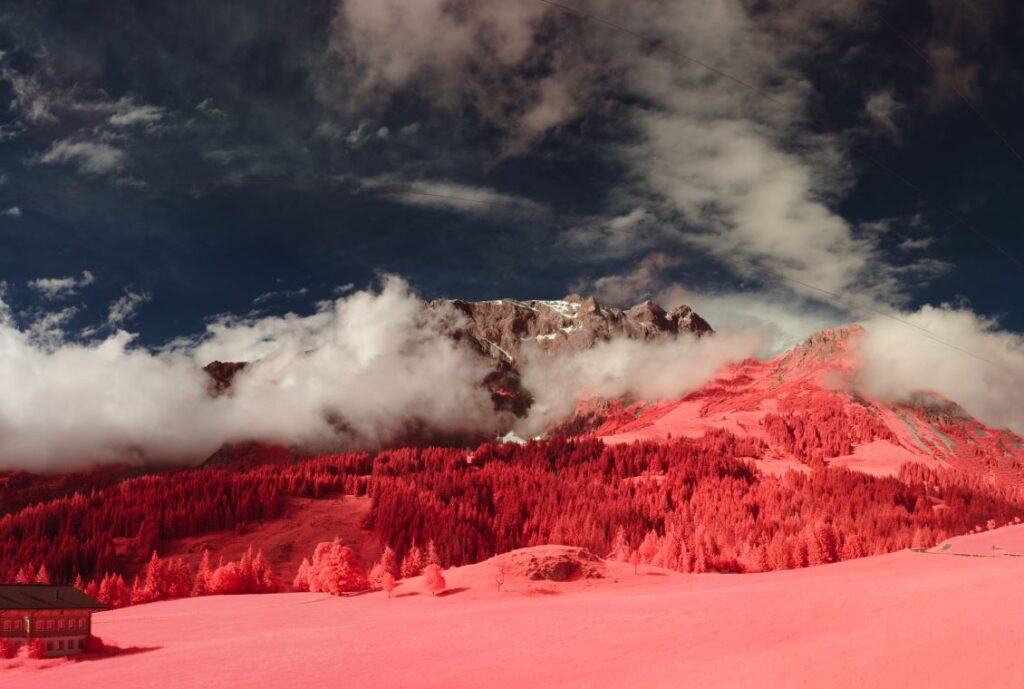
This depends on personal taste, in this case I used contrast color range, as well as some cross processing to get this end result:
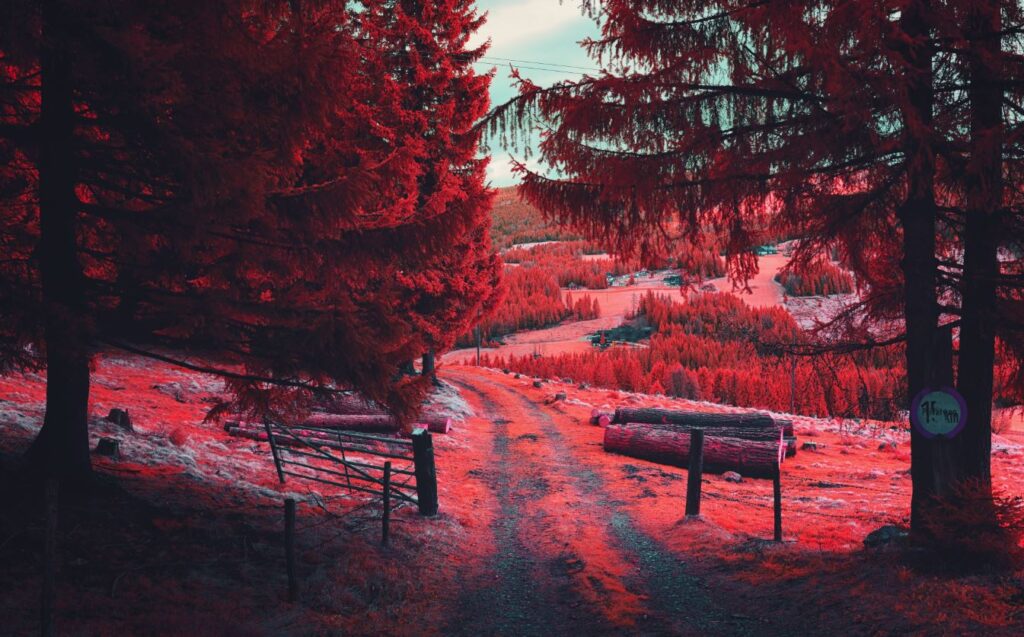
In another example I will show you how to get a result similar to the “superblue” or “NDVI” filter:
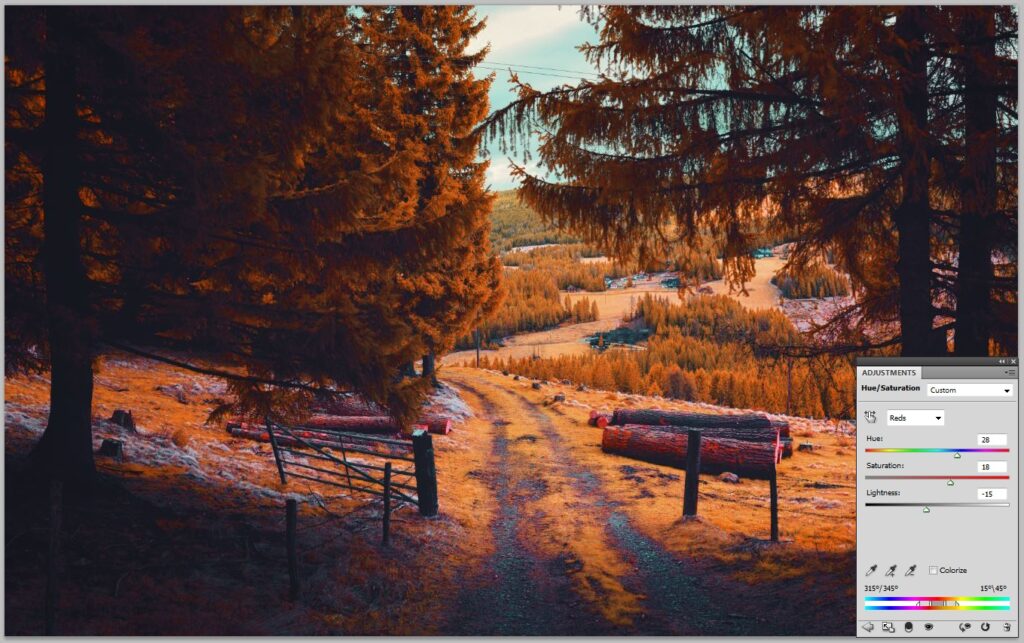
In this case I already did the basic steps as channel swap and color adjustments, but I didn’t like the outcome, as the scene demanded for some lighter colored tones in my opinion.
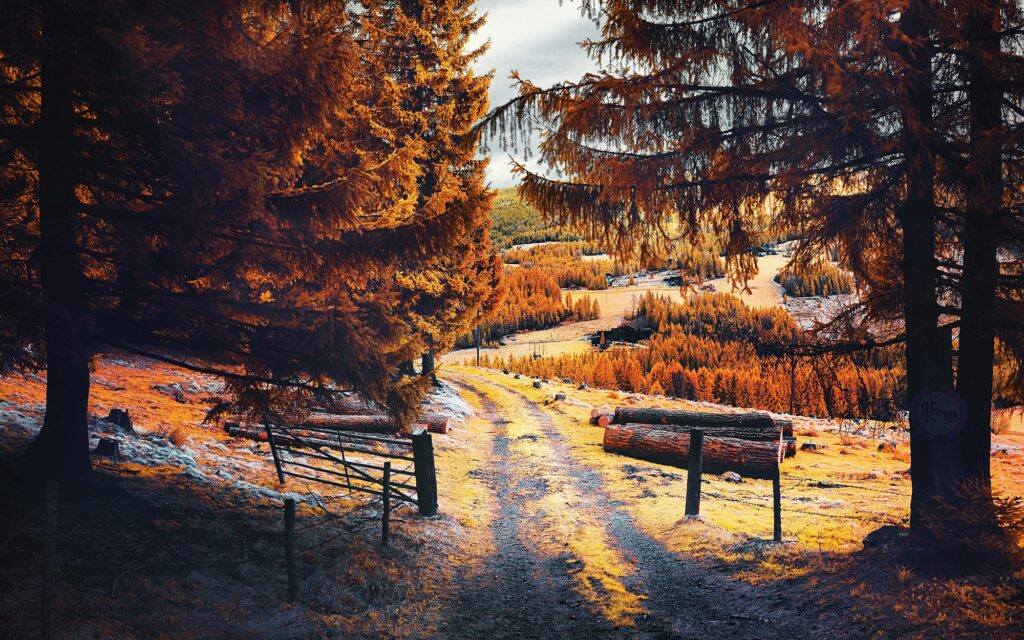
By creating a –hue/saturation- layer and adjusting the red tones, I created a more autumn like feeling, similar to the outcome of a super-blue or NDVI filter.
Again I proceeded by doing contrast adjustments, as well as using some NIK cross- processing filters to get this end result:
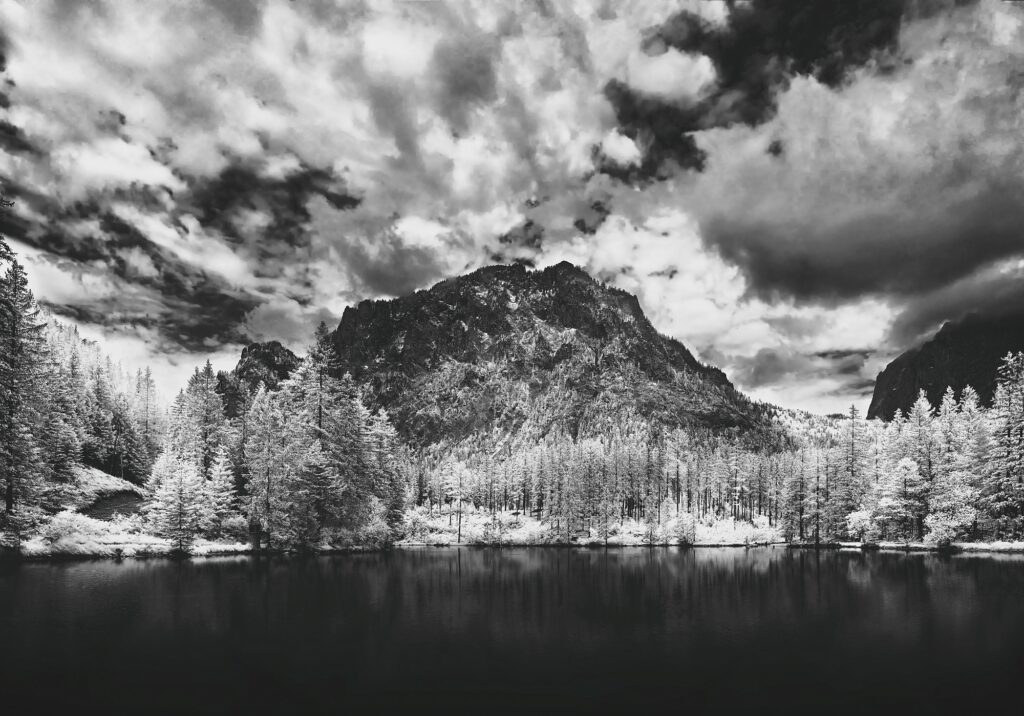
And last I will show you how to get striking black & white photos with the 550nm filter.
As already mentioned before, you can use any higher cutting longpass filter on your lens with a 550nm converted camera, but as I will show you now you don’t necessarily have to choose whether you want a color or b&w end- result on the scene. So taking your photos with a 550nm converted camera will give you the advantage to choose later on if you want a colored or black & white outcome!
The photo in this example already has some light color adjustments, as I wanted to do a color post process first, but then decided to try a black & white approach.
The procedure to get good BW results from the 550nm filter are basically always the same.
This is where we start:
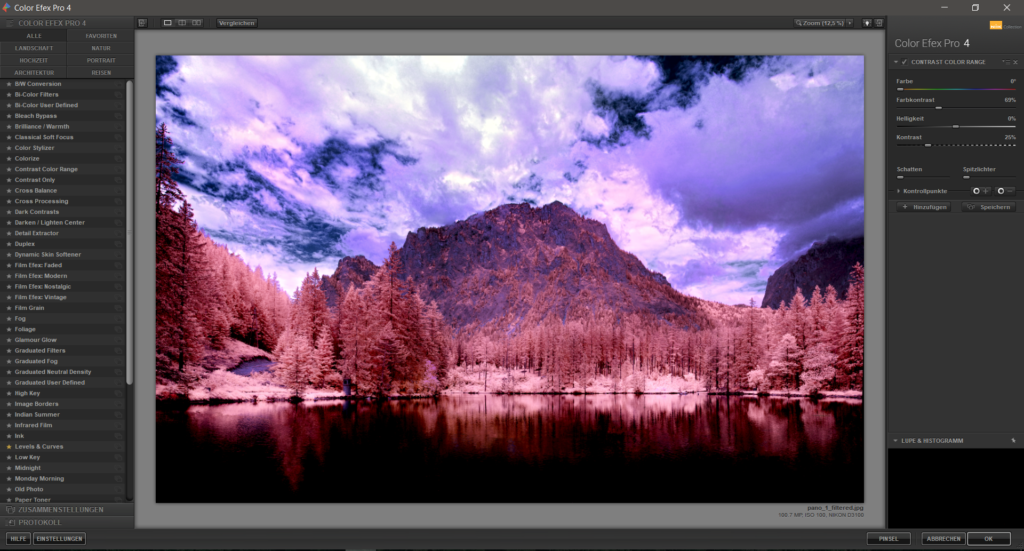
To get an infrared “woodeffect” meaning white foliage, we first have to adjust the contrast.
Best thing to do this is using the –contrast color range- filter of NIK color Efex:
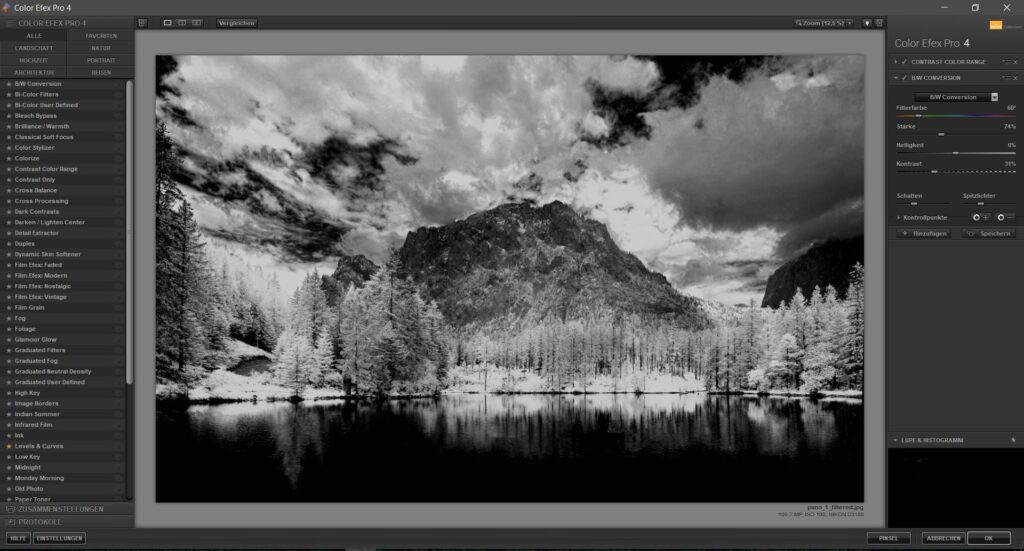
In the next step we convert the picture to black and white, also using a NIK filter –BW Conversion-:
You can now either adjust contrast with –tonal contrast- or –pro contrast- or try some cross- processing filters to your liking. I prefer to keep it simple:
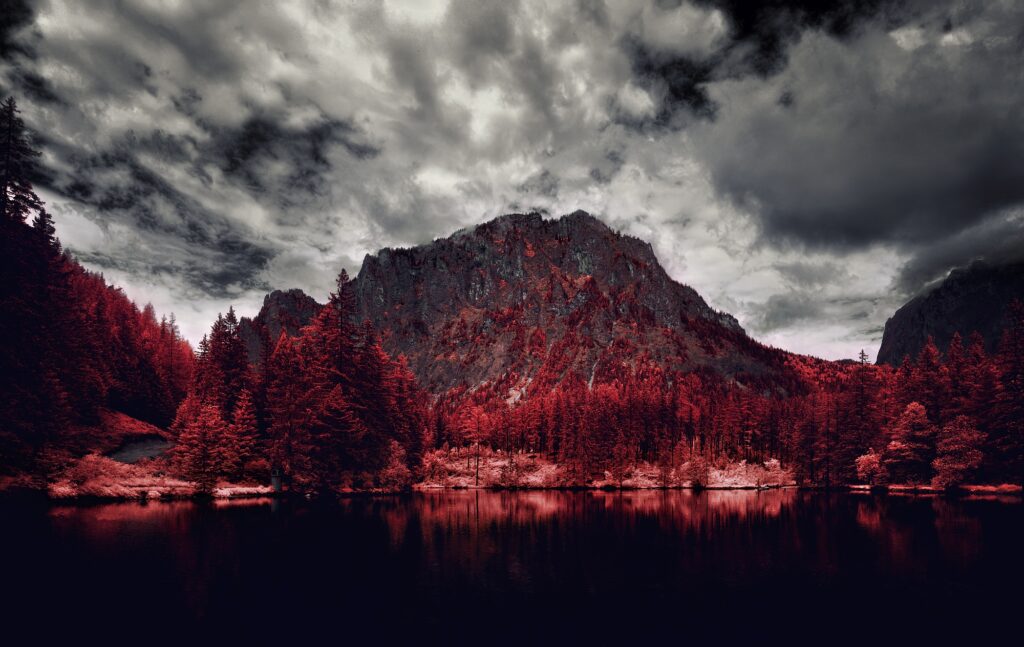
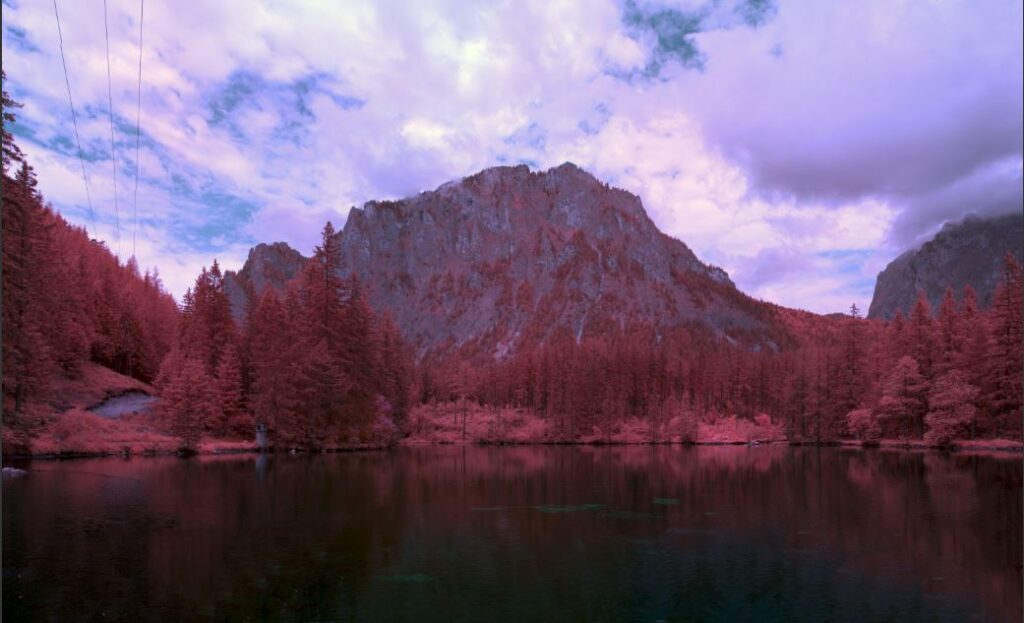
As I mentioned before, you are not restricted to either color or black & white! With the same file I also created this version:
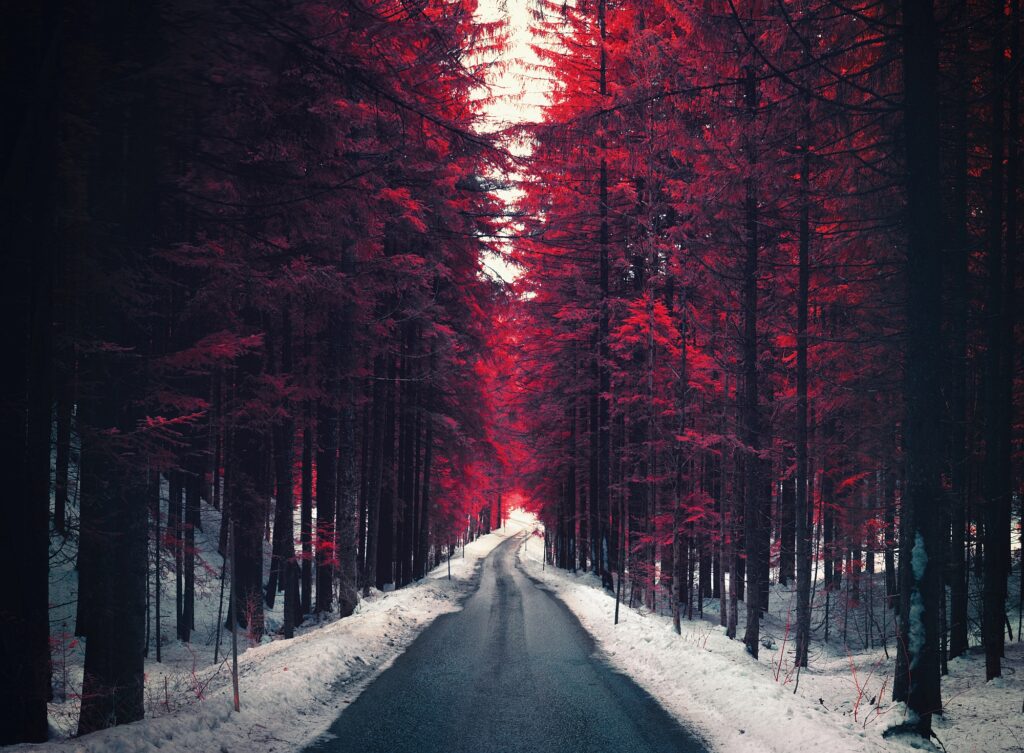
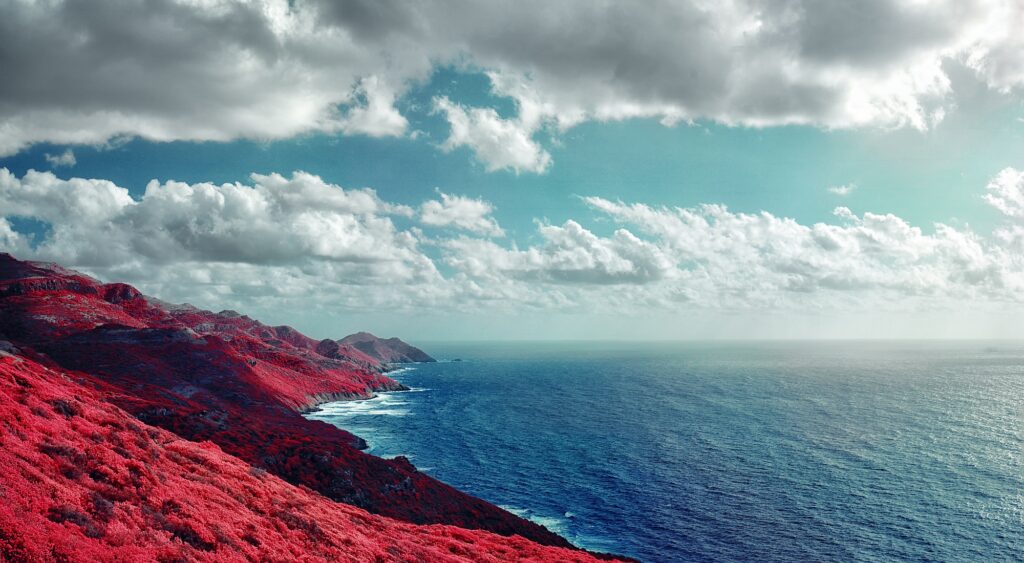
Some more examples for processing the 550nm Filter:
Lens Recommendations:
Lenses recommended for 550nm:
Nikkor 18-55VR II
Nikkor 35mm f1.8
Nikkor1 11-27.5
Nikkor1 10-30
Tested and not recommended:
Nikkor 18-105VR
Nikkor 70-300VRII
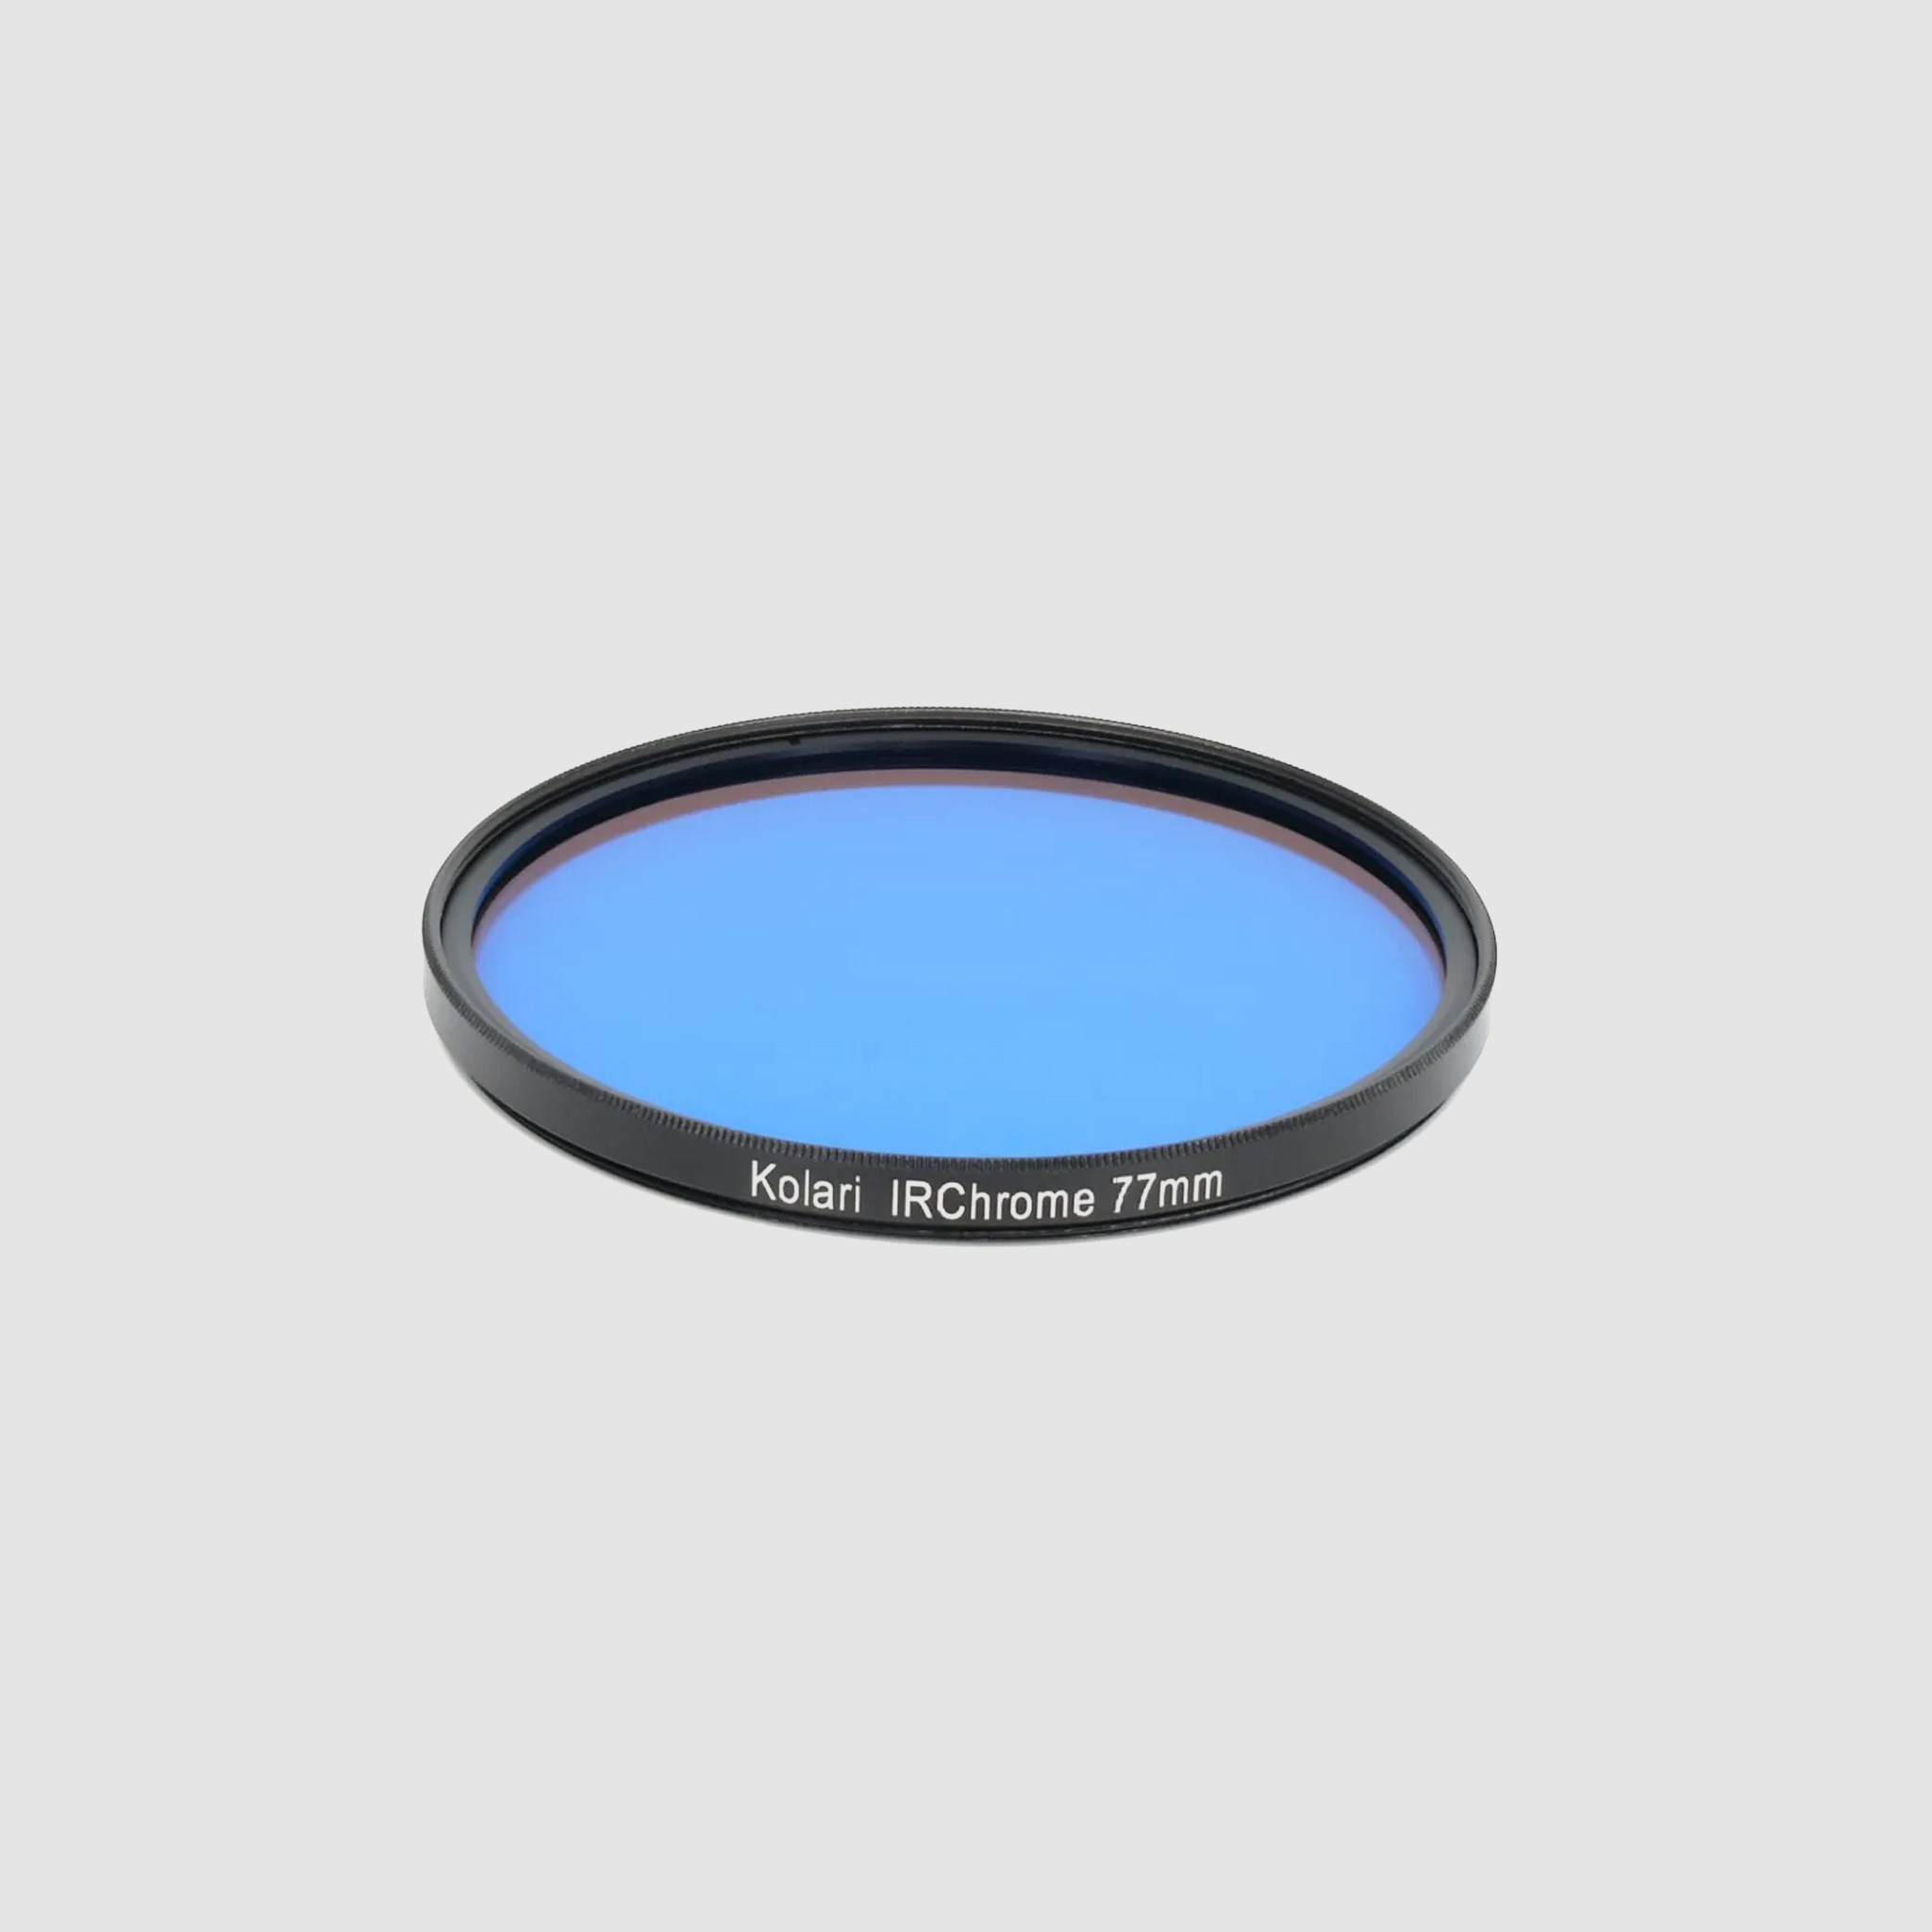
You can purchase the 550nm Filter in a variety of sizes Here!



For the 550, what do you use to measure a PRE white balance?
Hello. Great article – but I’m having a hard time even understanding what a good white balance for Infrared even looks like. I have a Canon M3, converted to full spectrum. And I’ve played around with a 590nm filter, and getting an array of vivid colors is fun but I wanted to achieve something more like the Kodak Aerochrome you discuss here. I grabbed the 550nm from Kolarivision. The RAW files I’ve been getting aren’t that different from the 590nm. Here is a sample set I’ve done with the 550nm with varying White Blances – (http://hnydsn.com/MD7rcS ) I cannot input a specific Kelvin temperature on this camera but can use an image or default presets. I’ve tried using RGB on LCD screen shot, grass shot, using various images as WB, Tungsten, with and without the filter, +Green, etc. I cannot seem to replicate that blue/white/green starting point you’ve achieved at the beginning of this tutorial – consequently I cannot achieve the Aerochrome look. Is there any light you can shed on this for me?
Hello Rina. I see your point but you must take into account that raw files are not affected by white balance. Also some cameras are very easy to set white balance, while on some others are impossible to adjust it to your liking not matter what efforts you make be it a grey card, a white wall or grass.
The deepness of reds has A LOT to do with the software behind the specific camera and not the technique. Cmos cameras especially Canons are better for B/W while Nikons give rich reds, especially the older models. I dont know about other brands as I have not converted any of them. A good step is to borrow if you can another camera to see what you will get. Regards.
Hi Rina,
I have the 550nm filter paired with an 2 spectrum converted Canon 6D. I custom WB using an grey-card or white-card and can achieve the Aerochrome look using David’s method.
For Canon…use the grey/white-card and take a shot in ‘auto WB’, expose 1/2 to 1-stop under-exposed, then choose ‘custom WB’ using that image and you should have those similar colors as a starting point.
Another option I found for the Aerochrome look that’s way simpler is the ‘Super Blue’ conversion. I also have an Canon 60D converted to ‘Super Blue’ and love the colors SOOC, but sometimes change the foliage color to resemble Aerochrome red. It’s really simple bc all you do is use ‘Hue/Saturation/Luminance’ slider on the foliage to adjust the golden yellow foliage to red. Everything else is visible colors already…simple.
Enjoy & Aloha- Jonny
I’m curious why you “merge visible” after the first red/blue channel swap before proceeding with the blue/green channel swap?
I just add another channel swap layer on top of the first and proceed with the blue/green swap – same results…
It should be fine to just leave the stack of layers as you work which allows for later layer setting tweaks in a fully non destructive workflow.
Hi, it hasn’t any special reason. It’s more like a habit. I sometimes work with dozens of layers and as my computer isn’t the most potent, I often try to reduce the number of layers to lessen the workload. Channel swap is non invasive and therefore not a problem when merged.
How about creating an action for the 550 nm with the blue green channel swap in addition to the red green
I have a 720 converted camera but want to sell it and convert a newer camera to 550. The way I process now is simply swap channels and adjust hue and saturation in photoshop and and import back into Lightroom to finish my edits. Am I correct in understanding that achieving red foliage is not as simple as just color swapping red and blue like normal? I’m not a photoshop wizard either and layers and masks have always confused me
Hello,
In the section where you wrote about black and white, I became a bit confused.
To get the color result, what was actually done? Was this photo blended with a color layer and a black & white layer? Or, is this the result of the steps in the beginning of the blog? I love the mood that resulted in this photo. How do I go about creating it?
I’m referring to the picture directly above the additional examples.
Unlike film, all 3 channels of the sensor will register the infrared data. When using the 550nm filter you’re blocking all the blue and therefore the blue channel will only register infrared. But the red and green channel will register red and blue PLUS infrared. So when doing the green-blue swap, shouldn’t red (now containing only infrared) be set to -100 for both green and blue?
So for green: -100 0 100
And for blue: -100 100 0
Hi,
Is it possible to get this Aerochrome effect with 550nm filter mounted on non-IRconverted cameras ? If yes, which is the post-processing difference ?
Thank for your attention,
Thomas.
Hi Thomas,
The 550 filter will only work properly with a full-spectrum converted camera. That includes the Aerochrome effect you see here.