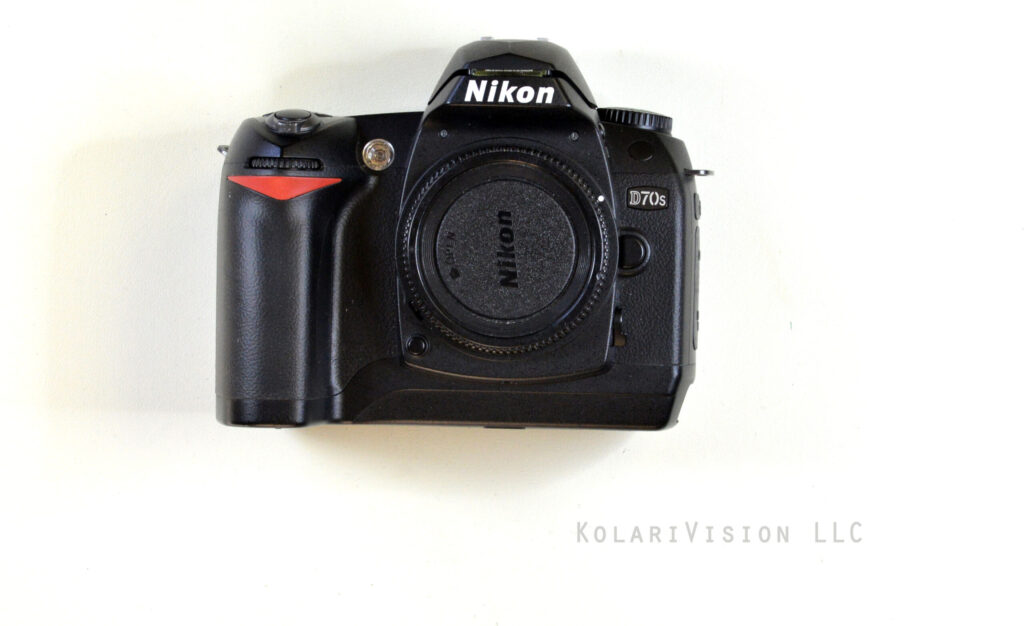
Before working on the Nikon D70S, be sure to be grounded to avoid any static damage to the camera. We highly recommend being grounded.
1
Step 1
Remove the three screws as indicated from the AV OUT panel.
2
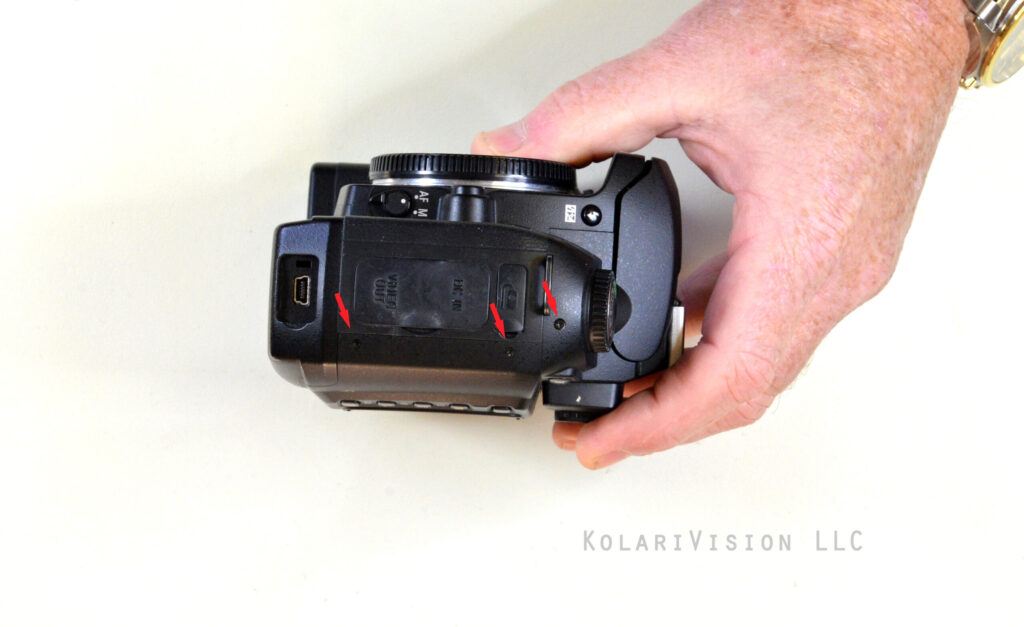
Step 2
Flip camera to opposite side and remove the two screws indicated.
3
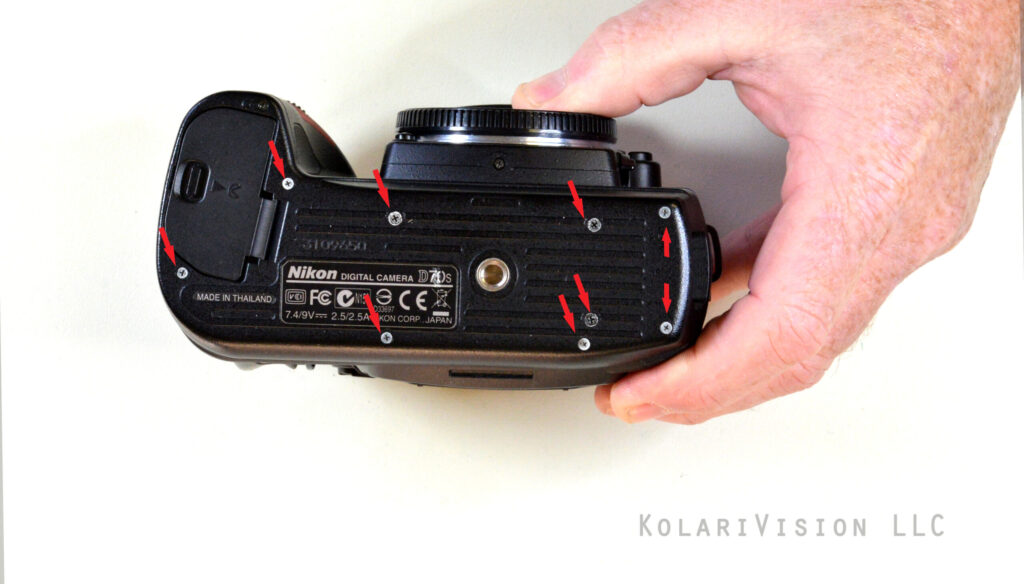
Step 3
Flip camera over so the bottom portion faces you and remove the 9 screws as indicated.
4
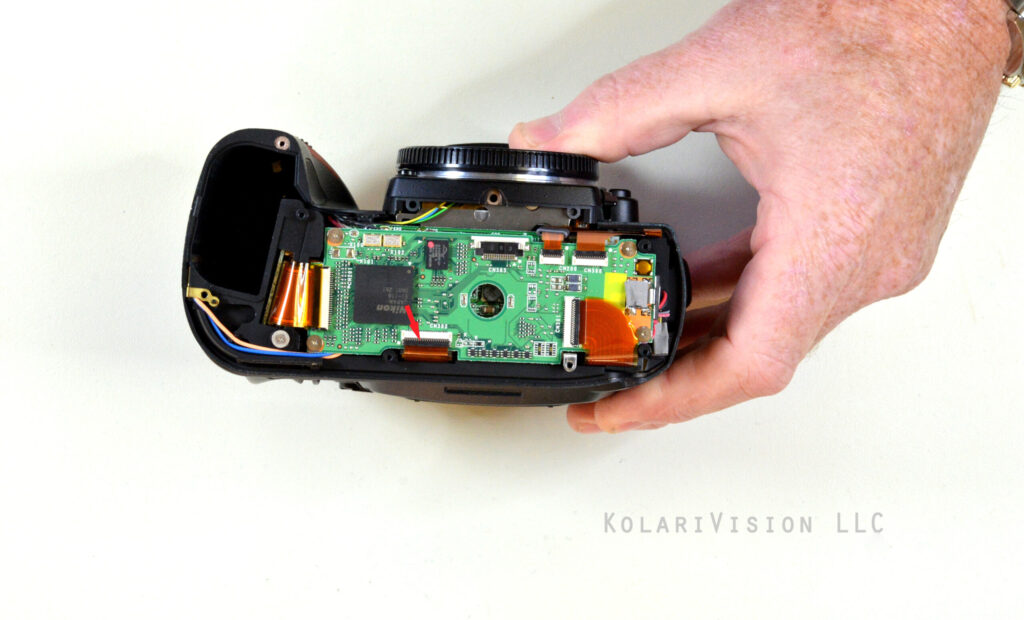
Step 4
Once screws are removed you can gently remove the bottom base. Now remove the indicated cable since it is connected to the back LCD panel.
5
Step 5
Once you release the indicated cable from the last step you can now remove the back LCD panel gently. Now you can move forward and remove the one cable on the MB as indicated.
6
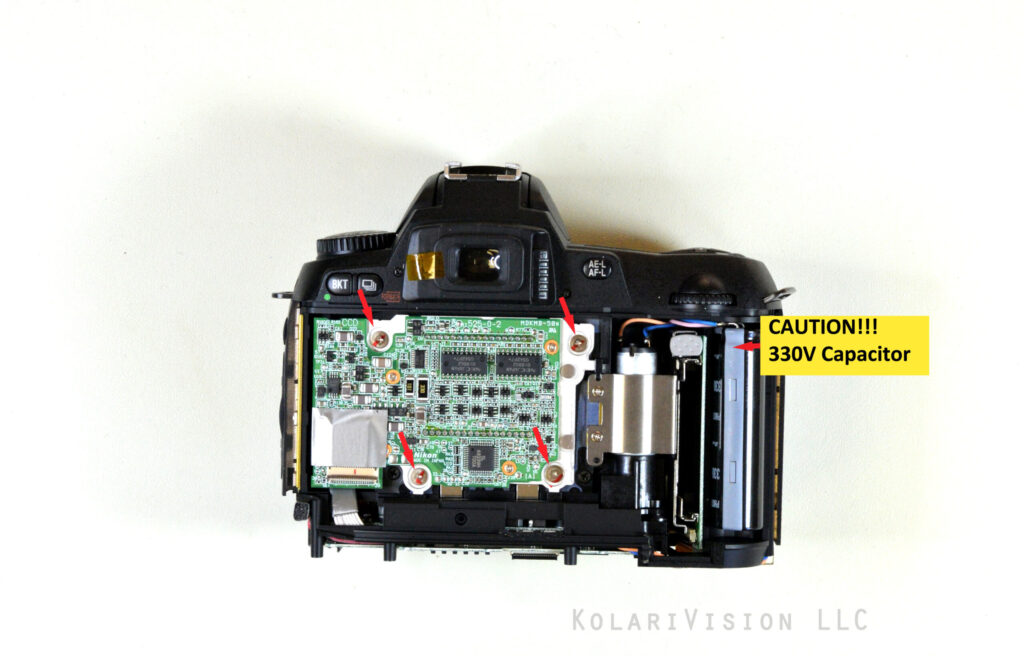
Step 6
CAUTION!! Be aware of 330V Capacitor. MB is directly attached to the sensor, so here you will remove the main four sensor screws. Once you remove the screws slowly lift the sensor up.
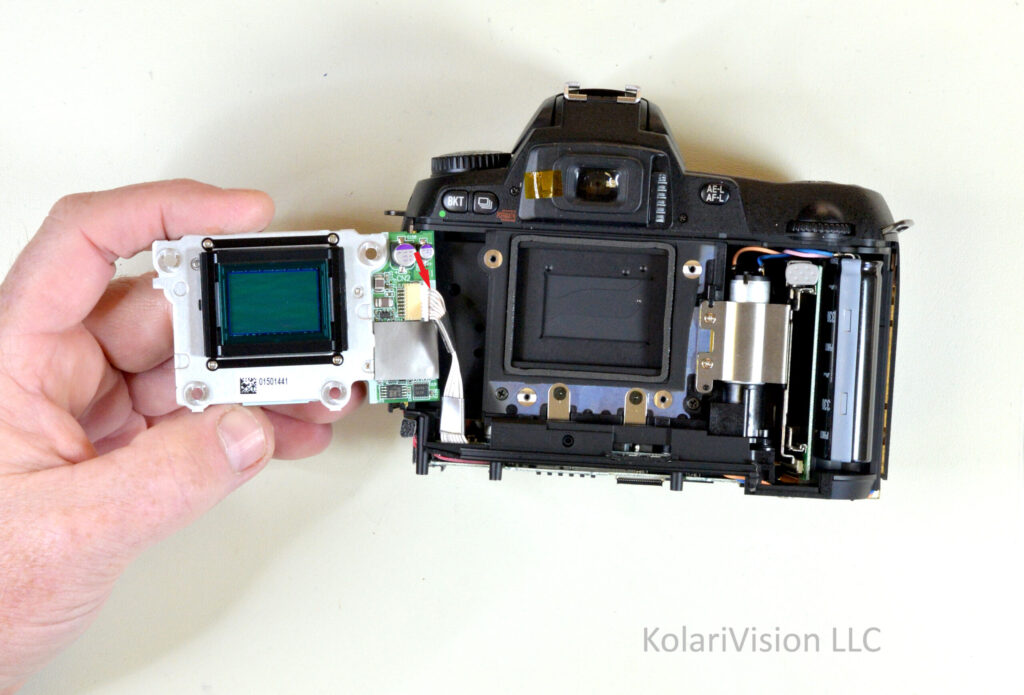
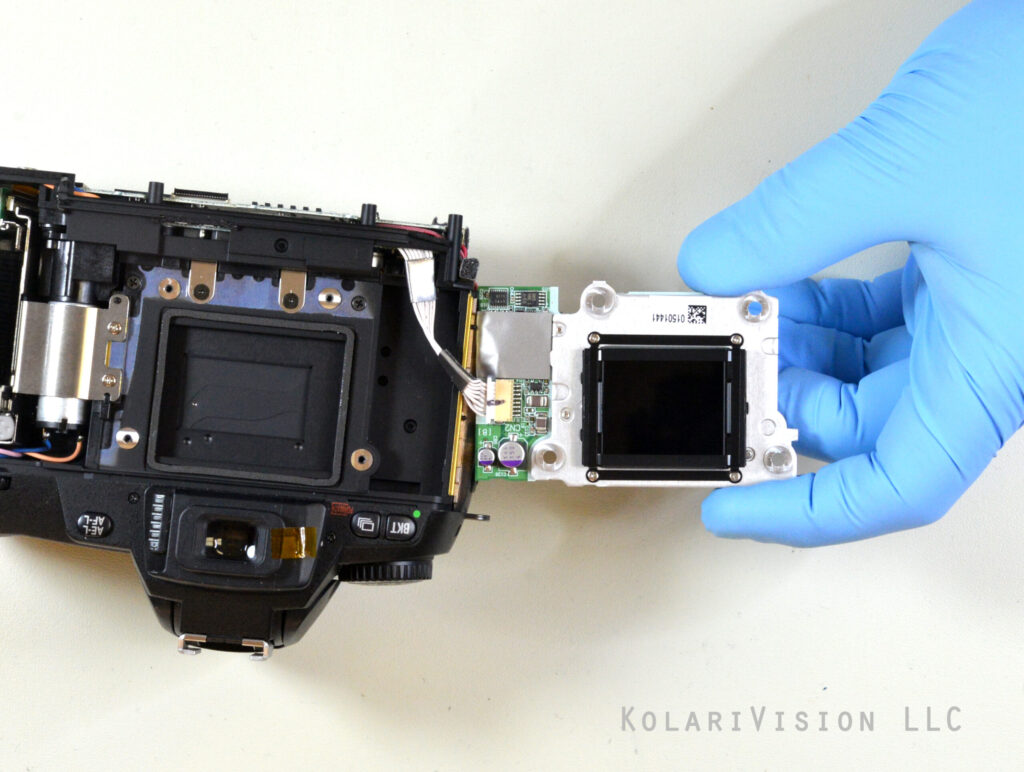
7
Step 7
Lift sensor up and remove the connector as indicated. Gently remove the connector.
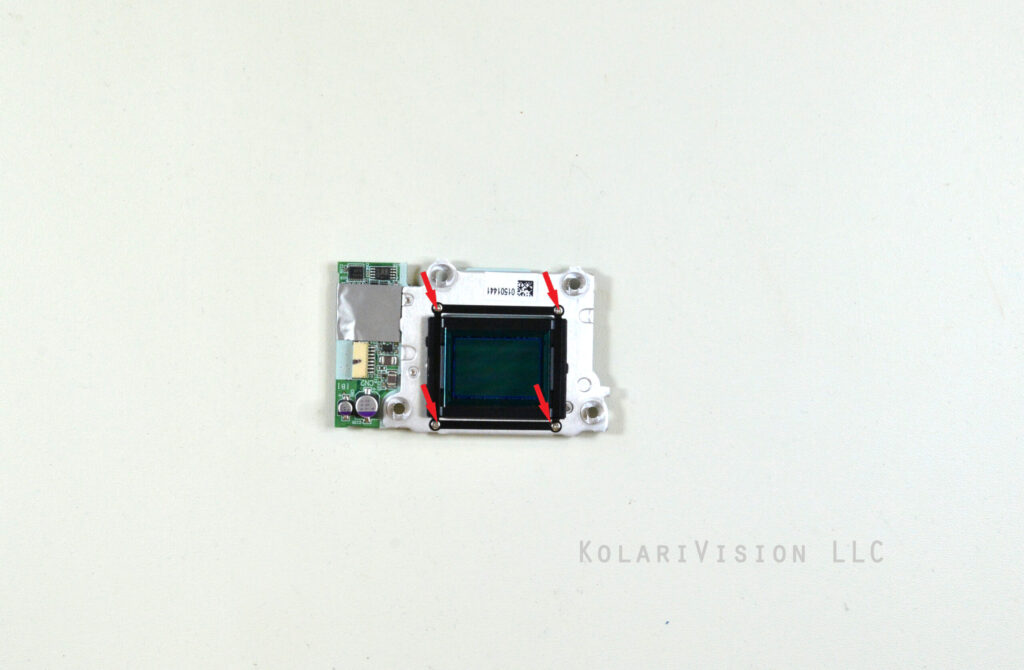
8
Step 8
Remove the four screws as indicated to release the black frame which is holding down the filter. Lift up the black frame and now you can remove the stock filter. Now you can convert the sensor to your desired filter.
9
Step 9
Be sure to clean the filter as best as you can so that there is no visible dust in your pictures. Double check sensor for dust and place the new filter over the sensor. Be sure to keep all stock shims inside.
10
Step 10
Congratulations!! You have now completed the conversion of your filter. Now work backwards to reassemble.
Awesome tutorial. Thanks for sharing.
It took me a second attempt (…and a second second-hand D70!) to succeed as I messed up with the flex connectors the first time. These little things are easily damaged or misaligned.
I left the connectors in place for my second trial. Rotated gently the back display 90 degrees from its original position and did the same thing with the motherboard.
I used 2 pieces of thick foam to protect both display card and motherboard while unscrewing the filter attachment. Worked like a charm. A little more tricky to maintain teh different elements without pulling on the flex cables but worth it.
Best luck for future IR photography amateurs!
Hello, I’ve done all the steps above, as described. However, when I take a photo, the camera works fine, but the image doesn’t appear in the card’s memory. Is the camera not saving the image to the card’s memory?


2 Responses
Awesome tutorial. Thanks for sharing.
It took me a second attempt (…and a second second-hand D70!) to succeed as I messed up with the flex connectors the first time. These little things are easily damaged or misaligned.
I left the connectors in place for my second trial. Rotated gently the back display 90 degrees from its original position and did the same thing with the motherboard.
I used 2 pieces of thick foam to protect both display card and motherboard while unscrewing the filter attachment. Worked like a charm. A little more tricky to maintain teh different elements without pulling on the flex cables but worth it.
Best luck for future IR photography amateurs!
Hello, I’ve done all the steps above, as described. However, when I take a photo, the camera works fine, but the image doesn’t appear in the card’s memory. Is the camera not saving the image to the card’s memory?