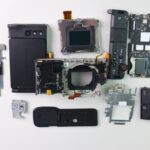
Use this guide to replace the top casing on your Canon T5.
1
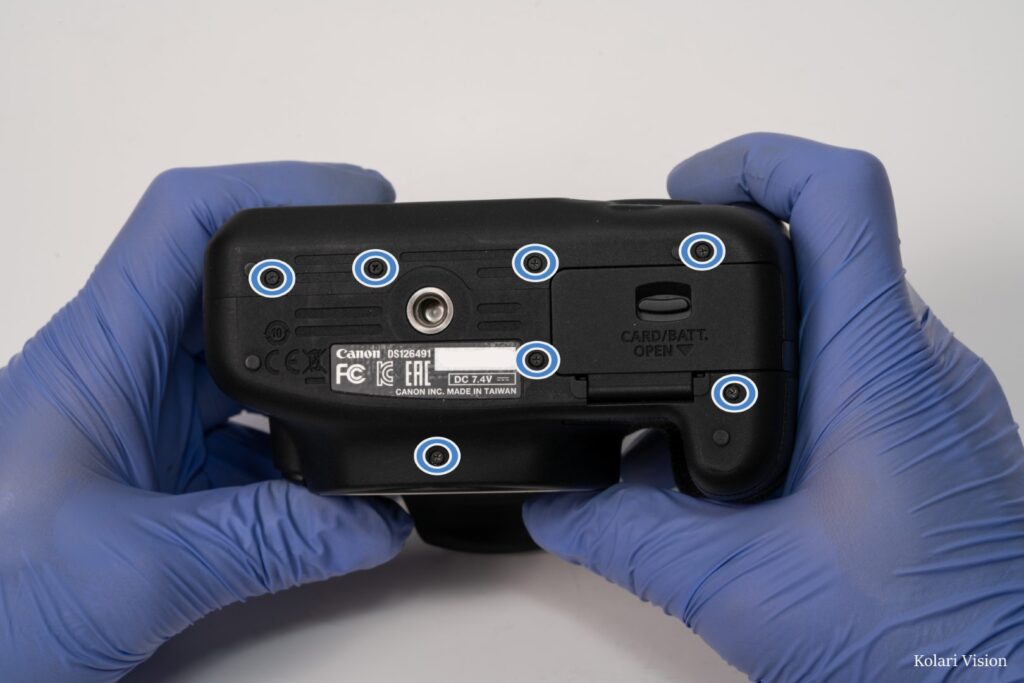
Step 1
On the bottom, remove all 6 screws, including the one under the lens mount.
2
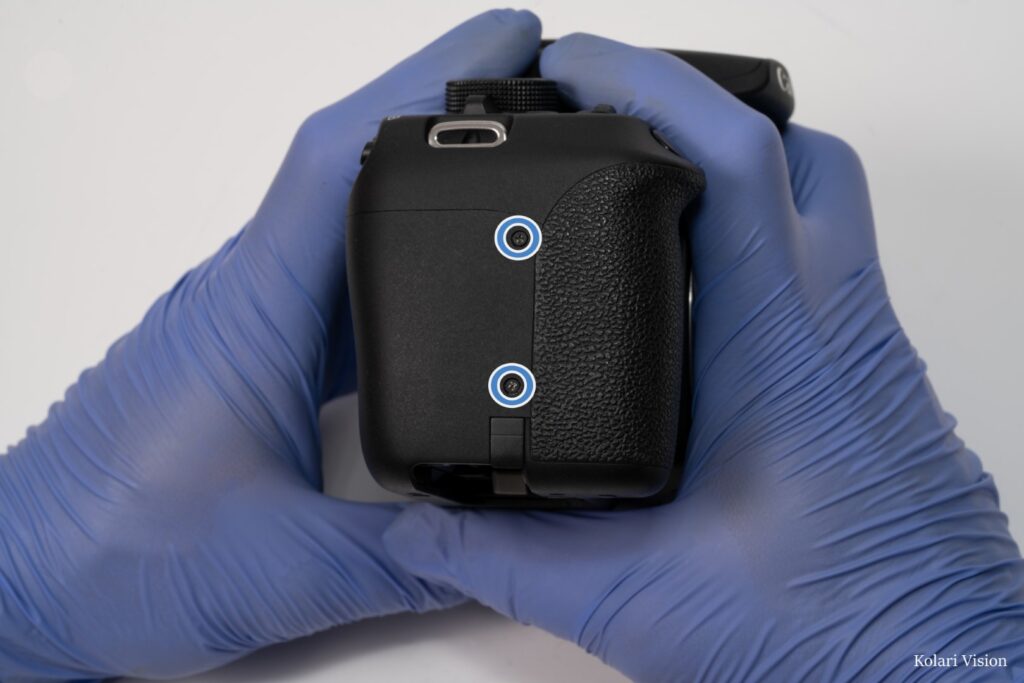
Step 2
Remove the 2 screws on the right side
3
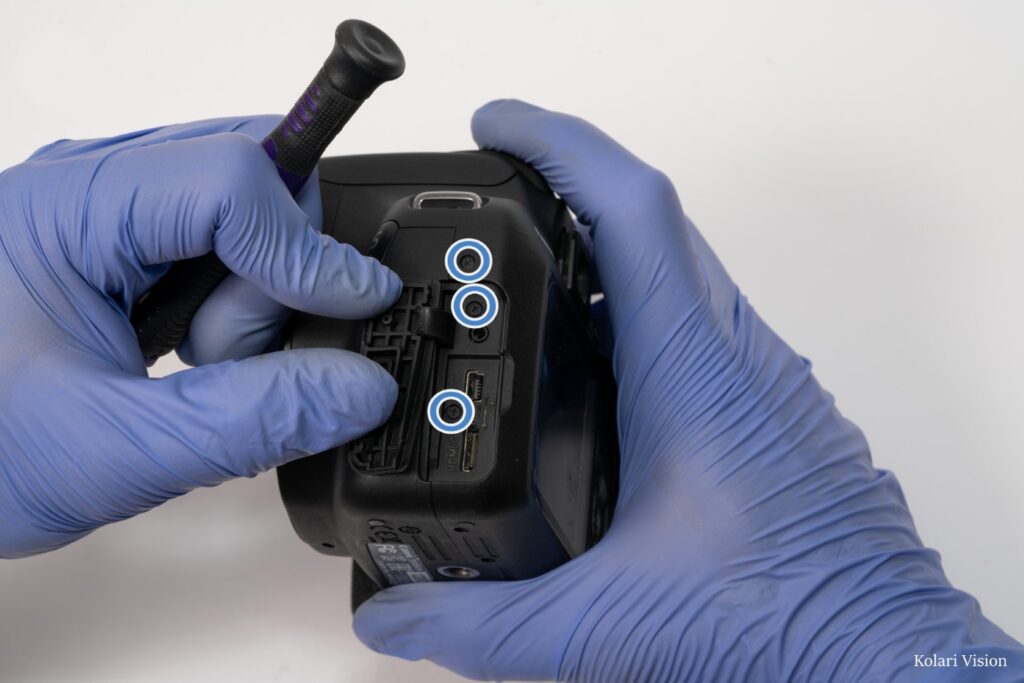
Step 3
On the left side, open the port cover and remove the 2 screws underneath and the 1 screw above it.
4
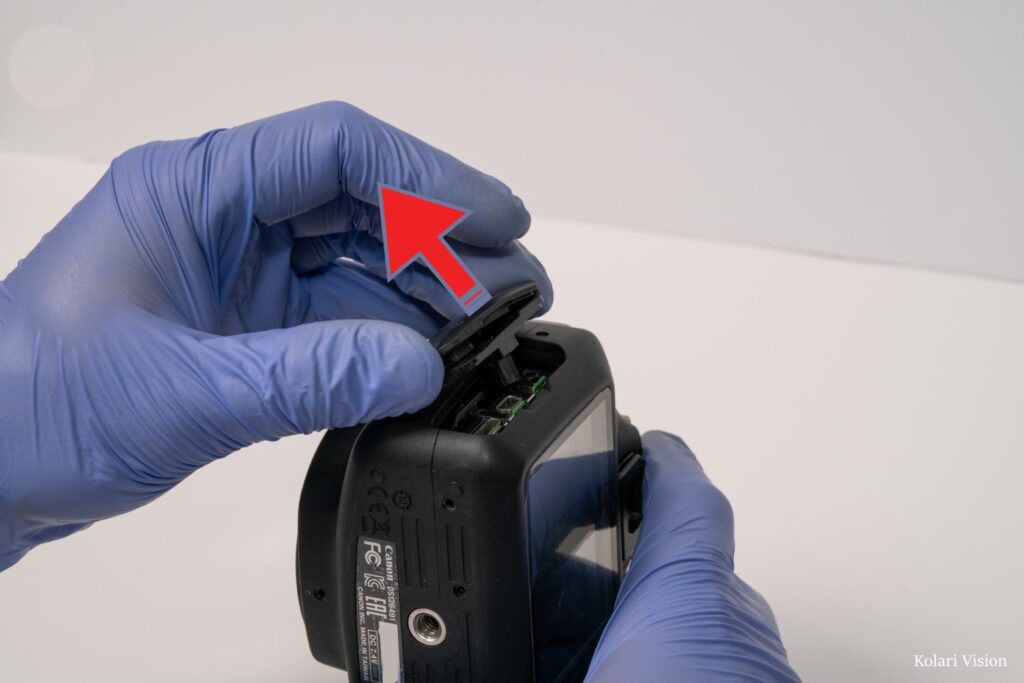
Step 4
You can take out the port panel piece
5
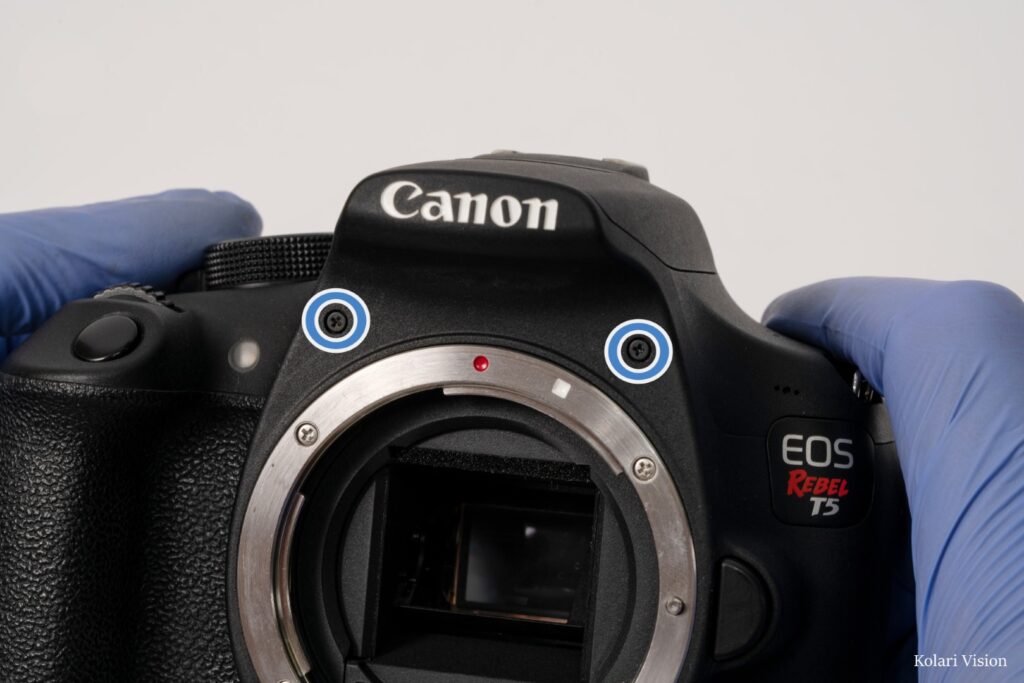
Step 5
remove the 2 screws on the front, above the lens mount.
6
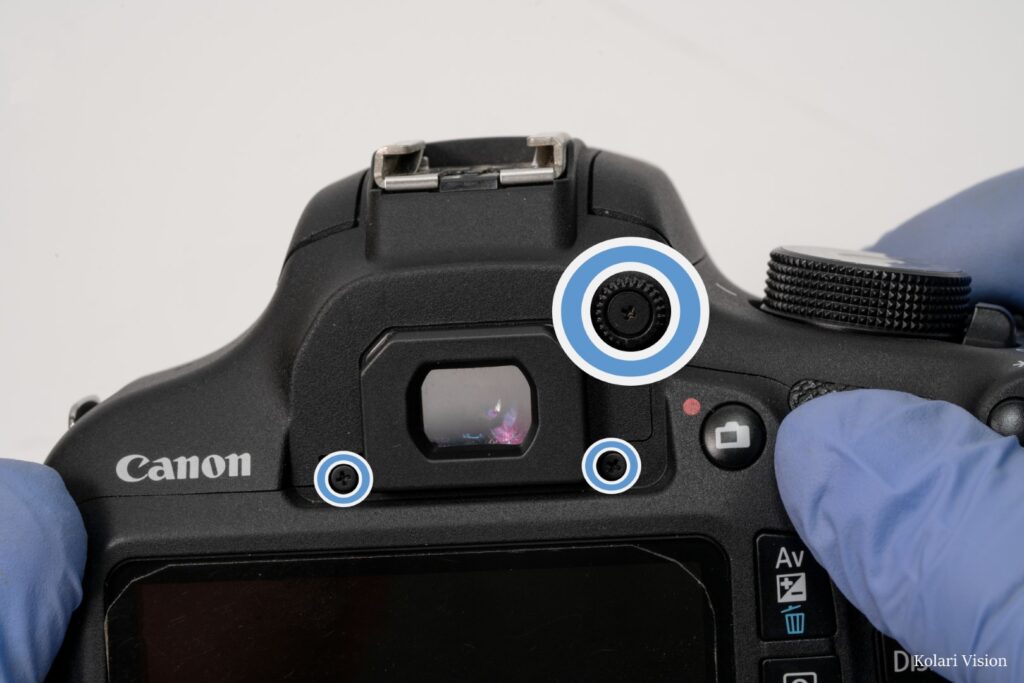
Step 6
Remove the 3 screws around the viewfinder and diopter
7
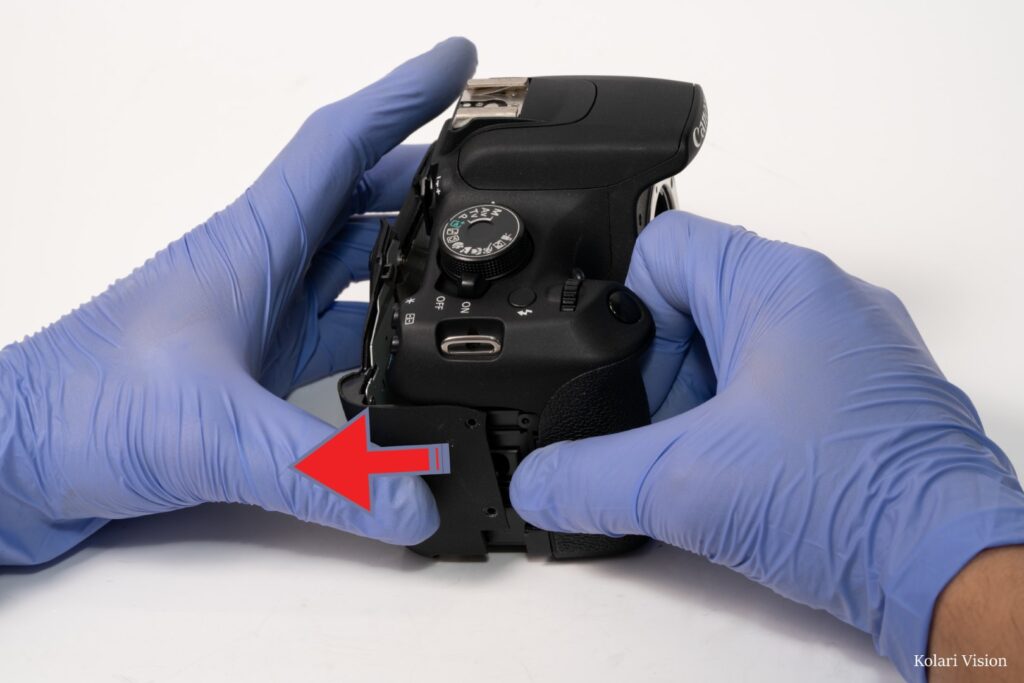
Step 7
Pull the back panel separate from the camera body, but don’t remove completely. There are 2 ribbons still connected to it.
8
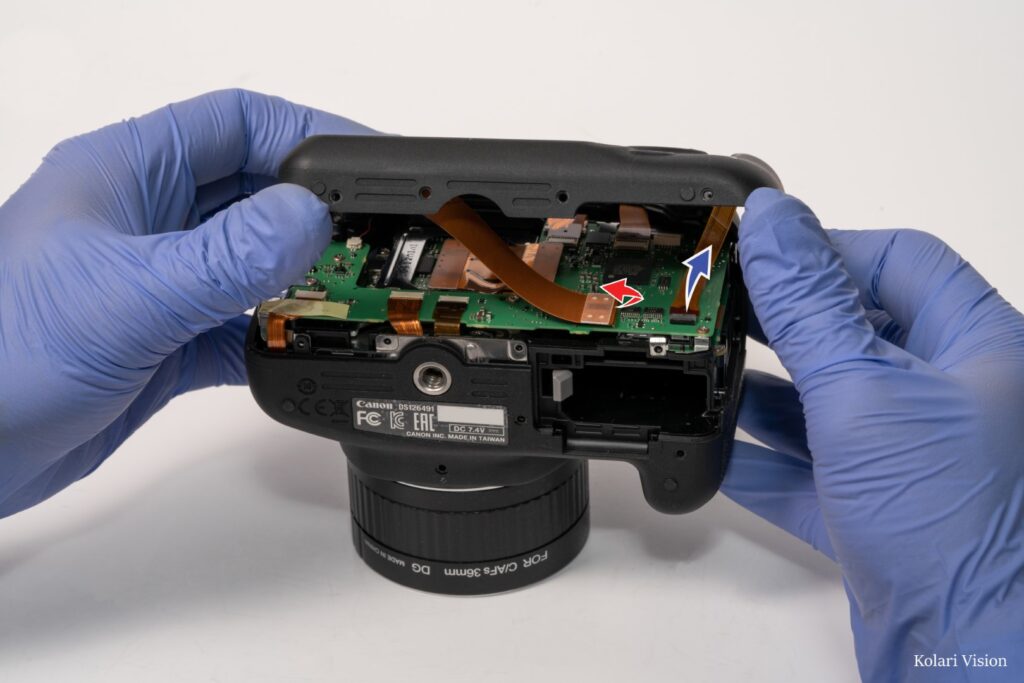
Step 8
Place the camera facedown, with the bottom facing you. Lift up the back panel and you’ll see the 2 ribbons connecting it. Disconnect the one on the left by evenly prying it up. disconnect the one on the right by unclipping it and pulling it free.
9
Step 9
Disconnect the 8 ribbons connected to motherboard, along with the red and black wires, and the black wire in the top right. Note that in the top right, there are 2 ribbons hiding beneath the others.
10
Step 10
Remove the 2 screws in the left and right strap mounts.
11
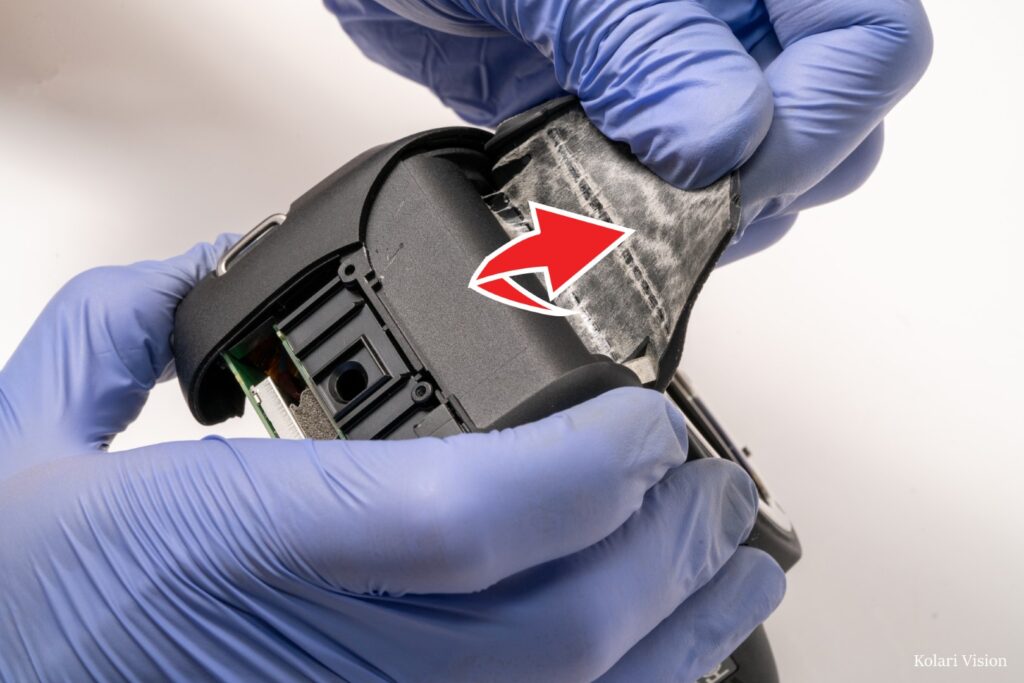
Step 11
Peel off the leathers over the handgrip.
12
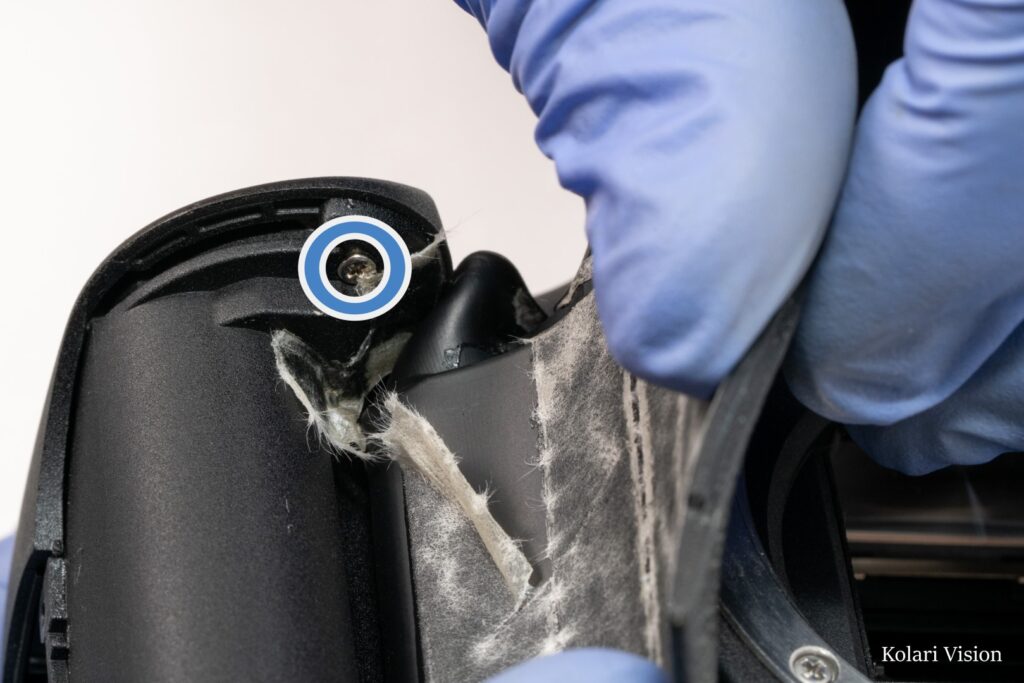
Step 12
On the roof of the handgrip/underside of the shutter button, there is a screw hiding. Remove the 1 screw.
13
Step 13
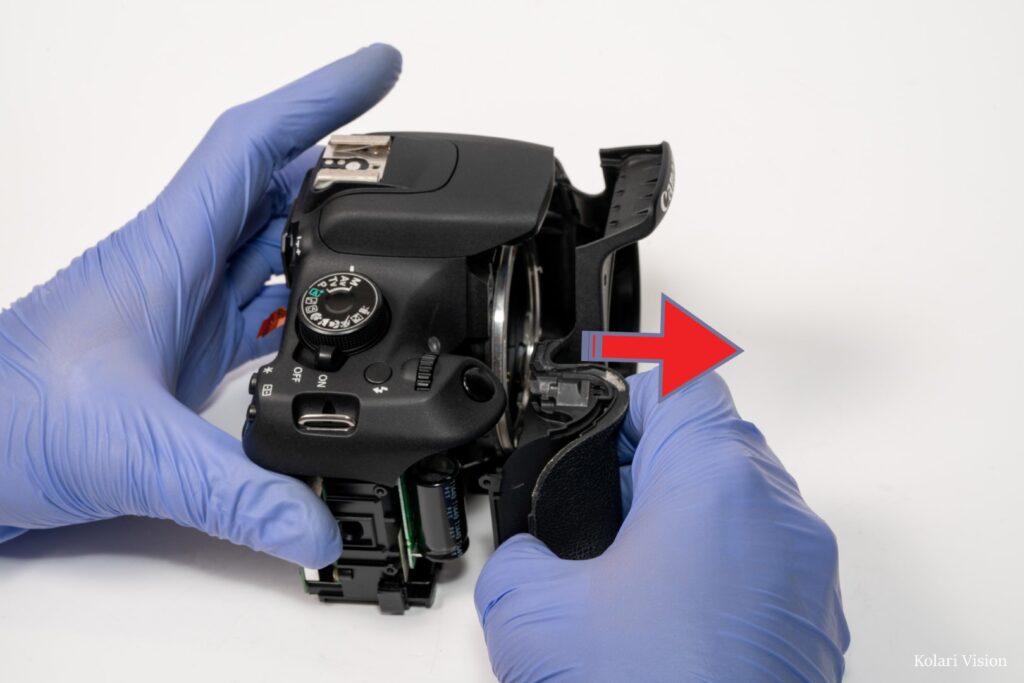
Pull off the front panel.
14
Step 14
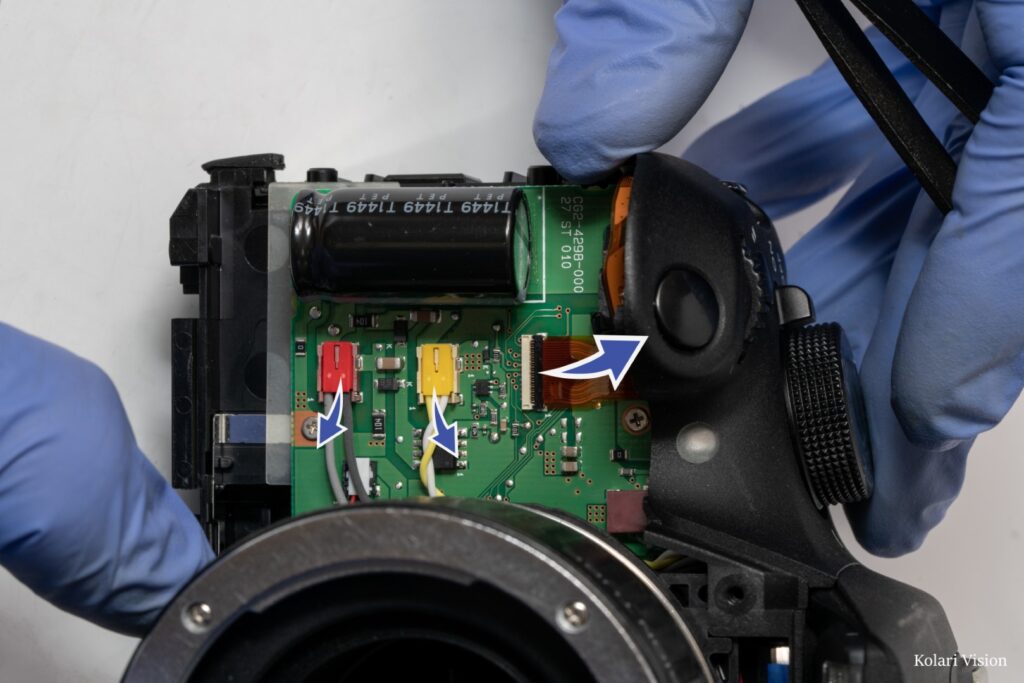
On the front of the camera, pull out the ribbon and unclip the ketchup and mustard red and yellow wire clips.
15
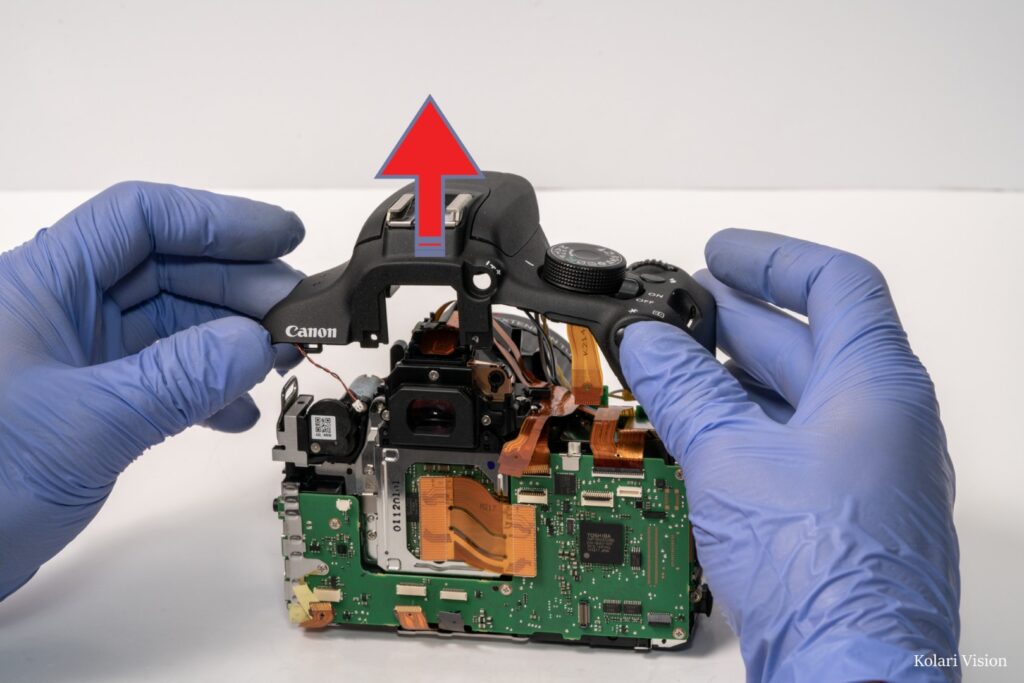
Step 15
Lift off the top cover.
16
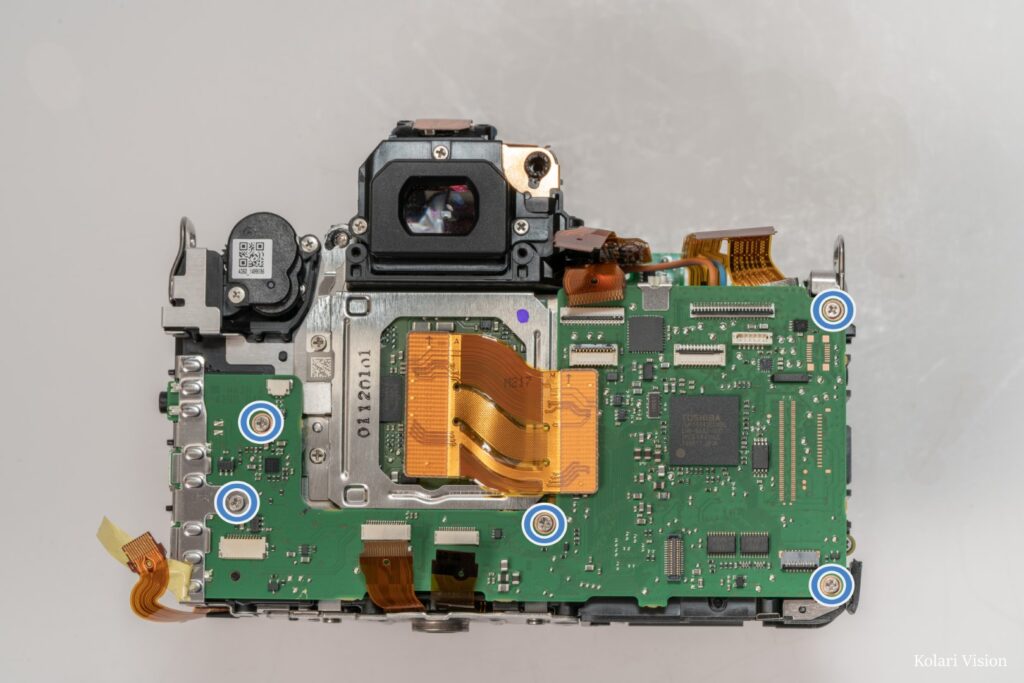
Step 16
Remove the 5 screws holding in the motherboard.
17
Step 17
Lift up the motherboard but don’t pull it off yet. On the underside of the board is a clip connecting to 2 wires. Pull out the clip to disconnect them.
18
Step 18
You can now remove the motherboard.
19
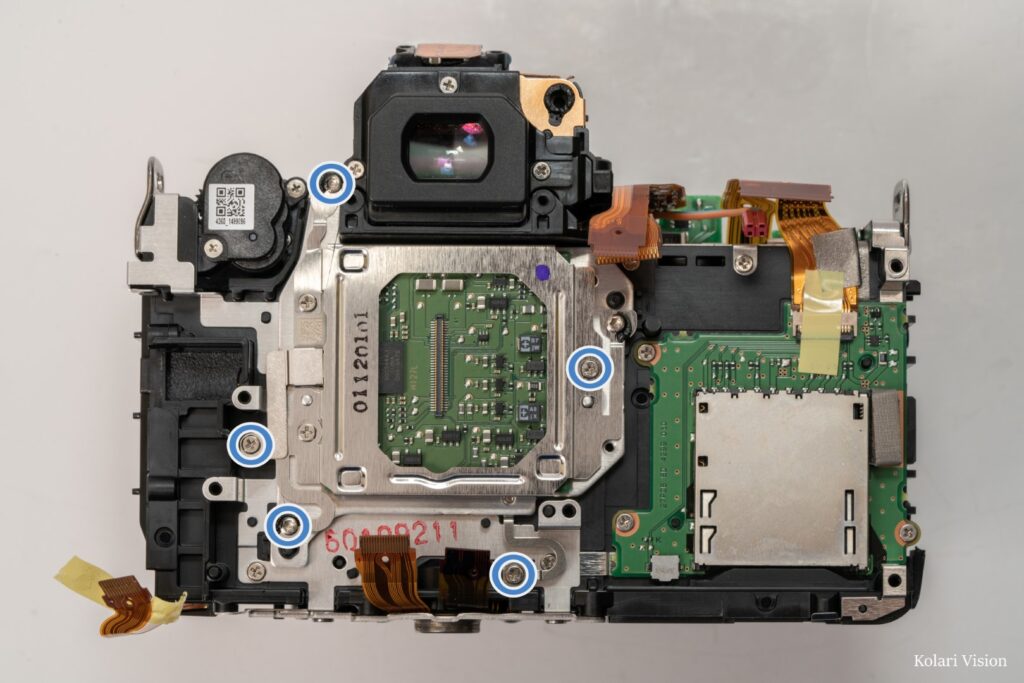
Step 19
This camera uses spring to calibrate the position of the sensor, and we use precision equipment to measure the height of the sensor. You can attempt to count the number of turns it take to remove a screw, however we do not advise doing so.
The springs are located under the 3 torx screws. You’ll need to remove those along with the screws connecting to the left and bottom.
")
")
")
")
")
")

")
")
")