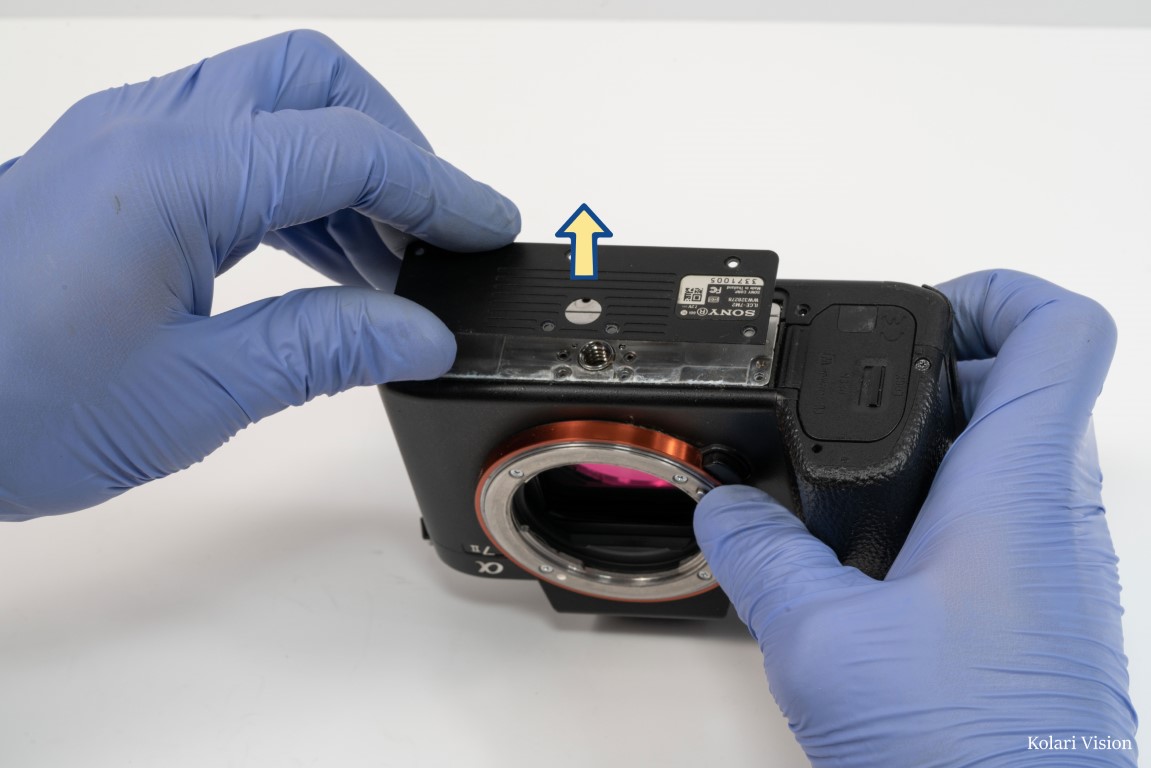
Take off the bottom plate, and remove the 1 screw on the inner bottom plate.
3
Step 3
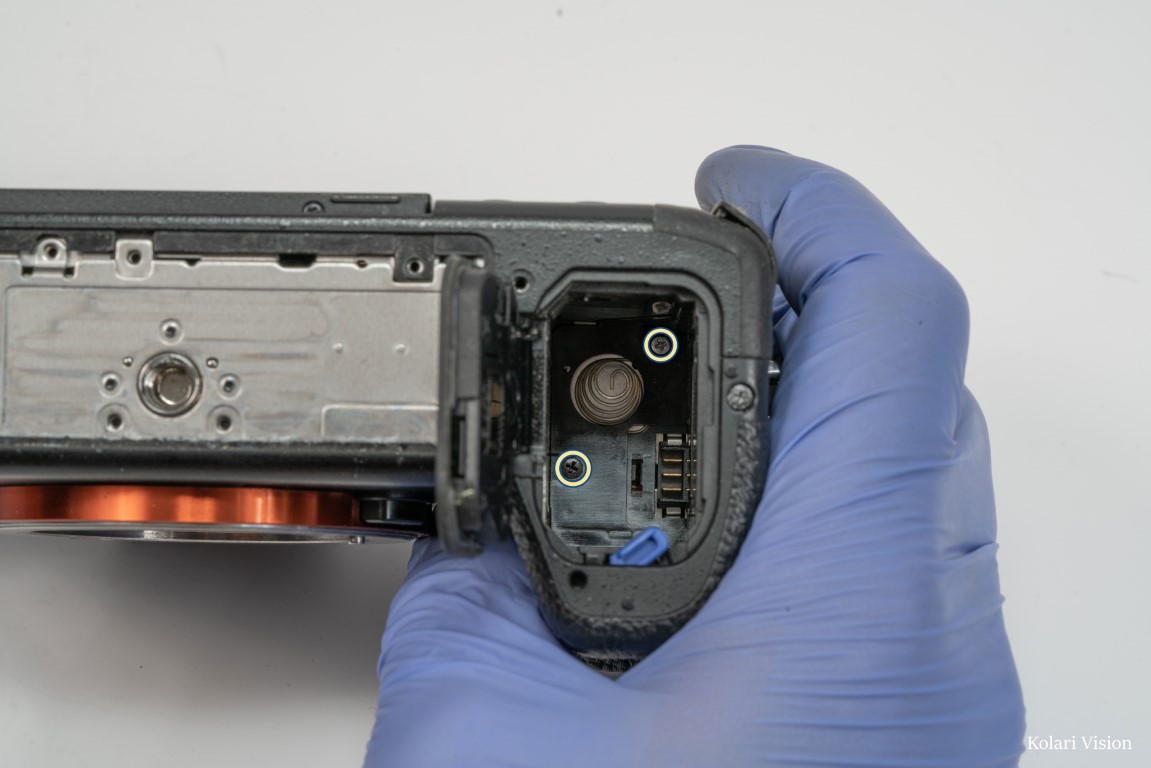
Open the battery and remove the 2 screws at the bottom of the battery compartment. You can also remove the battery door.
4
Step 4
Remove the inner bottom plate
5
Step 5
Peel back and remove the leathers on the hand grip.
6
Step 6
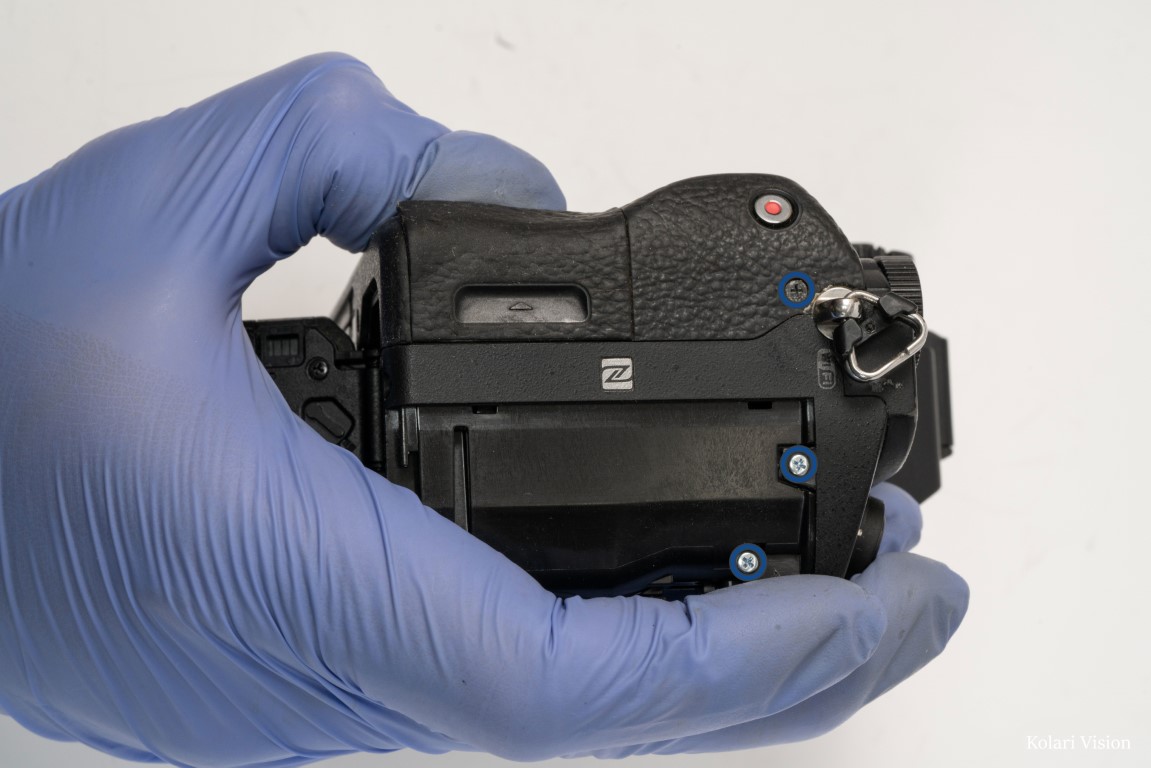
Remove the 2 screws that were underneath the leathers and the 1 screw by strap mount.
7
Step 7
There’s another screw other side of the handgrip, facing the lens mount. Remove it.
8
Step 8
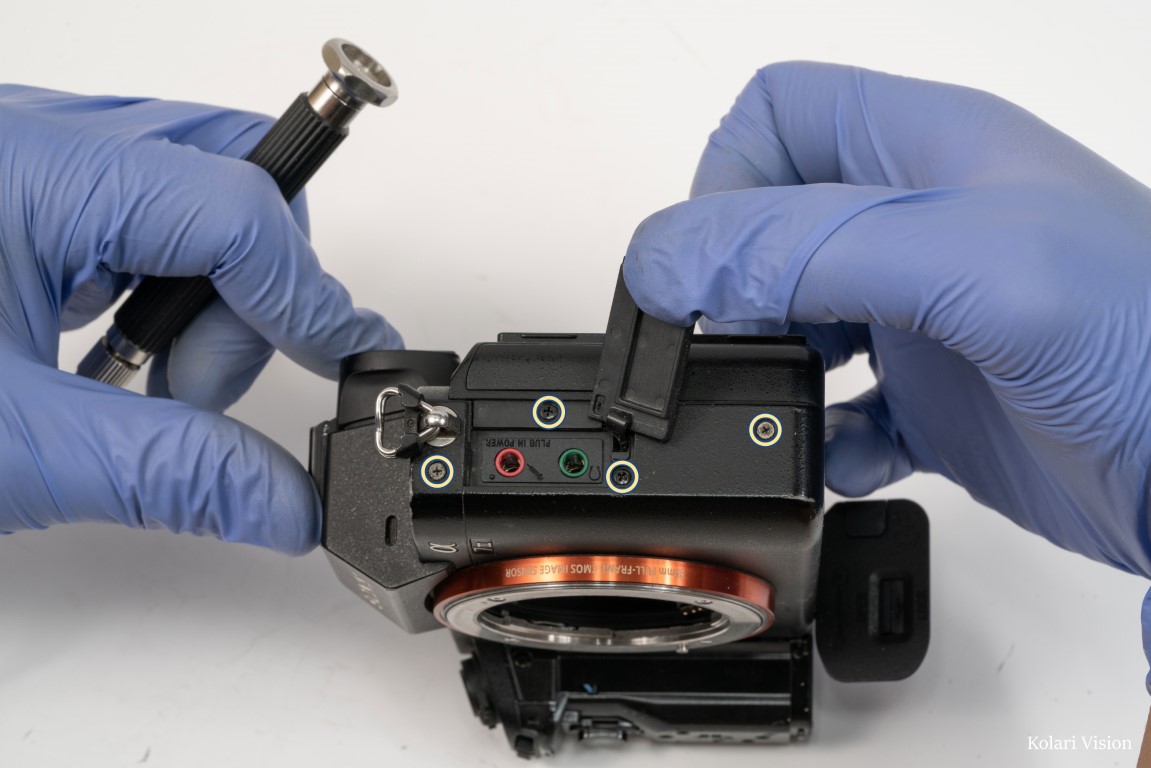
Remove all 4 screws on the right side, including the ones in the headphone panel
9
Step 9
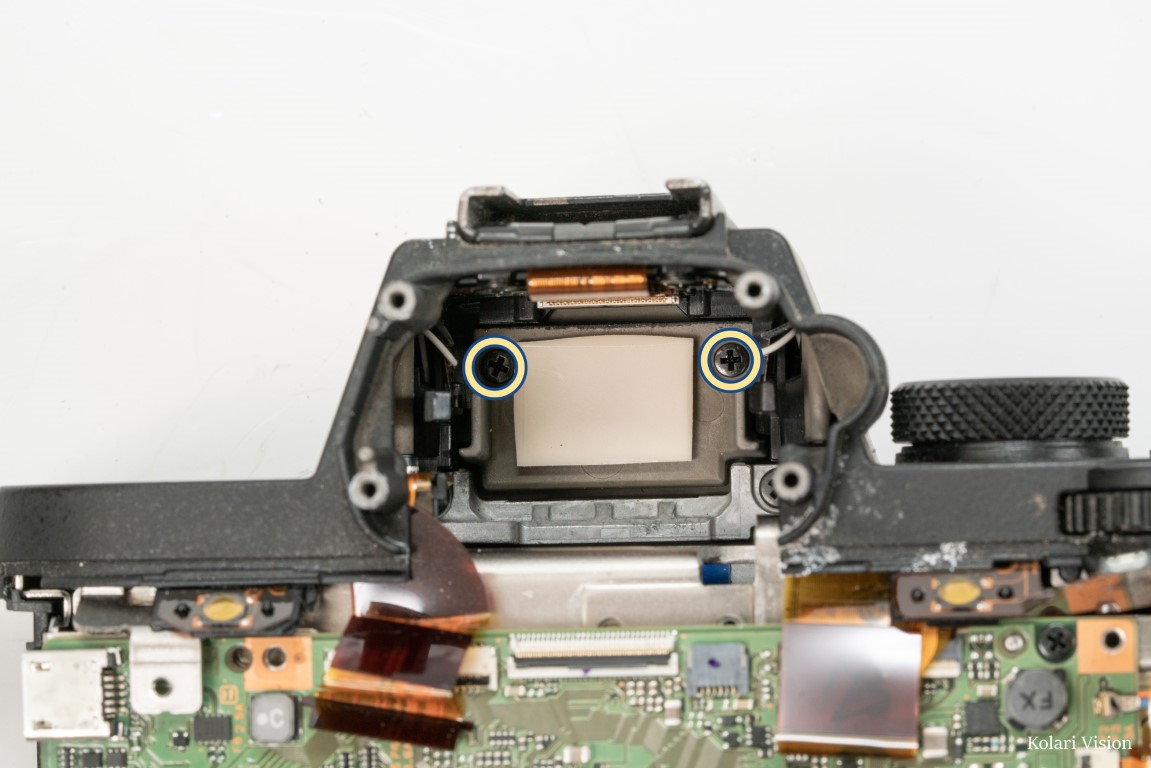
On the back, remove the 5 screws on the viewfinder and the diopter. Then remove all 7 of the screws from beneath the LCD panel
10
Step 10
On the underside of the LCD panel, by the right hinge, there’s a piece covering the ribbon connection. Carefully pry it loose and take it off.
11
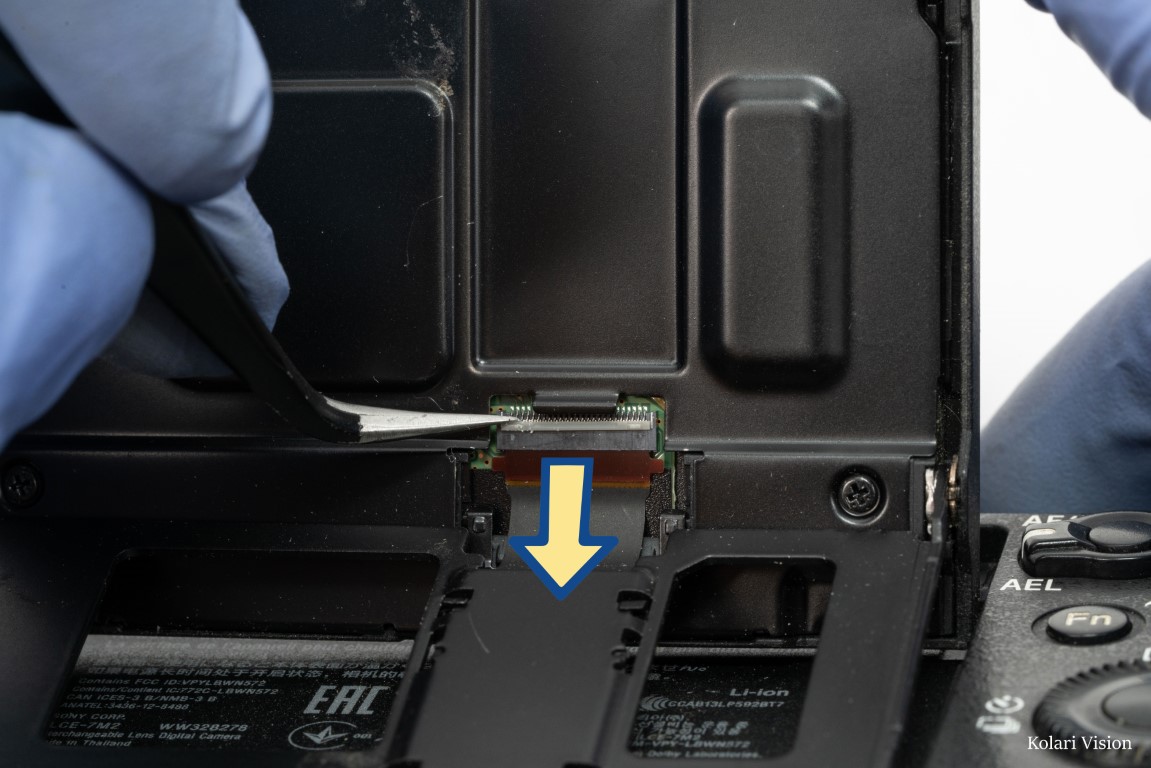
Step 11
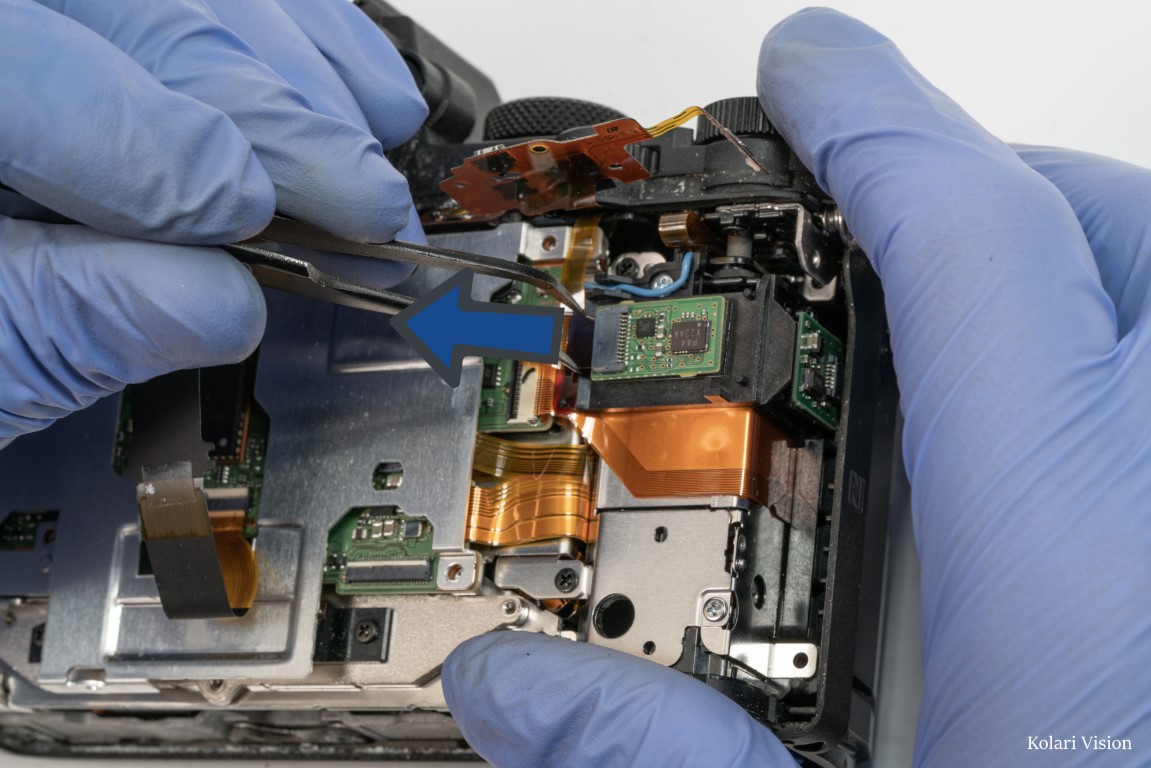
Disconnect the ribbon
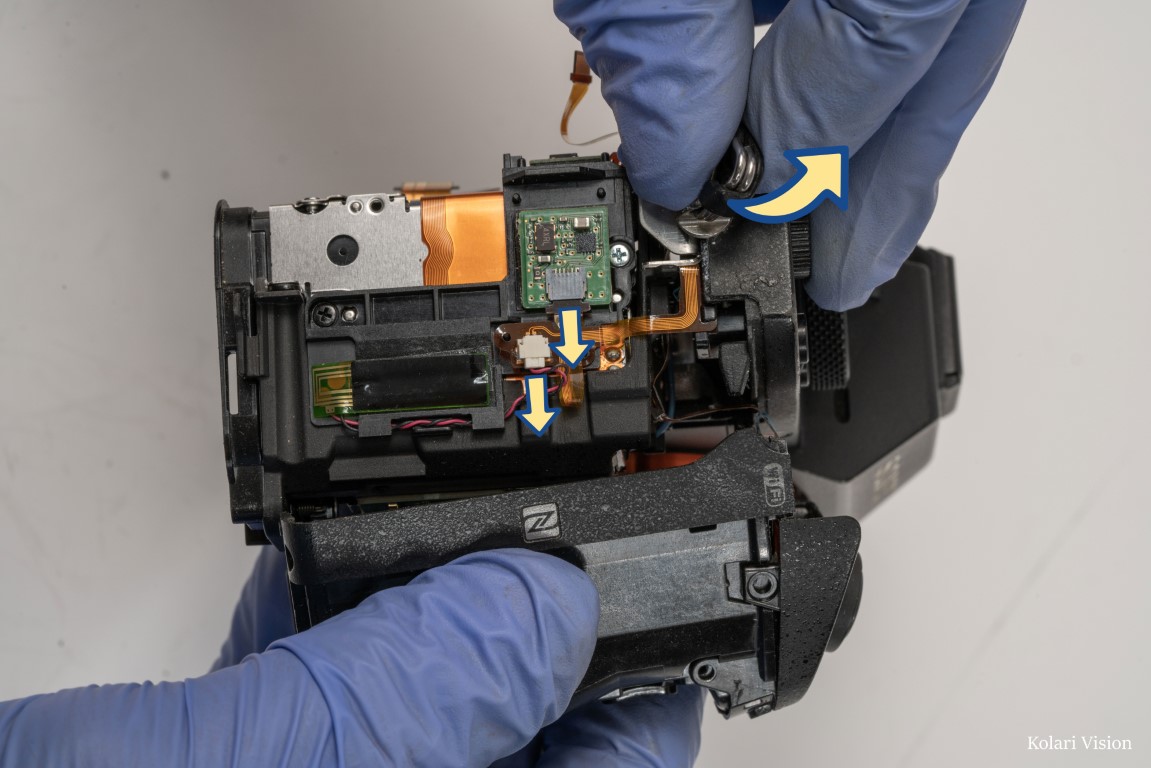
12
Step 12
On the back side of the LCD mount is a clip that is holding the ribbon in place. Simply slide it up to unlatch and place it to the side.
13
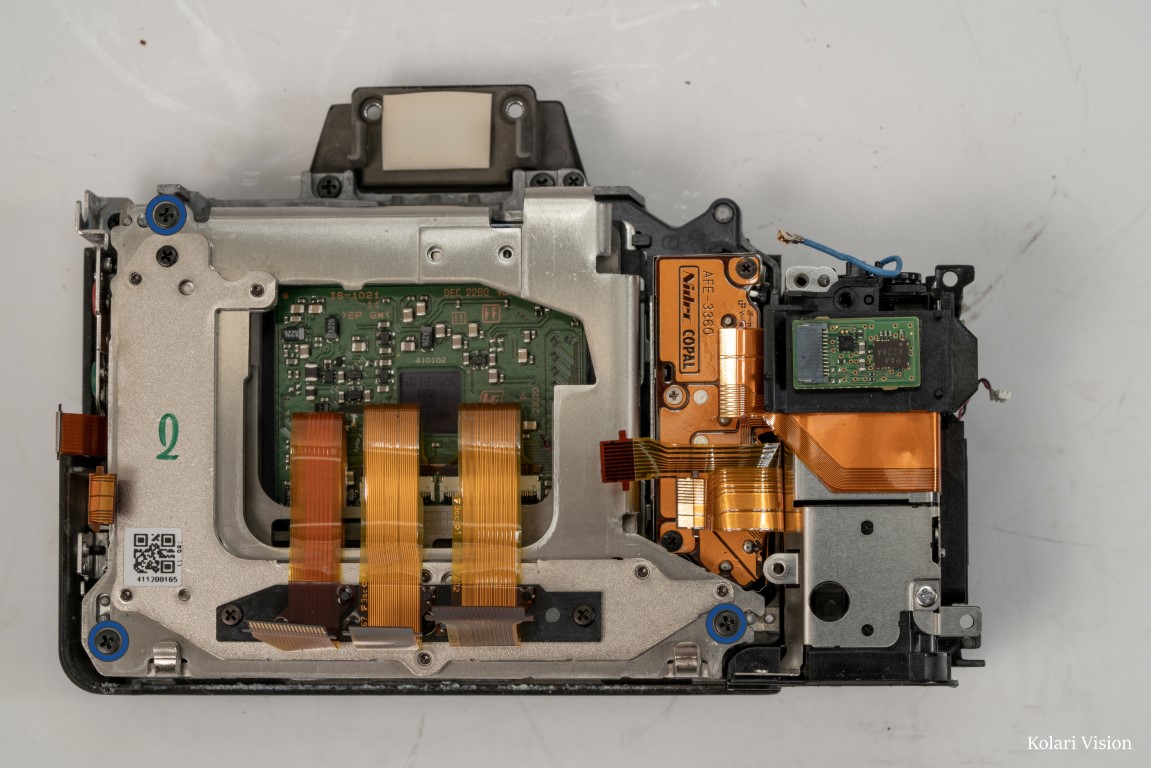
Step 13
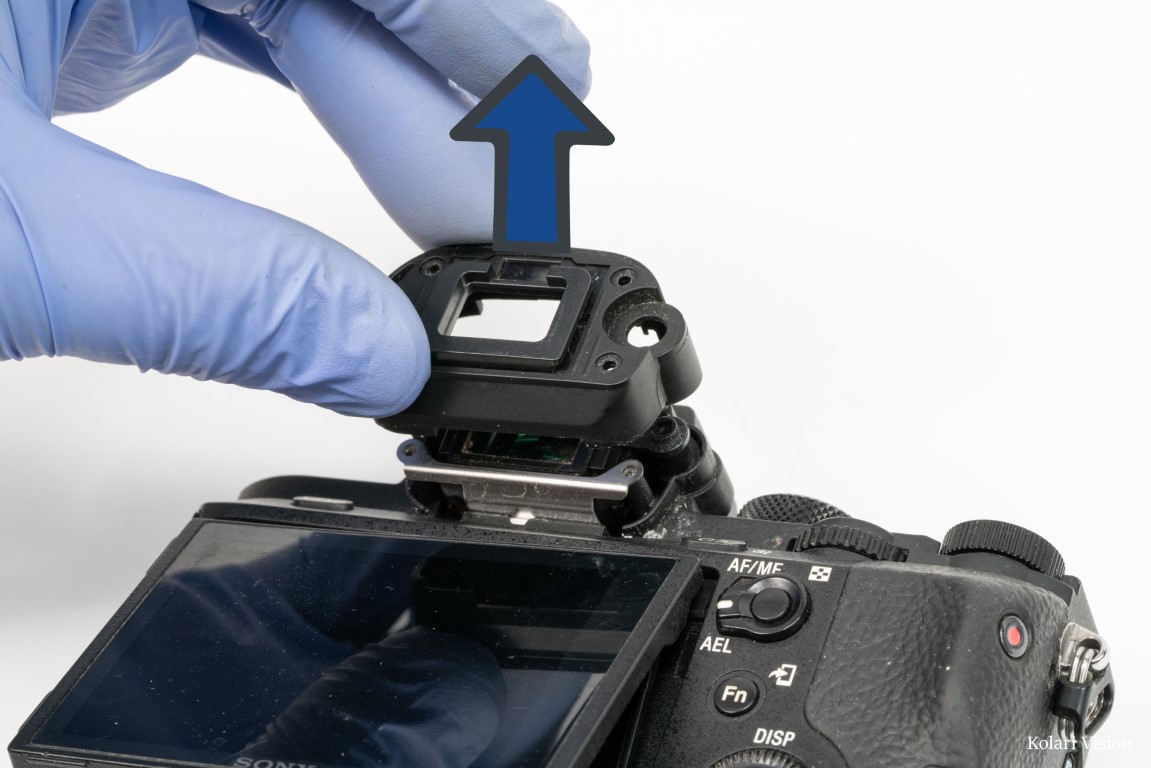
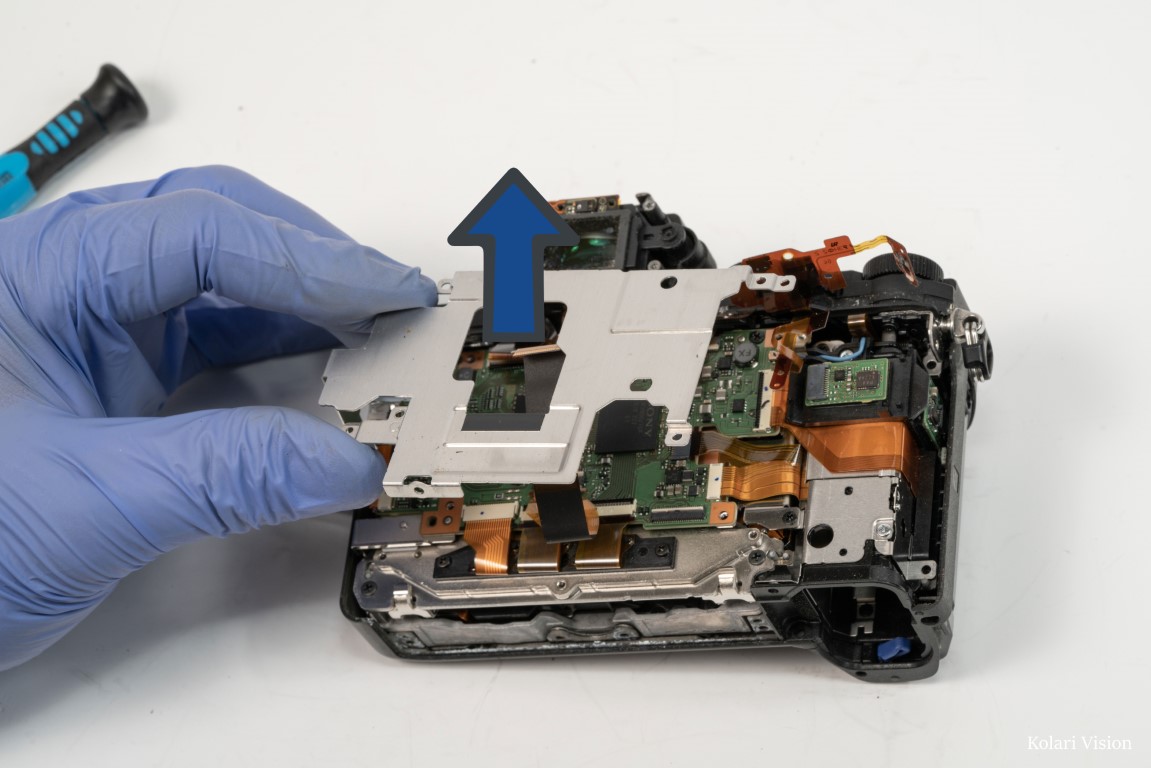
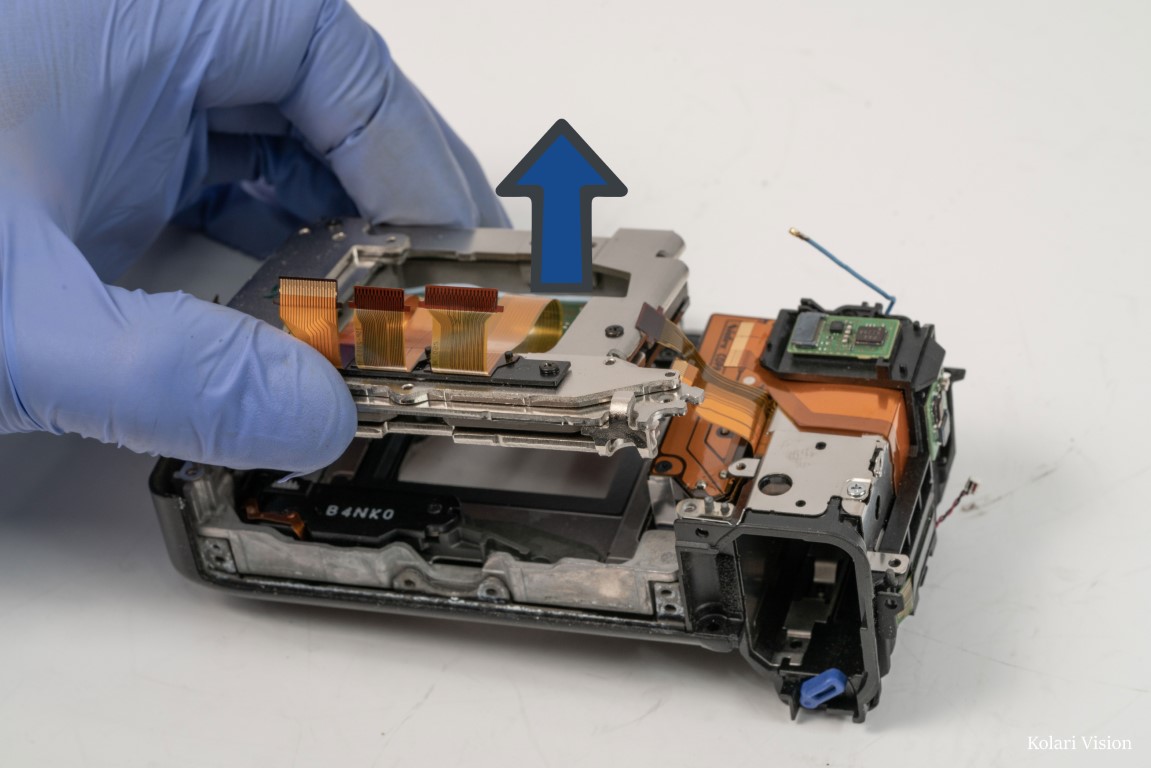
Remove the viewfinder casing
14
Step 14
Remove the LCD screen and its frame, carefully sliding it past the ribbon.
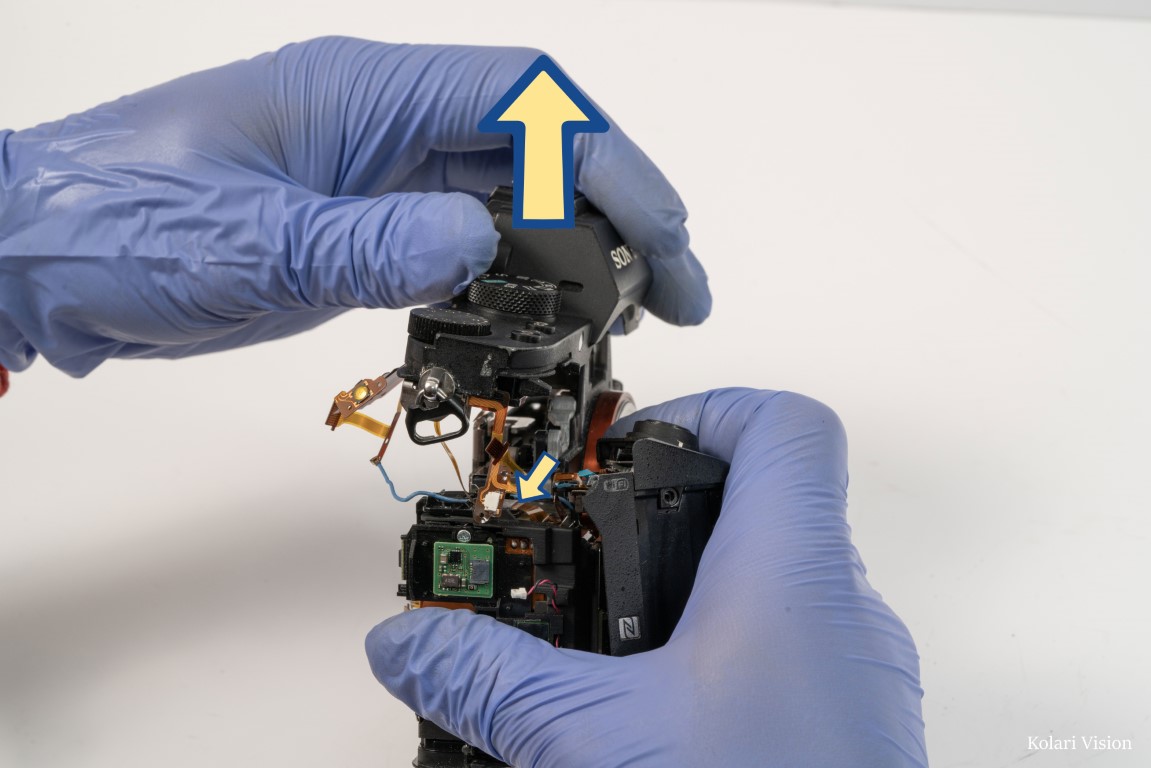
15
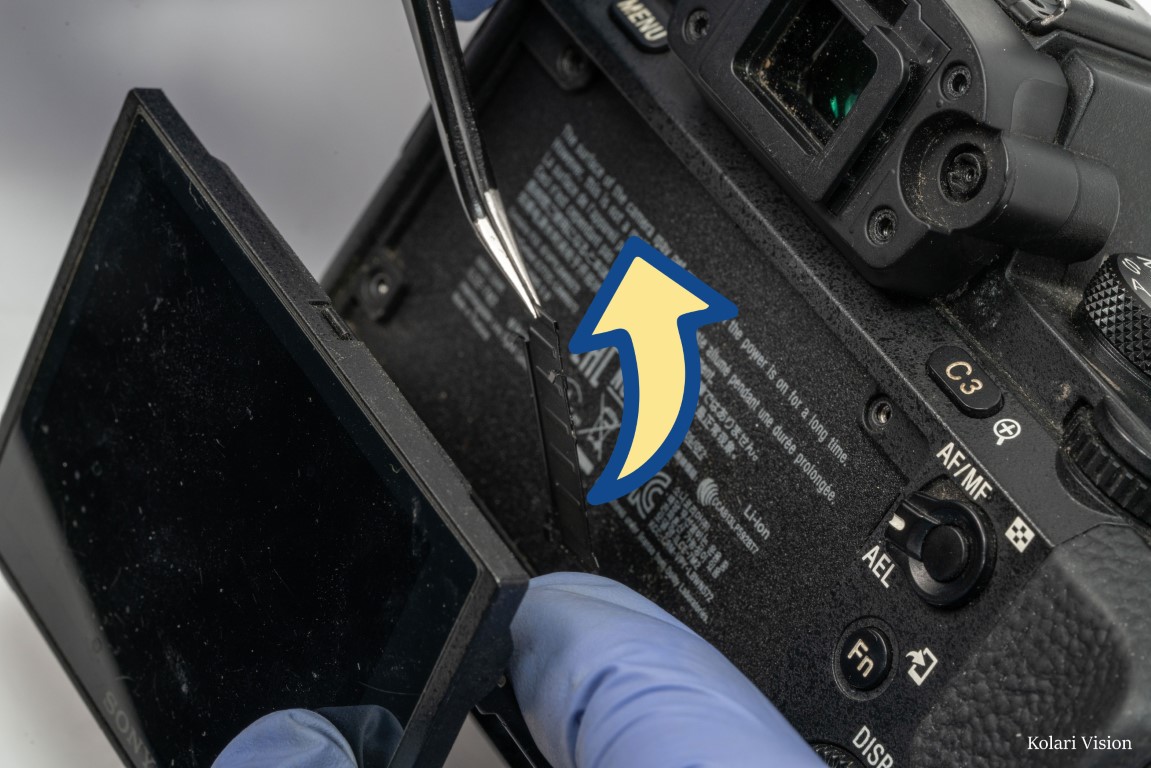
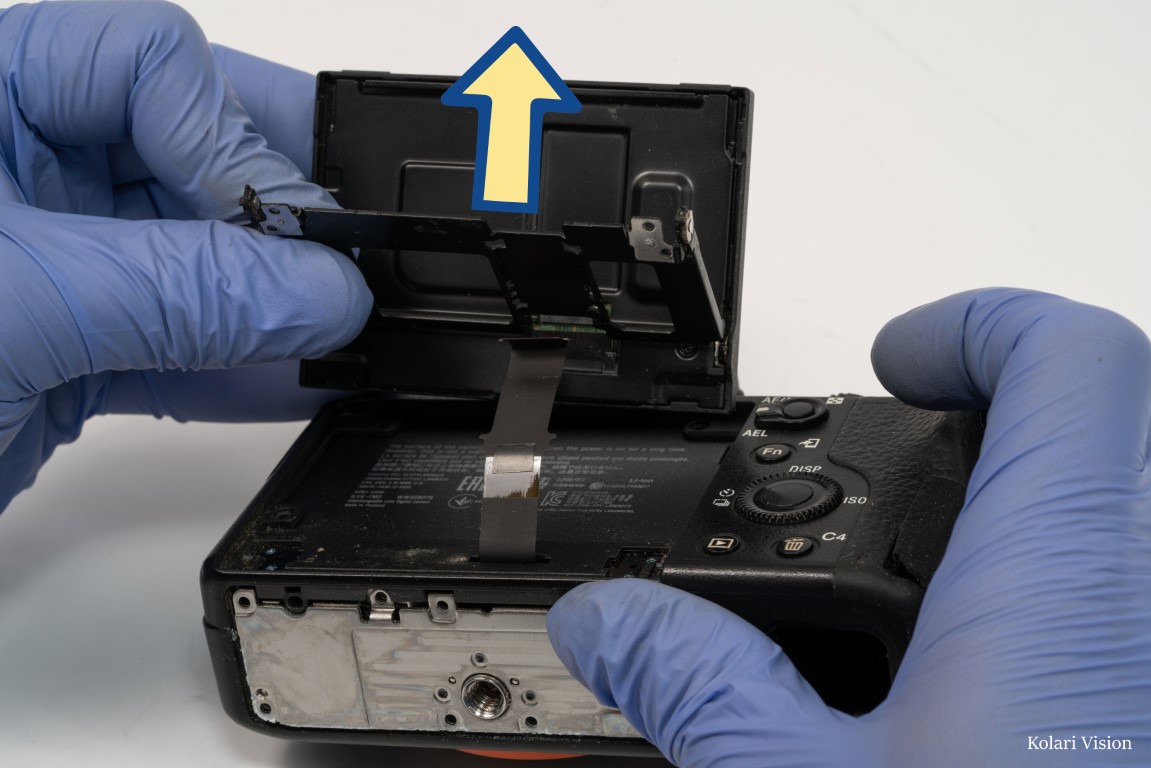
Step 15
Pull the back panel off of the camera.
16
Step 16
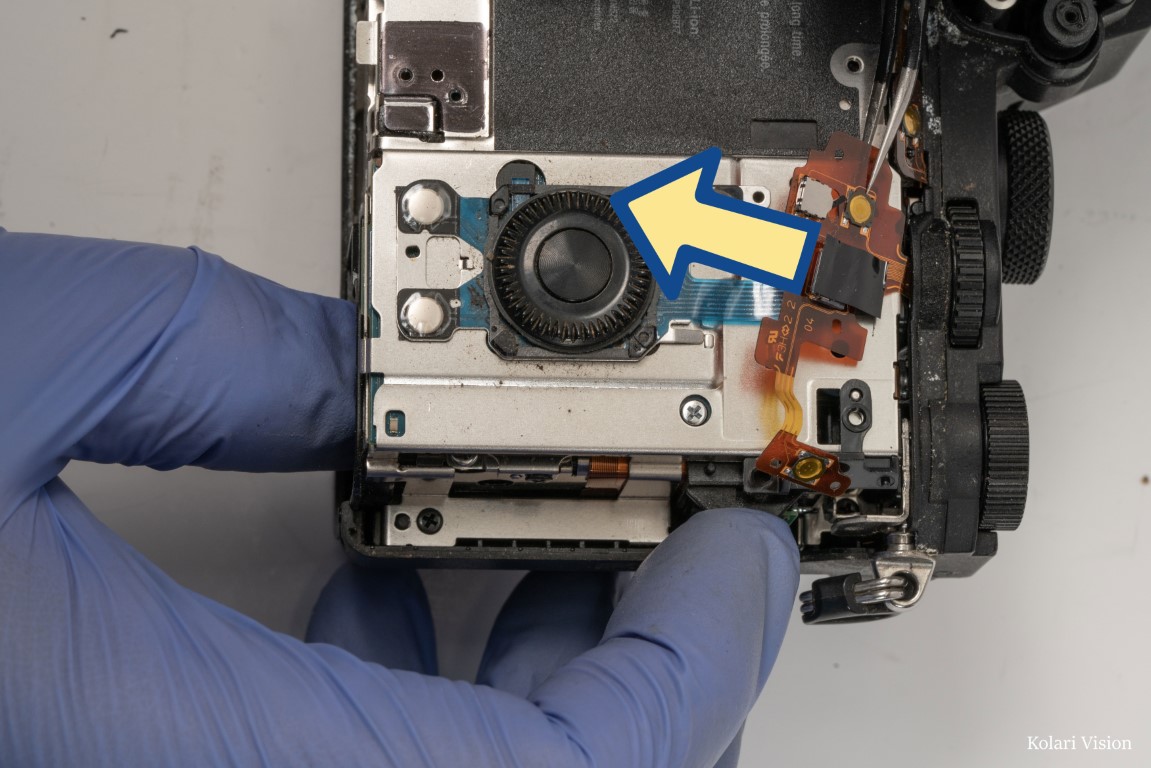
You’re in the camera. First peel back the heat tape over the blue ribbon leading to the control wheel and disconnect it.
17
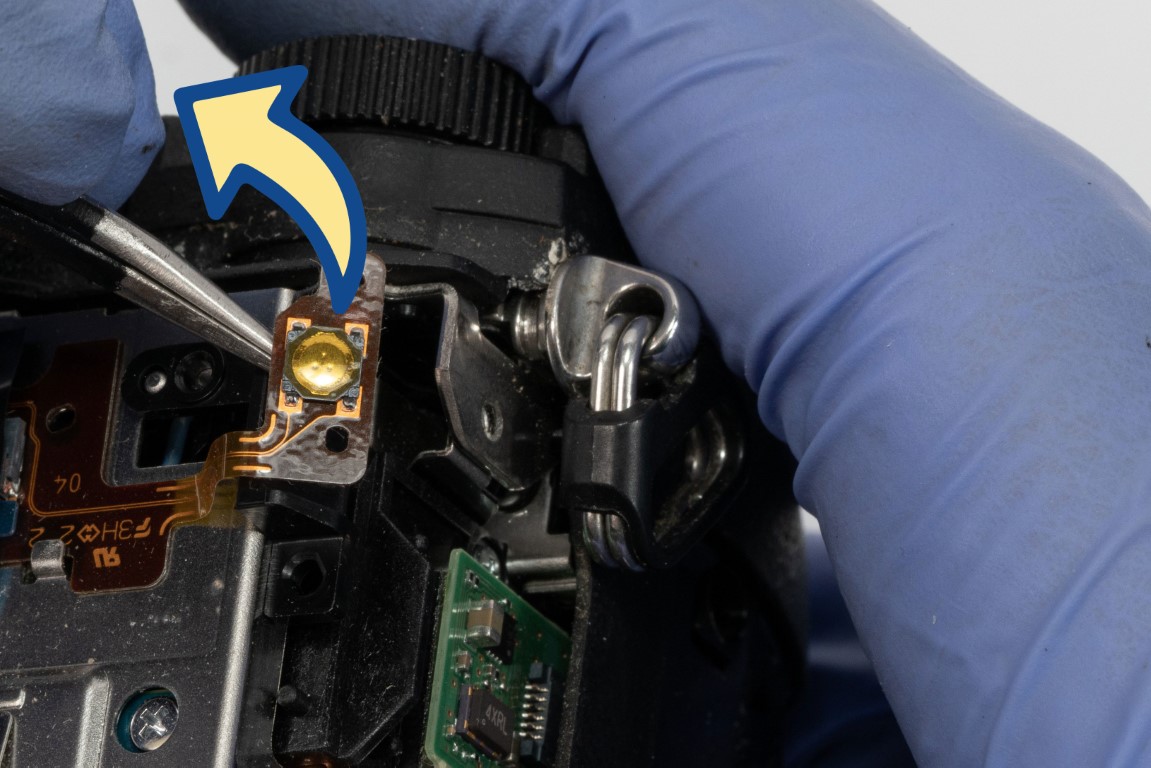
Step 17
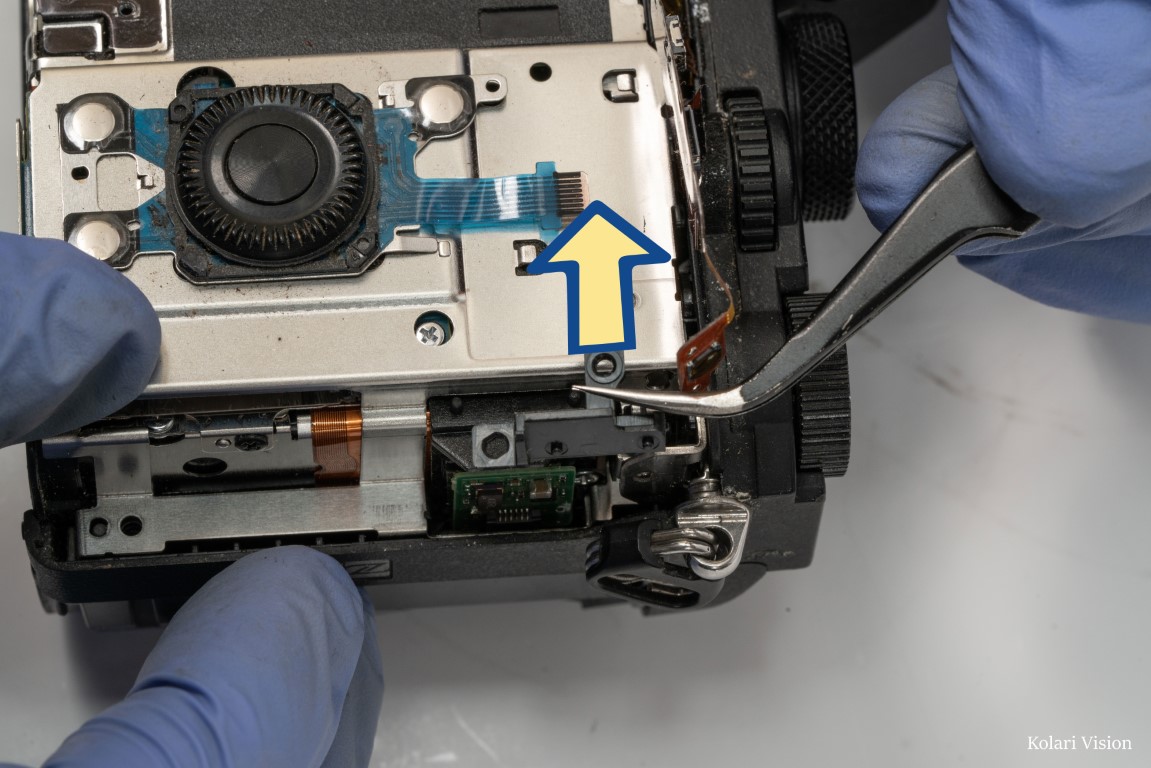
Next you’ll need to detach the orange flexible circuit structure it was connected to. Start on the right side, by lifting the end, with the gold contact, free of the pegs holding it in place.
18
Step 18
Next work the larger part out from under the hooks.
19
Step 19
Remove the 2 screws from the top and bottom corners of the right side, and the bottom corner of the left side.
20
Step 20
Take off the black bracket piece
21
Step 21
On the lower left side there is some heat tape which is sticking to the side of plate. You’ll need to peel it back before you can remove the plate. You can remove the heat tape entirely now or do it after removing the top plate.
22
Step 22
Lift off the top plate.
23
Step 23
Take out the heat tape if you haven’t already.
24
Step 24
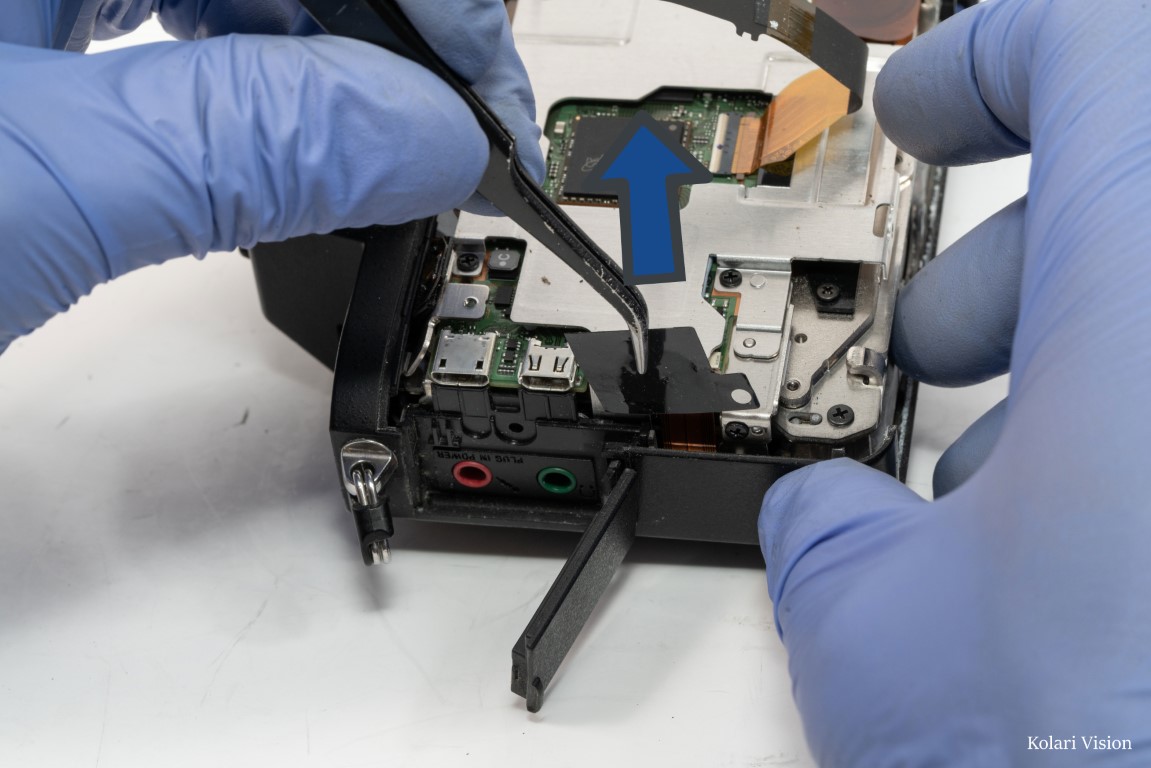
Unscrew the 3 screws on the top and side of the card reader and disconnect the ribbon attaching it to the board.
25
Step 25
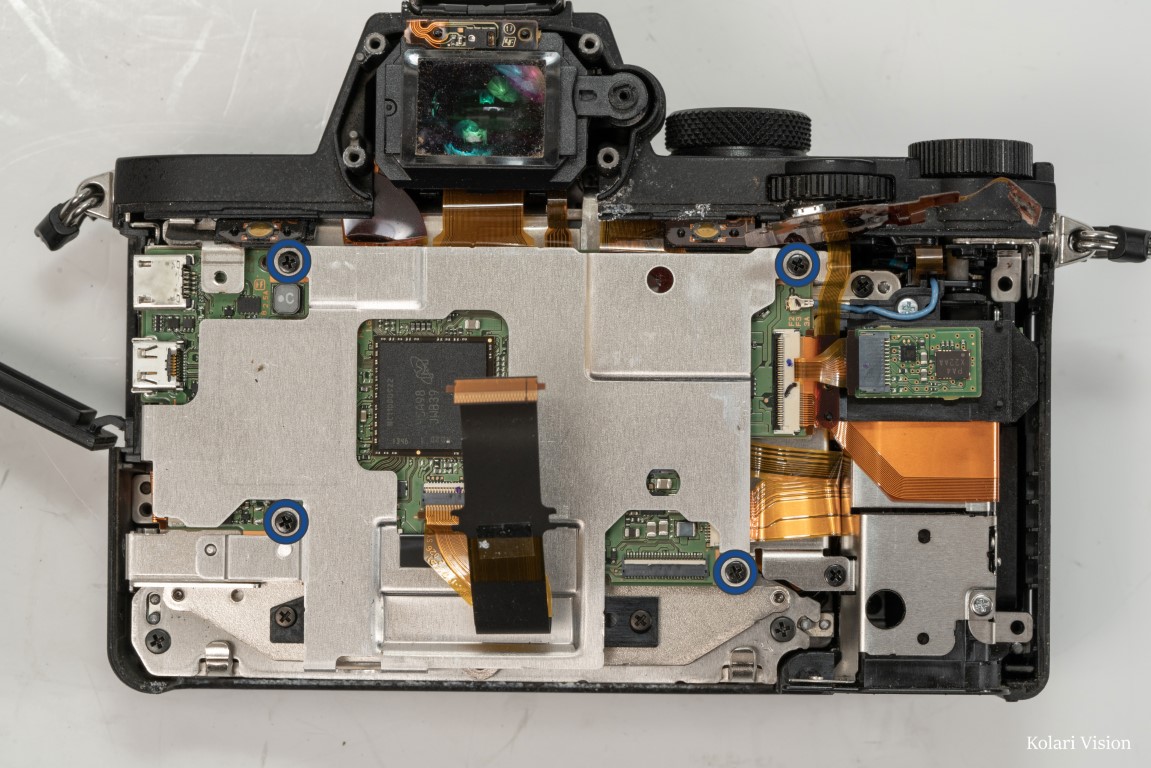
Remove the 4 corner screws holding the heat sink.
26
Step 26
Disconnect the ribbon leading to the small board on the upper right.
27
Step 27
Take off the heatsink.
28
Step 28
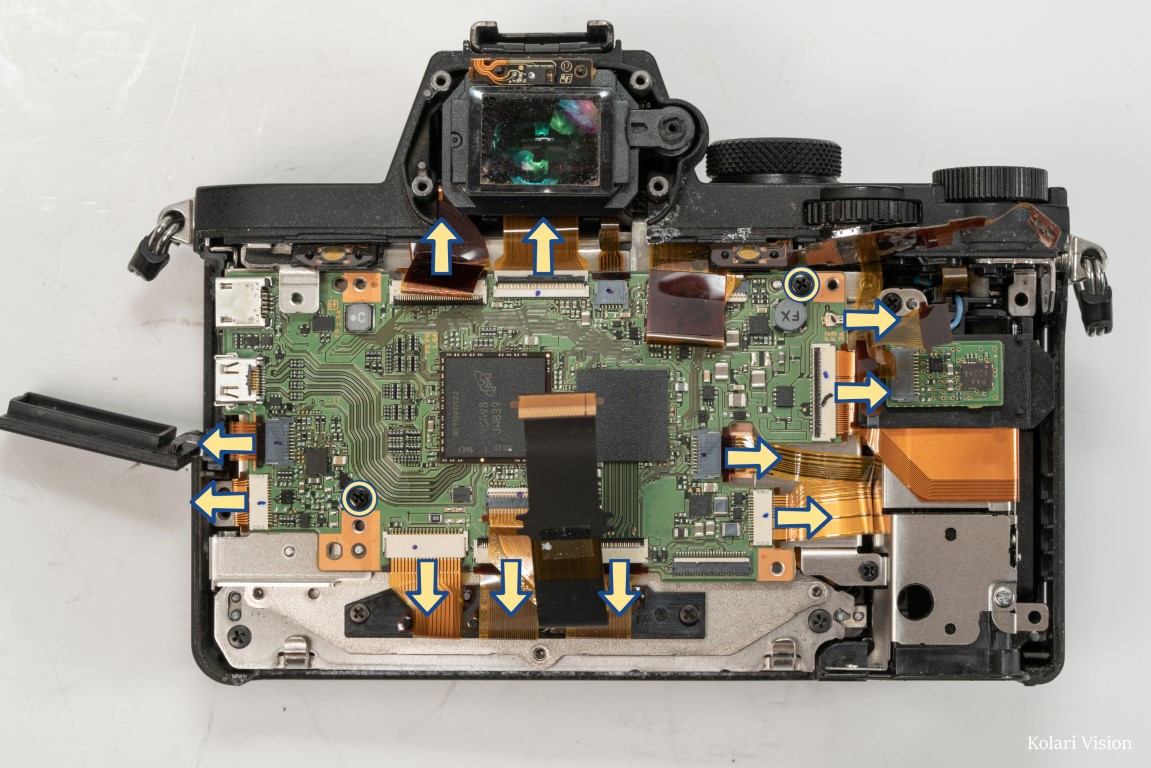
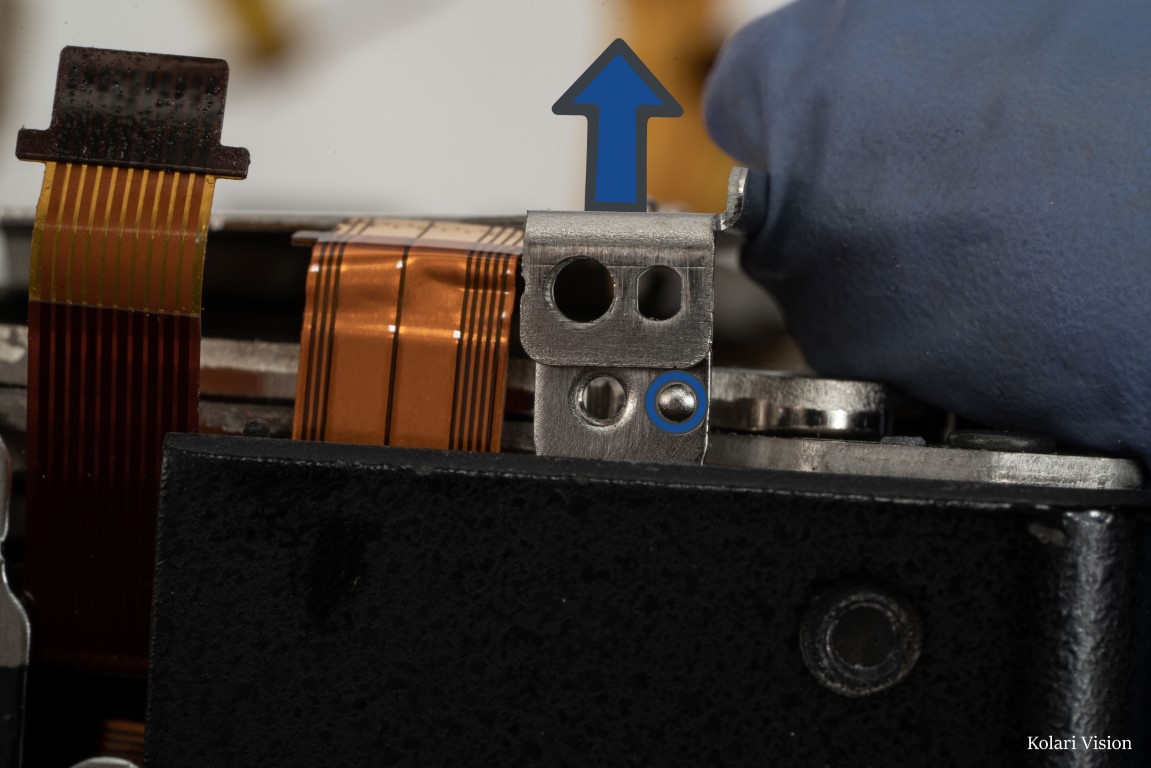
Disconnect the ribbons from the motherboard, unclip the blue wire, and the 2 screws holding the board in place
29
Step 29
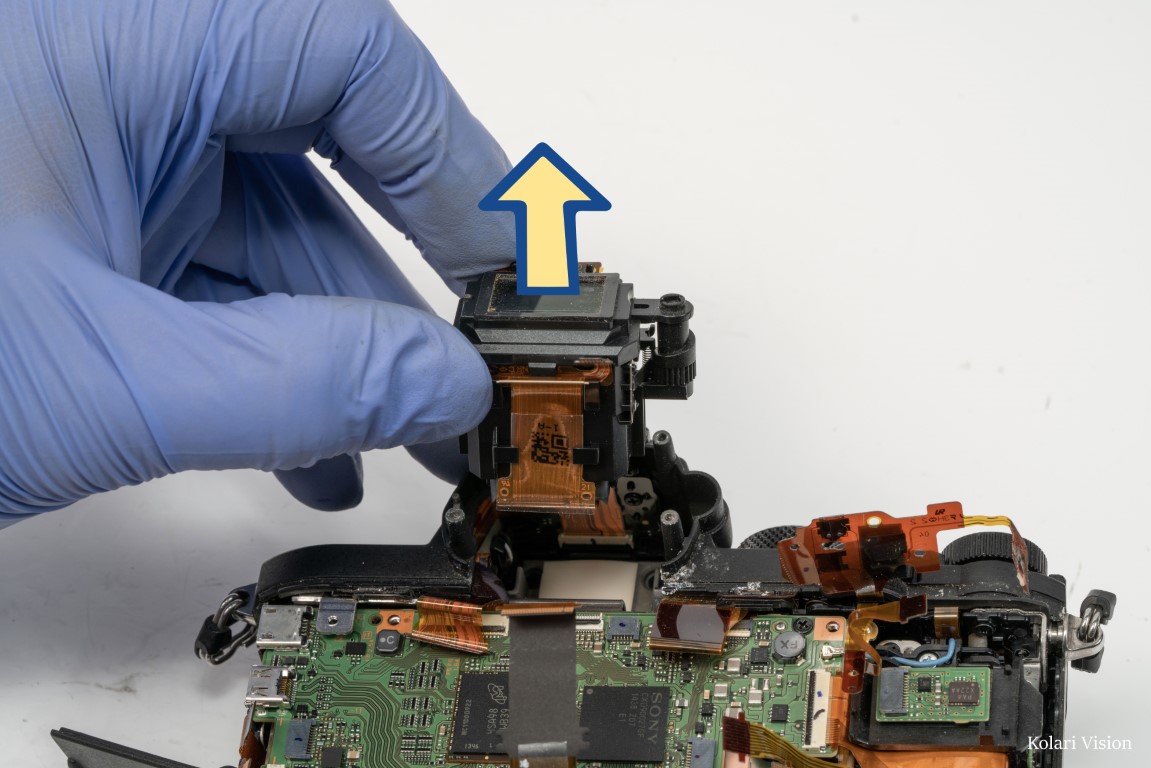
Next pull the EVF out. there is a sticky thermal on the back of it holding it in place, so you may need to wiggle it a little before pulling it out.
30
Step 30
Underneath the EVF are 2 screws that you’ll need to remove.
31
Step 31
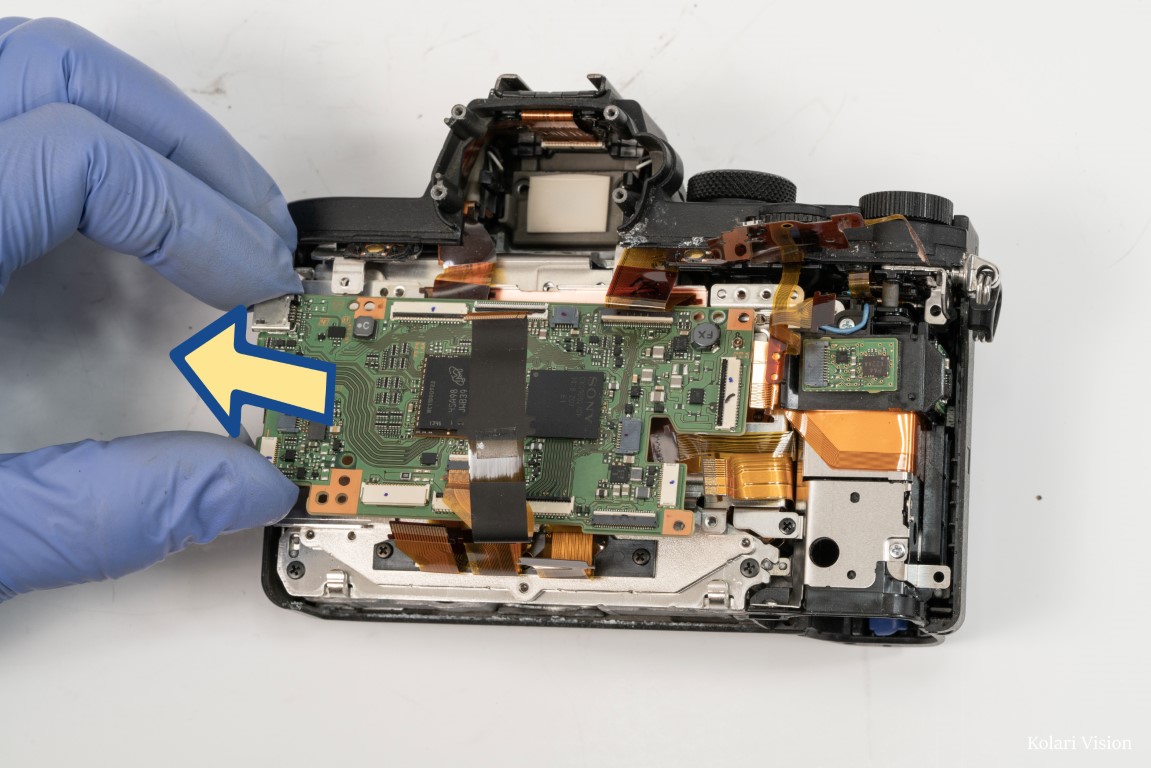
Take off the motherboard
32
Step 32
To take out the inner heat sink, remove both the silver and black screws in the upper right side, then flip the camera over so that the left side is facing up, and remove the screws at the top and bottom.
33
Step 33
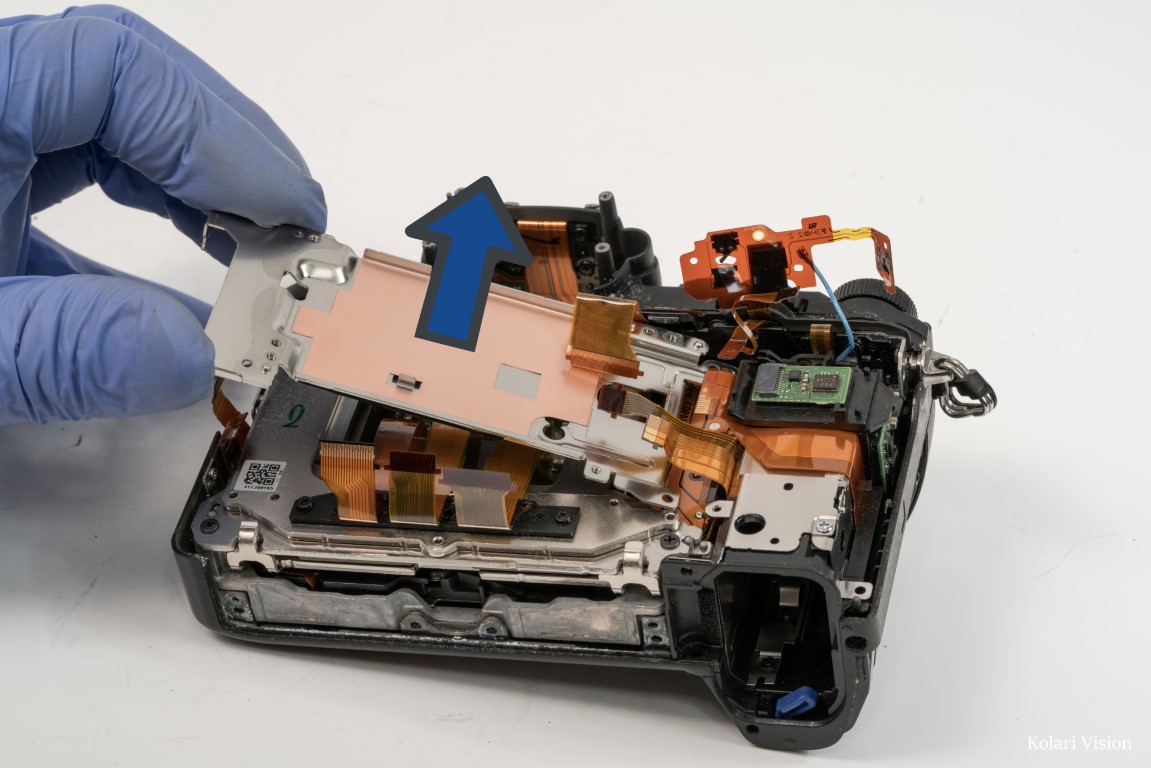
To take the plate off, you’ll to pry the side brackets off and over the studs.
34
Step 34
Take the plate off
35
Step 35
Now you’re at the sensor. Unfortunately before moving forward you’ll have to remove the hand-grip and the top. To take off the hand-grip, you need to remove a screw in the battery compartment which is accessible through a hole in the bottom right side of the back of the camera.
36
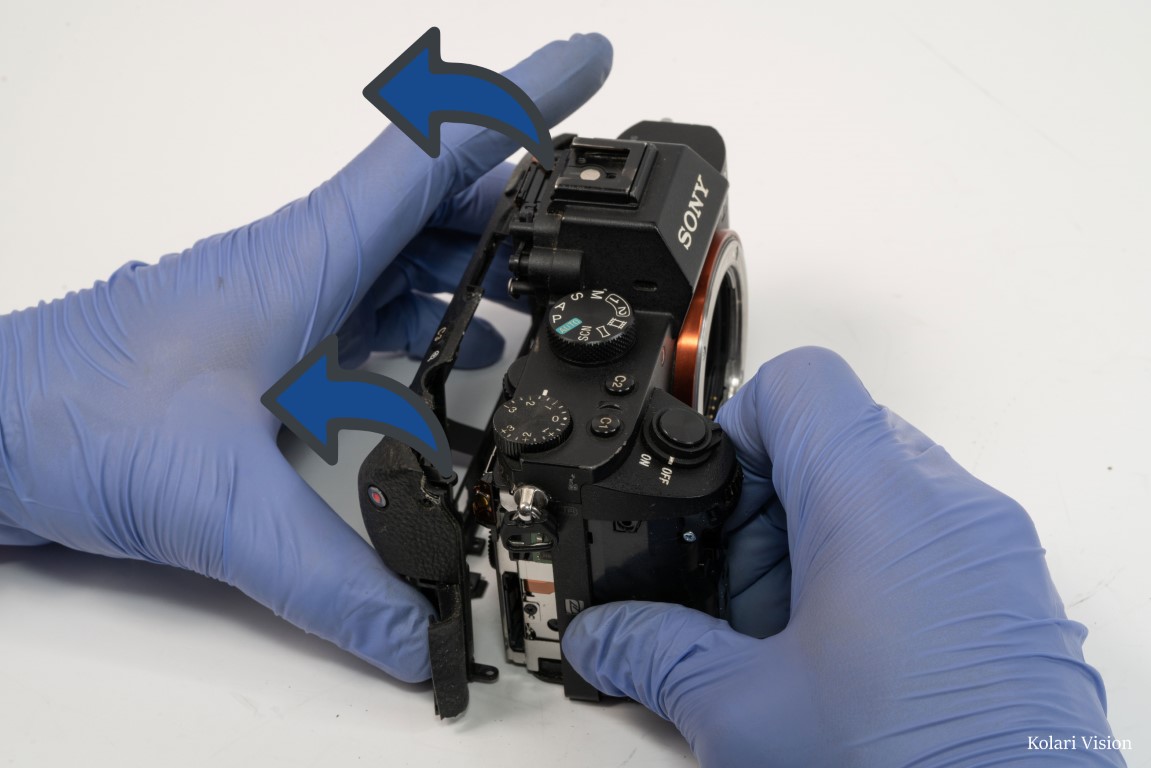
Step 36
Now you can pull the grip off the camera, but do not completely remove it yet.
37
Step 37
Turn the camera right-side up and disconnect the ribbon and the connector to red and black wire. The lift flexible circuit structure free.
38
Step 38
You should be able to lift the top off. Doing so will exposing the ribbon leading to handgrip, disconnect it to free the grip and carefully place the camera face down.
39
Step 39
Remove just the outer screws on the bottom and the top left.
40
Step 40
Now you can simply lift out the sensor. Be very careful not lose any shims, which are the thin metal leaves sitting on the screw holes, under the sensor.