Introduction
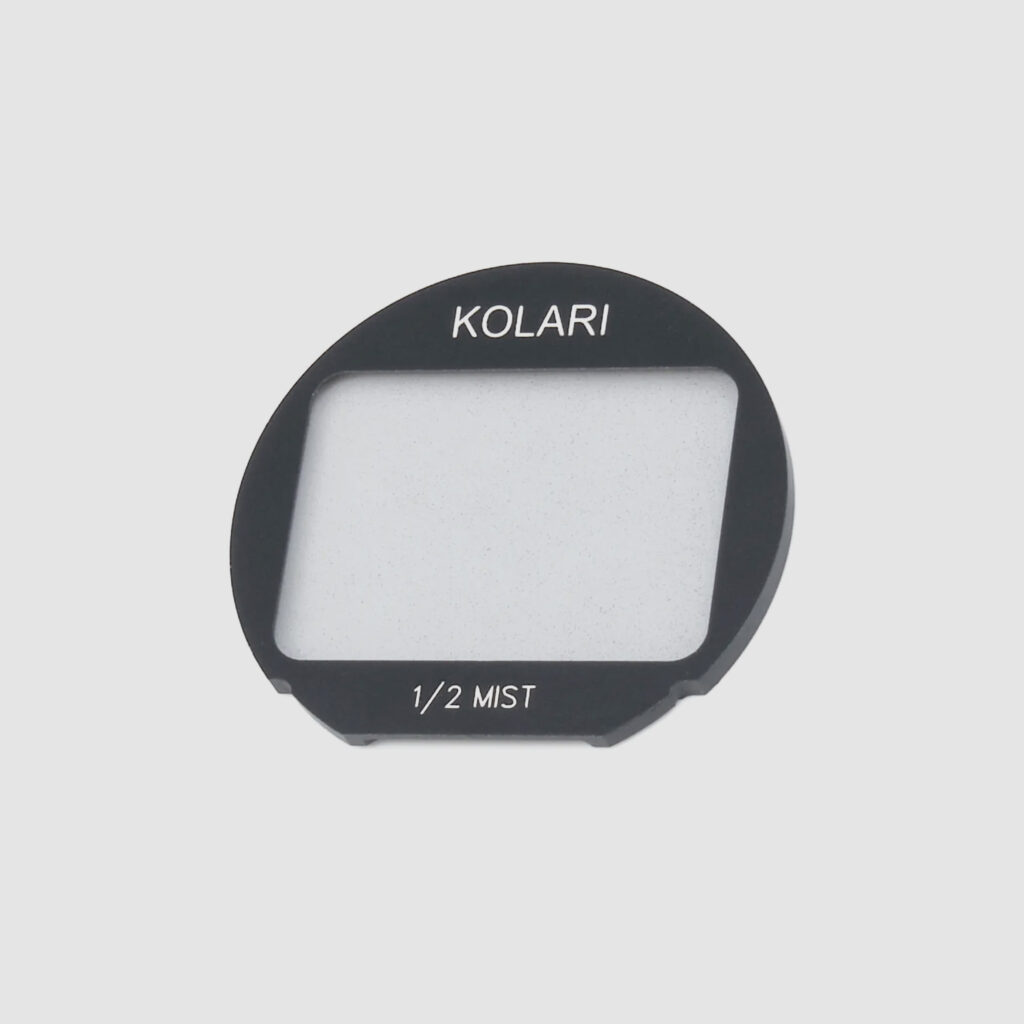
Infrared photography has been joined by infrared video as most digital cameras coming out now record in HD. This tutorial describes how to film and process infrared video files using Adobe Premiere. The video files used in this tutorial are coming from a Canon 6D full-spectrum with a Canon 16-35 F/4 IS and a Kolari 590nm infrared filter.
How to film in infrared?
Filming in infrared involves a similar process to shooting photos in infrared as you have to deal with the same parameters: Discrepancies in exposure, custom white balance, and inverted colors.
White balance:
Just as it is with shooting IR stills, white balance is the most important step to follow before filming in infrared: it will directly impact the video file created. White balance has to be done using a gray chart. Filming the gray chart is also useful for processing. Do not hesitate to film two or three seconds of gray chart before every recording session. It will help you later.
Exposure adjustment:
The best way to deal with strong exposure transition is to film in manual mode. This will give you the most creative control. Using manual exposure is especially important for IR video since your camera may not auto-expose as accurately with infrared light as it would normally. Live view is essential here.
General filming tips:
- Use a stabilizer to avoid vibrations while filming. While you may have some steady hands, remember the market is full of tripods, stabilizers, gimbals, and Steadicams that fit most DSLR, mirrorless, and GoPro cameras.
- Choose your camera wisely. Have a look to the camera comparison article to find the best camera for your needs.
- Use a fast memory card with big data storage.
- Take a look to MagicLantern if you wish to film in RAW format on a Canon camera.
How to process infrared videos?
Now that you have spent some time filming in infrared, you’ll need to process the video files to get the right look. This part is done entirely in Adobe Premiere.
Step 1 – white balance:
If you have adjusted the white balance on your camera using a gray chart, this step is optional but still useful to calibrate the color rendering.
As said previously, filming the gray chart will allow you to adjust the white balance in Adobe Premiere. The following screen capture has all the different parts that will be used to adjust the white balance of the video files highlighted:
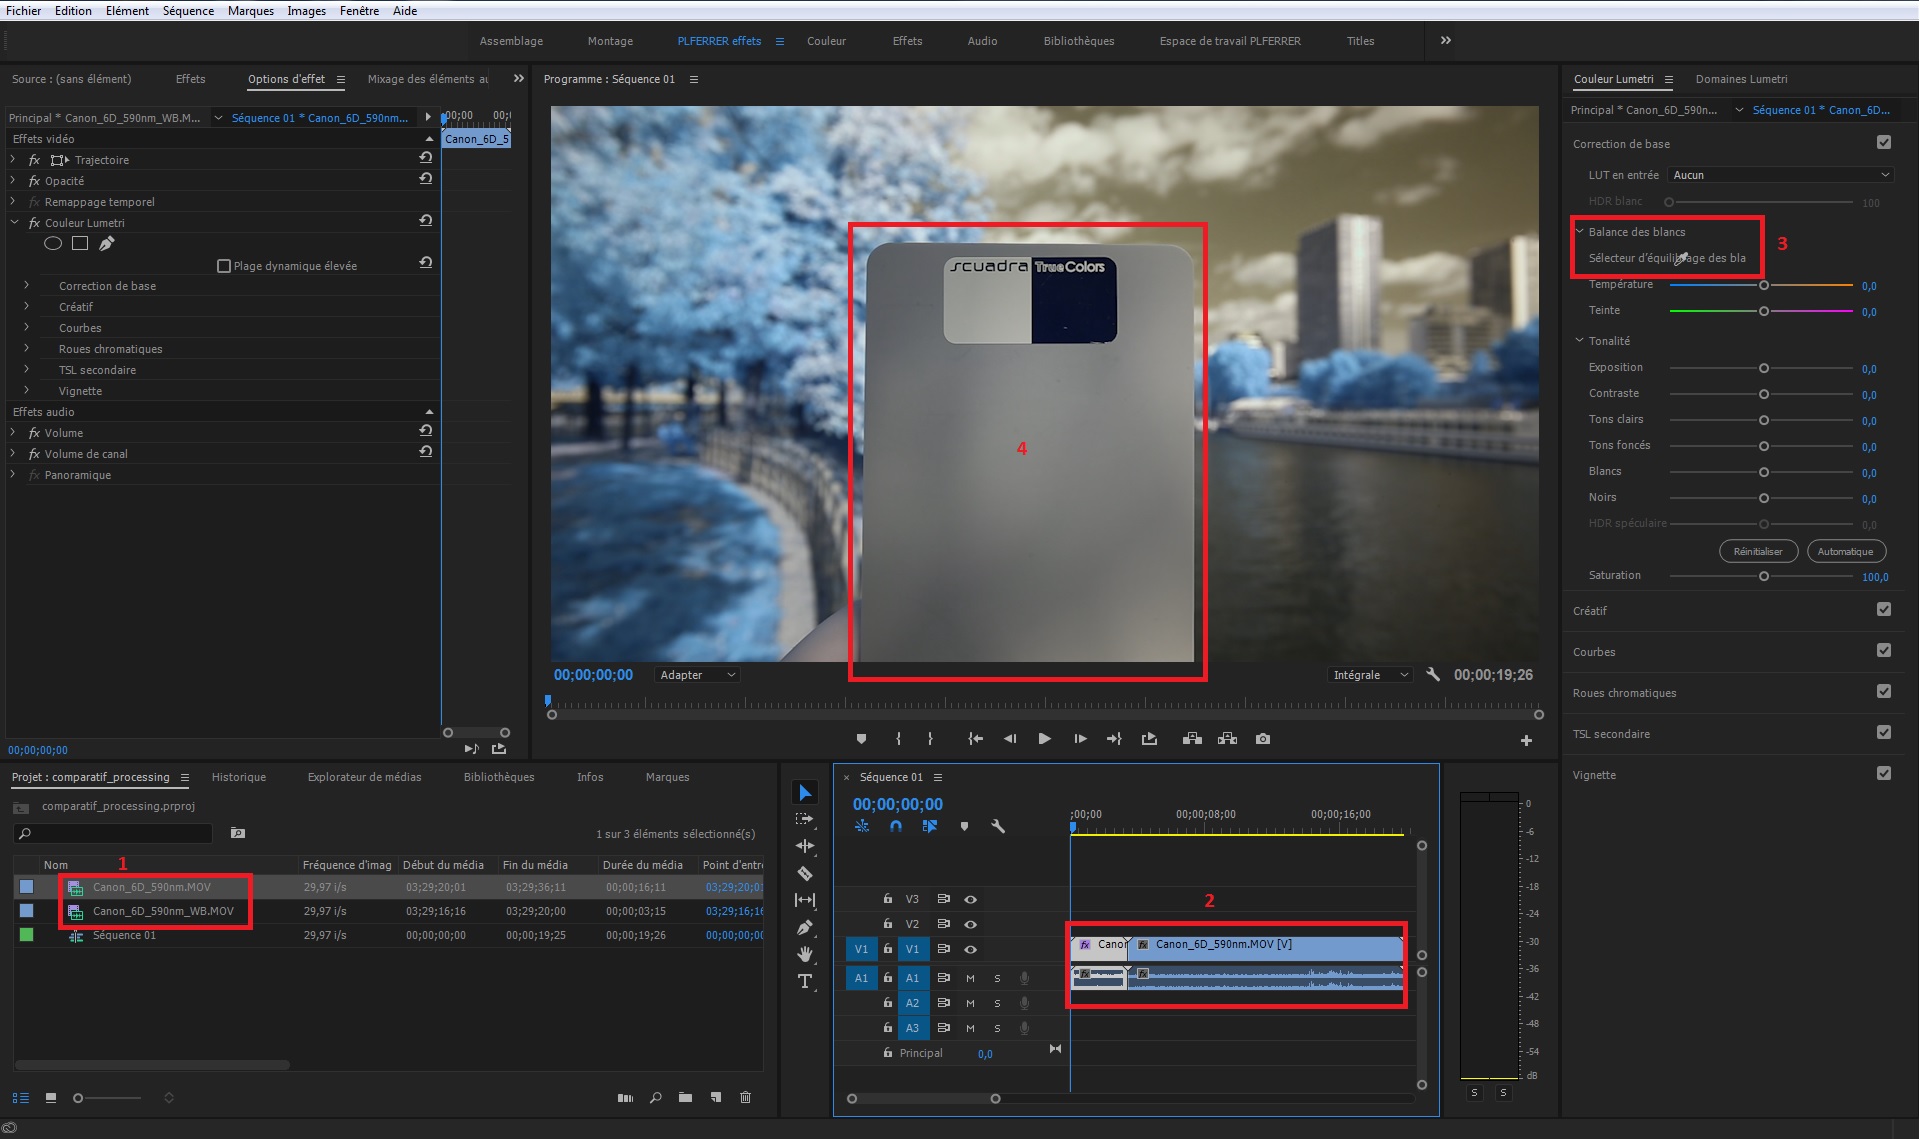
- 1 – Library, where you find the video files and the sequences.
- 2 – Timeline, where you compose your sequence. Here the gray chart video file is put in the beginning of the sequence.
- 3 – Eyedropper tool, used to adjust the white balance on the gray chart.
- 4 – Gray chart video file.
Using the eyedropper tool, click on the gray chart in frame and note the temperature and tint values.
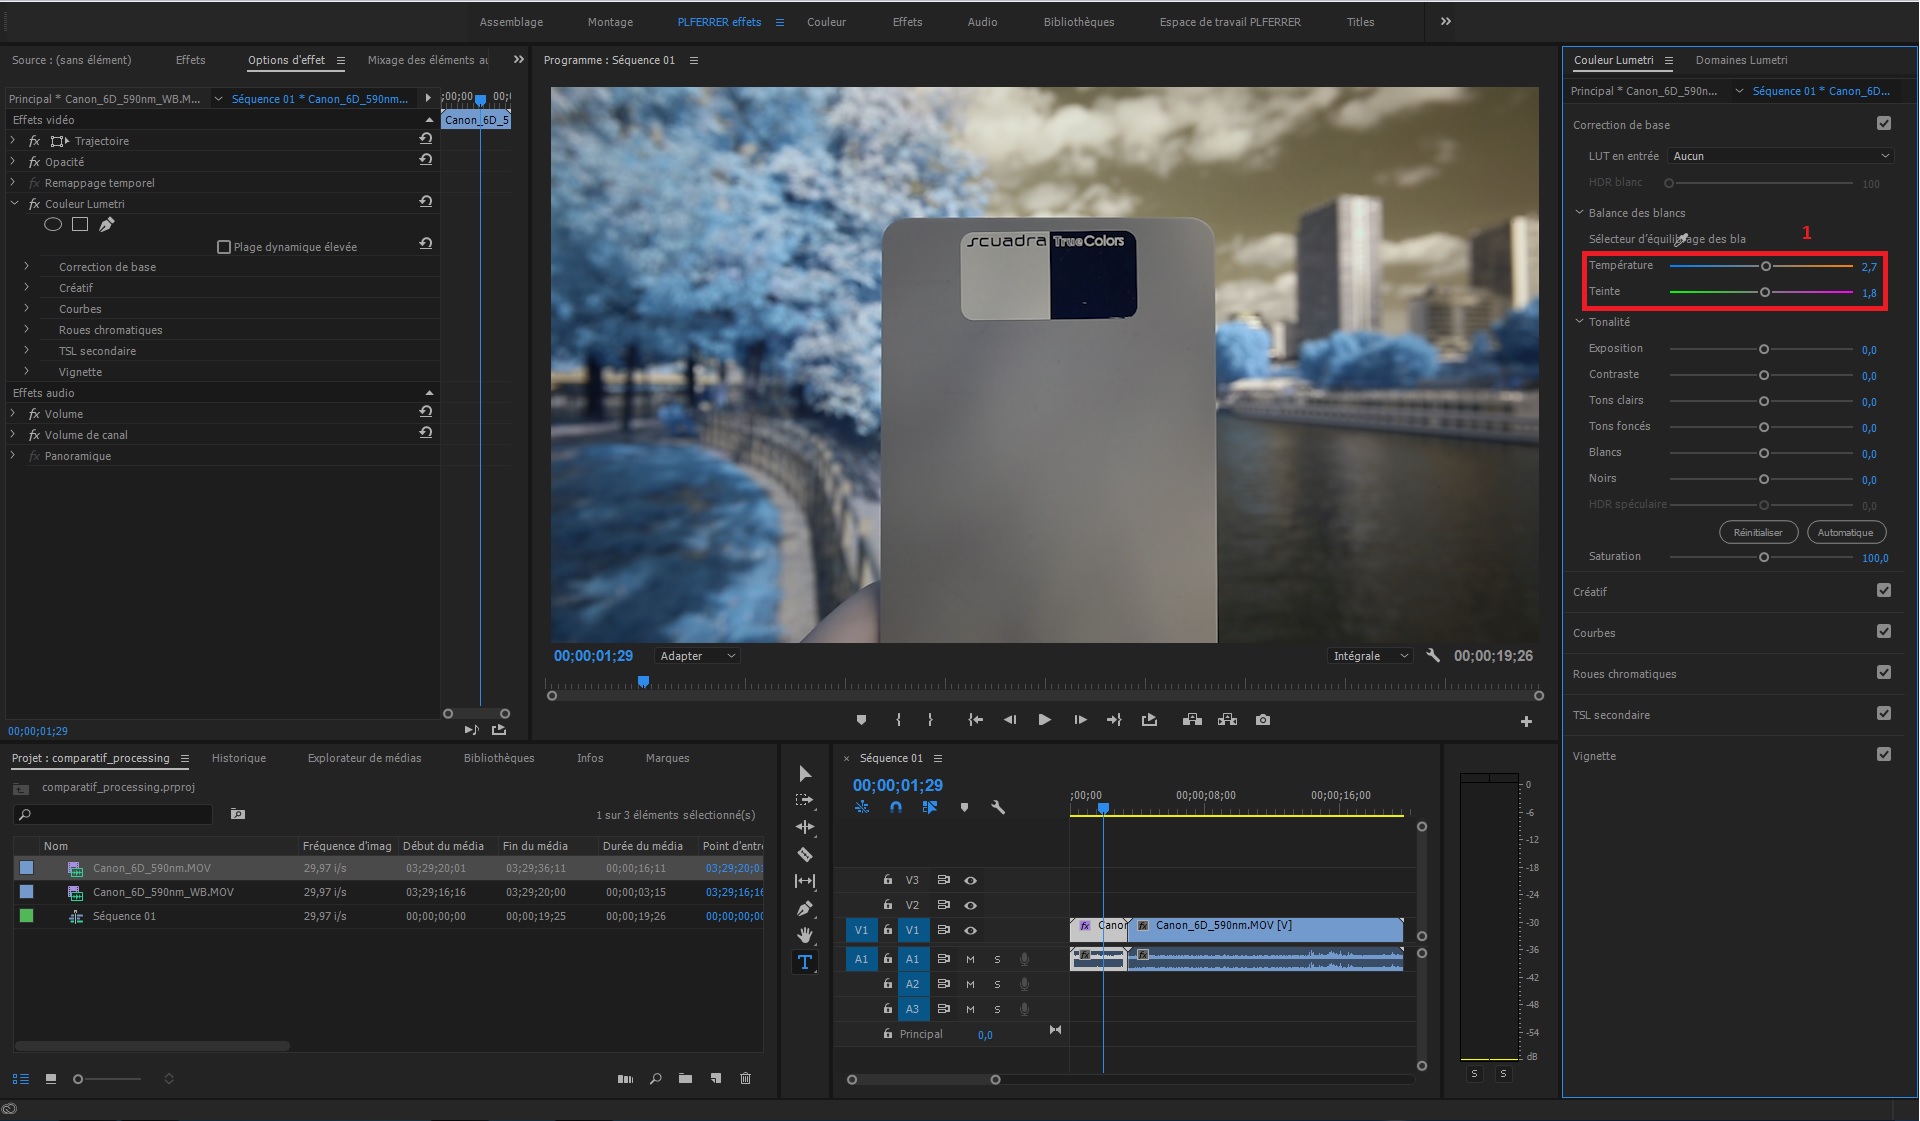
Apply these same values to all of the video clips your using to make sure they look consistent, or to keep a baseline for more creative adjustments(1).
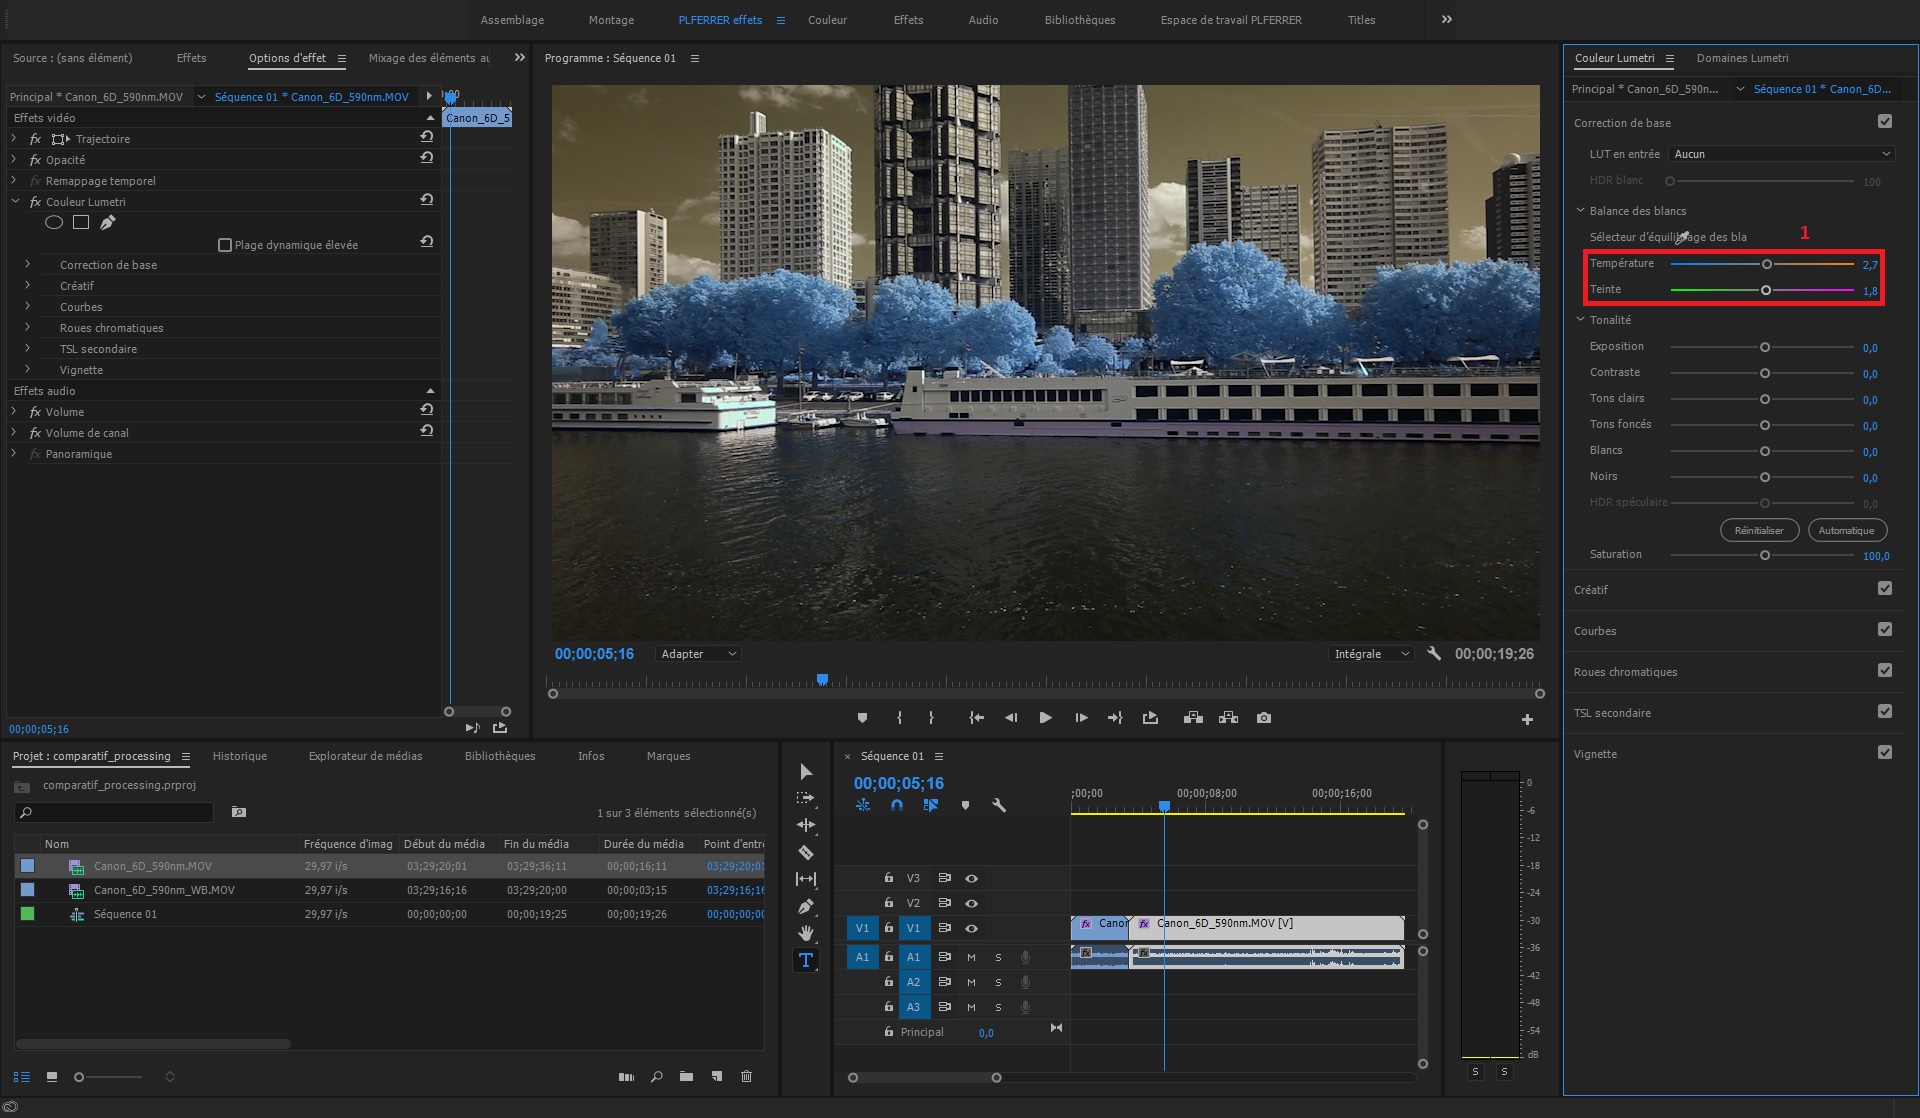
If the white balance was already set in camera, this change can be very subtle but is still important.
Step 2 – channel mixer:
Now that the white balance is correct, revealing the desired infrared effect is done using the channel mixer. In Adobe Premiere, the channel mixer is found in Effects (1) – Video effects (2) – Color correction (3) – channel mixer:
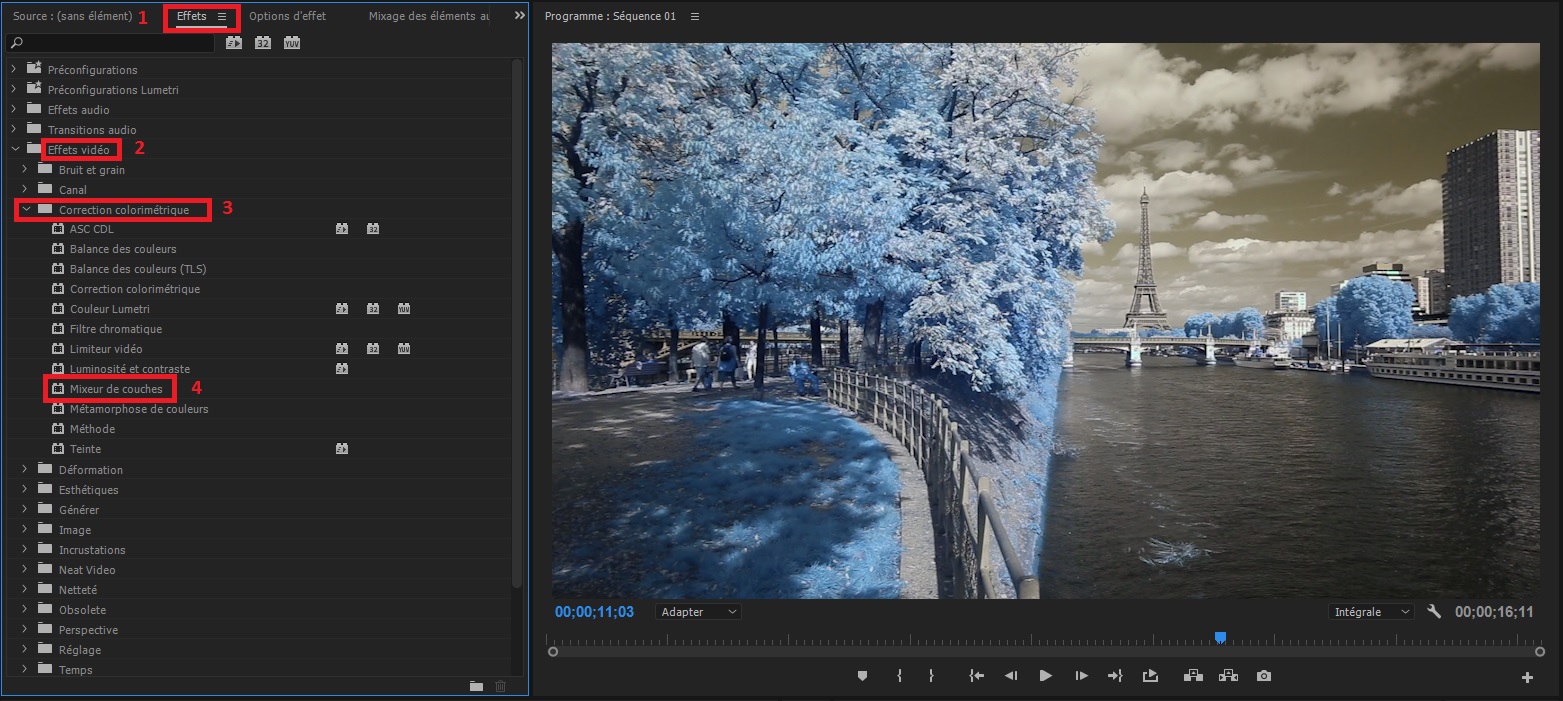
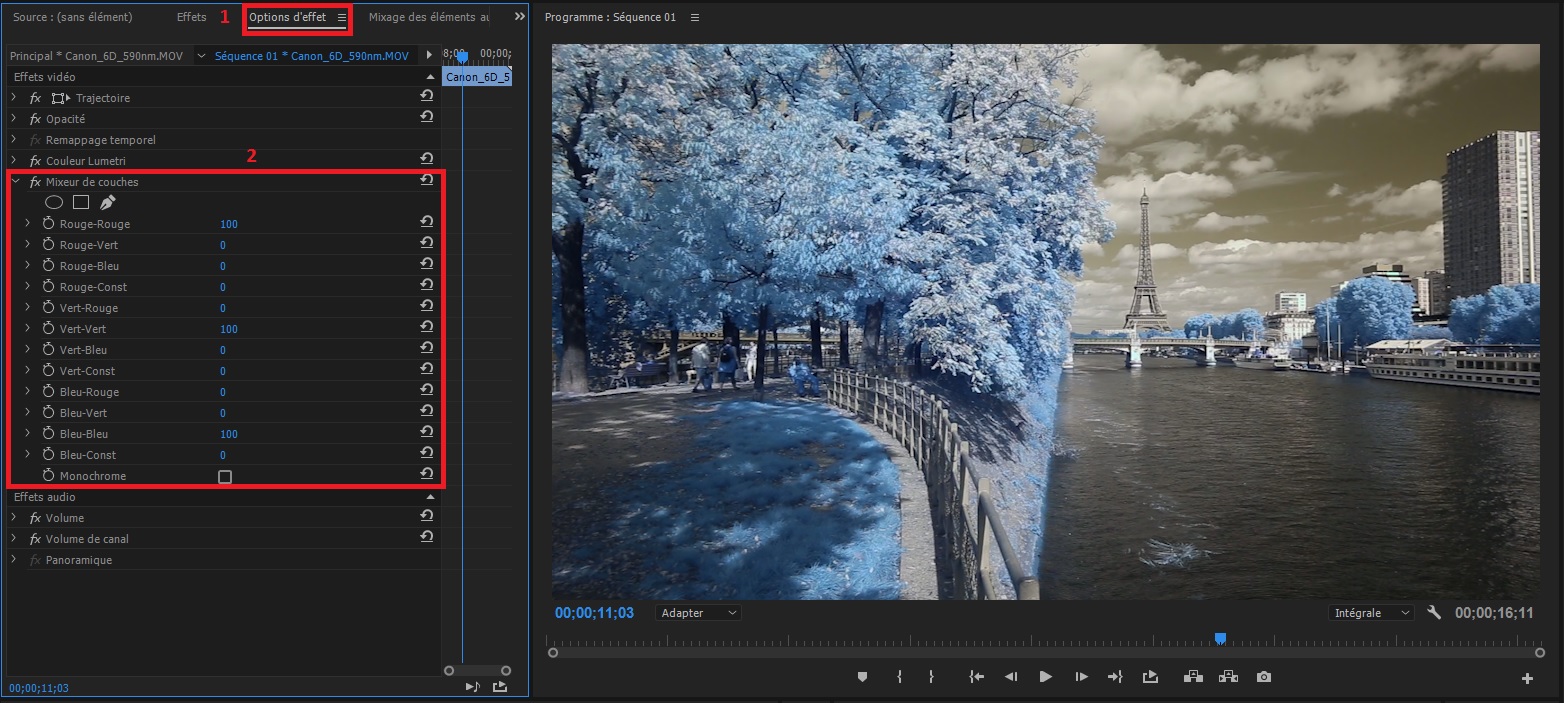
This adjustment is done the same way it is for infrared photography: in Effect options (1), the composition of each channel (2) can be changed.
The following capture shows some standard parameters to apply to your videos. You can feel free to play around with these levels and find which false color looks are your favorites.
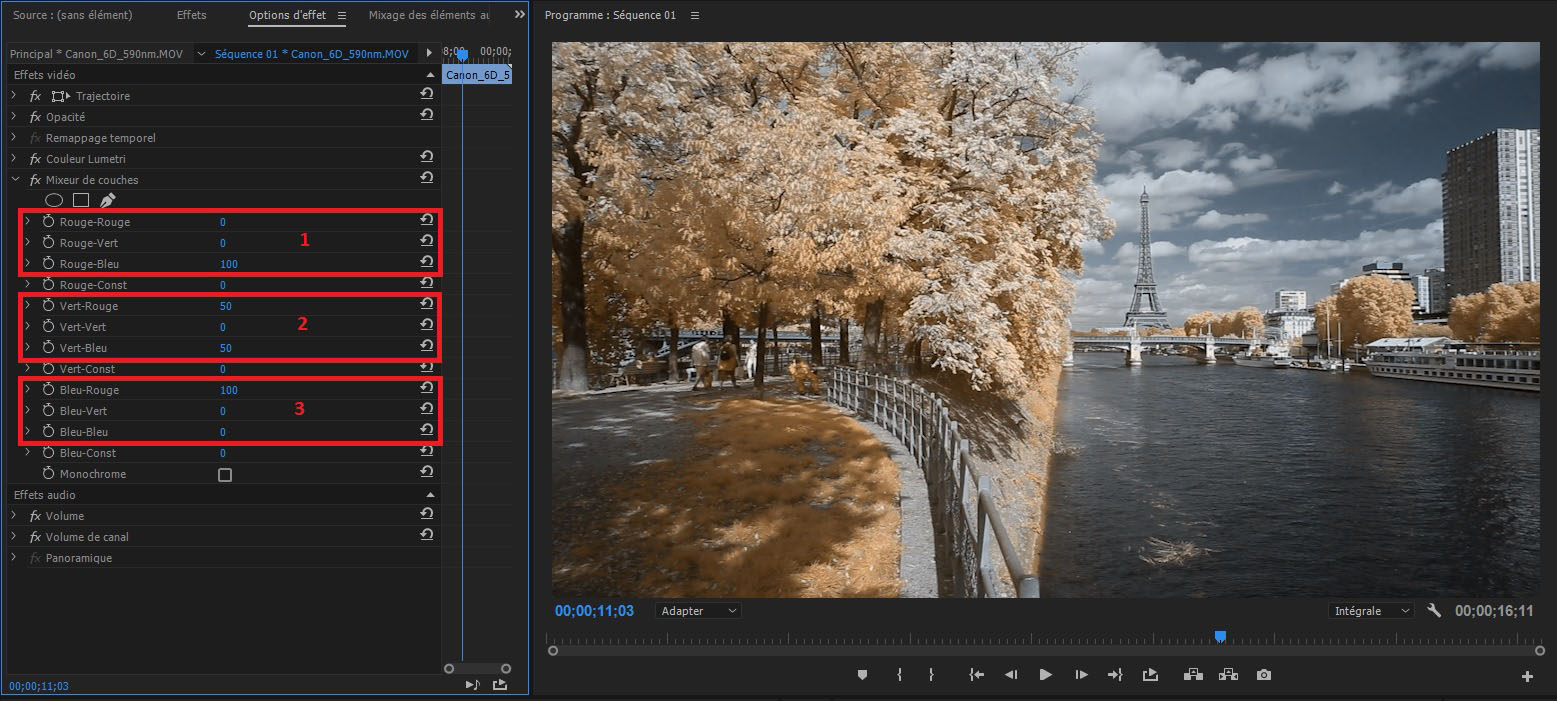
- 1 – Red channel:
- Red – red: 0
- Red – green: 0
- Red – blue: 100
- 2 – Green channel:
- Green – red: 50
- Green – green: 0
- Green – blue: 50
- 3 – Blue channel:
- Blue – red: 100
- Blue – green: 0
- Blue –blue: 0
These particular adjustments work with every infrared filter except for the NDVI Blue infrared filter, in which case only the green channel has to be modified.
The final video shows the how this processing tutorial changes your video files, step by step.