★★★★★ 5/5
Nikon D7000 Infrared Conversion DIY Tutorial and Disassembly Guide

Difficulty
Moderate
Steps
14
Time Required
10 minutes
Small Phillips Screwdriver
Tweezers
Grounding strap with current limit resistor
Grounded work mat (optional but recommended)
Canned/compressed air
Sensor wet cleaning solution and tissue
Introduction
Welcome to the DIY tutorial of the Nikon D7000. Before we get started we suggest you to be grounded so that you avoid any static damage to the electronic components.
1
Step 1
- You can start by removing the bottom screws from the camera. Open the battery door to remove 2 more screws.

2
Step 2
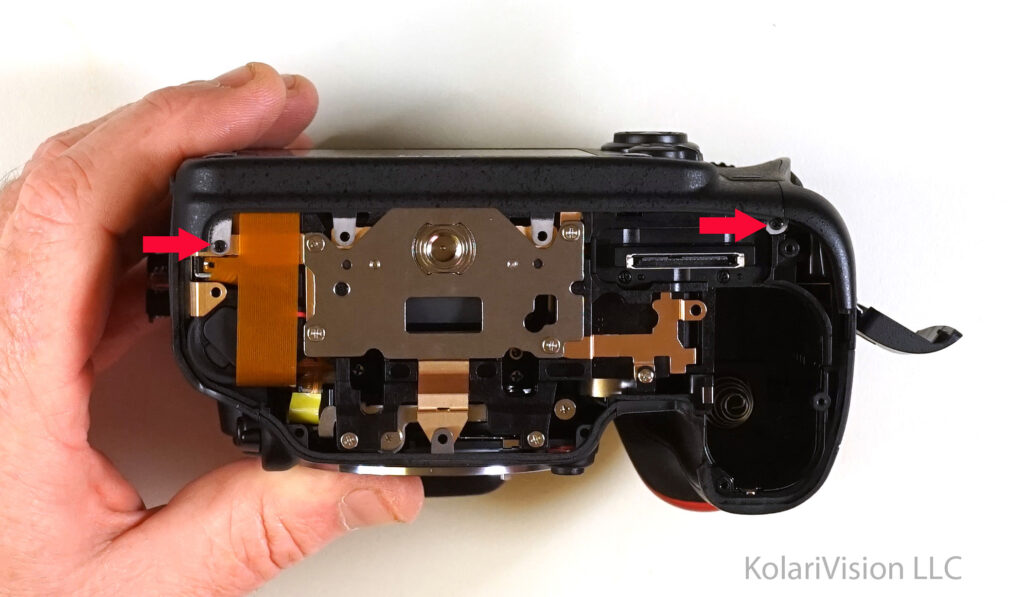
- Once you remove the bottom panel, you will notice 2 screws. One on each corner which hold the LCD panel down.
3
Step 3
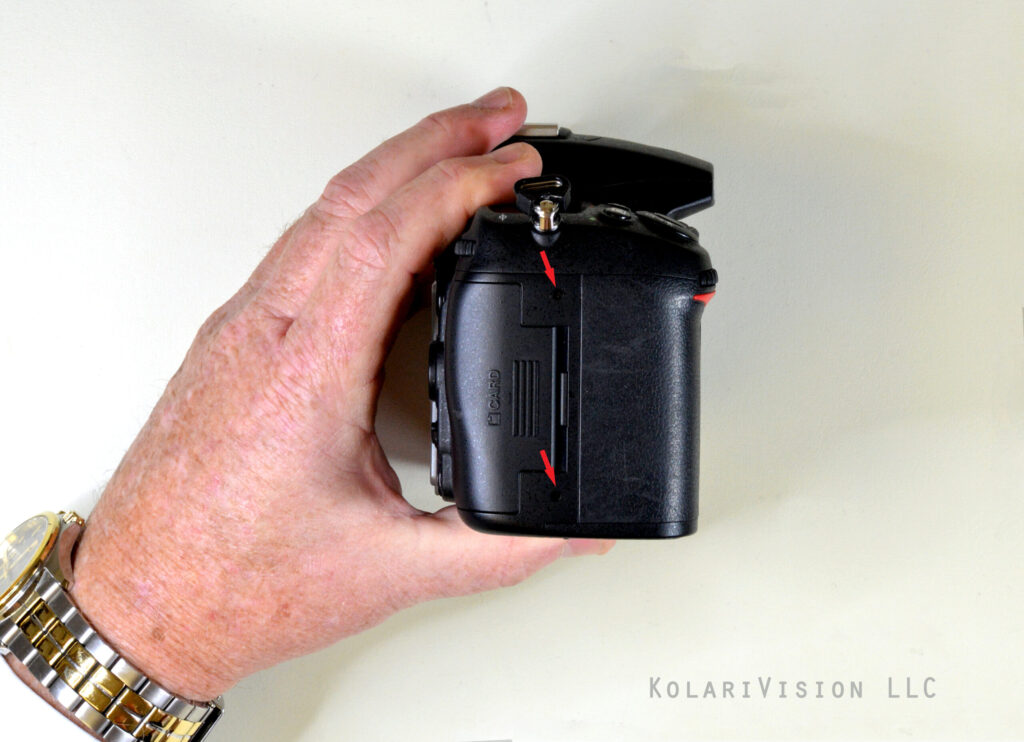
- Turn the camera to the SD Card side, and remove the 2 screws as indicated.
4
Step 4
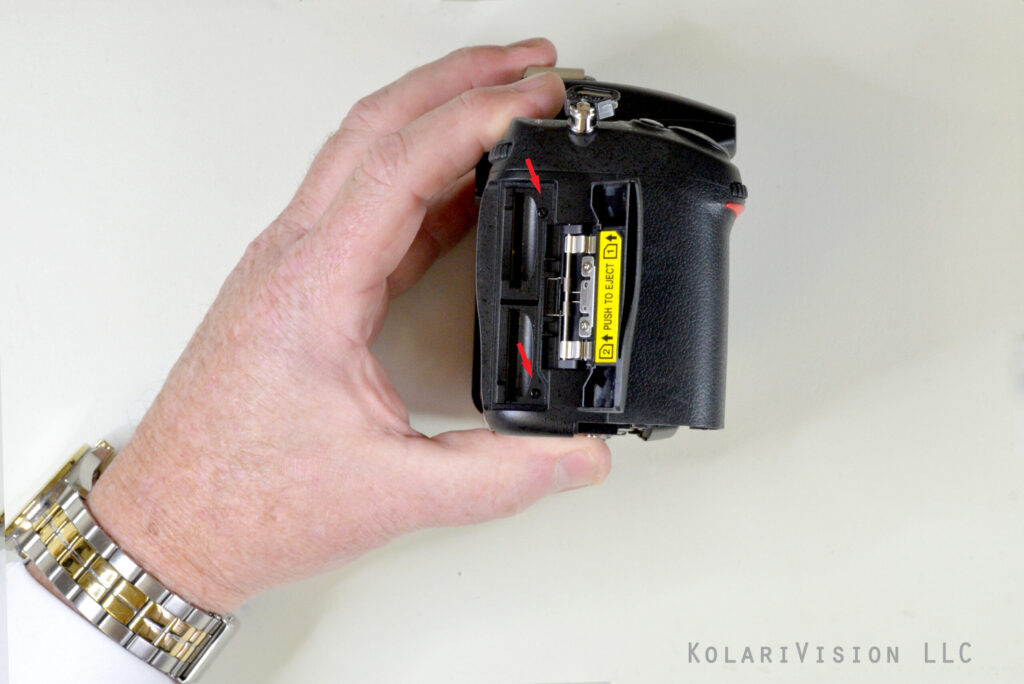
- Open the flap, and you will have to remove the two screws as indicated. It makes it easier to remove the PC board later on.
5
Step 5
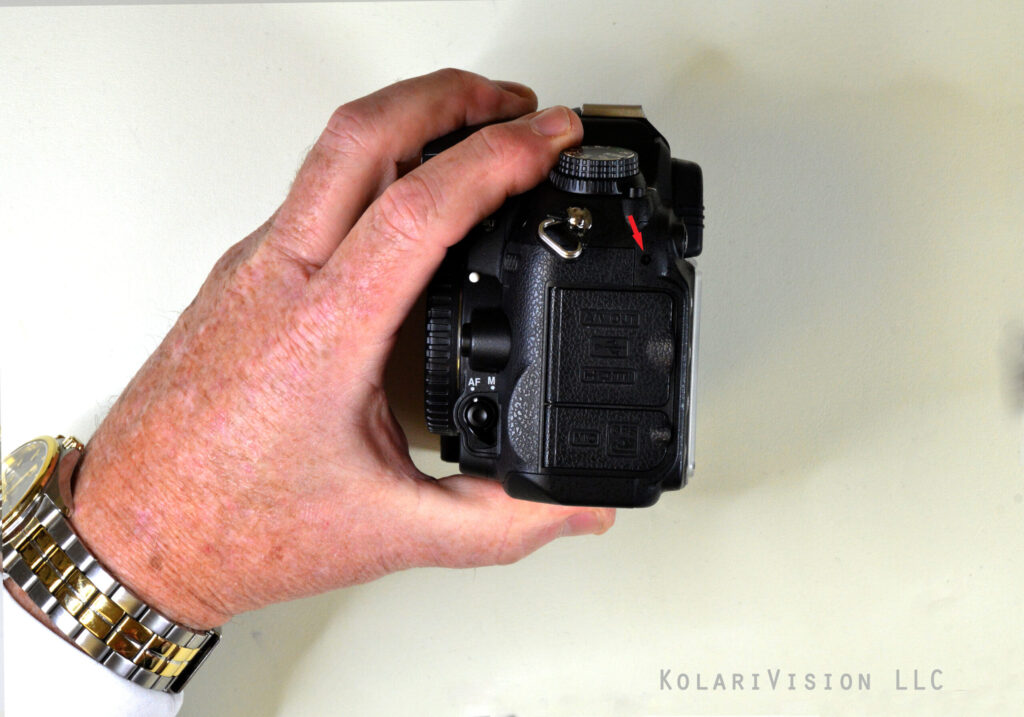
- Now rotate the camera to the AV Out side and remove the screw as indicated. Then open the HDMI flap and you will see another screw.
6
Step 6
- Slide off the EVF cover and the rubber grip and remove 3 screws as indicated.
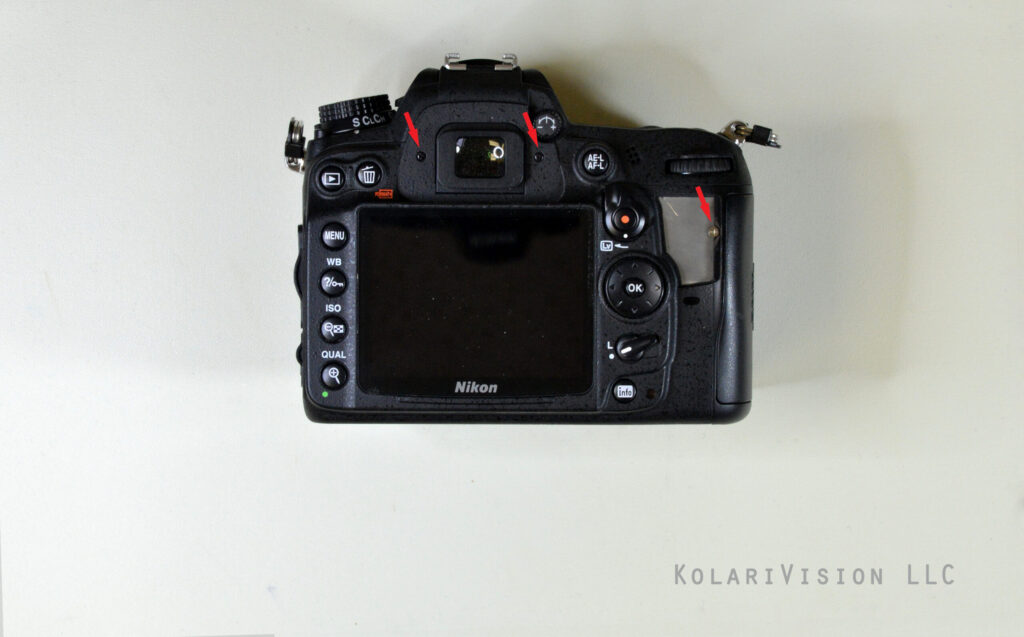
7
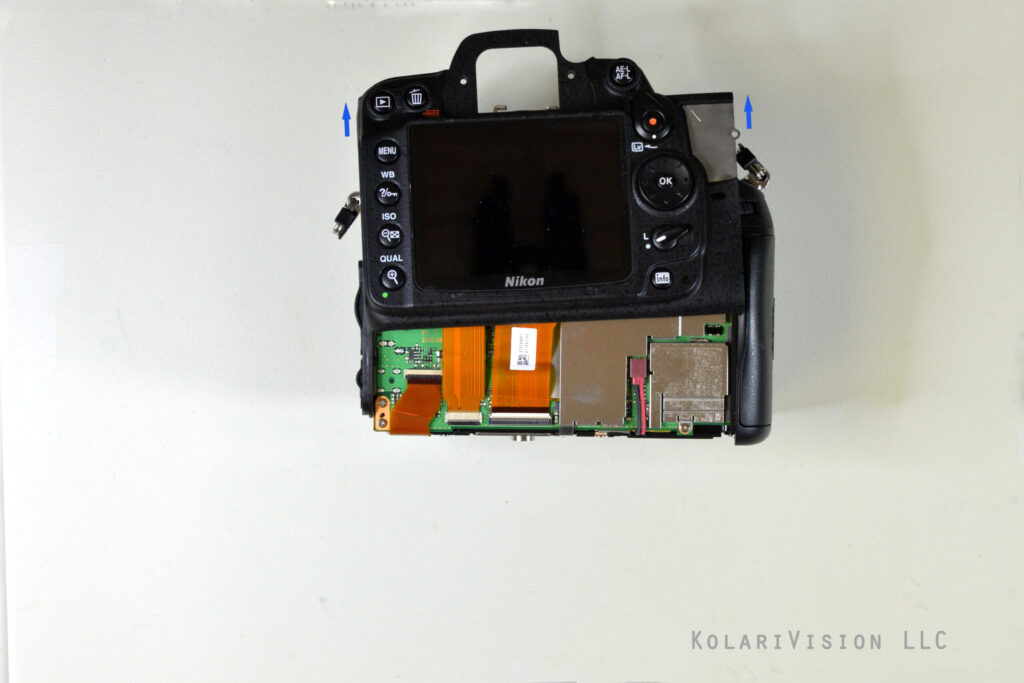
Step 7
And now you can remove the LCD panel, but before you completely take it off, be careful and remove the 2 cables attached to the panel.
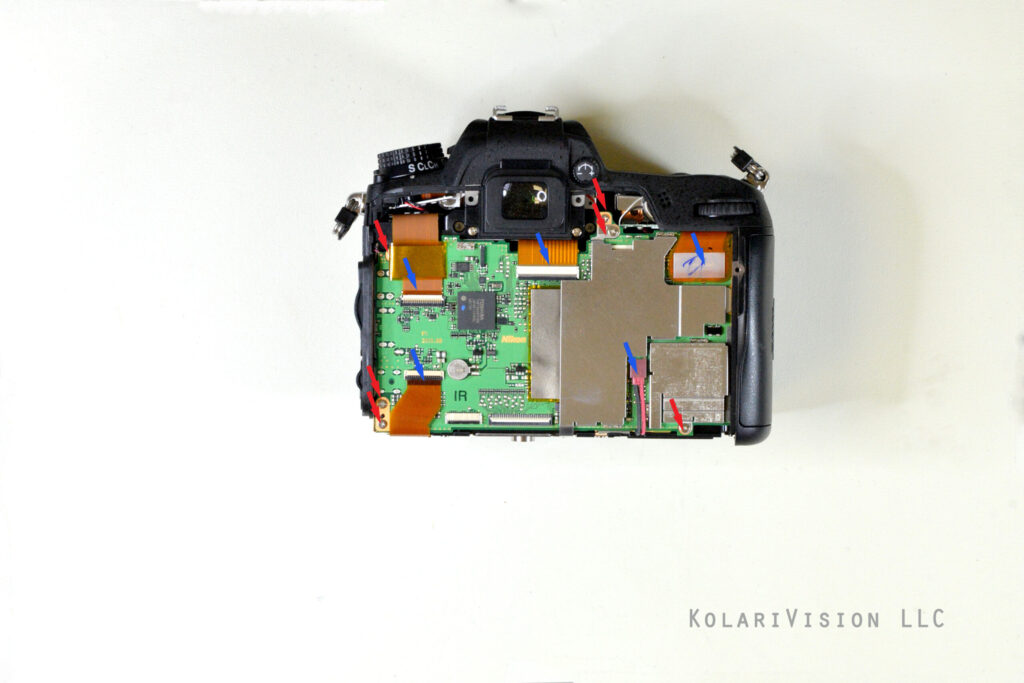
8
Step 8
- Once you have lifted off the LCD panel, you can remove the cables as indicated with the blue arrow, and the screws as indicated with the red arrows.
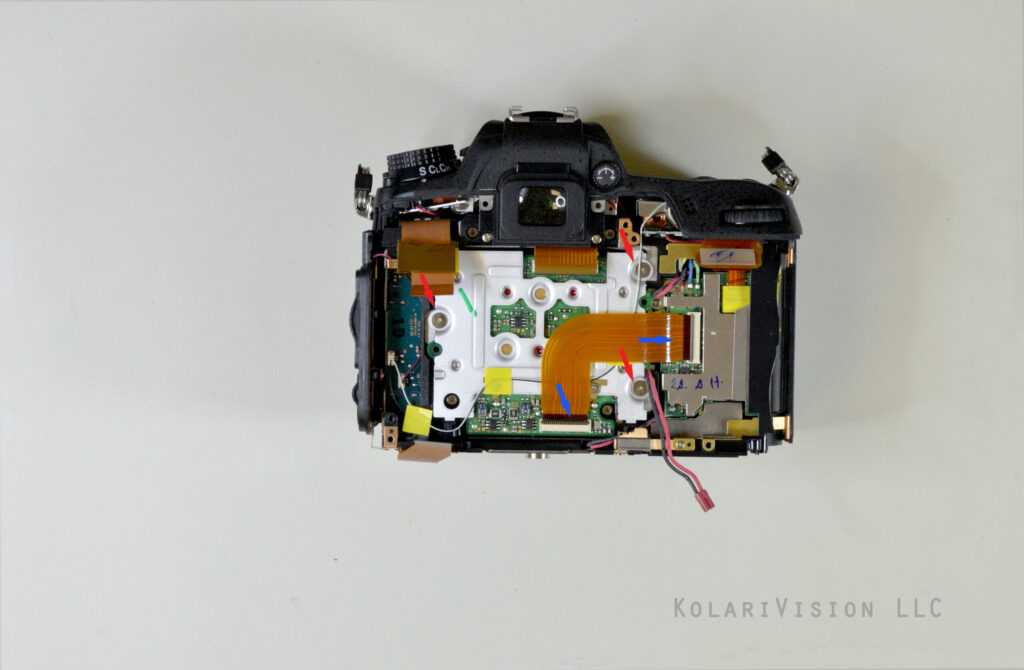
9
Step 9
- Once the PC board is removed, you will have to remove the 3 screws as indicated with the red arrow, and one side of the sensor cable with the blue arrow. Not necessary to remove both.
10
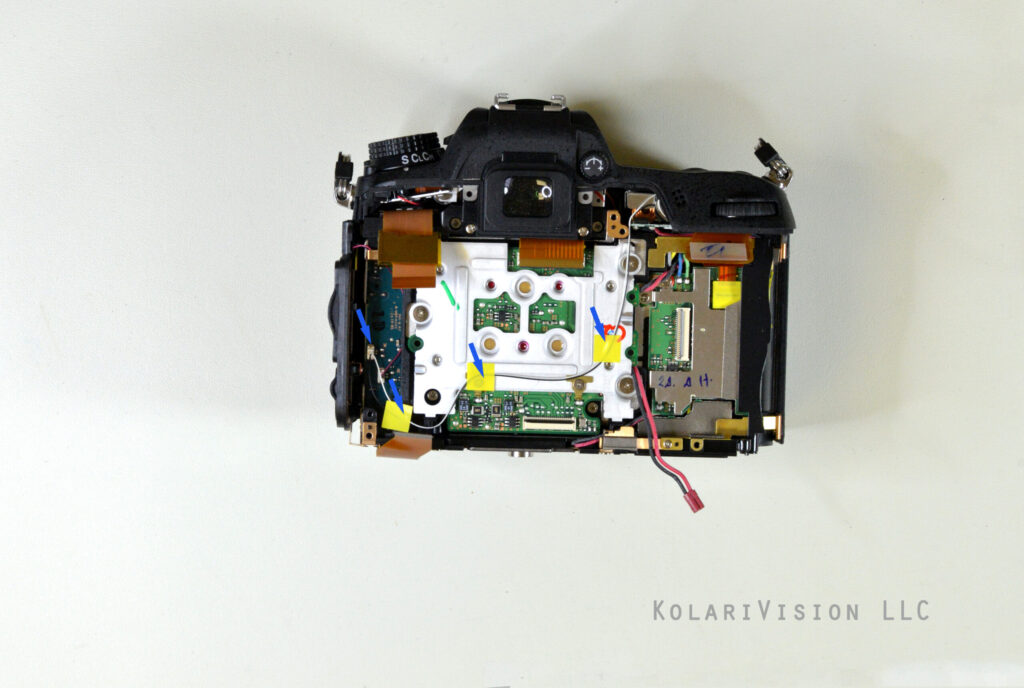
Step 10
- Lift up the tape off the sensor and take out clip near the bottom left hand corner of black and white wire.
11
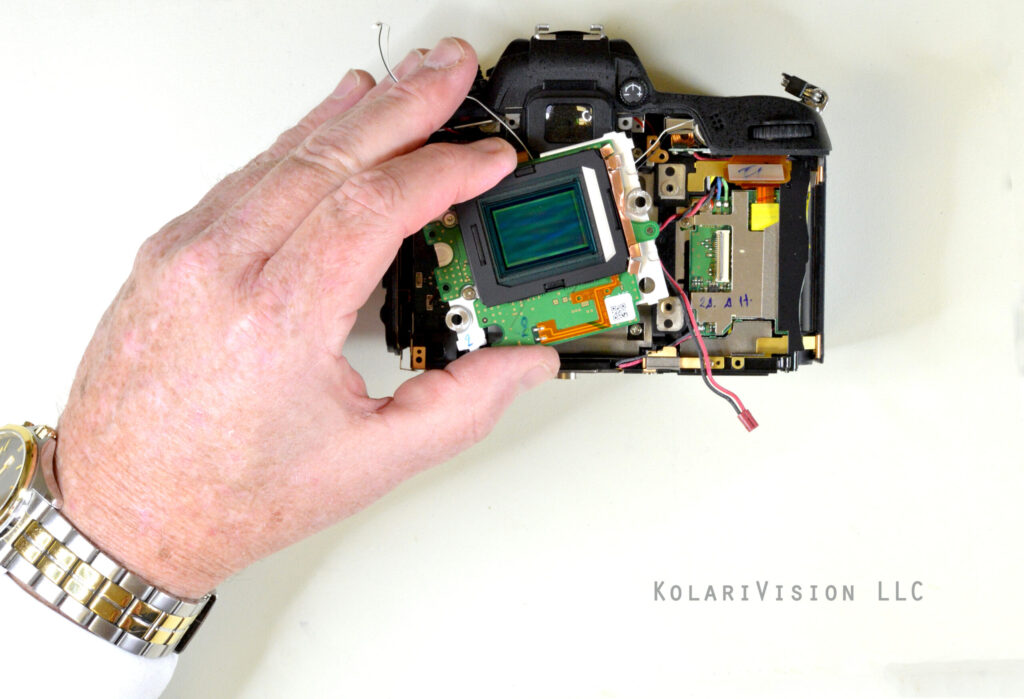
Step 11
- Sensor now should be easy to remove from its position.
12
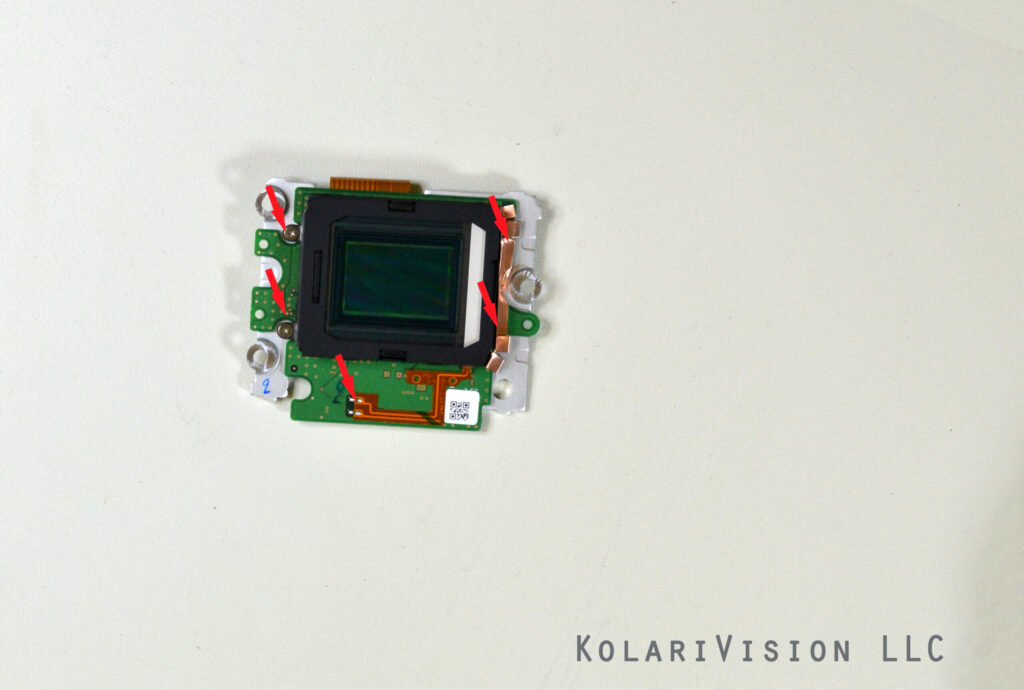
Step 12
- Remove the 4 screws in order to release the black frame which holds the filter down. Also remove the solder connection which links to the dust filter.
13
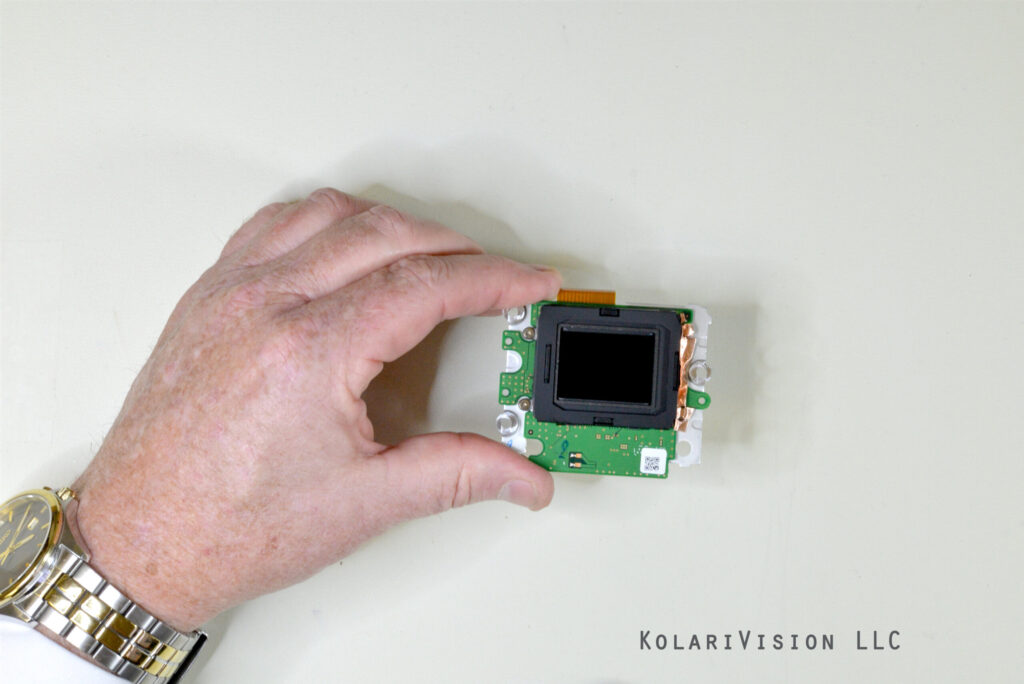
Step 13
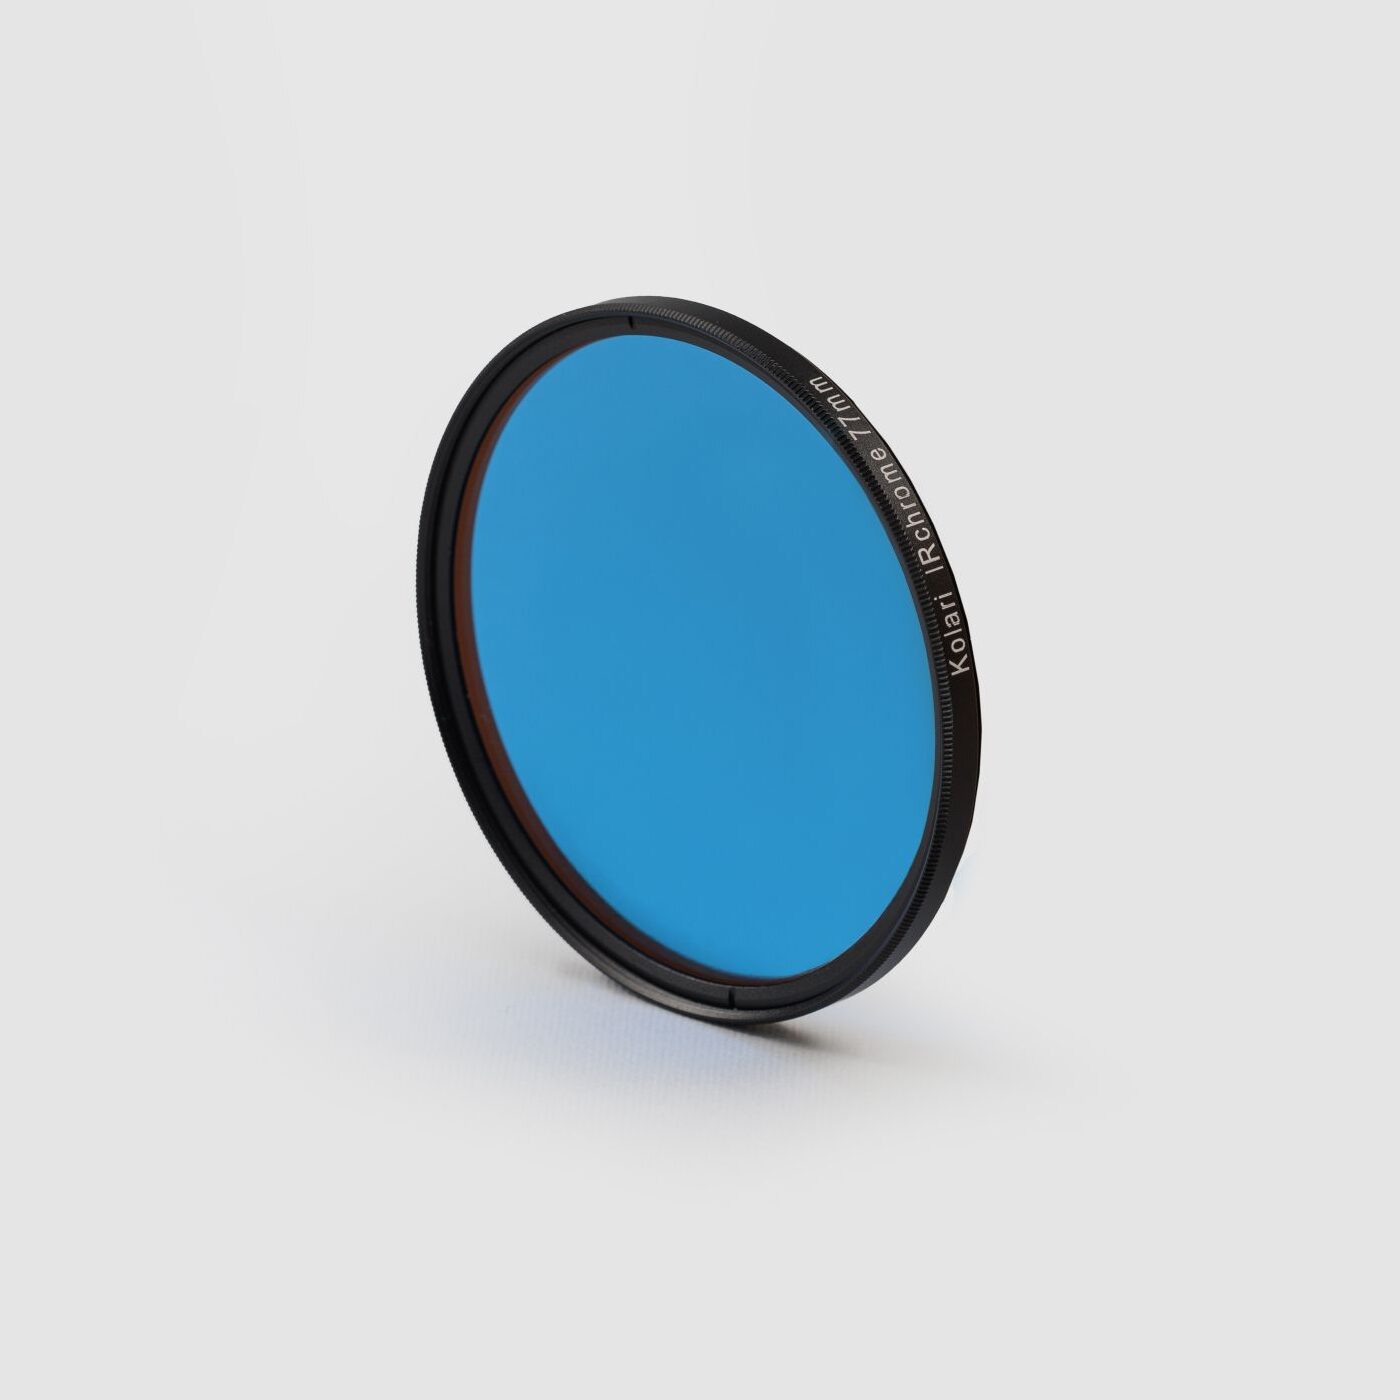
- Remove BOTH filters over the sensor. Once you have done the above steps that lead to this point, be sure to thoroughly clean your filter, and double check for any dust on the filter and sensor. Install the filter back onto the sensor and attach it with original retainer. Follow the guide in reverse to assemble and be sure to check the focus of the camera, which may have changed with the new filter.
14
Step 14
- Congratulations you have completed your Nikon D7000 filter conversion!

