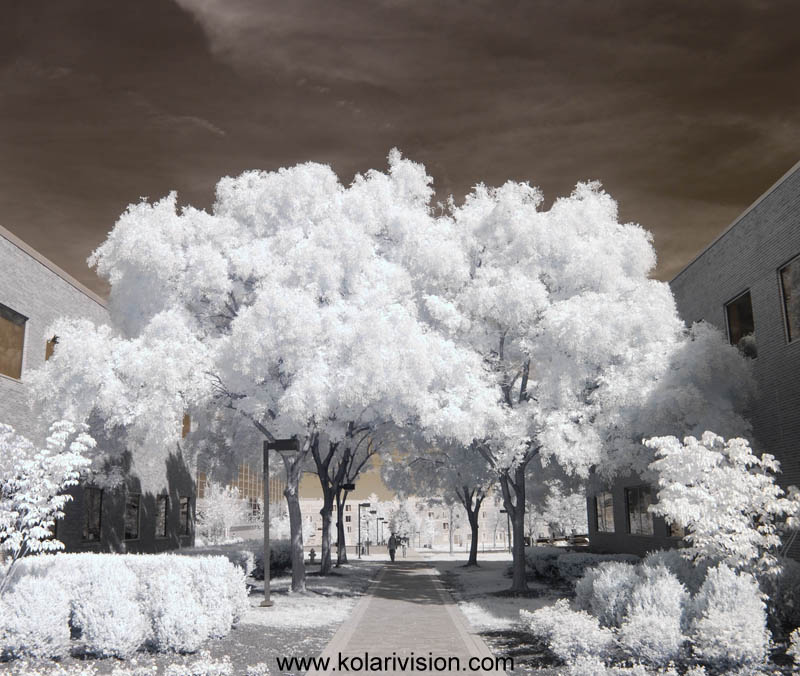
Everyone who has tried infrared photography is disappointed at first that no camera takes those blue skied infrared photos directly. Rather, you get a less spectacular red picture that has to be worked on to produce lovely false colors.
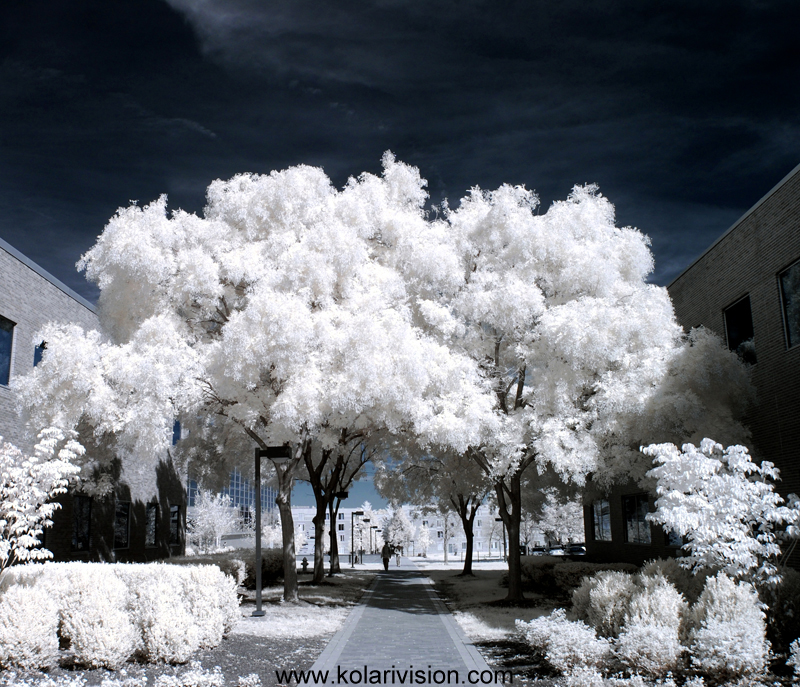
| I’m going to show you how to go from this: | To this: |
 |
 |
First, you should set a custom white balance with your camera
This is best done by going to the set white balance option on your camera and setting it to a patch of green grass so that the camera’s full view is of grass. This might not work on certain models, depending on how powerful the cameras white balance feature is, in case it does not record, increasing the EV or setting it to a wide outdoor shot can sometimes make it read the white balance. If it still cannot read the custom WB, see below for processing images with auto white balance.
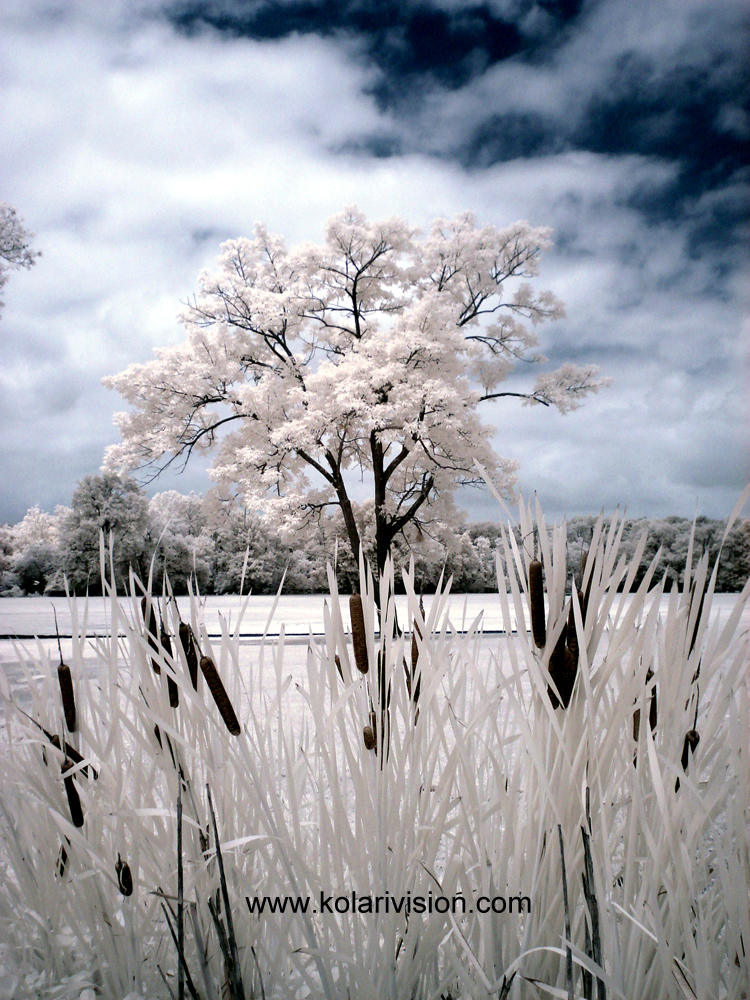
If your camera does not have custom white balance, false colors are still possible; you just have to adjust the hue and levels more afterwards. Below false colors with an auto white balance from a compact camera:
.JPG) |
 |
Switching the blue and red channels
Use the False Colors Photoshop action now and skip the next two steps.
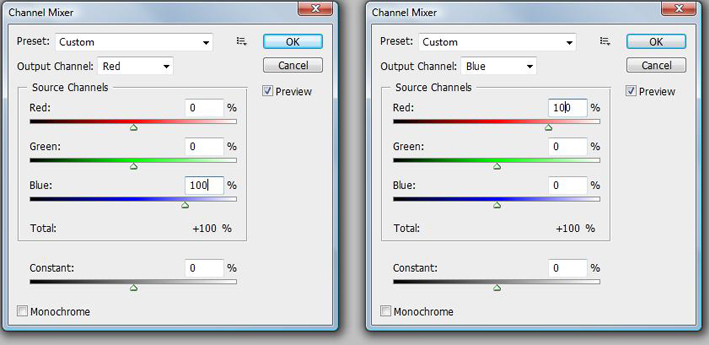
If you want to do it manually or use some other software, find the option called channel mixer. In the red channel, reduce the red to 0 and set blue to 100. Do the same for the blue channel reducing blue to 0 and setting the red to 100.
 |
Your image should come out something like this:
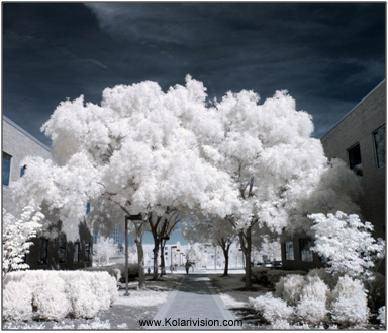 |
Because this camera had a great custom white balance, I did not need to change much in the hues. If the leaves don’t come out to be perfectly white, you can use the autotone feature, and adjust it further by reducing the saturation of the reds, greens, and yellows and increasing their lightness.
I personally prefer the white tree effect to the yellow effect. But depending on your preference you can adjust the yellow hues to taste.
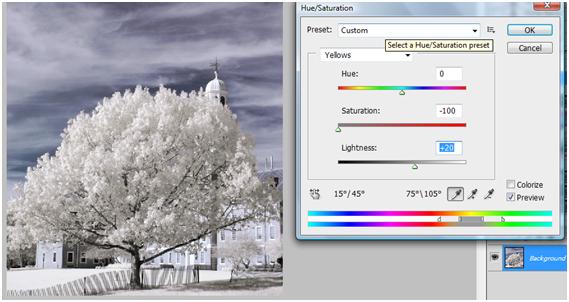 |
This is of course just a basic overview of the process. You can apply any other Photoshop techniques and adjust anything to personal taste.


Baie dankie Johan vir die interessante artikel weereens. Dit is die roete bo wat ek nog heel tyd beoefen met min sukses – nog baie leer en oefen. Saam met die Nikon D750 en D7100 geniet ek my Fuji XT-10 en mag dalk net die nuwe Fuji oorweeg. Na aftrede is fondse vir fotografie nie so geredelik beskikbaar nie. Dankie nogmaals vir al jou interessante artikels en super pragtige fotos. Altyd ‘n ervaring om na te kyk.
Superb effect
I have an nikon D90 converted to super color
And D750 in converted
I can I achieve the white color effect5
Once the channel swap of red and blue channels in both has been made before closing the dialogue box save these as a preset (top of panel) and next time just load the named preset (e.g My channel swap), a much quicker way of applying the basic channel swapping once set.
Do you do a custom white balance for each filter # you would be shooting with? On a full spectrum, for instance that comes with different filters.
Yes, we recommend you set a new custom white balance each time you swap filters or save a preset custom white balance for each filter you use with your full-spectrum camera.
Some recent thoughts from some IR enthusiasts suggest doing an Auto White Balance in Post and then using the channel mixer to the desired effect. However, I cannot find an AWB choice in the Photo Persona or in the Develop Persona.