Nikon ZR Teardown and Disassembly
Nikon ZR Disassembly and Teardown Written by Phillip Andrew Iglesias Last year, Nikon bought out RED cinema cameras, leaving photographers…

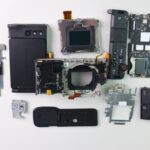
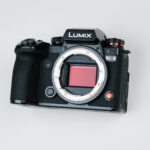
Panasonic Lumix S1R II Disassembly and Teardown
Panasonic Lumix S1R II Disassembly & Teardown Written by: Phillip Andrew Iglesias The Panasonic Lumix S1R II was released earlier…

Canon EOS R50V Teardown and Disassembly
Canon EOS R50V Teardown and Disassembly | Infrared Conversion Written by Phillip Andrew Iglesias https://youtu.be/7i4B2fniujM?si=YSb2b8V6Zr6iuoi5 The Canon EOS R50V mirrorless…