Introduction
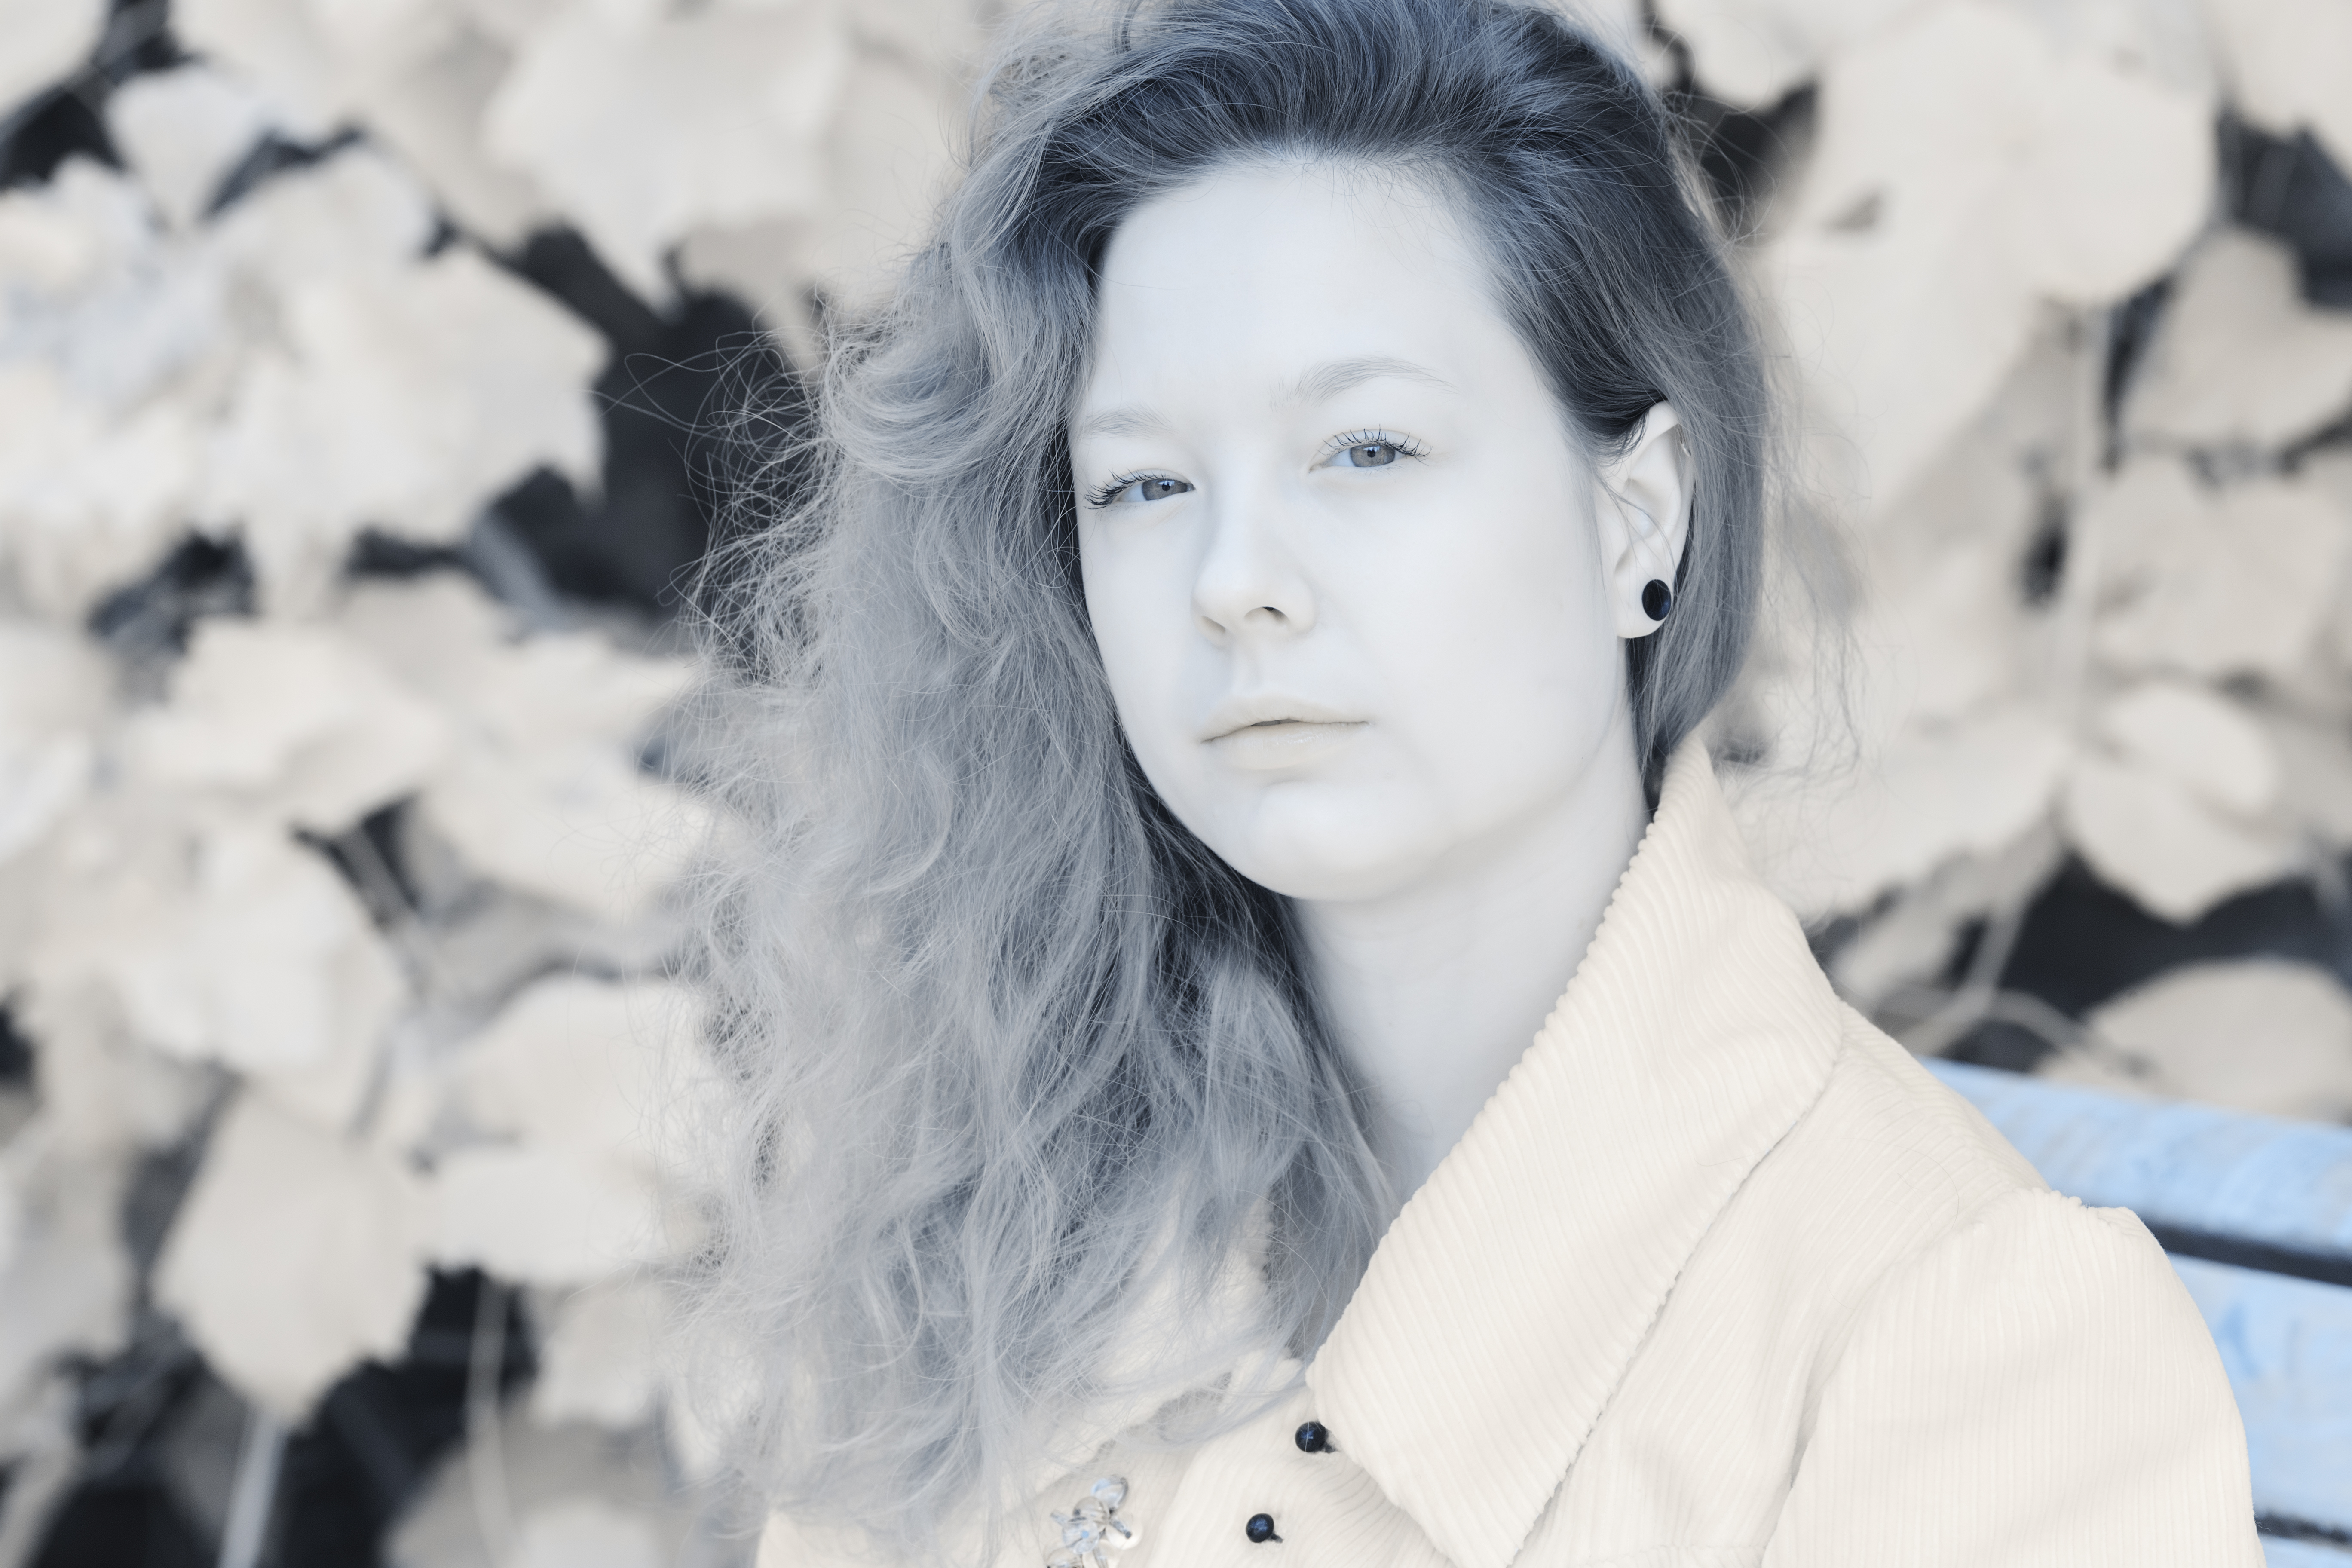
Infrared photography is most often used for landscapes due to its interesting effects on vegetation. However, infrared photography also has unique effects for portraits such as white and smooth skin and colored hair. In this article we will see how infrared portrait photography works, from practical shooting to the processing of RAW files for each infrared filter provided by Kolari Vision.
How to shoot infrared portraits?
Shooting portraits in infrared is the same than shooting landscapes in many ways: compatible lenses are the same, shooting RAW is an obligation and using liveview is still the best way to compose your images and focus on the eyes of the model. The main parameter to adjust here is the white balance. In the case of infrared portrait photography, the white balance is not adjusted for foliage color but for skin tones.
White balance using a gray chart:
The white balance is adjusted with a gray chart for each filter used the same way it would be done for landscape infrared photography. Results show that this method is not suitable in portrait photography for filters under 720nm: it impacts the skin tones by giving them a colored tint.
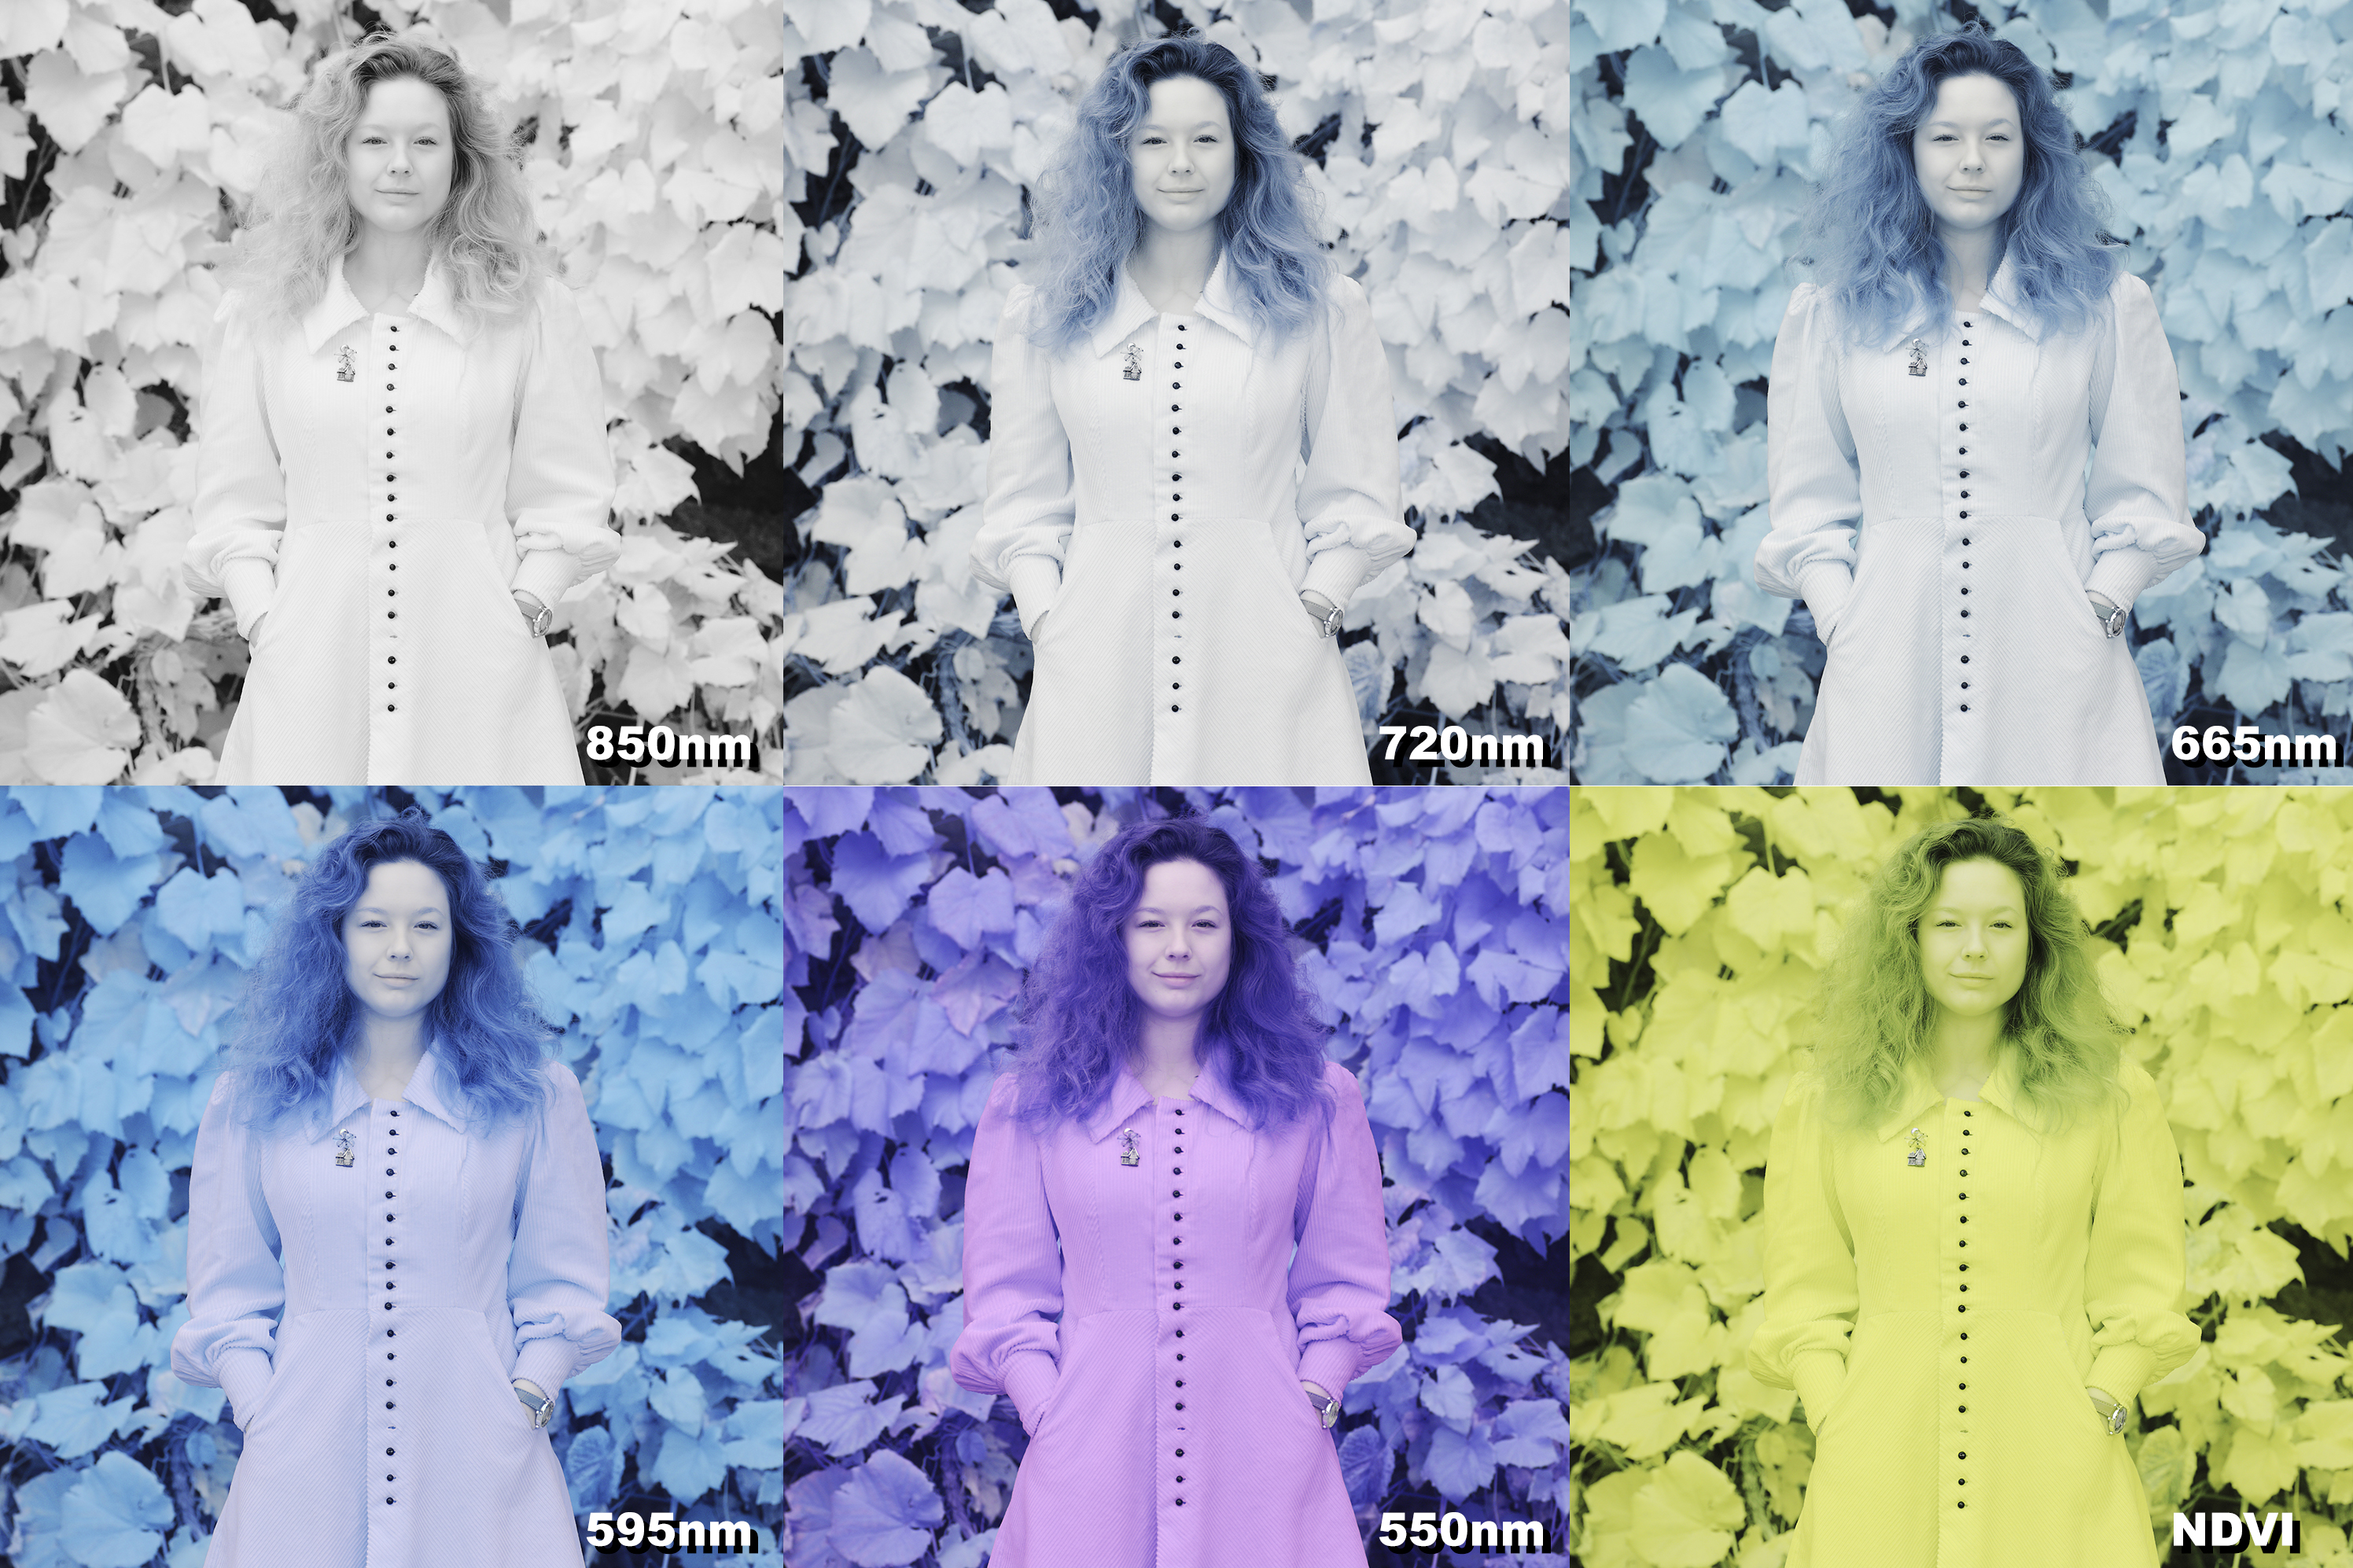
Note that there was no channel mixer applied here, just an adjustment of the white balance.
Dedicated white balance for portrait infrared photography:
An alternative method to assure a more neutral tint of the skin is to adjust white balance to obtain a superposition of red and blue channels:
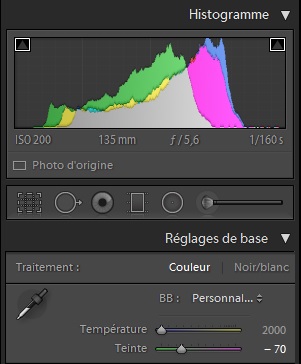
In Lightroom, this adjustment is achieved in playing with the tint level, once the temperature is fixed at its minimum. The resulting image is very magenta at 720nm here:
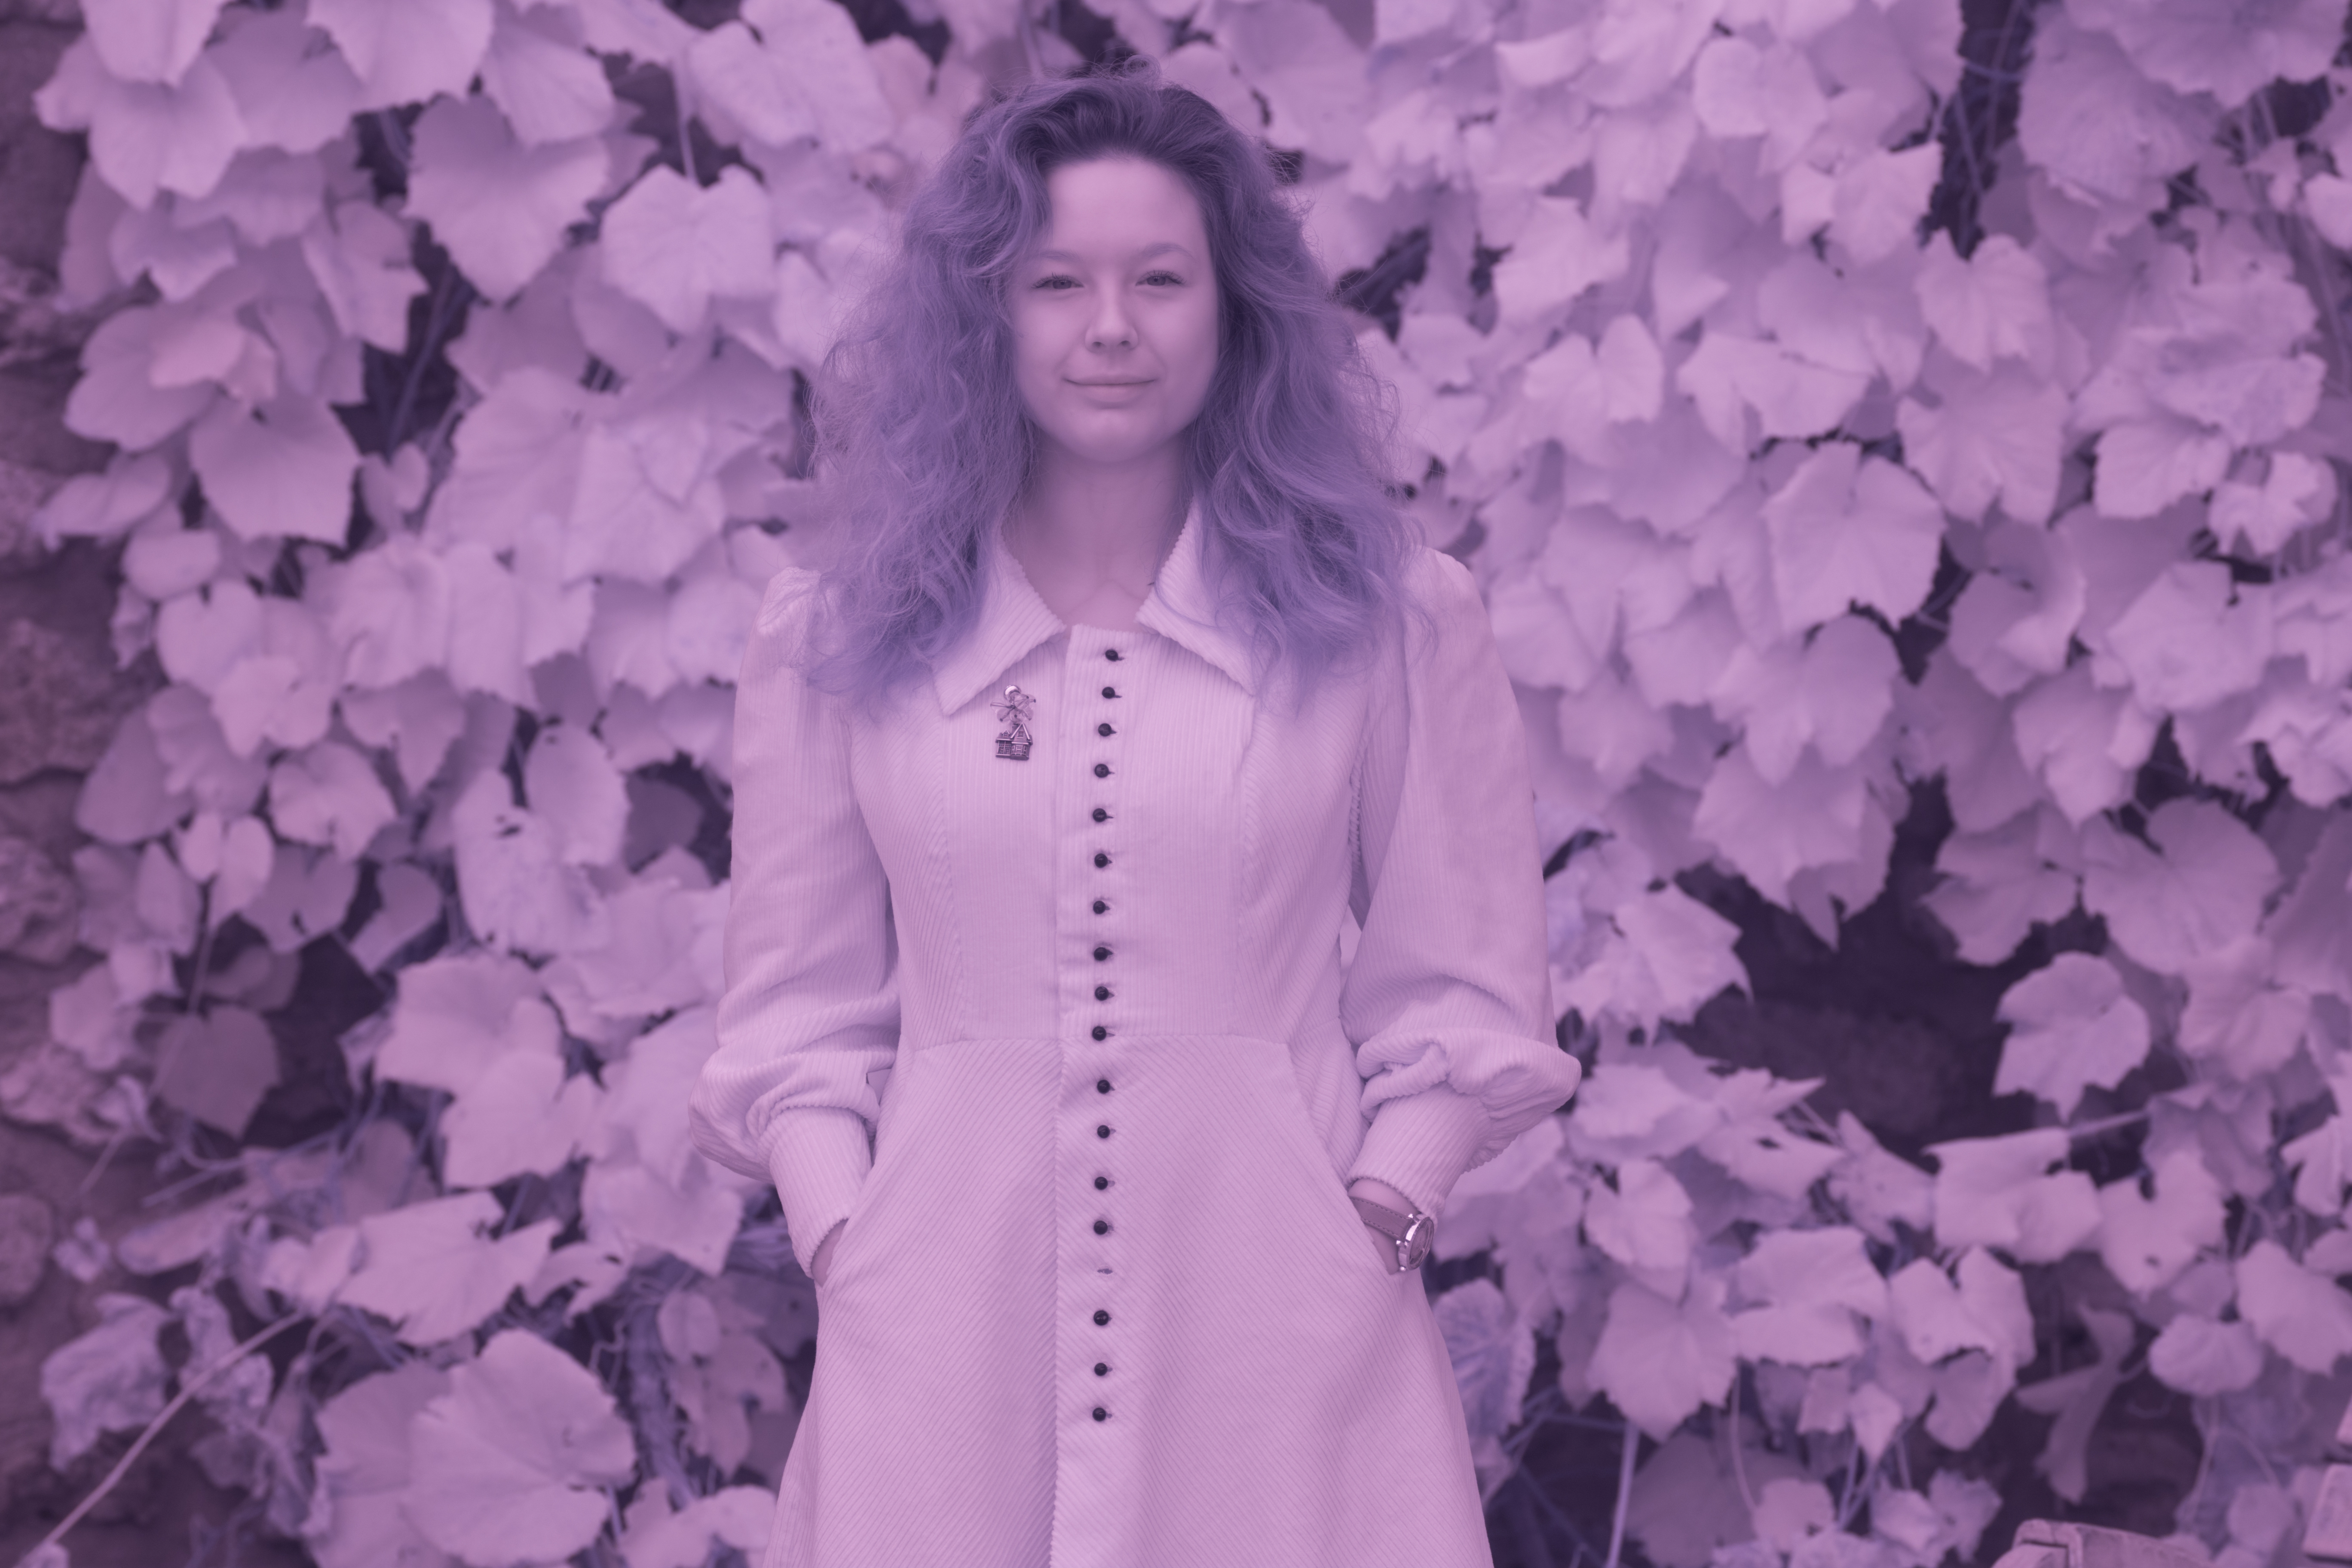
The next step is to apply a channel mixer following these adjustments:
- Red channel:
- Red: 100%
- Green: 0%
- Blue: 0%
- Green channel:
- Red: 50%
- Green: 0%
- Blue: 50%
- Blue channel:
- Red: 0%
- Green: 0%
- Blue: 100%
The result is a less saturated image, with more subtle colors and less blue tint on the skin:
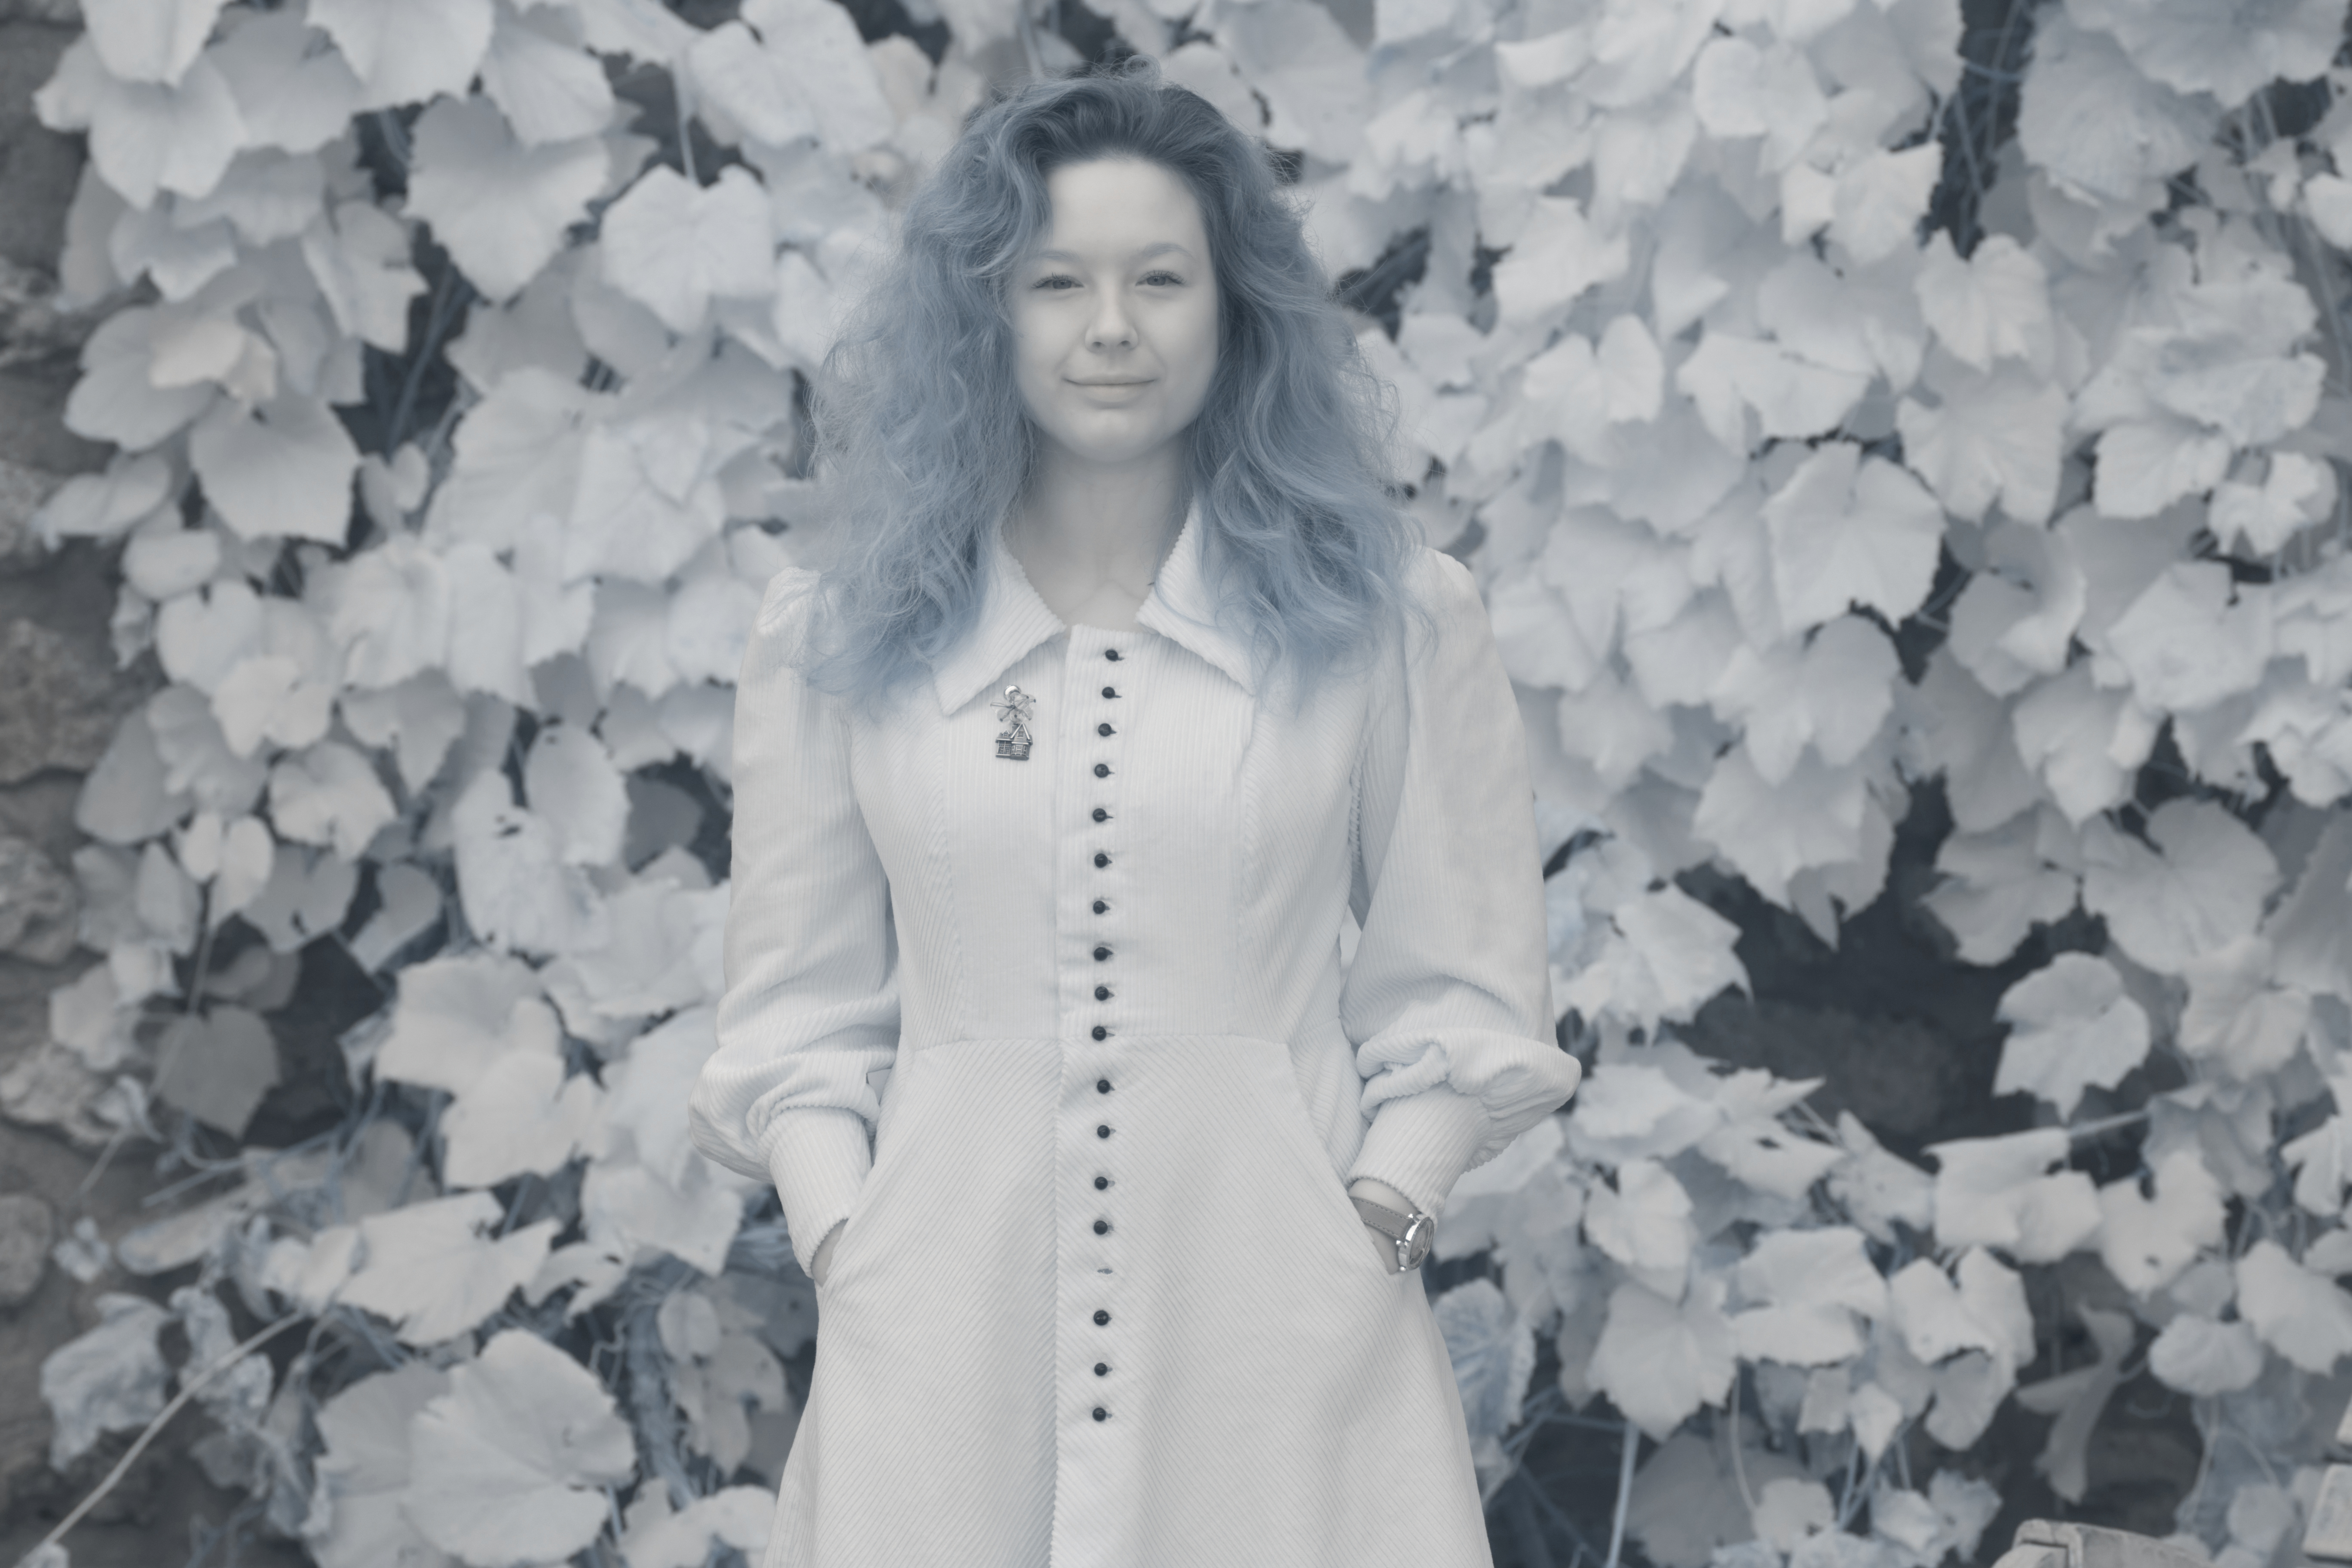
850nm filter is the only filter not impacted by the change of white balance.
Here is the result of dedicated white balance used with corresponding channel mixer, for each filter:
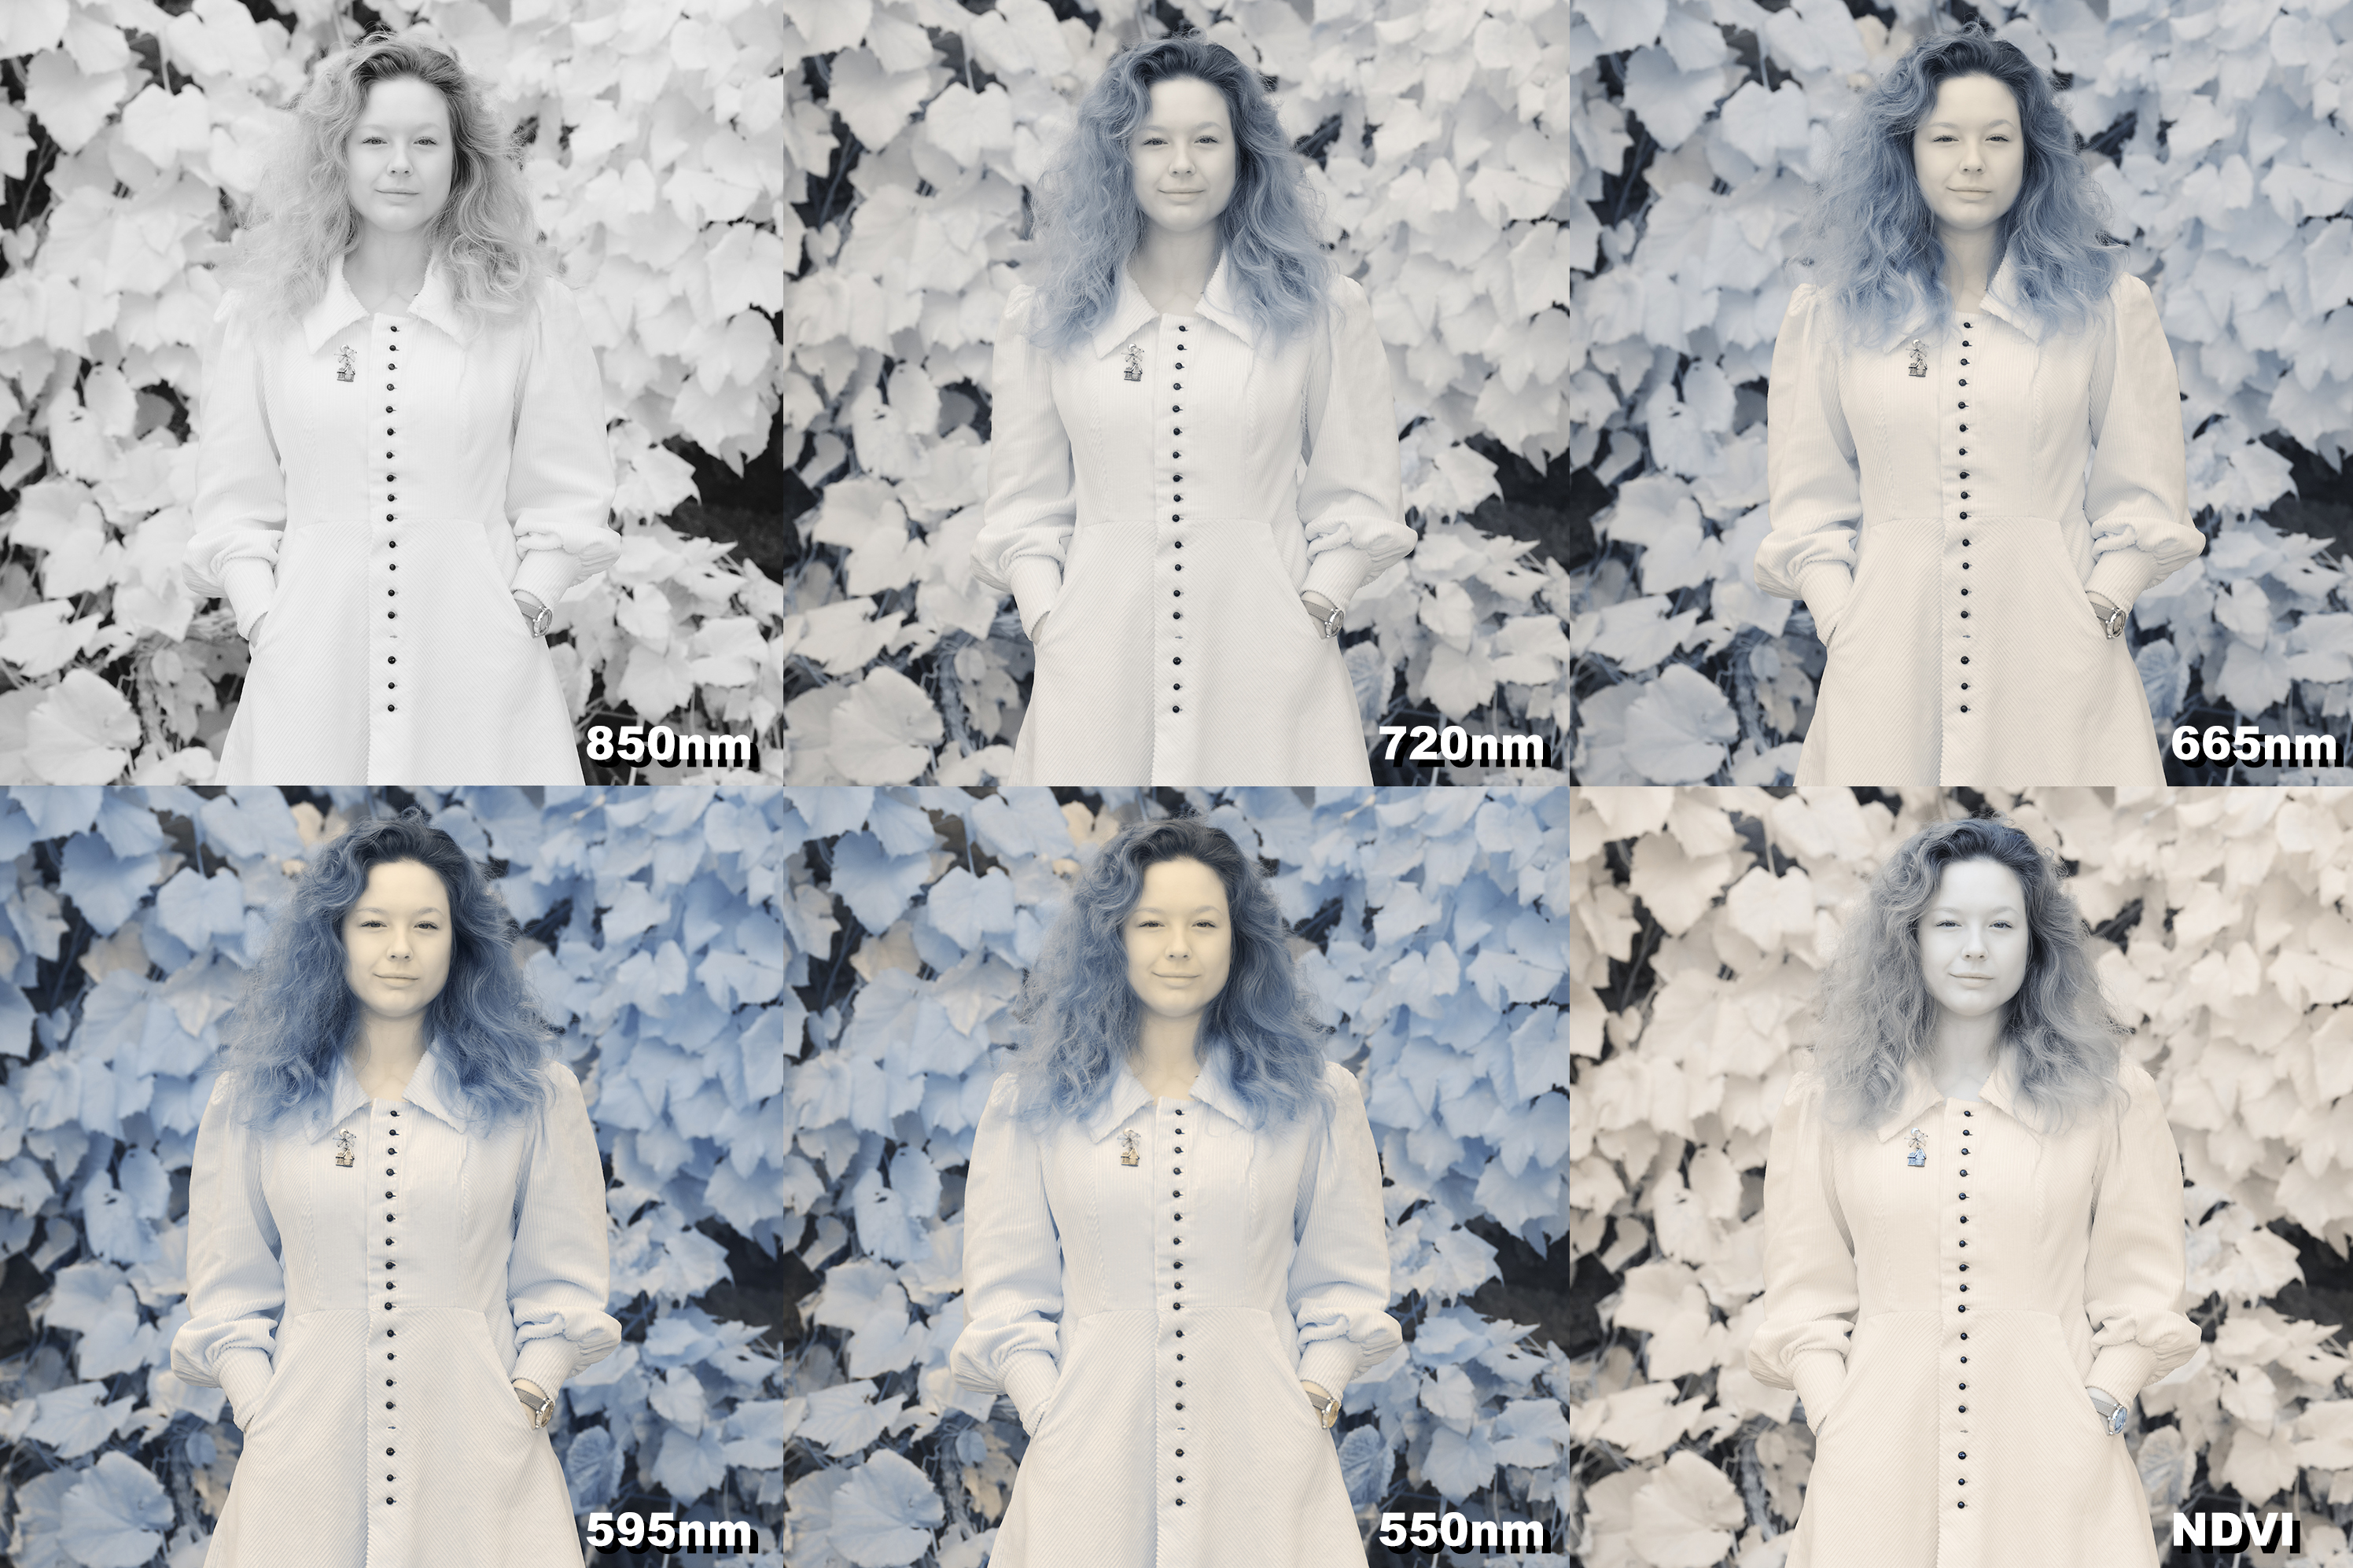
The skin tint is more acceptable here. Skin tones become warmer as the wavelength decreases, and the foliage becomes cooler. The next part of this article will describe the effect of each infrared filter more precisely.
How to process infrared photography portraits.
In this part, we will see the processing specificities of each infrared photography filter. The most important part of digital process has been seen with the adjustment of white balance.
Each infrared portrait was taken with the same gear:
- Canon 6D modified to full-spectrum
- Canon 135mm F/2
- Corresponding infrared Kolari filter
Each picture has been processed the same way:
- Dedicated white balance
- Specific channel mixer
- Adjustment of exposure and contrast
850nm portrait
850nm portraits offers subtle black and white rendering, with bright, white and smooth skin. Foliage stays bright and white as well.
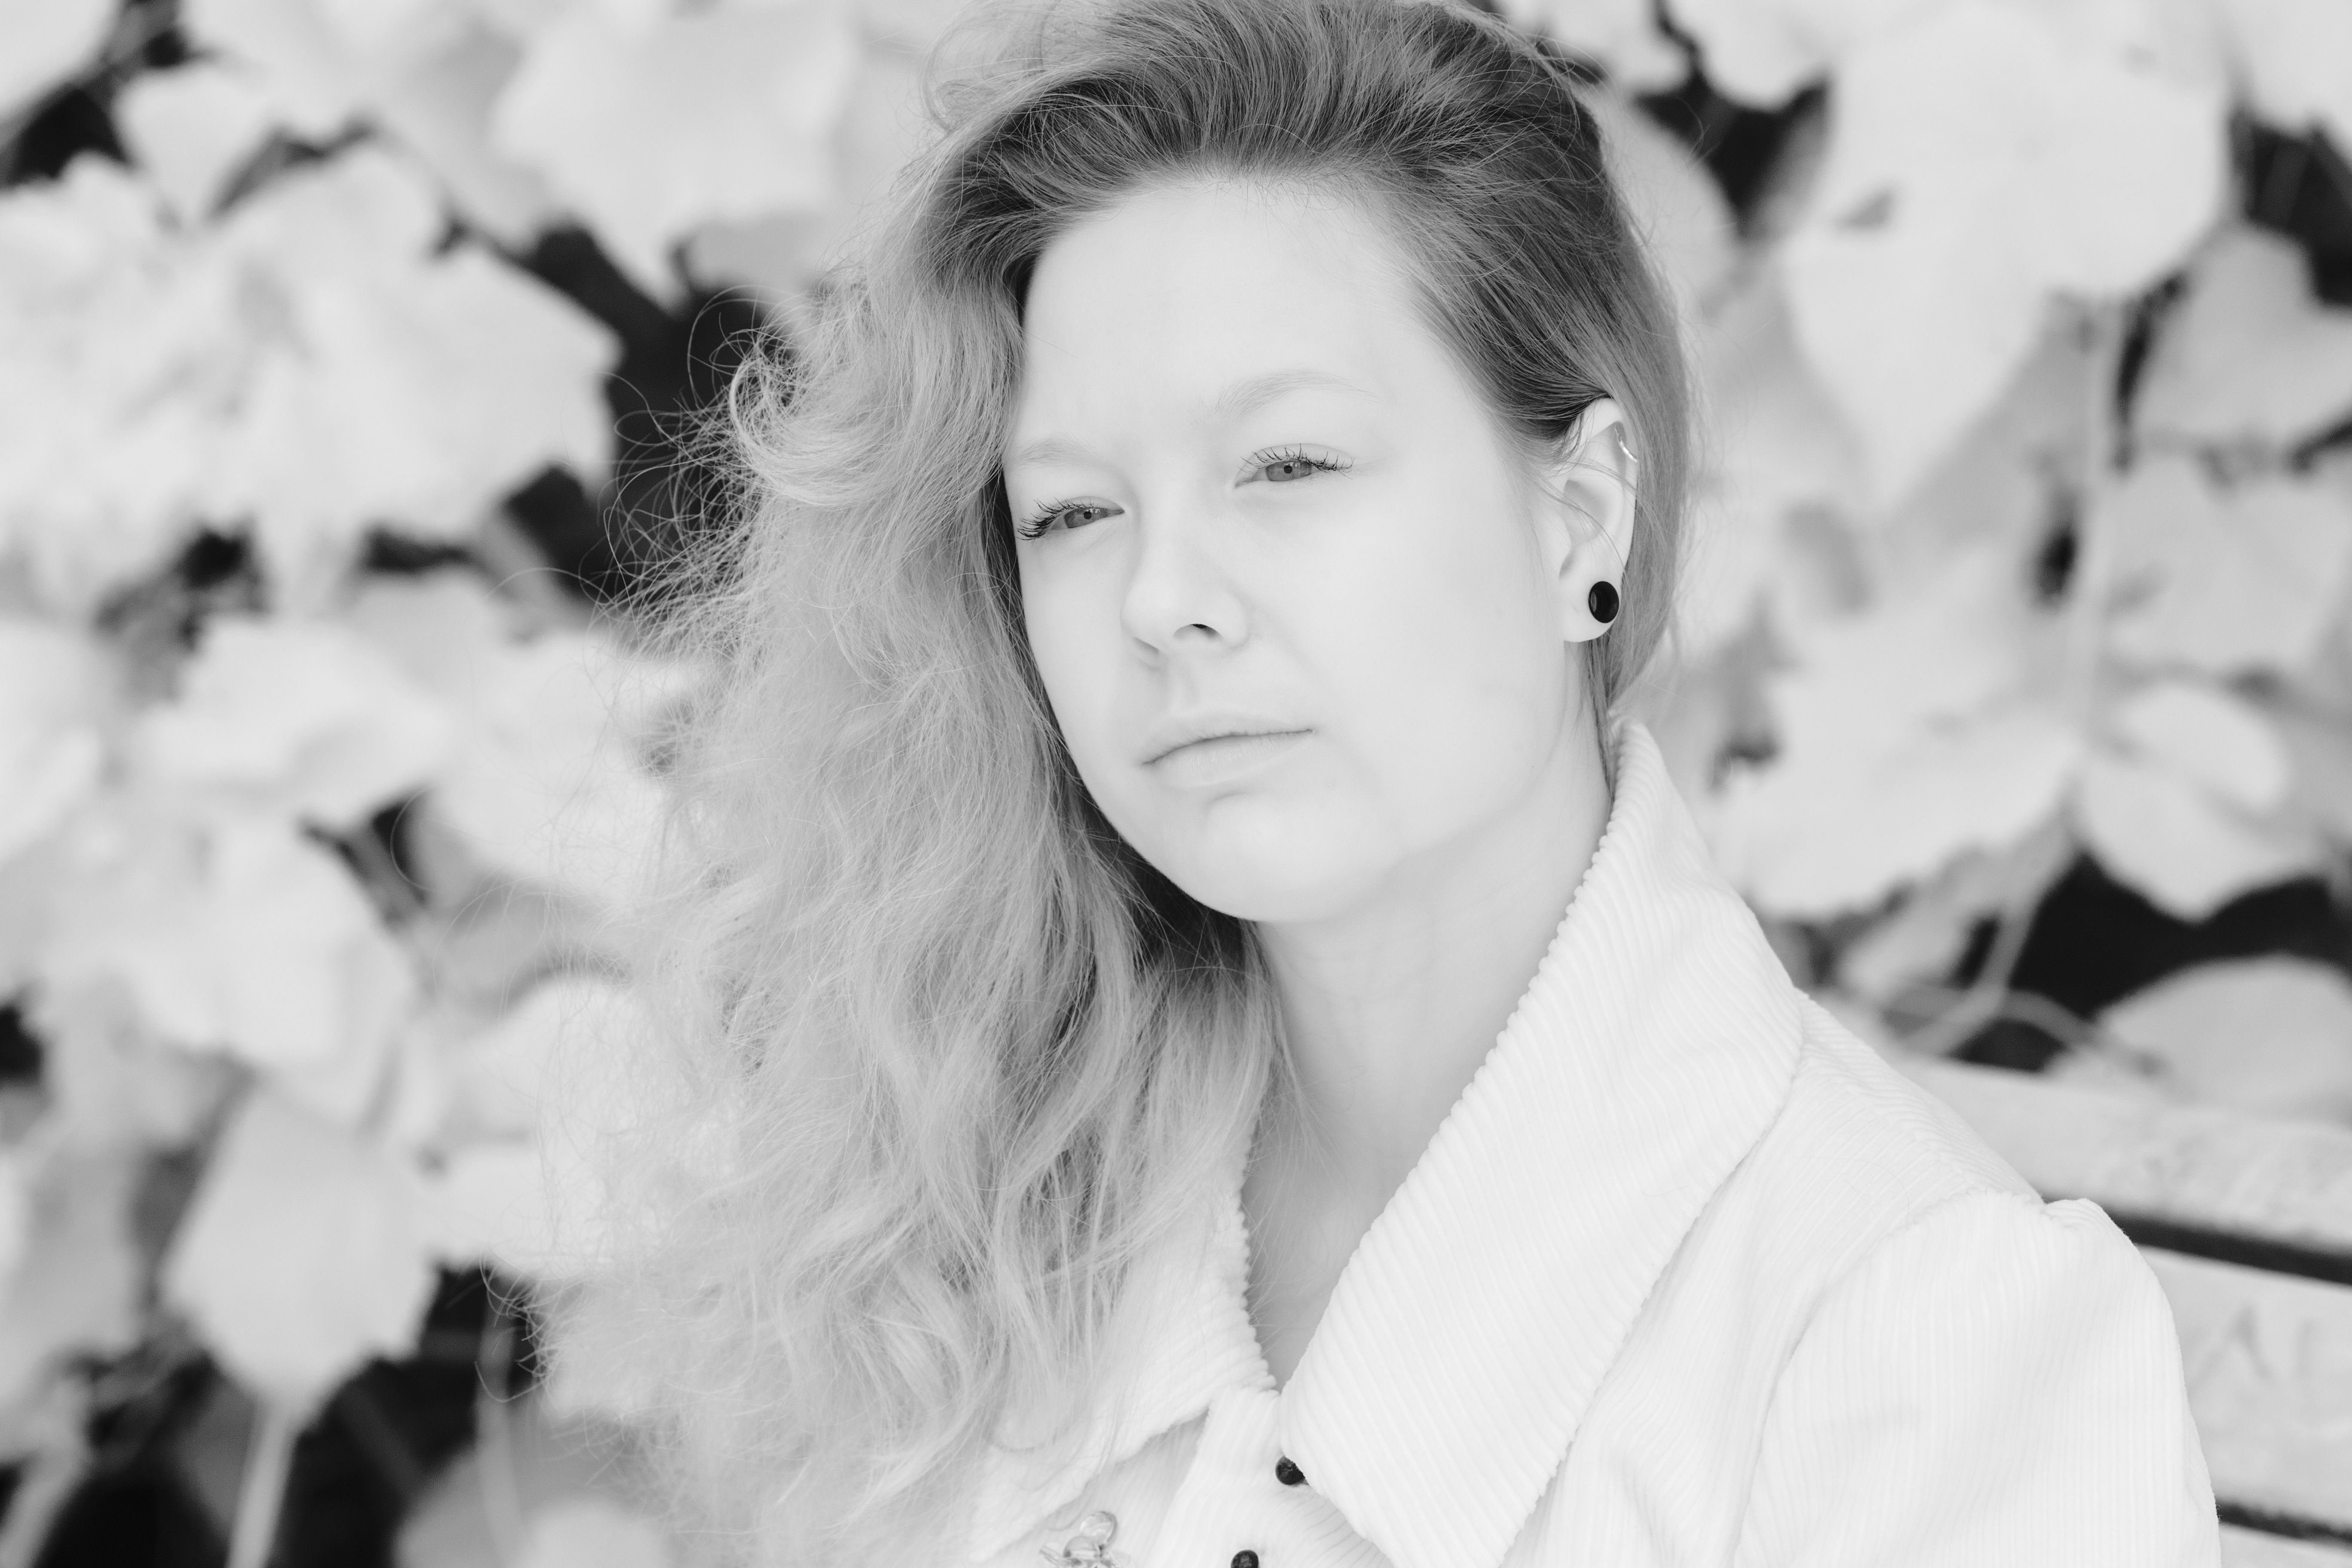
To avoid flat aspect of the face, due to the uniformity of the tint of the skin, a solution is to extend the gray shades which you can find in my Black and White processing tutorial.
Moreover, at 850nm, veins are visible in some parts of the body including the neck and the mouth. The most efficient solution to reduce their impact is to use the dodge and burn technique precisely to lighten them.
720nm portrait
The 720nm filter adds some colors in the picture. Models with dark hair will see it becoming blue-gray, while the foliage remains white. Models with blond or red hair will see it becoming totally white. The skin is still bright, white and smooth.
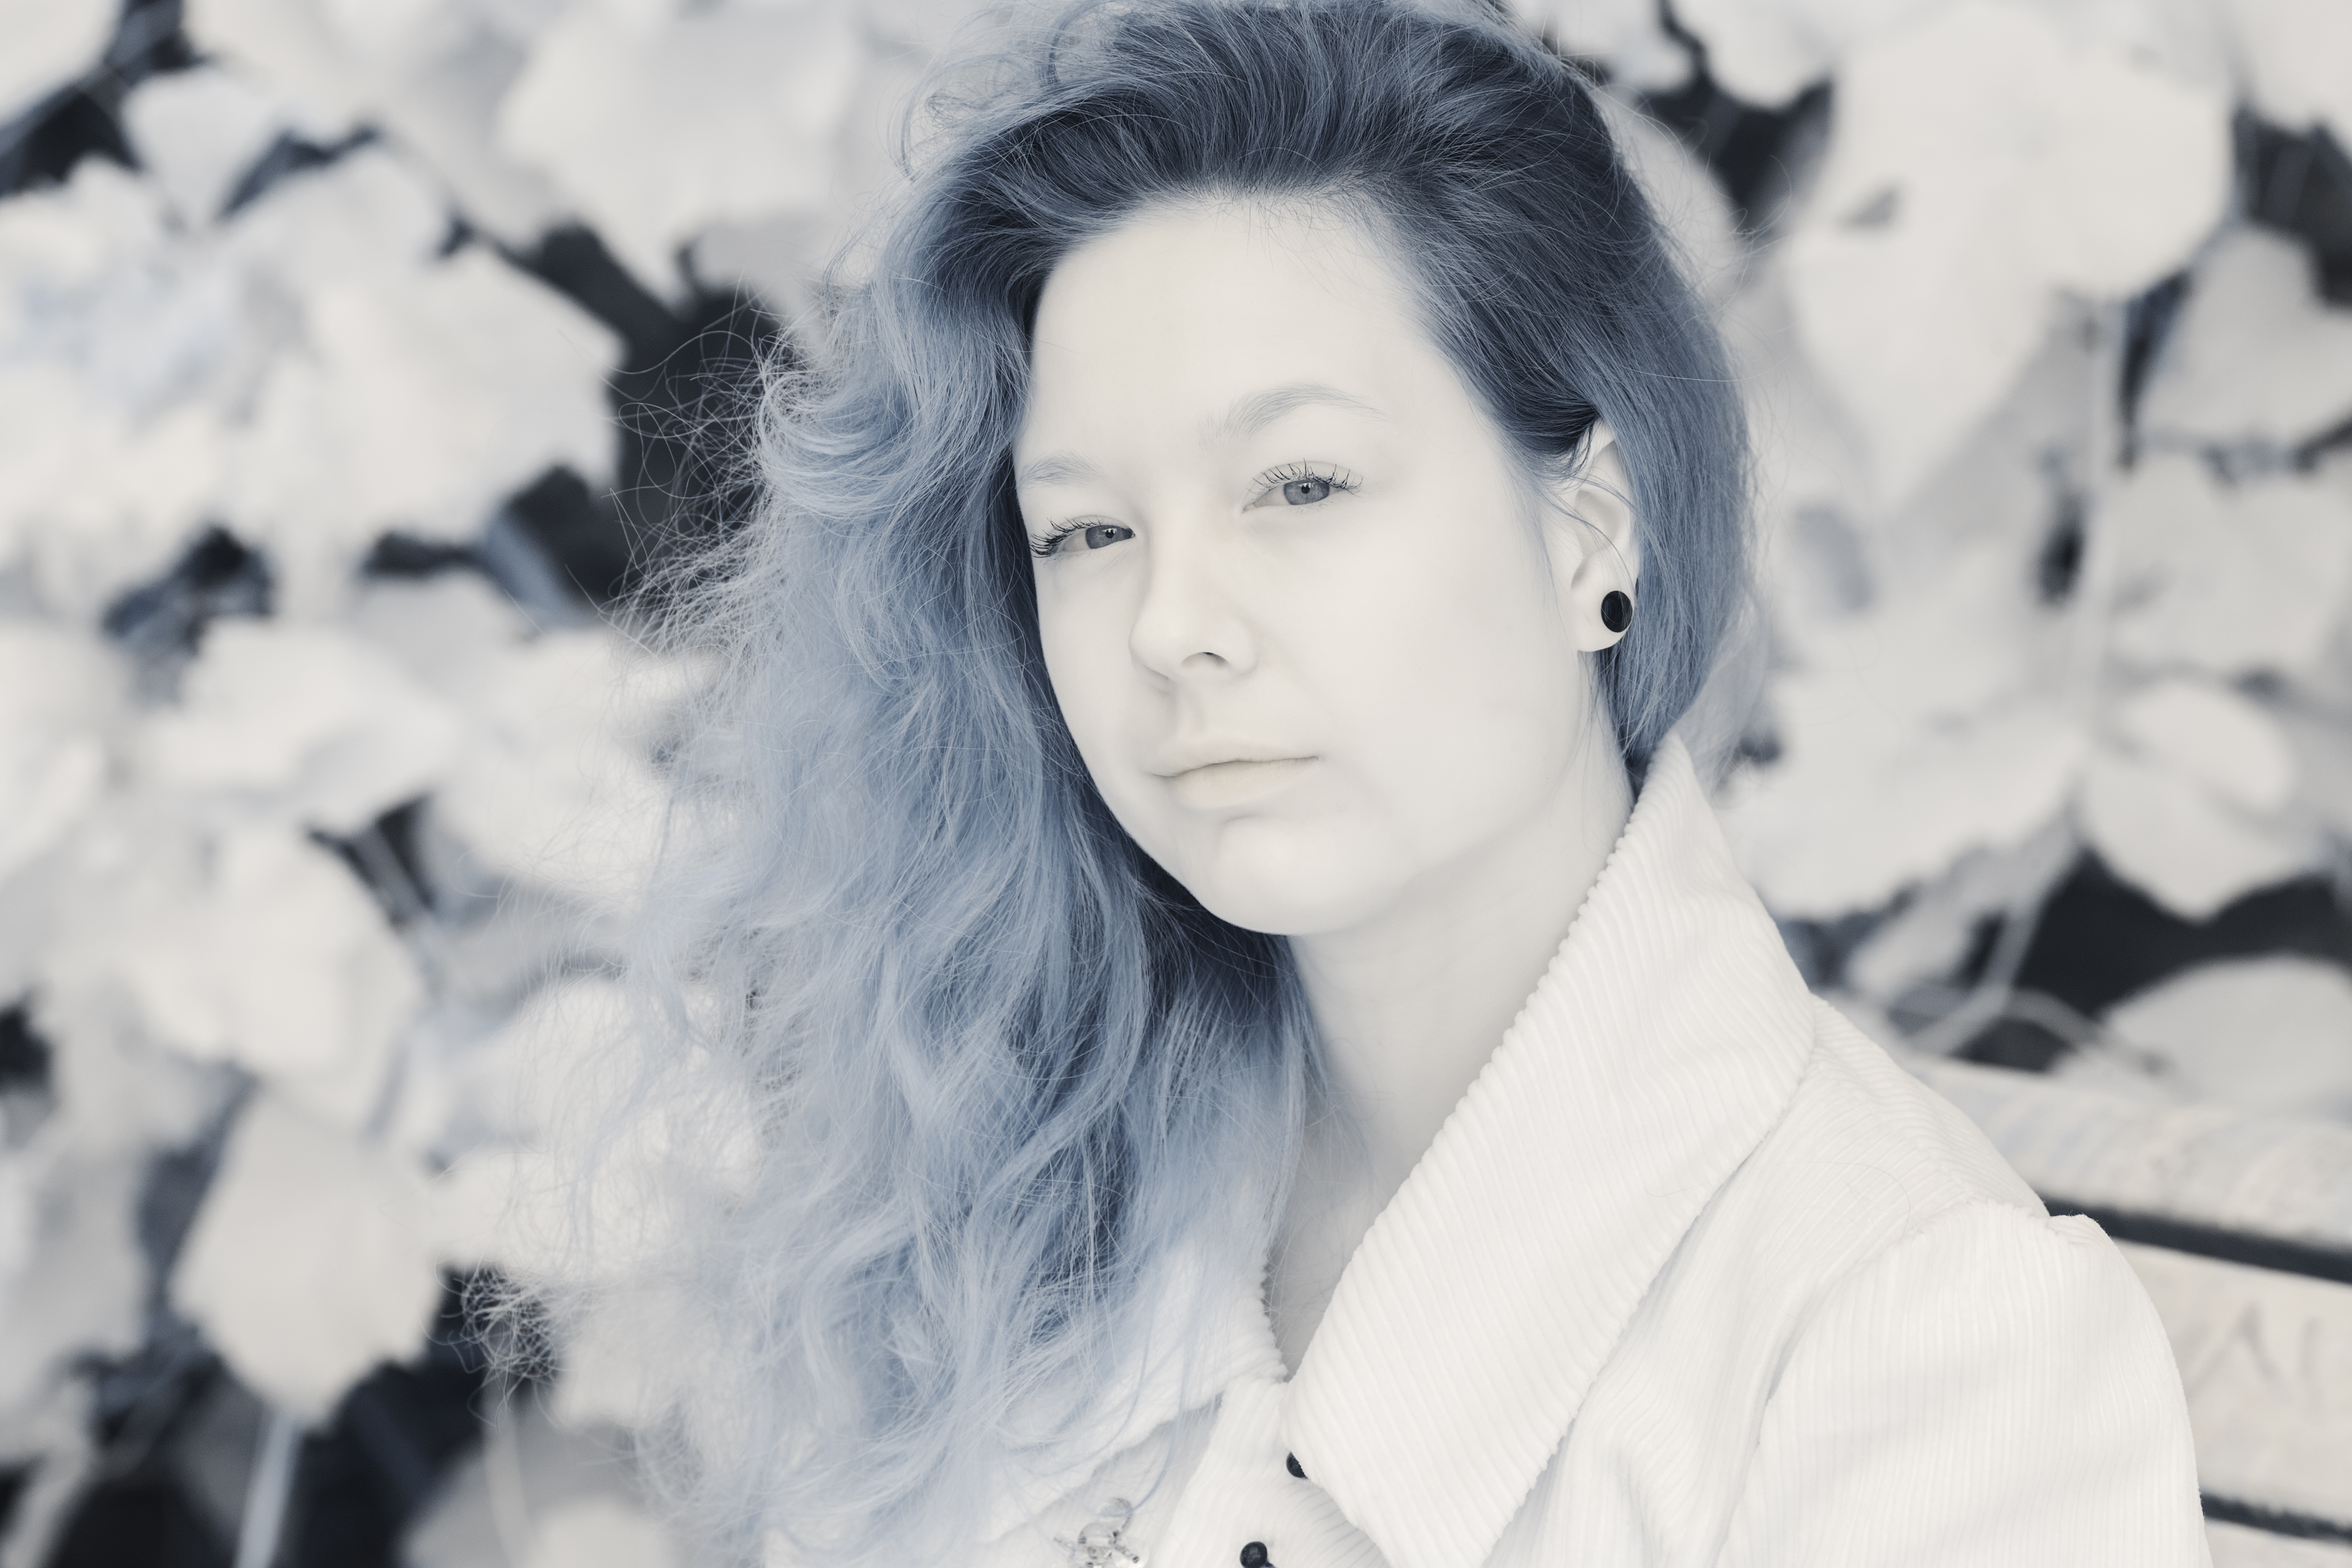
As with 850nm filter, veins can still be visible with this filter and the dodge and burn technique has to be used to remove them.
665nm portrait
The 665nm filter offers a result closed to 720nm filter, but with more vibrant colors. Skin becomes warmer and foliage gains a blue tint too.
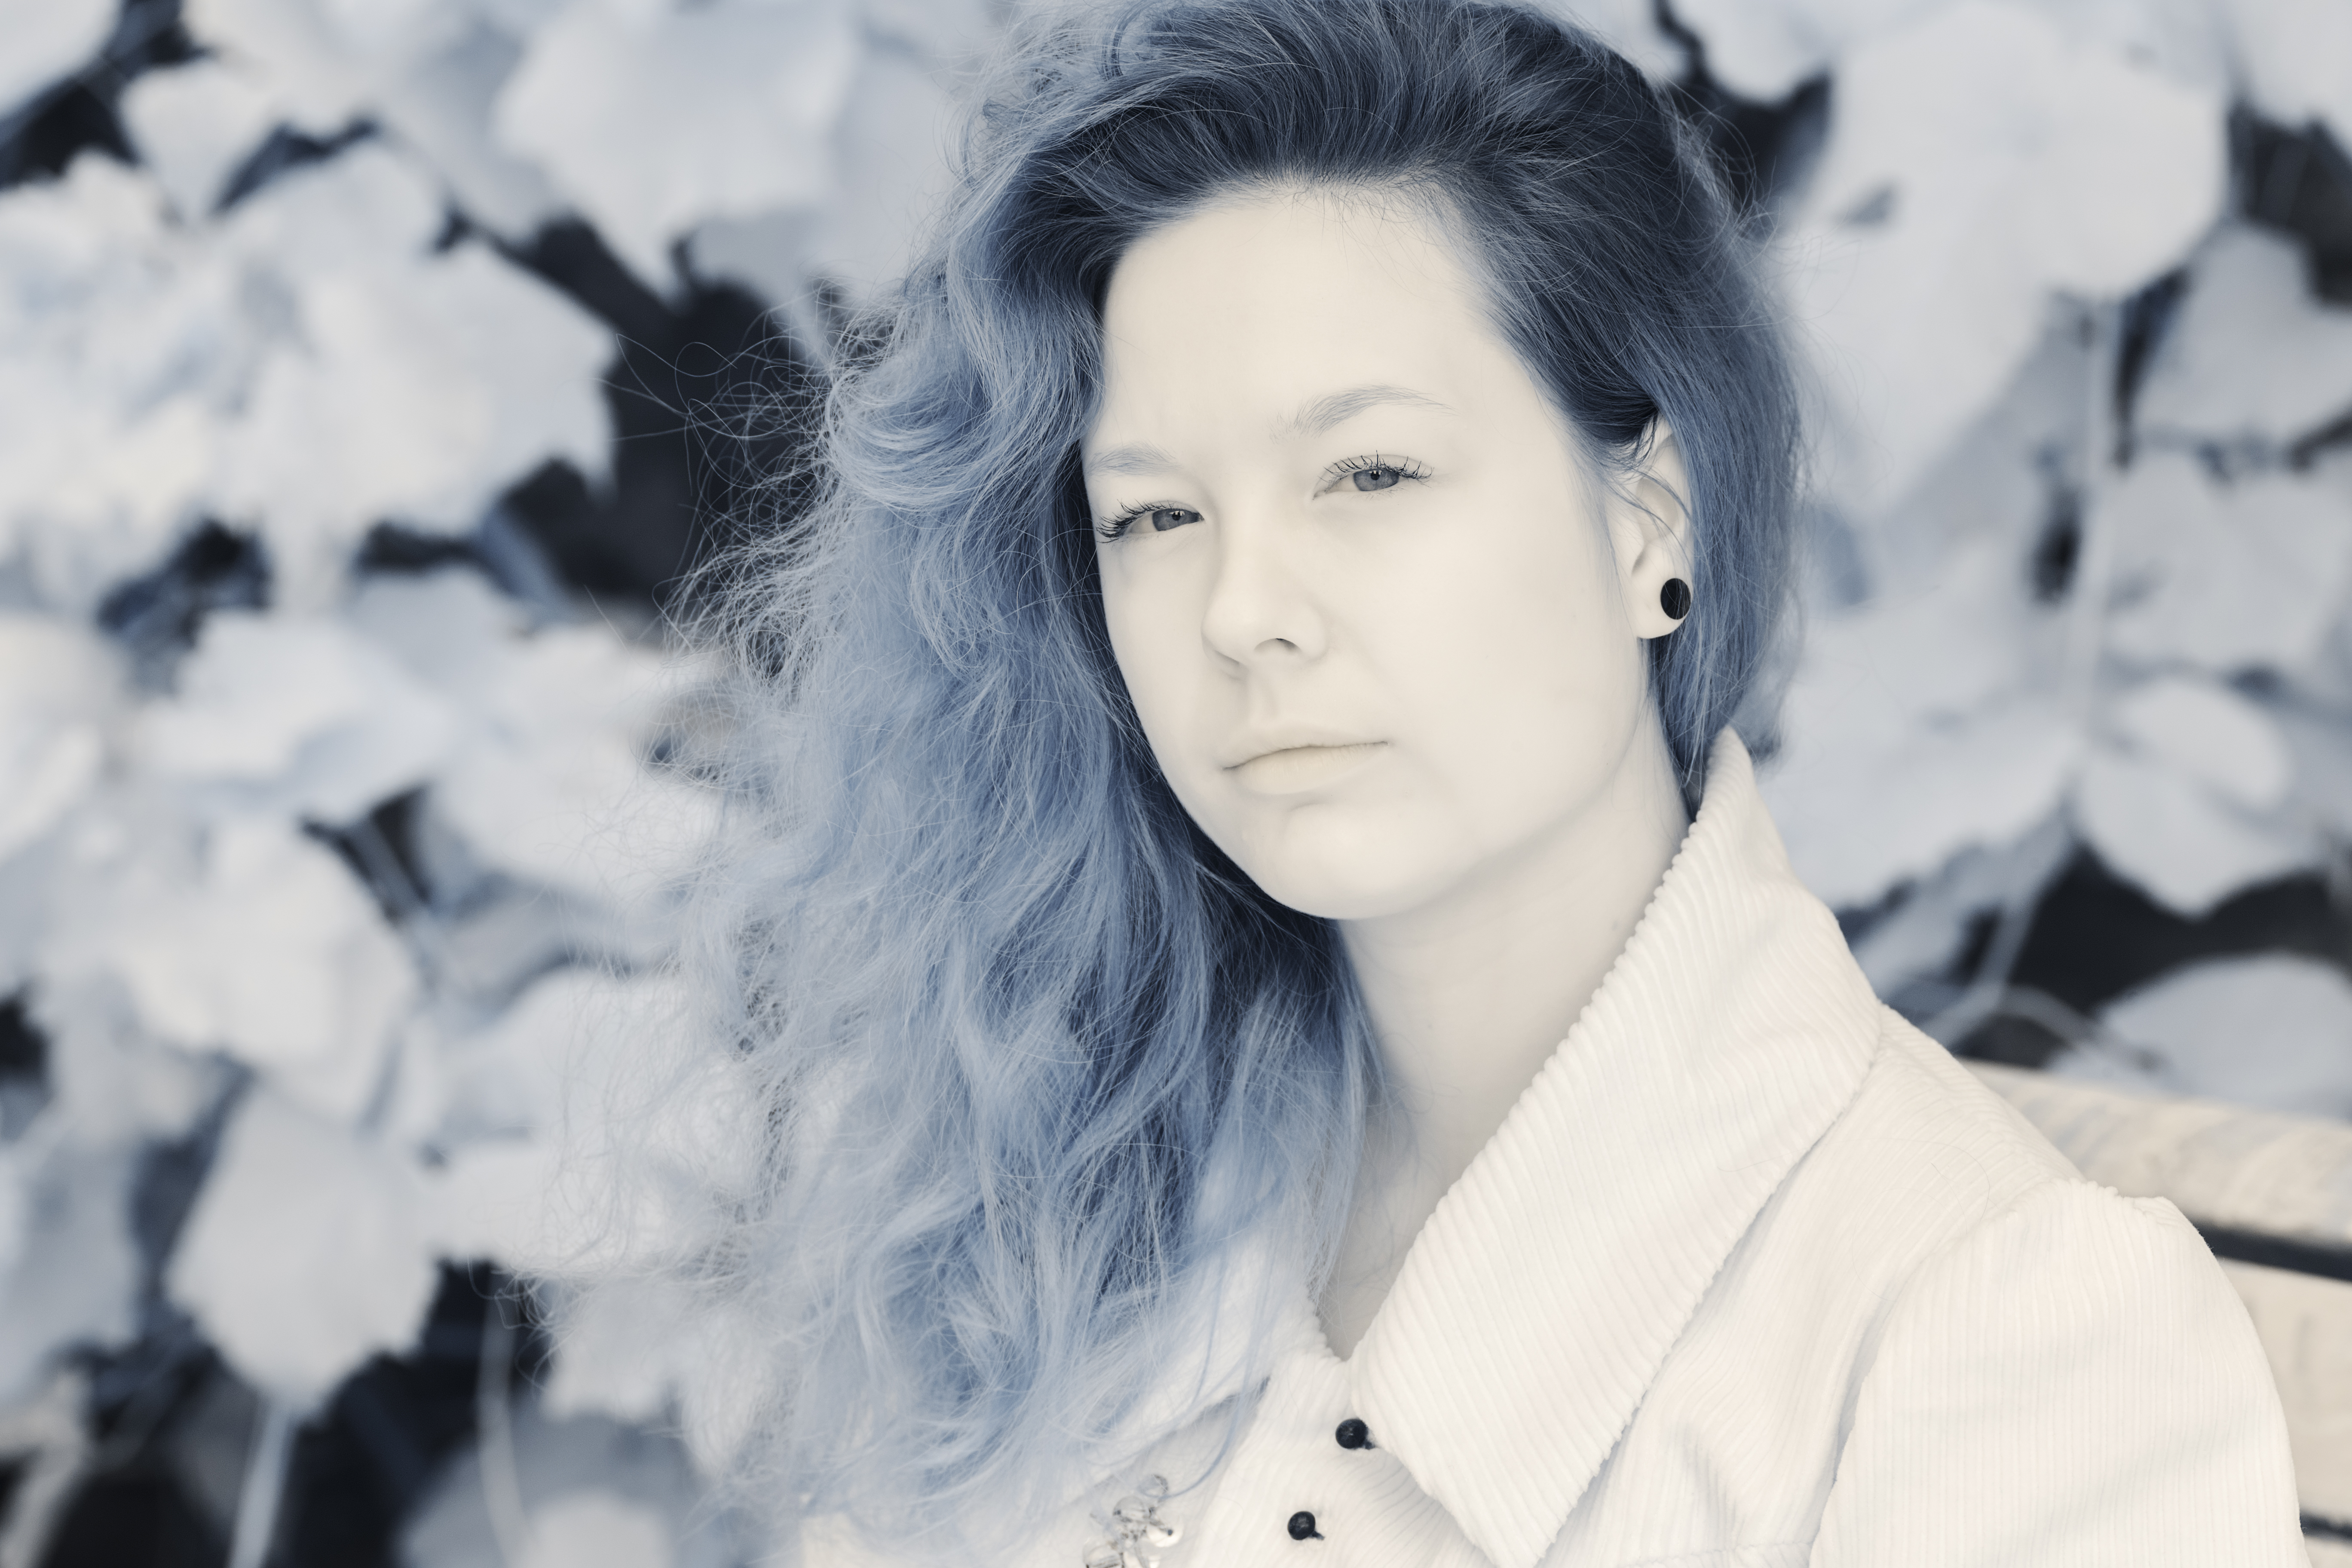
Veins are less visible here than with the two previous filters.
590nm portrait
The 590nm filter offers warmer skin tones and more saturated colors in hair and foliage. Skin suffers a bit of yellow tone that can be locally reduced.
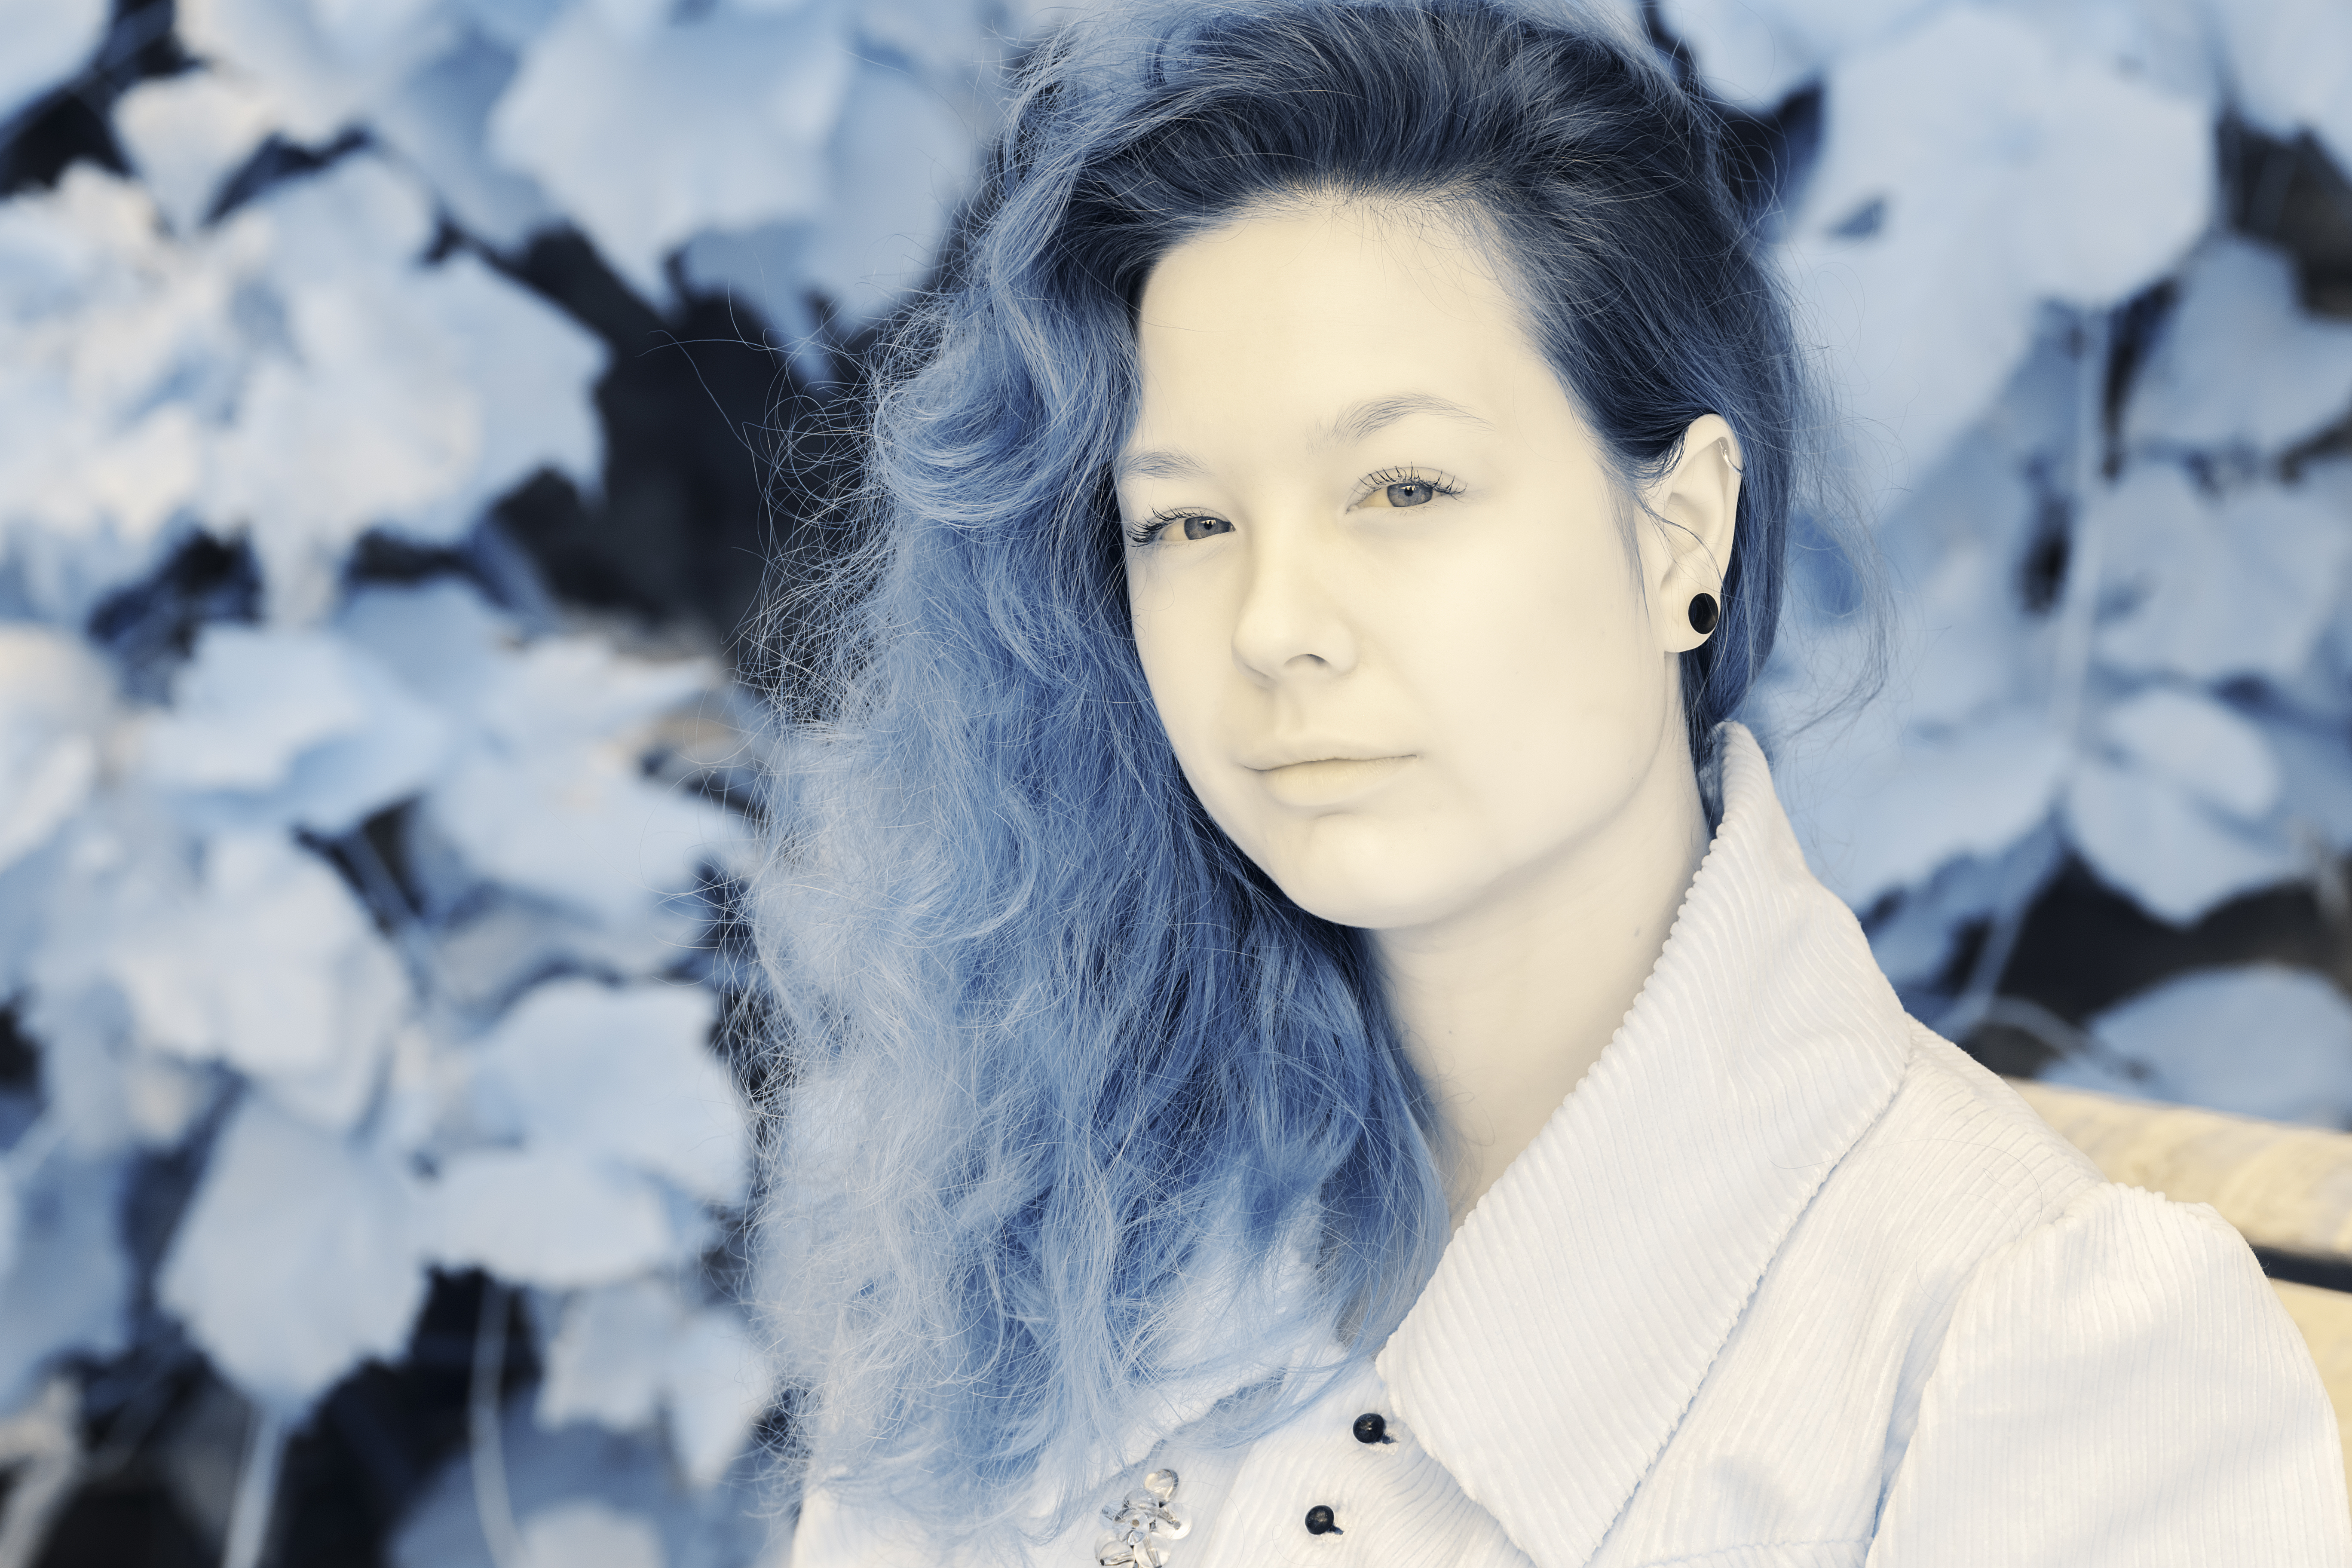
Again, veins are less visible here than with the previous filters.
550nm portrait
The 550nm filter works a bit differently than the previous ones. The blue color is more saturated, but the skin tones do net get warmer than at 595nm. Skin tones are far more pleasant with this filter.

Moreover, the 550nm filter allows another rendering similar to Kodak aerochrome effect. This effect is only attainable at 550nm.
Blue IR portrait
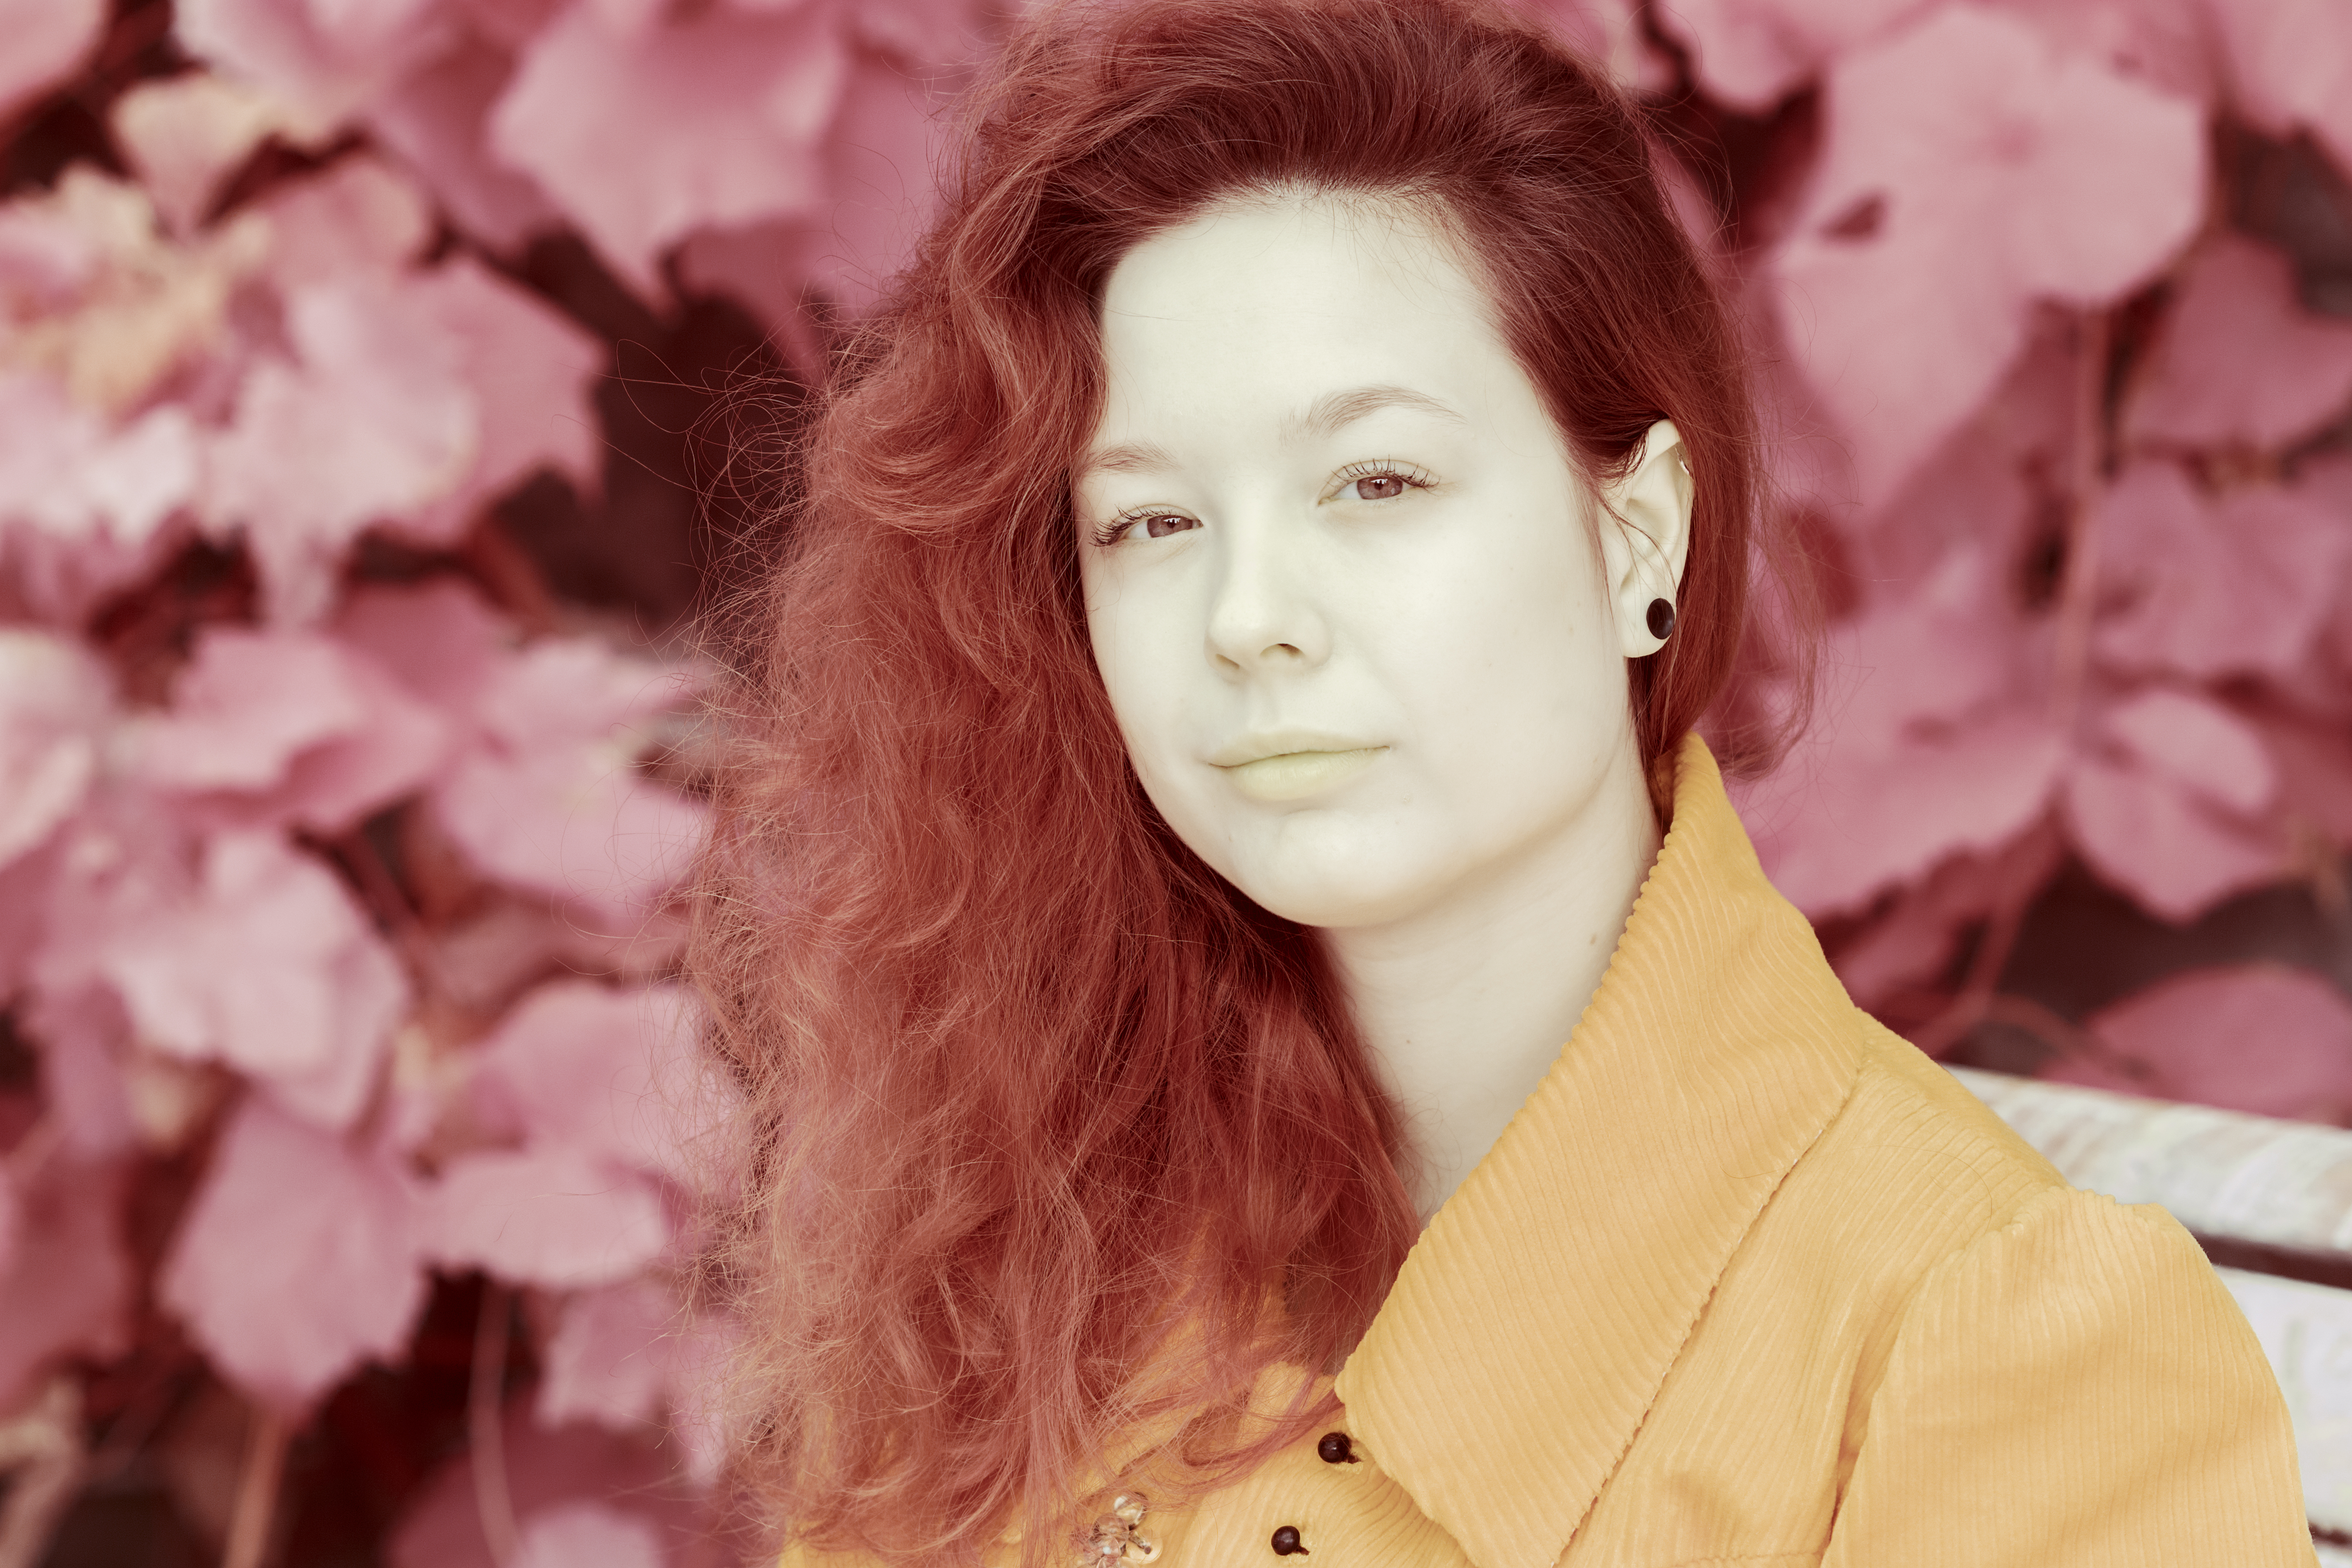
Blue IR filter is the only infrared photography filter offering yellow foliage with classic IR processing. Skin tones are cold here but do not suffer from important colored tint. Moreover, there is no visible lack of sharpness with this filter used in infrared portrait photography.
Final Thoughts on Infrared Portrait Photography
Infrared photography is easily applicable to portraits, no matter which infrared filter you own. This technique offers very smooth skin and original colors with simple digital processing steps.
The only issue is the visibility of veins with the most selective filters, but this problem can be easily solved using the dodge and burn technique.