Welcome to the infrared Conversion DIY of the Sony Alpha A6300, before you start please be sure you are grounded to avoid any static damage to electronic components
1
Step 1
First, we will rotate the camera so the bottom is faced towards you and you will remove the 3 indicated screws.
2
Step 2
Open the battery compartment door and you will remove 2 screws as indicated.
3
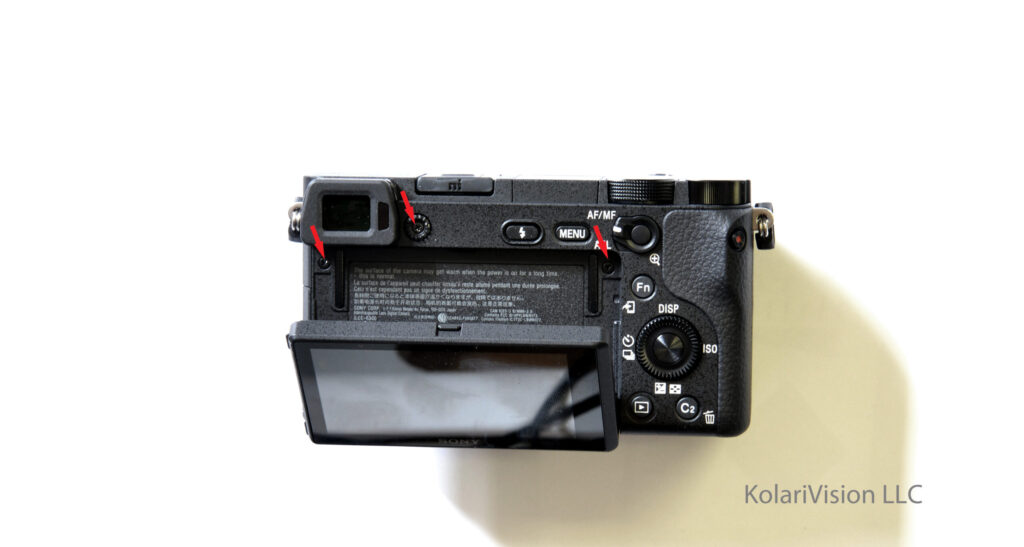
Step 3
Release the flash manually and you will remove the two screws as indicated. Then also slide out rubber piece as indicated by an arrow.
4
Step 4
Remove black cover with a fine-tipped knife carefully. (It peels off)
5
Step 5
Once you peel the sticker off, you will find a screw behind it as indicated by the arrow, and also remove the other 2 screws to help you release the back panel.
6
Step 6
Remove the 4 screws as indicated to release the LCD. DO NOT TOUCH the middle screw because it is attached to back panel, and it is easier to remove cable behind it. Now you can remove the back panel.
7
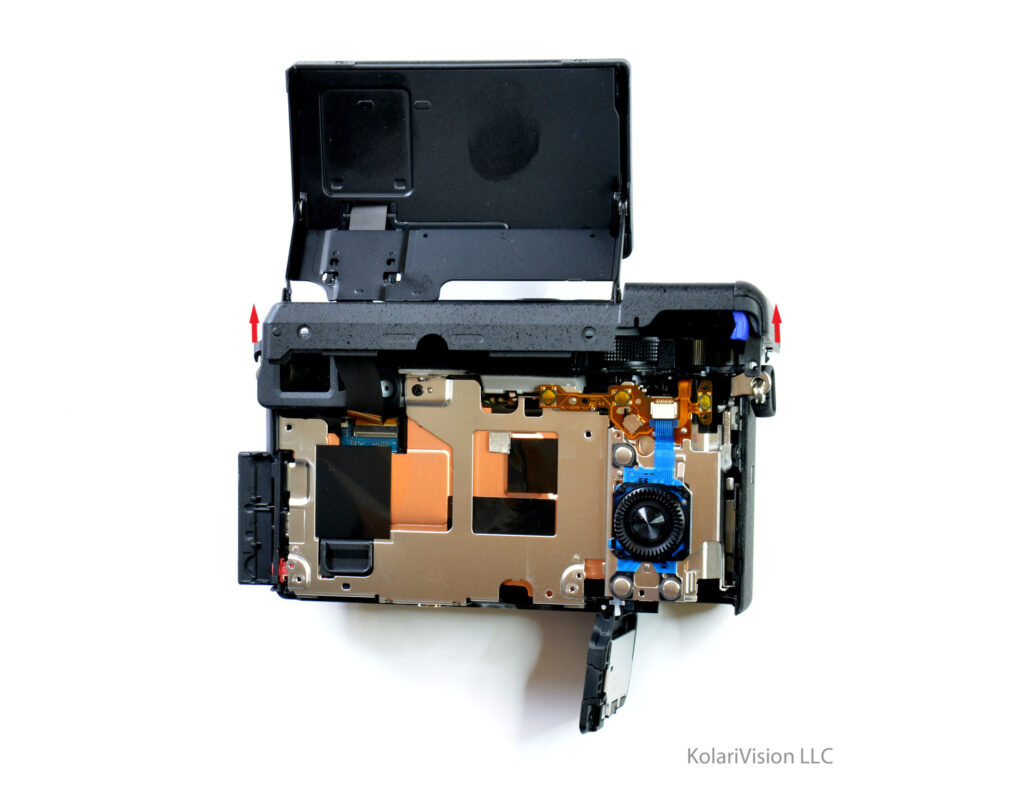
Step 7
Once the back panel is lifted off, you will see LCD cable still attached. Release the cable and then you can fully remove the back panel.
8
Step 8
Remove the screw on the front shield, and release the blue dial cable.
9
Step 9
Rotate the camera where the bottom is facing you and remove the two screws as indicated.
10
Step 10
Turn the camera to SD card side and remove shield screws as indicated.
11
Step 11
Turn the camera to AV OUT side and remove 1 screw and remove the shield.
12
Step 12
Remove the 4 screws as indicated to release the bronze frame.
13
Step 13
2 screws are to release the circuit board and 1 screw in the top left-hand corner is to remove the EVF. Release all indicated cables to release board.
14
Step 14
Remove 3 screws and lift up the silver bracket. Last bracket between you and the sensor.
15
Step 15
Remove the 3 sensors screws and 1 screw holding down the bronze bracket as indicated. One sensor screw is under the sensor cable.
16
Step 16
YOU ARE ALMOST THERE! Now you have the sensor out, remove the black bracket which is held down by a clip on either side.
17
Step 17
Great! Now you can use your tweezers and lift up the filter and convert it to whichever filter you like.
18
Step 18
I’d suggest you lift this filter off once your new filter is cleaned and ready to go so you avoid any dust getting on the sensor.
19
Step 19
Be sure to clean the filter and double check sensor for any dust before putting in your filter. Also, secure it down with the black bracket you had removed earlier.
20
Step 20
Congratulations! You have now completed your filter conversion for your Sony A6300!