You’ve heard that white balance is important for getting good results in infrared photography. Most cameras you can just set this in camera, and it gives you nice photos that are ready to use. Sometimes though, the camera’s white balance range is too narrow for IR, and trying to set a white balance just gives you an error and leaves you a pink image. This is a particular problem for Nikon cameras, where many models will not set a white balance at all with any filter. In milder cases, the camera may set a white balance for the 850nm and 720nm infrared filters, but not set one for the 590nm or 665nm IR filters. The Nikon J1 and many Nikon DSLRs fall in this category. The third category is the cameras that will set the closest white balance it can, but that white balance isn’t good enough for post processing. This is an issue with a lot of the Fuji cameras when working with the 590 and 665nm filters, like below. This can be particularly frustrating, because it will seem like the white balance set, and you may not realize there is an issue until you try post processing your photos.
So what do you do? Luckily, raw files can come to the rescue! Raw files save the data from the sensor prior to compressing the shot to a jpeg. This lets you tweak exposure and contrast, and importantly for us, set a new white balance point. Unfortunately, depending on your raw converter, the white balance range that you can set in software may be even more limited than your camera’s range. The Photoshop Raw converter is often too limited.
I want to digress here for a second. Some people claim that raw is absolutely necessary for IR post processing. That is not the case, all you need is to be able to set a good white balance, and usually you do not need raw for that. In fact in some cameras and some raw converters it works better to set the white balance in camera. If you are processing for false color infrared, you will need to convert to JPEG regardless to perform a channel swap and actually see what you are working with.
Anyway, back to the problem at hand. You have a raw file where you could not set the white balance in camera, and you can’t set a good white balance in your raw converter. The workaround for this is to set a custom color profile for your camera in your raw software. What this does is center the white balance of your raw file so that the white balance sliders in photoshop now cover the range that you want, allowing you to set a white balance. This may sound a little daunting, but you only need to do this once. After that you will have a saved profile that you can use every time when opening a raw. I’ll show you how to do this with Adobe tools and the profile we will make will work in both Lightroom and Photoshop.
Step one: Convert your RAW to a DNG
Convert the camera raw file into .DNG. I used Adobe DNG converter for this, it is simple free software. You can read about it more and download it here for PC and here for Mac. You can also use Lightroom to export a DNG file.
DNG is an open source raw file. As a bonus, if you have a new camera but an older version of Adobe Camera Raw that won’t open your file, you can just convert your proprietary raw file into a .DNG and skip the upgrade.
Step two: Launch the Adobe DNG Profile Editor
Open your new .DNG file in Adobe DNG Profile Editor (also free software, here for PC and here for Mac).
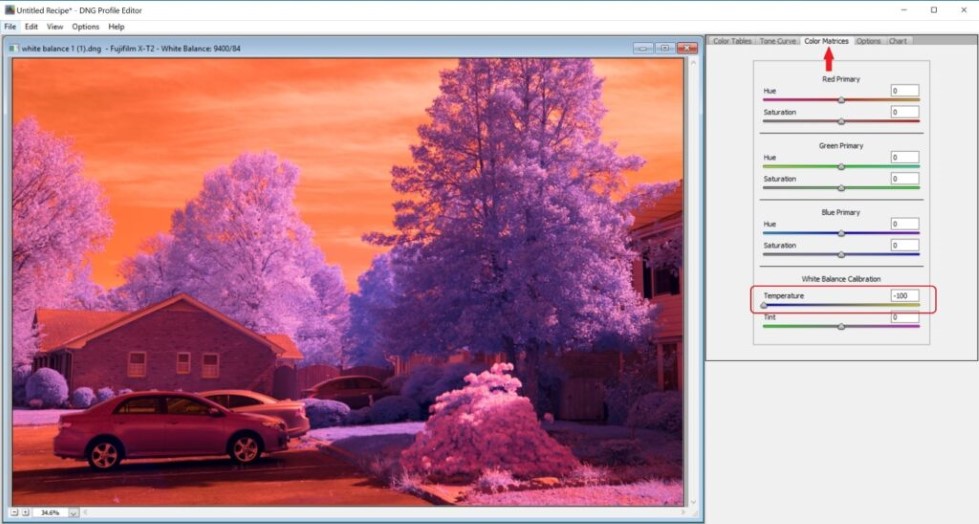
Navigate to the “Color Matrices” tab. Find White Balance Calibration and move the Temperature slider to -100.
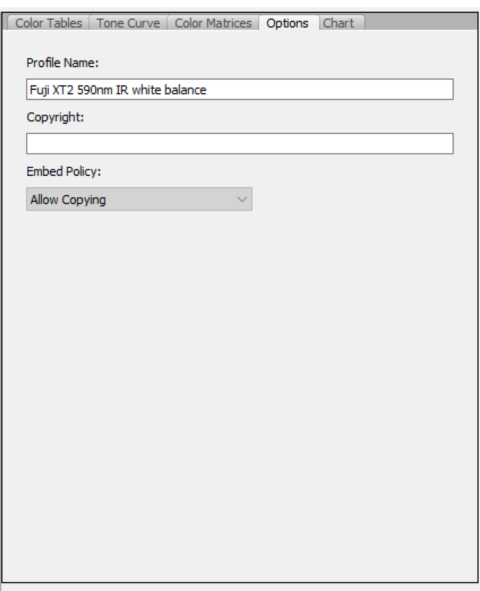
Go to Options and add a name for the profile that you will recognize. In this case I was working with the Fuji XT2 converted to 590nm infrared.
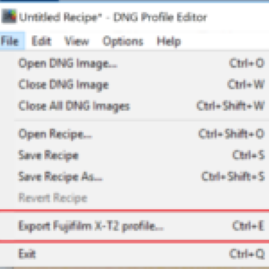
Go to File, and click Export Profile. Do not change the save directory, the program should pick the correct default directory for the profile. Close the program and don’t save the recipe. You’ll only have to do this once per camera, after this your custom profile will be available in Camera Raw and Lightroom.
If you’re having trouble importing your profiles, you can also use Adobe Lightroom to manually import custom profiles. In your basic adjustments panel, click the grid to show the profile browser. Once you’re in the profile browser, click the + sign on the top left corner to reveal the “Import Profiles” option. Once you import them manually into Lightroom, they’ll be available on Camera Raw and Photoshop as well.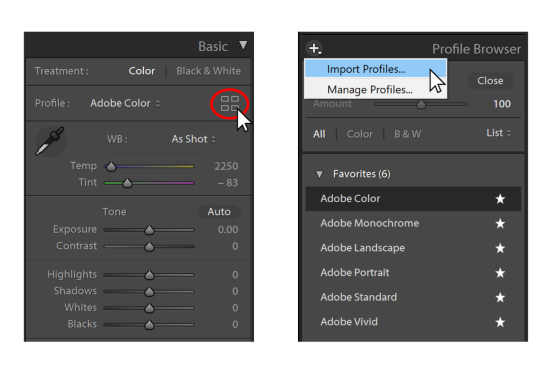
Note: Some users have mentioned that the DNG Profile Editor is no longer usable, but that’s not entirely accurate. While Adobe has discontinued support for the software, it’s still available for download and can be opened successfully.
For Mac users, there’s a common issue where the system displays an error message stating, “Application cannot be opened.” However, this is a simple fix: just right-click on the app, select “Open,” and a dialog box will appear, allowing you to bypass the warning and launch the program.
Step Three: Set the white balance in Camera RAW
Open the .DNG file in Photoshop. This will open Camera Raw. You can also open the file in Lightroom and follow the same steps.
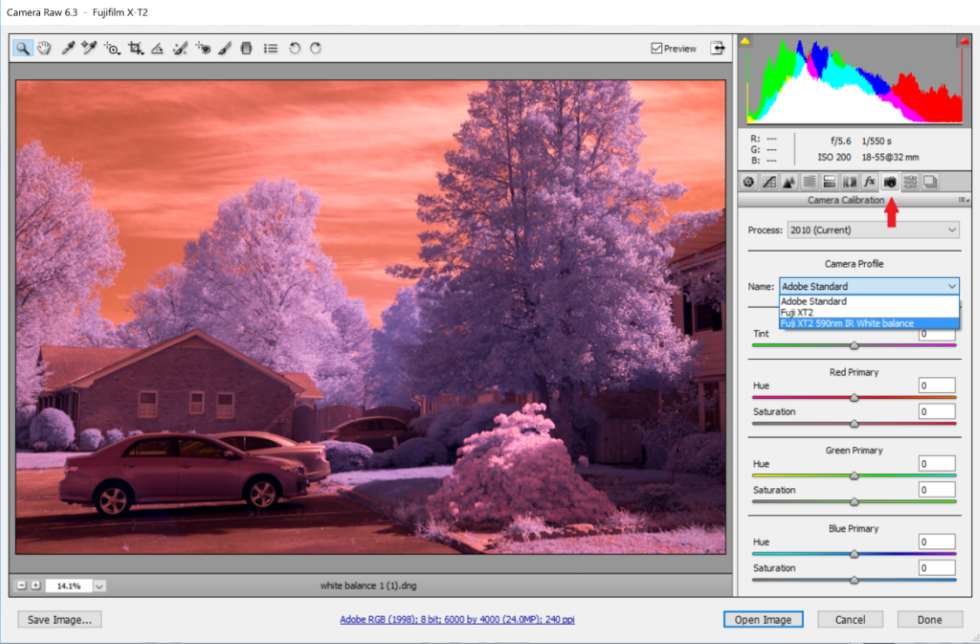
Navigate to the Camera Calibration tab on the right and change the camera profile to the one you just made.
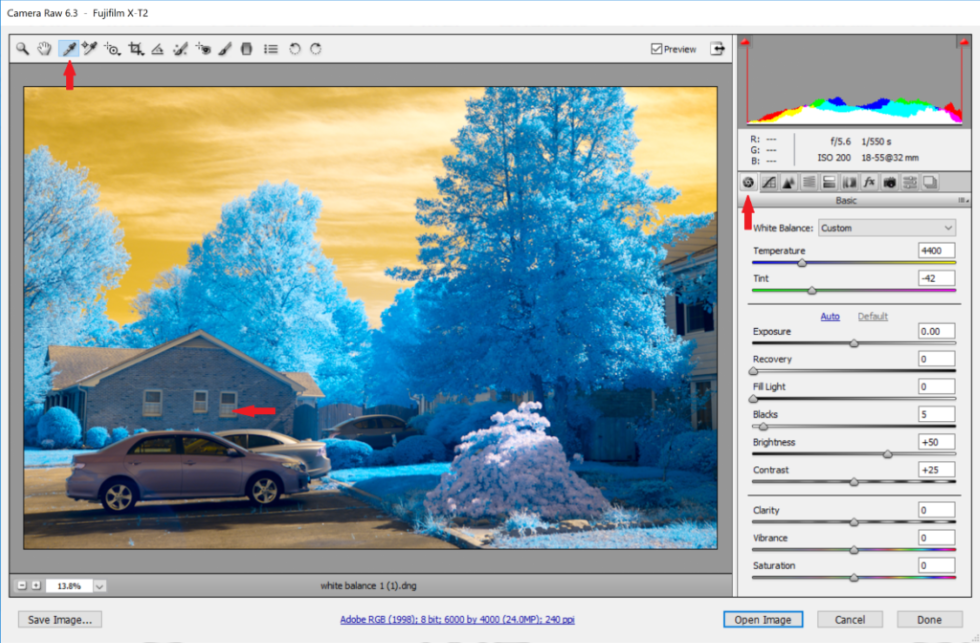
After this, you can set a custom white balance like you would expect. Go to the Basic tab on the right, and here you will be able to adjust the white balance. You should now be in range to set an appropriate white balance.
You can play around with the temperature slider, or use the eye drop tool from the top menu to measure a custom white balance. I used the eye dropper and selected the white window to get a better looking white balance. For the 590, we expect the leaves to be blue for good post processing results. After this, I opened the image in Photoshop. From there, you can follow our tutorial on the channel swap to get blue skies and yellow leaves.
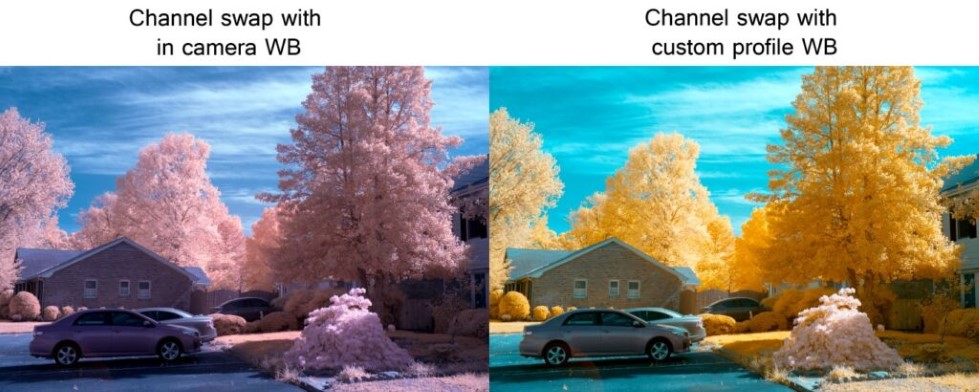
Left, the results of a channel swap starting with the picture out of the camera. Not terrible, but no yellow leaves that you expect from the 590 filter. On the right, the results after a channel swap with our custom profile.



Does it works on camera raw 10.3?
It does but the camera profile selection location has been switched to the first tab (Basic) in newer Camera Raw versions. Don’t know when the switch took place.
Thanks for the instructions and sharing. Very interesting.
This guide needs to be updated as Camera Raw is now up to v11.1 (as of this writing) and DNG Profile Editor is now legacy software. I’ve found a workaround, I think, but I’m still new to this sort of photography.
Thanks, very helpful and to the point.
Thanks for the instructions. You should add the standard location for CR and LR where to store these profiles. The DNG profile editor by default opens the folder where you pull the images from, NOT the location where the profiles should go…
Hello,
I have a 590nm converted Fuji X-E1, thinking that your X-T2 would be the same or very similar Engine, would it be possible for you to email the WB setting you created to me?
I could not find the profile that i have created in the PS camera calibration tab. Need some advice here.
Thanks!
Given all the issues you’re discussing revolving around color differences, are there any extra considerations that need to be undertaken with regard to color calibration of the monitor, or do we just do that as usual?
Can I use Capture One 20 in the same way with a DNG profile?
this does not seem to work with Camera raw 12.2
can you please advise how to setup the custom profile for this version of camera raw
thx
Do I need to make a custom profile for each filter that I use on my full spectrum camera? If not, do you recommend creating the profile with an image from a specific filter? ie. The profile set up is best with the 720nm over the 665nm. I use the 590, 665, 720 and the 850 in my IR photography.