★★★★★ Rated 5 out of 5
Nikon D90 Infrared Conversion DIY Tutorial and Camera Disassembly Guide
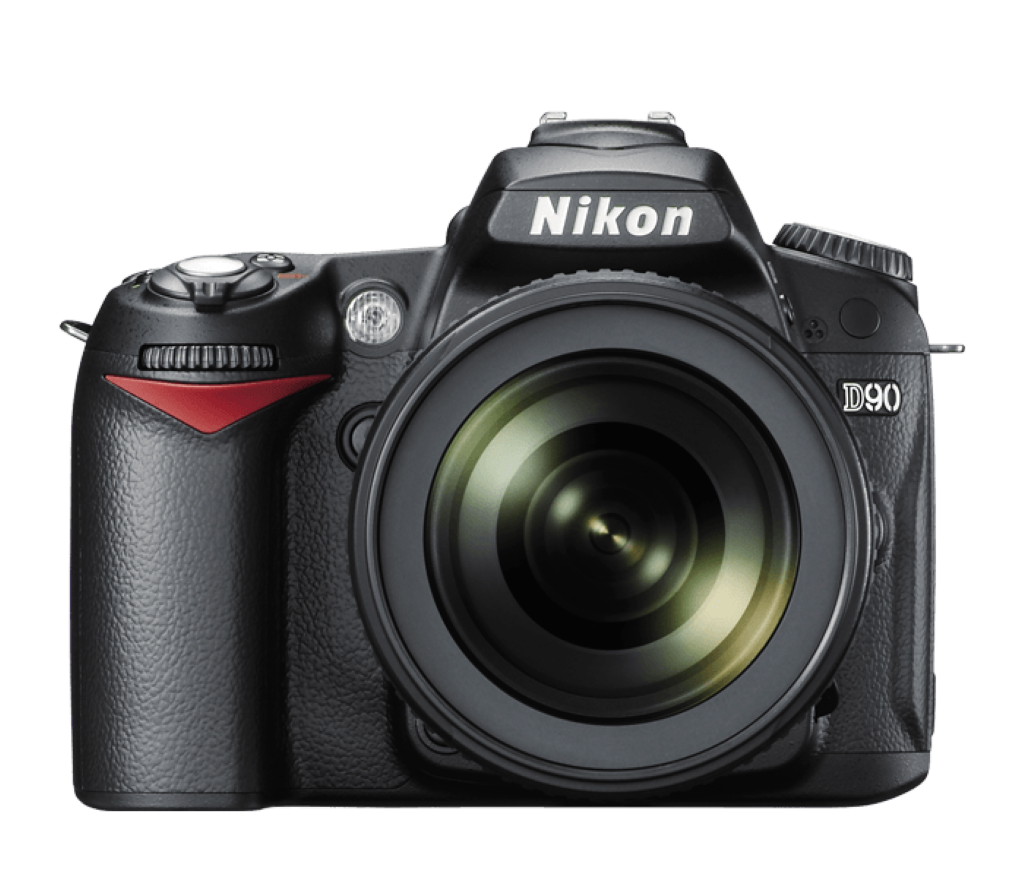
Difficulty
Moderate
Steps
12
Time Required
10 minutes
Small Phillips Screwdriver
Tweezers
Grounding strap with current limit resistor
Grounded work mat (optional but recommended)
Canned/compressed air
Sensor wet cleaning solution and tissue
Capacitor Discharge Tool
Introduction
Welcome to the Infrared Conversion DIY of the Nikon D90, before you start please be sure you are grounded to avoid any static damage to electronic components.
1
Step 1
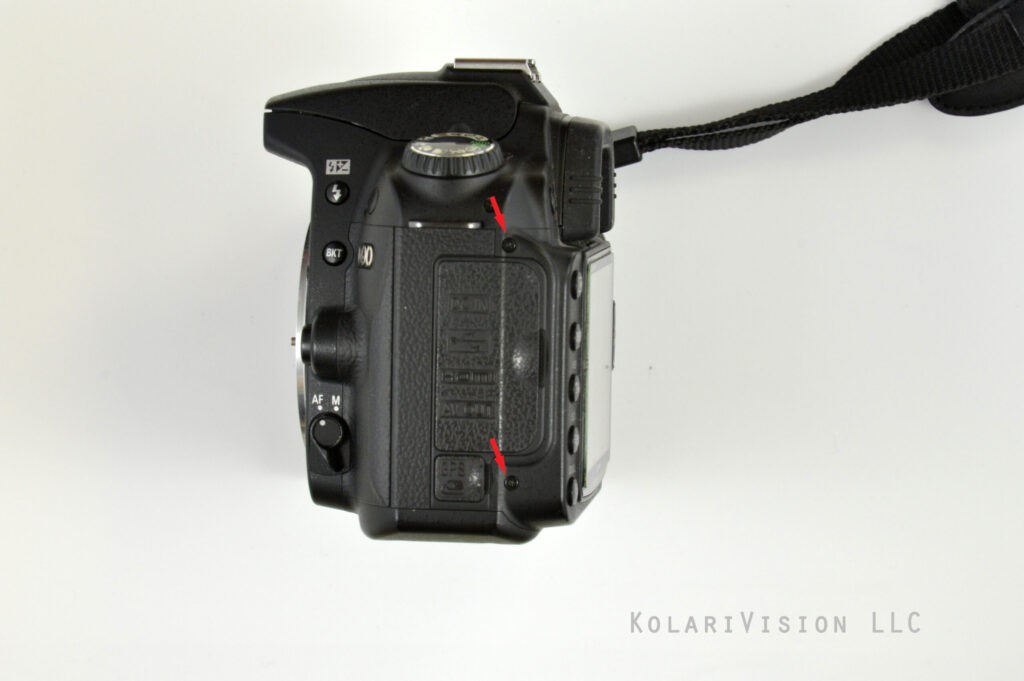
- Once you are ready, let’s start with removing the two screws indicated on the AV OUT panel.
2
Step 2
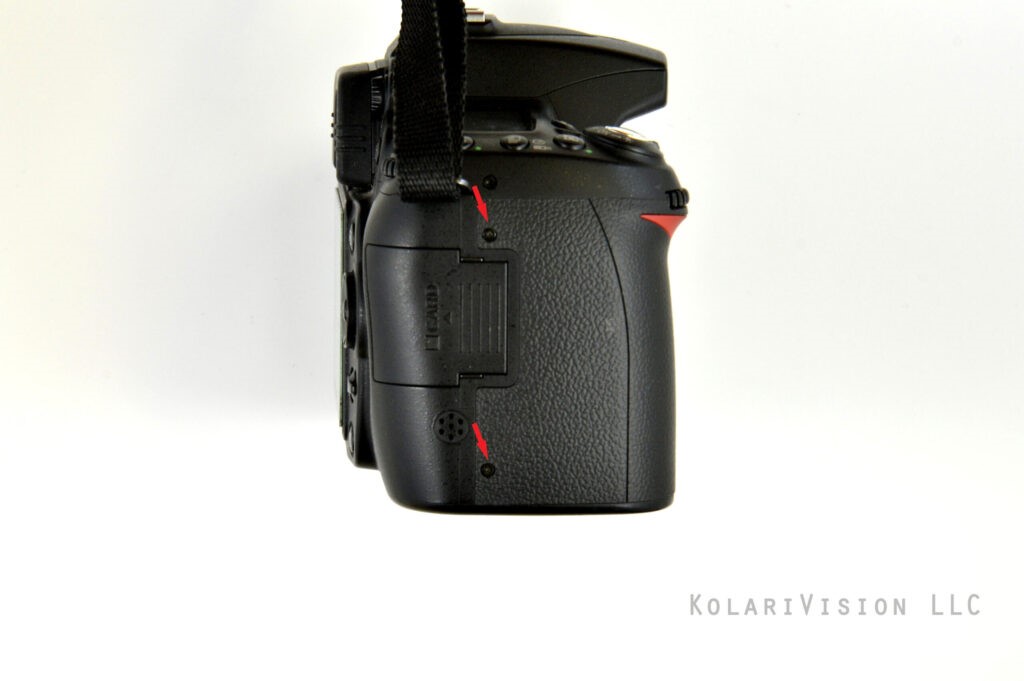
- Rotate to SD Card side and remove the two screws indicated.
3
Step 3
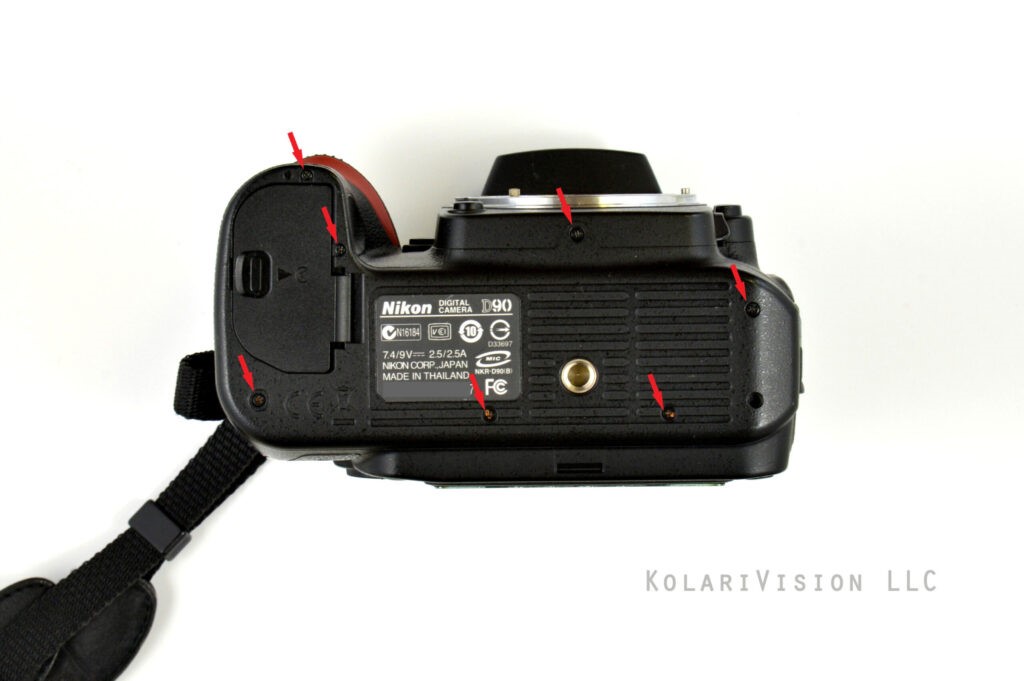
- Have the bottom of the camera facing you and remove the 7 screws indicated from the base panel.
4
Step 4
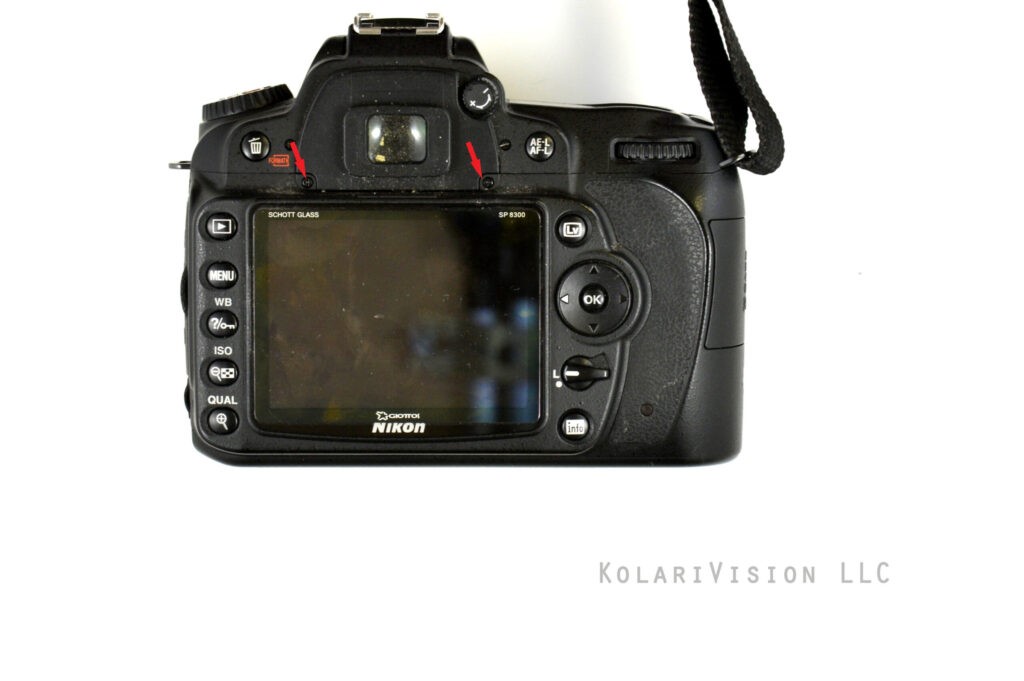
- Now, flip camera towards LCD panel and remove two screws as indicated. This will now loosen up the back panel for you to remove.
5
Step 5
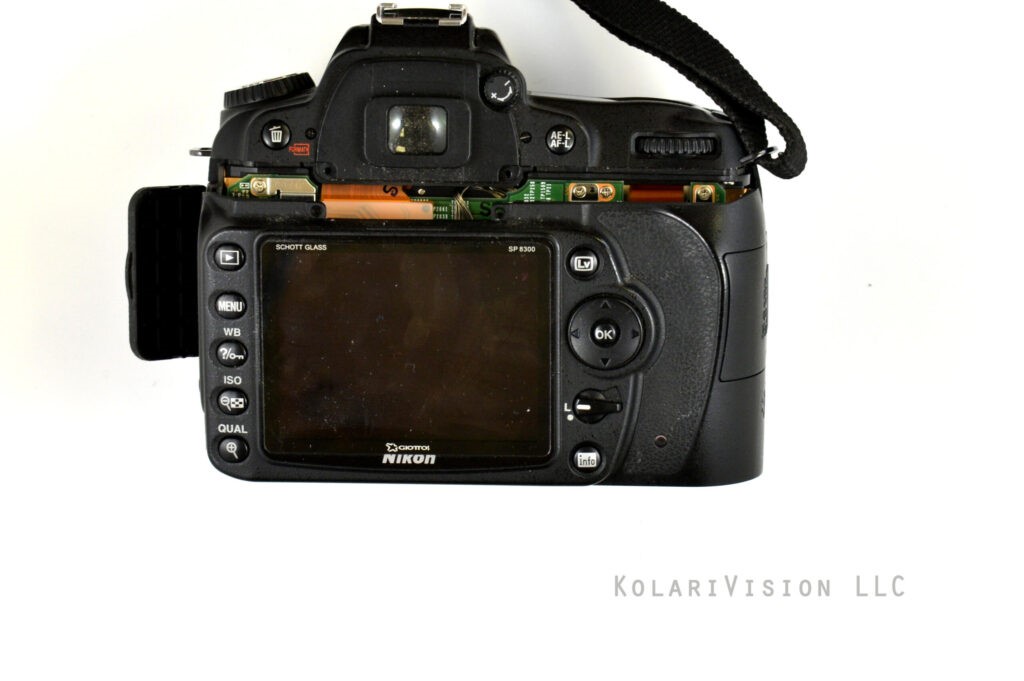
- Now just wiggle and pull off carefully. Be very gentle because there are two cables behind the LCD panel that are attached which you will remove before completely removing the LCD panel.
6
Step 6
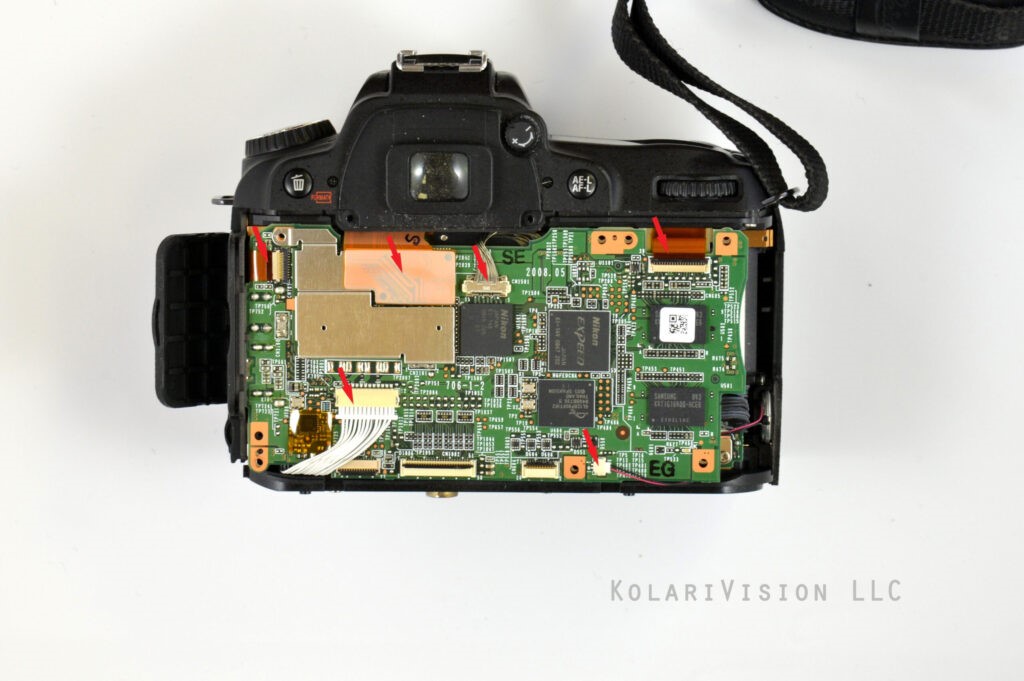
- Once you have successfully removed the back panel, you will notice shields that are covering the main PC Board. Remove the screws and cables as indicated. Now that the shield is removed, you can go ahead and release the cables from their connectors as indicated.
7
Step 7
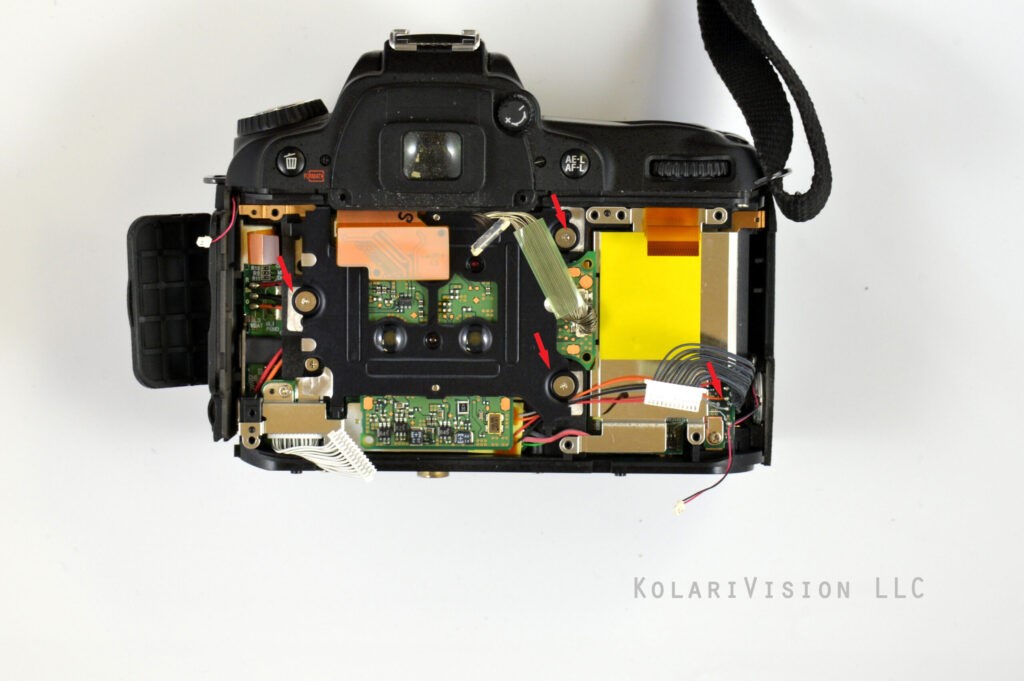
- Remove three screws which hold down the sensor, and also you have to unsolder the 4 multicolored wires which are linked to the dust filter.
8
Step 8
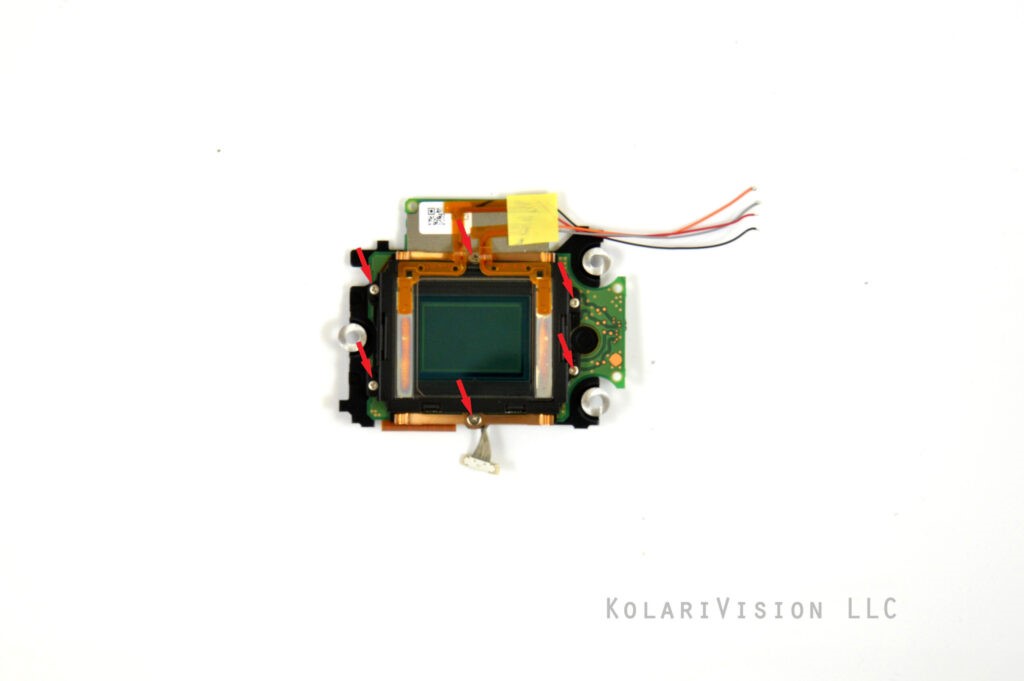
- Sensors comes out, and now remove 6 screws which release the dust filter and frame which is holding down the inner filter.
9
Step 9
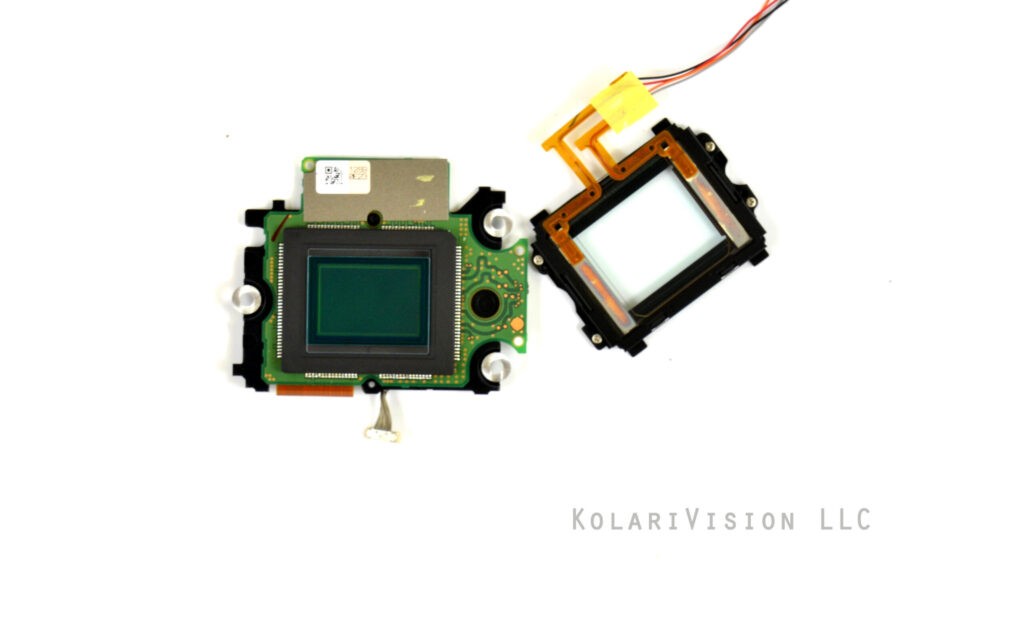
- Now that the frame is released, you can go ahead and remove the inner filter. Remove the 4 screws on the filter frame and remove the outer filter also. You will still need this filter holder later.
10
Step 10
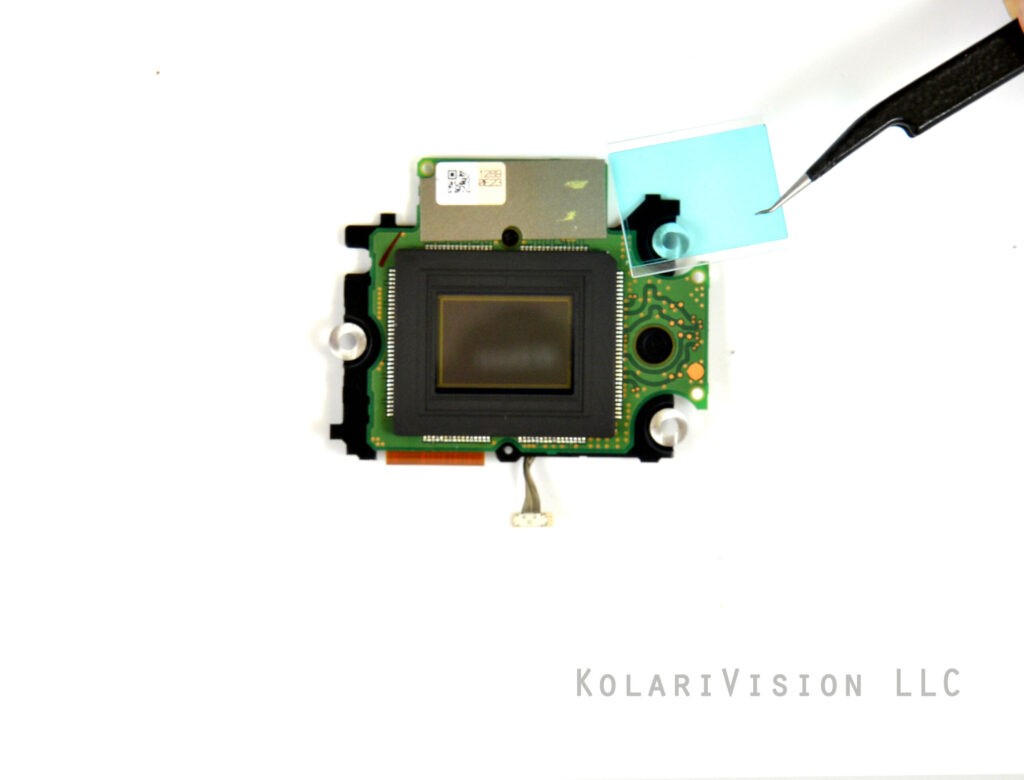
- Use tweezers to remove filter very carefully.
11
Step 11
- Before putting down the new filter, be sure to check for dust on the sensor and filter in order to avoid captured dust in your photos. Our filter sits on the rubber, and is held in place by the original metal clip for a secure, reversible installation. Work backwards now to reassemble camera.

12
Step 12
- Congratulations! You have now successfully completed the D90 filter conversion.

