Tutorial courtesy of Dean Frate
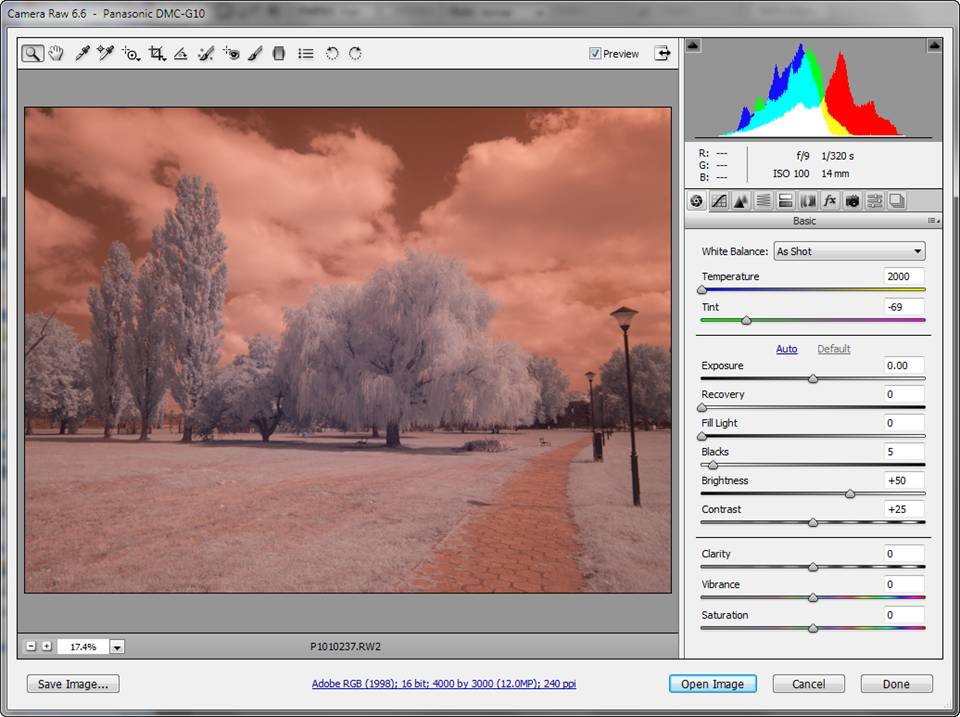
To start working on an infrared image, open the camera raw image in a format that can handle manipulation without introducing artifacts. Here, I’ll use Adobe RGB 16b color space (wiki). For some applications, I prefer to useProPhoto RGB color space (wiki), but in this case it gives unwanted color shifts toward green.
The reason to start in a RGB is to accomplish the standard channel swaps, and even the tone adjustments that are most commonly applied to IR images. They only make sense in RGB.
Open camera raw file into RGB 16b (no other adjustments needed)
 |
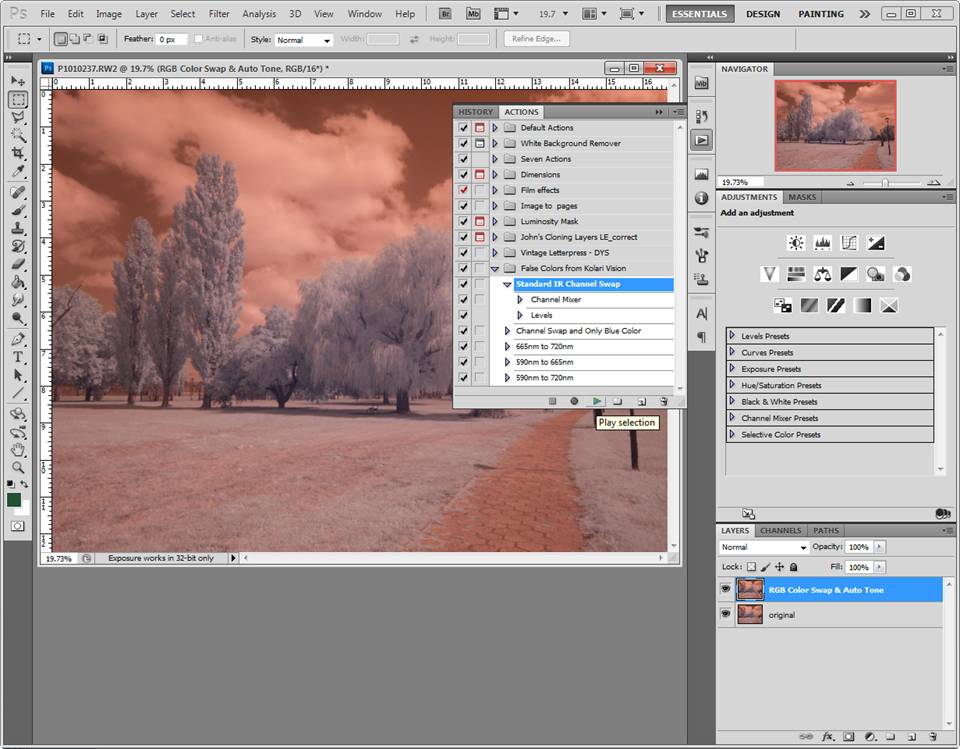
Swap Red and Blue Channels
Duplicate the background layer if returning to it as reference is of value, and rename newly generated layers for reference. Then, apply the Kolari VisionStandard IR Channel Swap action (download).
 |
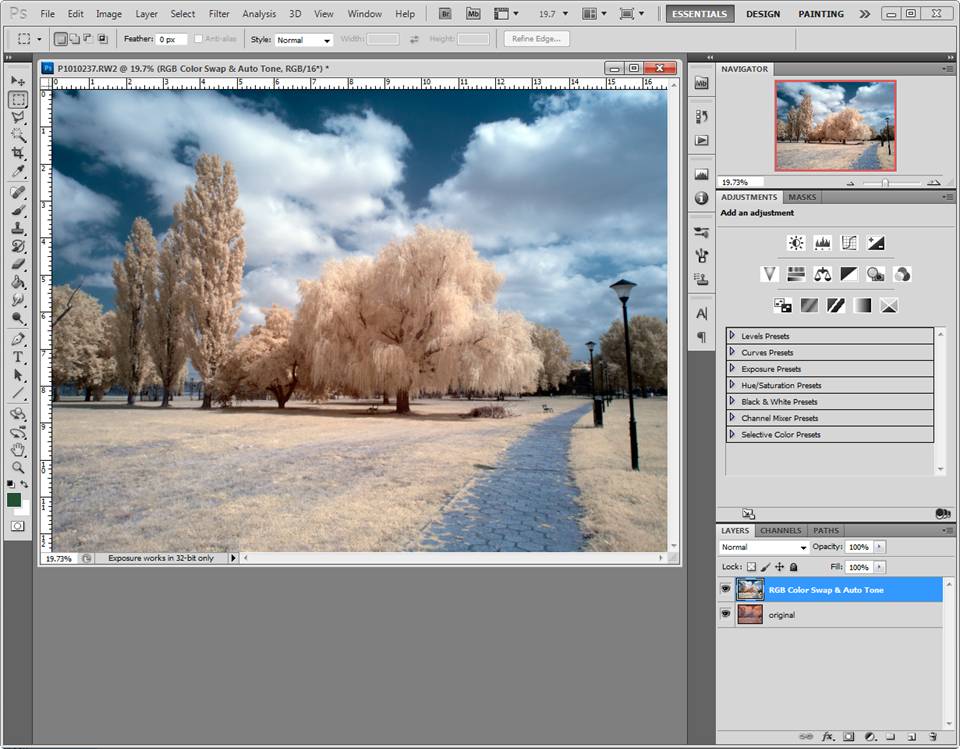
The Standard IR Channel Swap action gives these results. They’re pretty, but not yet optimized (to taste, of course).
 |
Switch to Lab color space to further enhance colors and sharpen
Lab Color Space (wiki) is useful for processing enhanced color IR photos for the following reasons:
1. It separates channels into color opposites (mimicking human perception) of Lightness [L*], Green <> Magenta [a*], and Blue <> Yellow [b*].
2. The enhanced color adjustments are almost entirely in the [b*] channel.
3. Sharpening can be accomplished in the [L*] channel without color artifacts or noise.
4. And, it is a good transition color space for transformations to other purpose driven choices like CMYK for print.
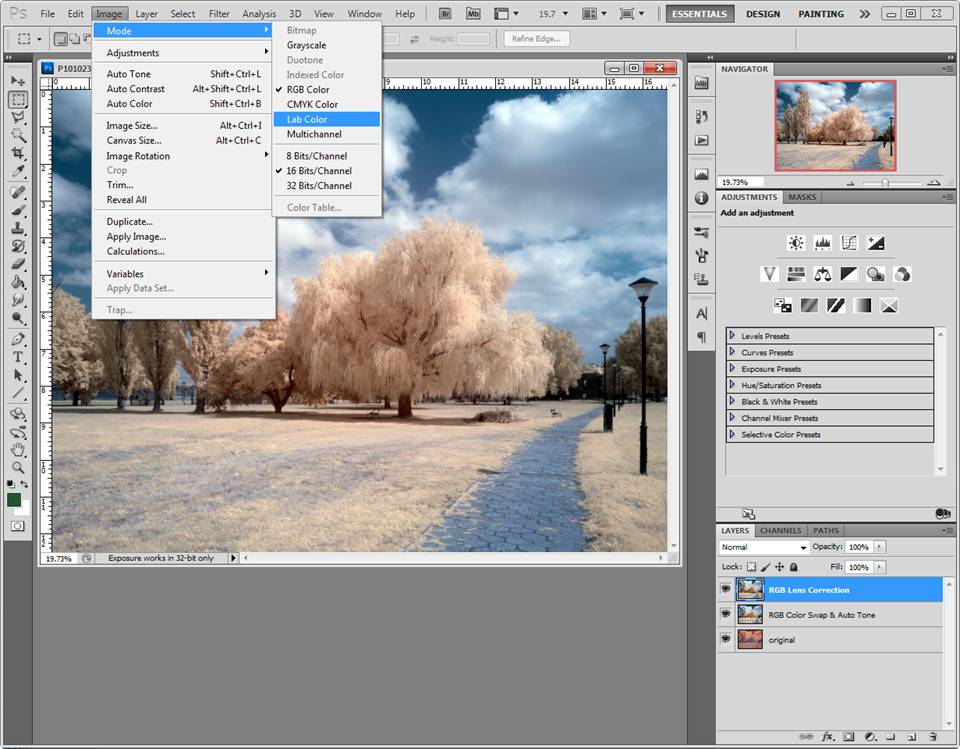 |
Photoshop gives a warning here. Keep layers if you want to retrace your steps, or go back to your work.
 |
Sharpening using the [L*] channel
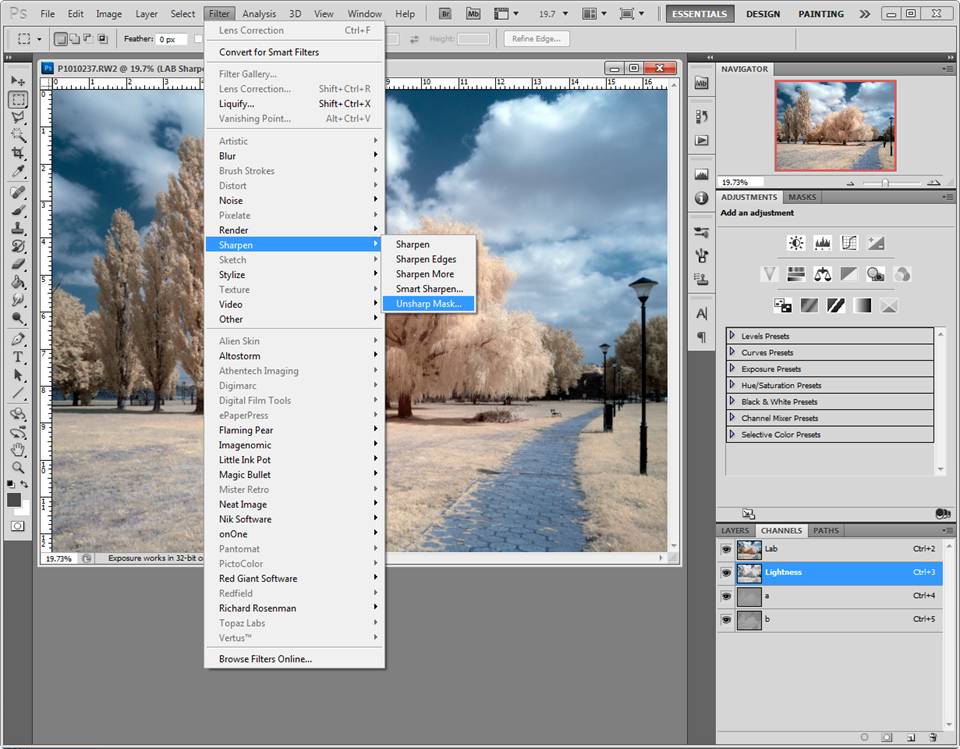
Apply Unsharp Mask to the [L*] channel.
 |
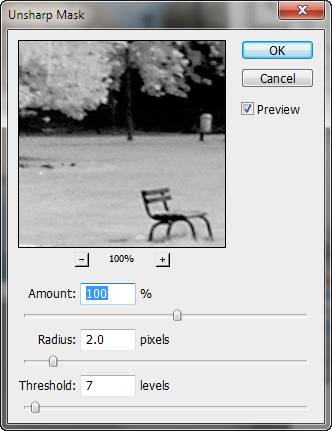
A small threshold will reduce the appearance of luminance noise.
 |
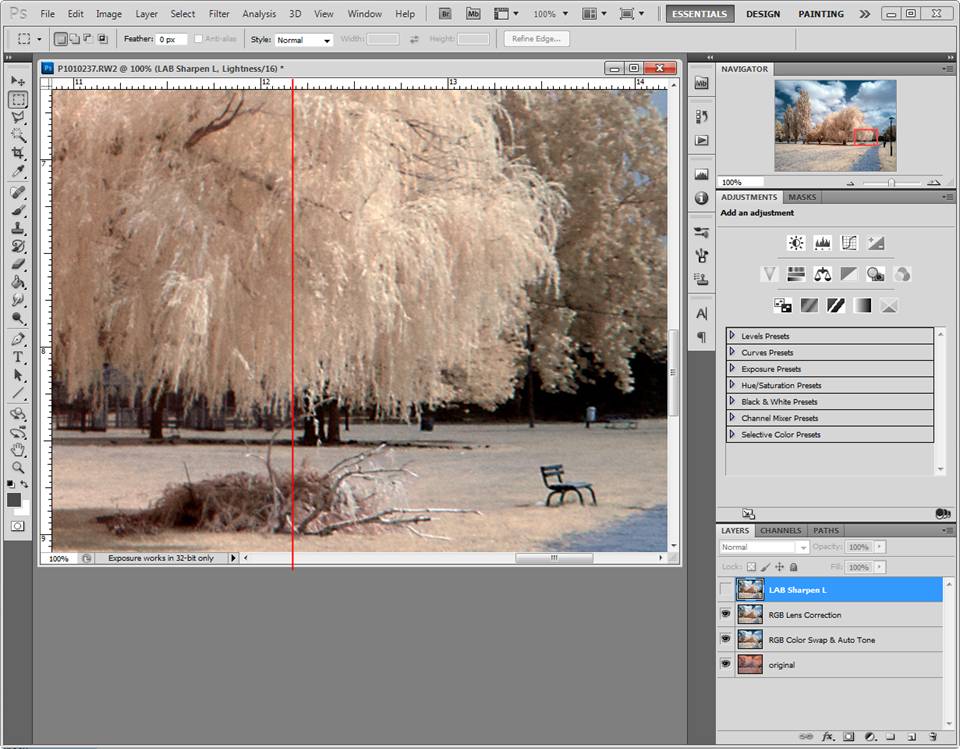
Here a before and after have been composited. The right side of the image has been sharpened.
 |
Adjusting colors with a modified “Man from Mars” method
There’s a technique of enhancing colors in the Lab color space that is based around pivot points in curves. The technique was published by Dan Margulis (wiki) as “The Man from Mars Method” (acrobat file). This step is not faithful to the original method, but does follow the ideas presented for a starting point.
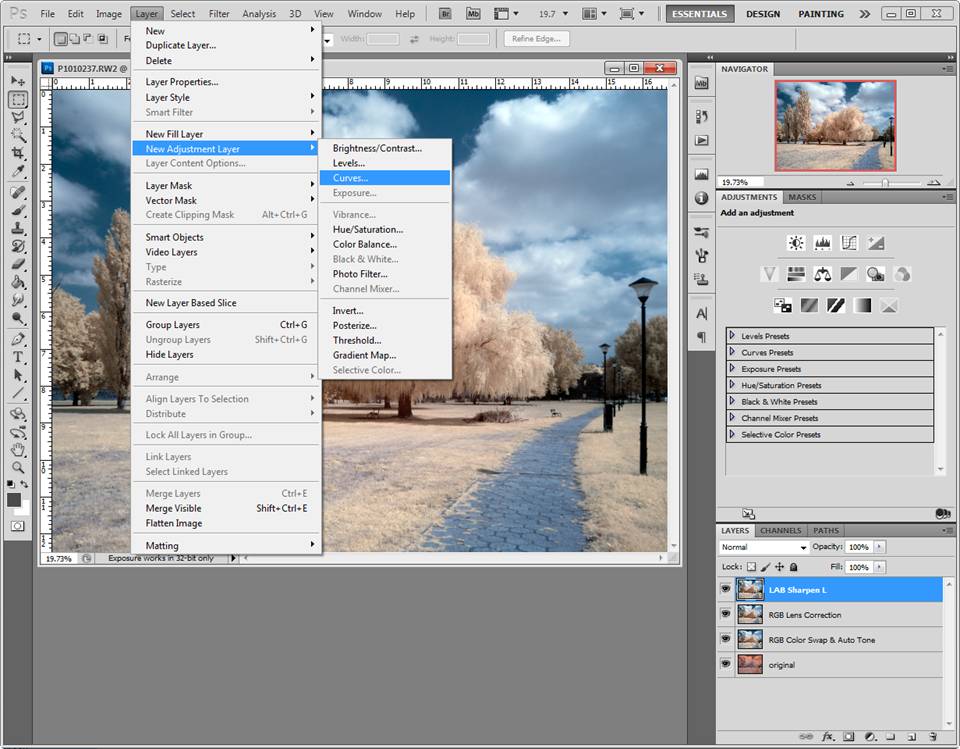
Add a new Adjustment Curves layer and get to work. Please refer to “The Man from Mars Method” link above for more details. The goal here is to selectively modify the Blue<>Yellow character using curves in channel [b*] and Green<>Magenta in channel [a*] by increasing relative contrast around a dominant central color in the image.
 |
The curves used look like below. [L*] was adjusted for different ranges of tones as labeled. [a*] was adjusted at various points to change the degree of magenta in the sky and walkway versus that in the grass and leaves. [b*] was adjusted to deepen the tones in both the blue and yellow dominant areas, giving more texture to the image. (color squares placed here as a guide)
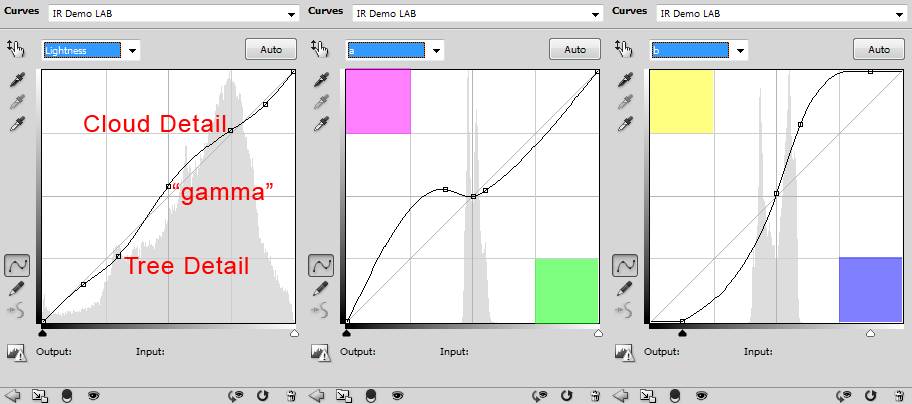 |
Applying these curves gave a decidedly garish picture.
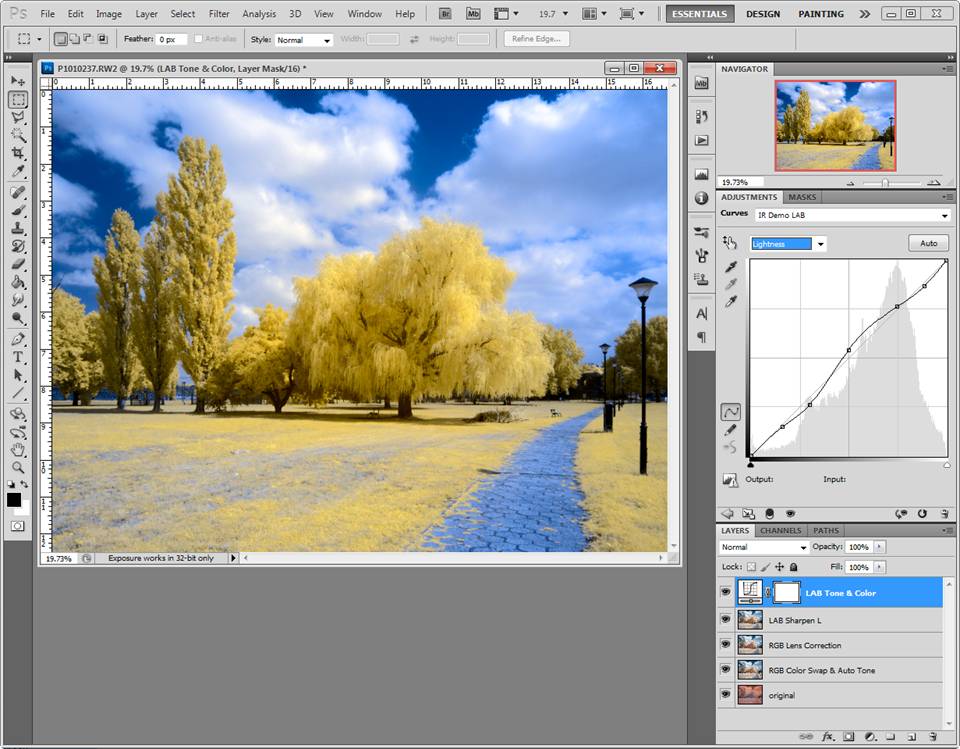 |
Reducing the opacity of the adjustment layer to 55% gave a more pleasing result.
 |
Removing some red “brassiness” with selective blending
Another advantage of Lab is that blending can be selectively applied to only the desired ranges of green <> magenta by specifying the [a*] channel, and only the desired range of tones by setting a range and gradient in the [L*] channel.
To get rid of some red coloration in the tree trunks and other dark areas of the image without affecting the rest, take advantage of selective layer blending. First open a new Hue/Saturation adjustment layer.
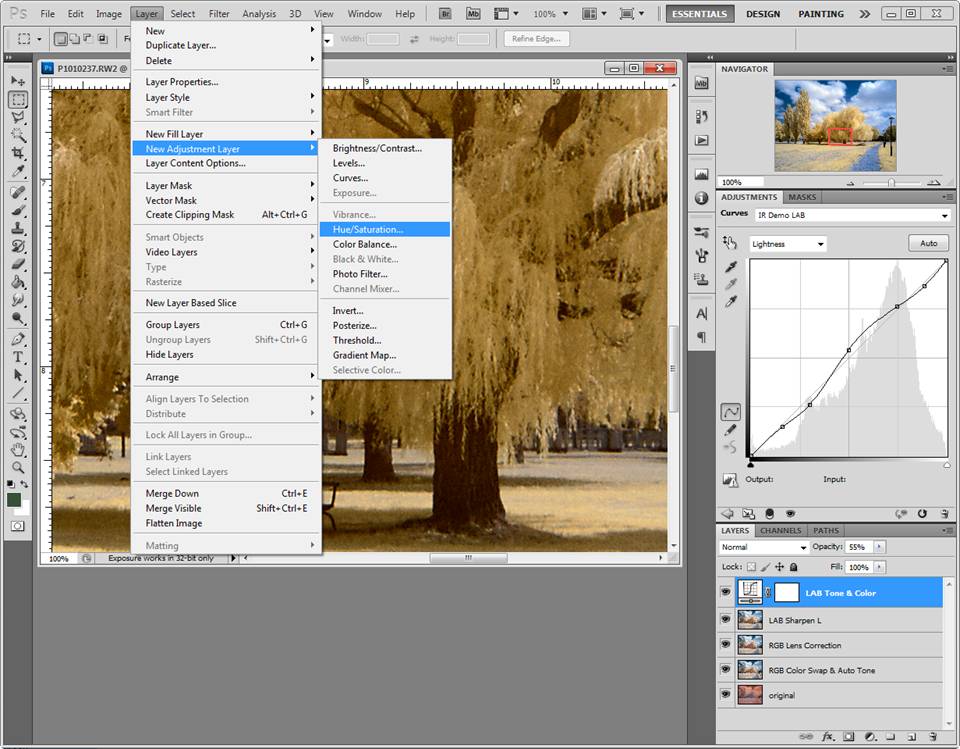 |
Then desaturate the reds. It leaves the golden yellow of the leaves much too dull (preference). It might be better to apply the desaturation only to the darker areas, without masking.
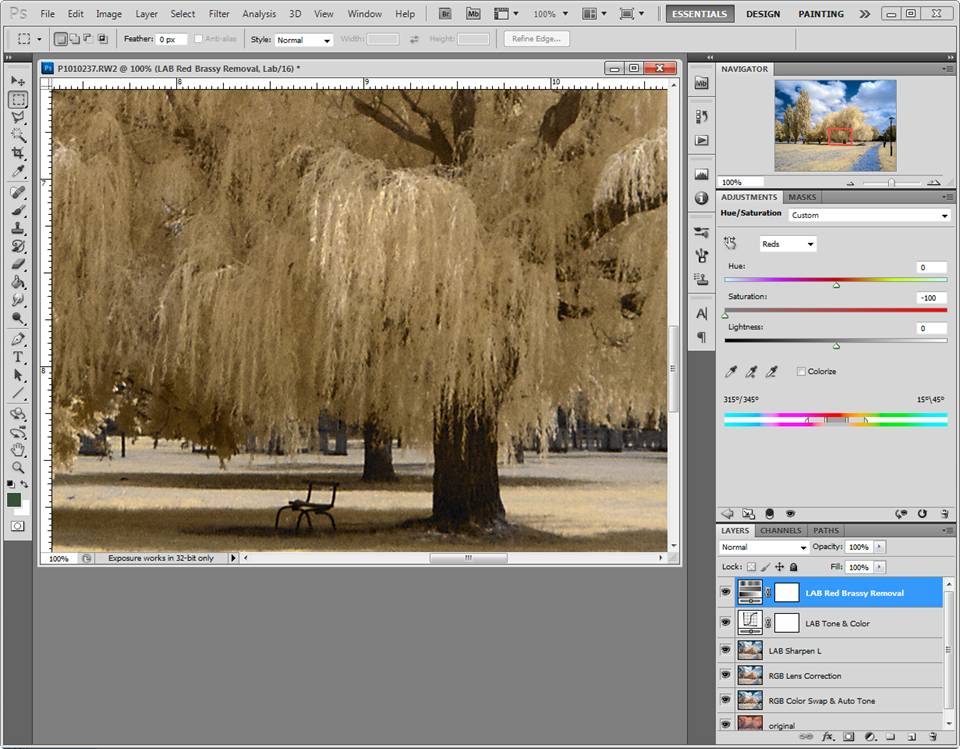 |
This is where selective blending comes to the rescue. Open the Layer Style, Blending Options dialog.
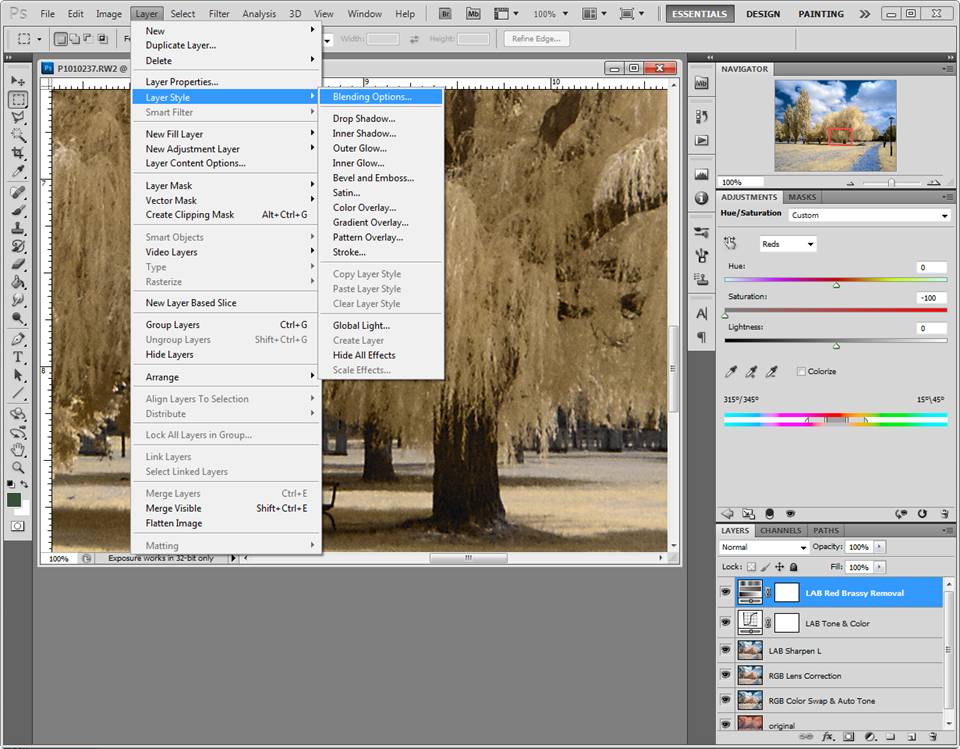 |
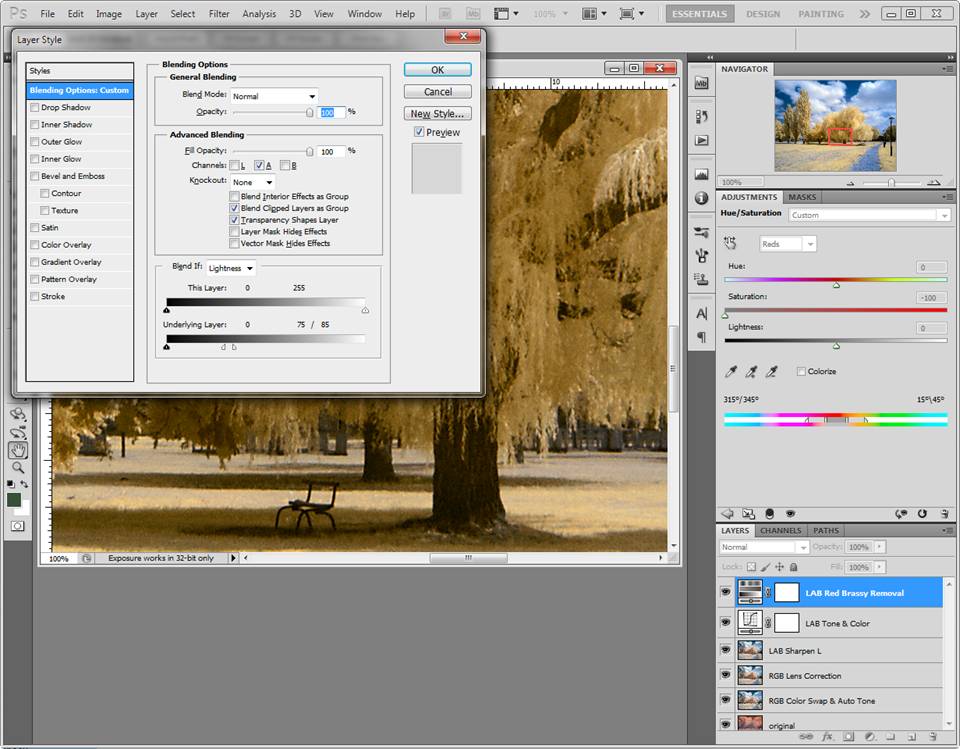
Specify the [a*] channel (Advanced Blending) and the range of lightness desired (Blend if) using alt-click (cmd-click on Mac) to split the range slider to produce an application gradient in the underlying layer. Leaving the Preview checkbox checked will allow feedback in real time.
 |
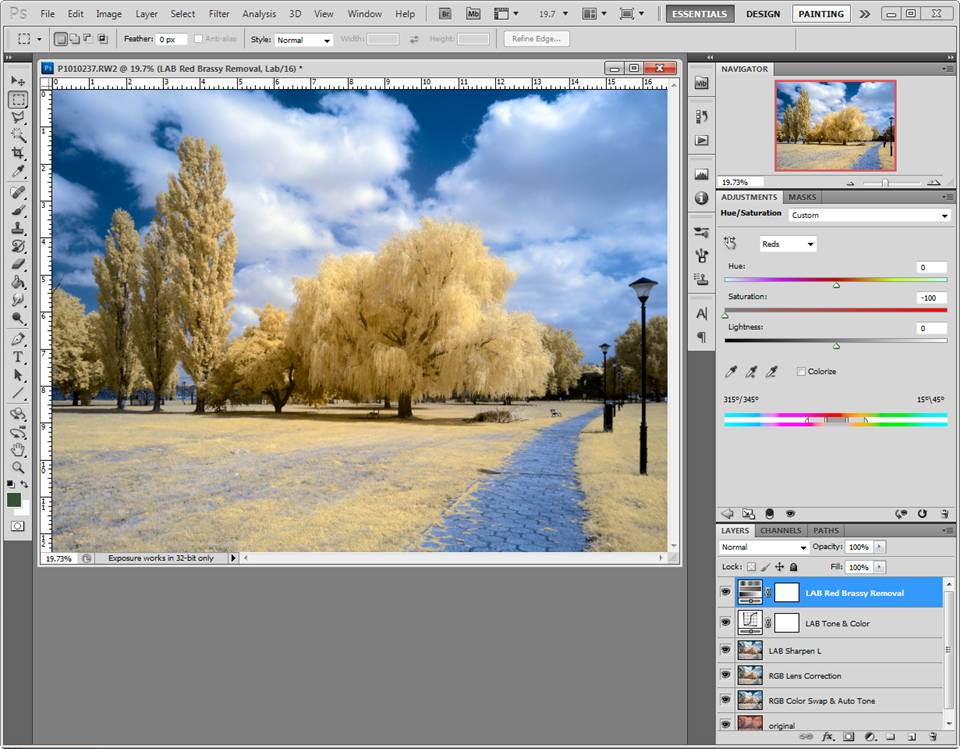
The resulting image gives the golden hues to the trees and grass, brilliant blues in the sky and walkway, and removes the red brassiness from the darker areas.
 |
Evolution
The image here has gone through a few helpful transformations.
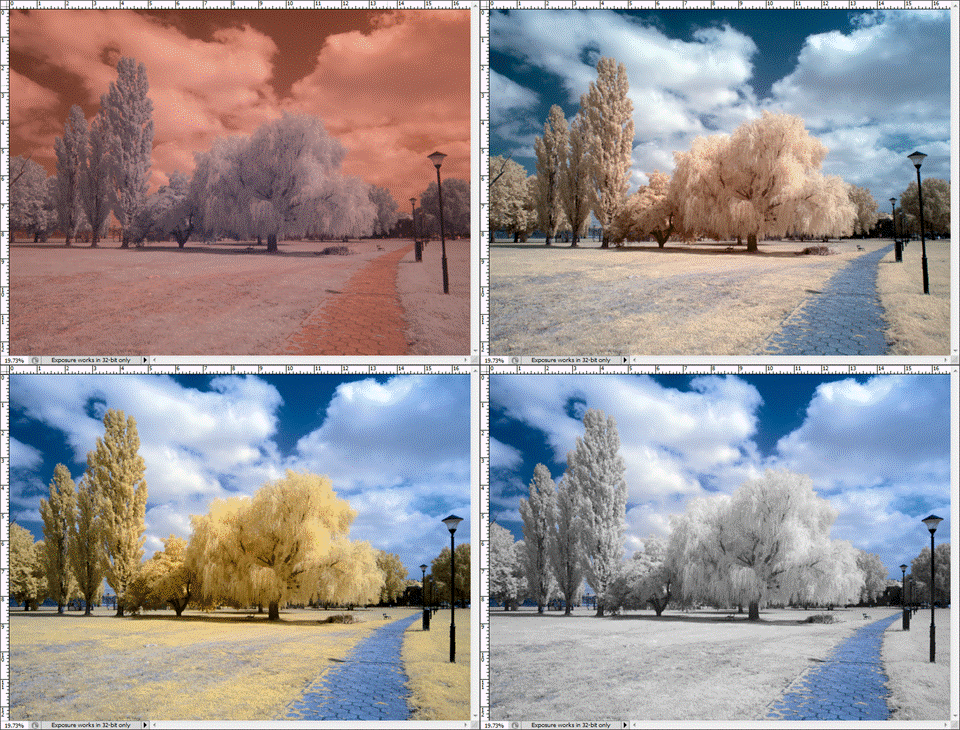 |
For the last transformation to achieve a white tree look, see the Basic False Color tutorial (link) and the Enhanced Color Processing Techniques (link).


It’s always such a joy to read posts created by
real professionals. I’m fed up with that no-name, ghostwritten articles.
That is the reason it was so wonderful to look at a persuasive piece.
I visit the author has floor knowledge it the topic as well
as some practical expertise. This kind of information is more valuable than copypasted blog
articles ideas.
From the author: Thank You! I hope the information was clear & useful.
I’m a hobby photographer who was so impressed with the personal service from Kolari Vision that I was happy to share some of my process for others entering IR to try as well. I was very pleased with the personal support, the rapid turn around, & the high quality workmanship.