Introduction
Photographers most often shoot infrared during sunny days to catch the maximum infrared light from the sun. However, the sun is not the only source of infrared light, and it is also possible to practice infrared photography at night within several parameters.
We will see in this tutorial how it is possible to shoot infrared pictures at night and the effects of this technique in term of composition and colors.
Part 1: Finding and dealing with infrared light sources at night
Shooting at night means shooting without sun. This powerful source of infrared light is replaced by urban lighting. This light source can emit a certain amount of infrared light along with visible light, and the exact amount is based on the lighting technology and the amount of infrared light each type of bulb emits.
Urban lighting is also characterized by its spaced distribution and its closeness to the ground. Most of the time, lights of the city are places at 4 or 5 meters upper the street, which is far lower than sun. This distribution will impact the way you will frame and compose your image, to avoid flare occurrence.
Flare is one of the most common issues encountered in digital infrared photography. During the day, it appears when the framing is too close to the location of the sun when using wide angle lenses. At night, avoiding flare will be more difficult, due to the far more number of light sources.
The following images, shot at 720nm, show the flare occurrence from the full moon at two different focal lengths:
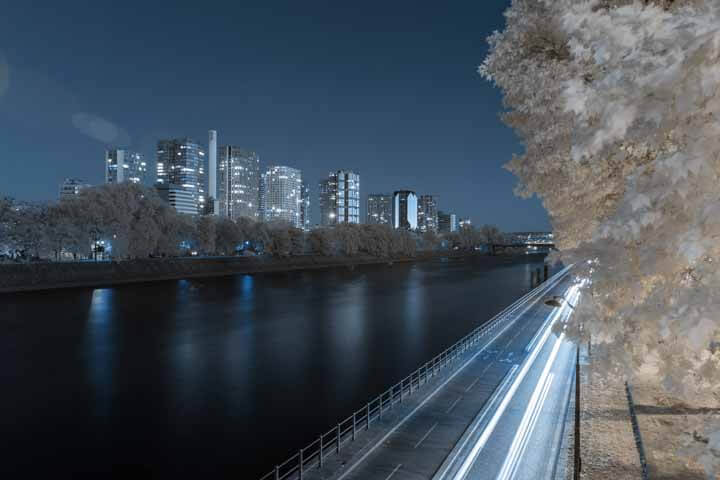
Focal length: 27mm on full frame camera
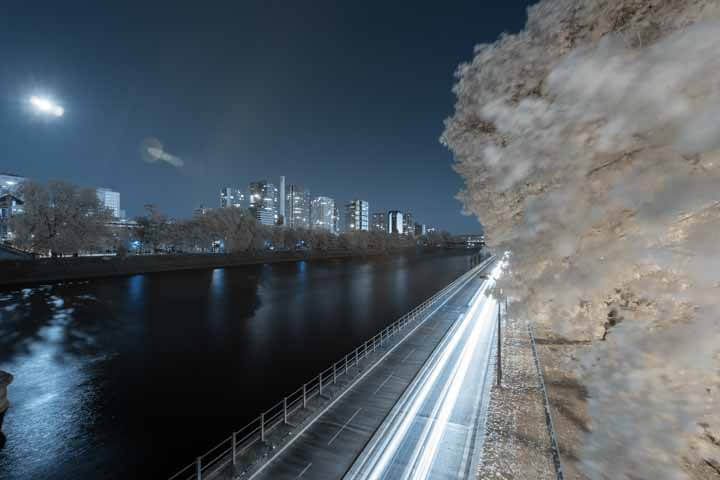
Focal length: 16mm on full frame camera
This example shows that zooming at night will help get the different light sources out of the frame, and so will reduce the amount of flare in the picture.
Another solution to reduce the amount of flare is the use of a sunshade or lens hood.
Part 2: infrared filter comparison at night
2.1 Exposure and flare sensibility
In this section, the same composition was shot with each of the following infrared filters:
- Kolari Vision 850nm infrared filter
- Kolari Vision 720nm infrared filter
- Kolari Vision 590nm infrared filter
- Kolari Vision 550nm infrared filter
Each picture was taken with the same exposure settings. ISO and exposure time were adjusted to achieve this exposure. Channel swap was applied in post-processing.
- Kolari Vision 850nm infrared filter: 24mm – F/8 – 800iso – 30s
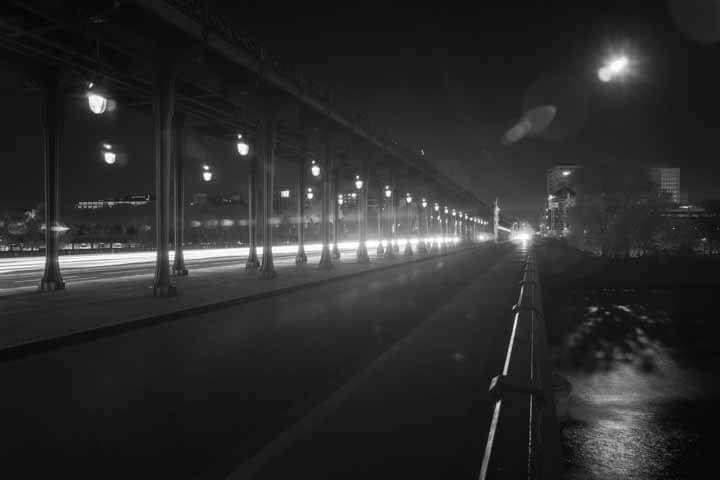
The 850nm infrared filter is not very useful at night. It is very sensitive to flare and needs a lot of infrared light to expose correctly. Moreover, there is no speical infrared effect visible here.
- Kolari Vision 720nm infrared filter: 24mm – F/8 – 200iso – 30s
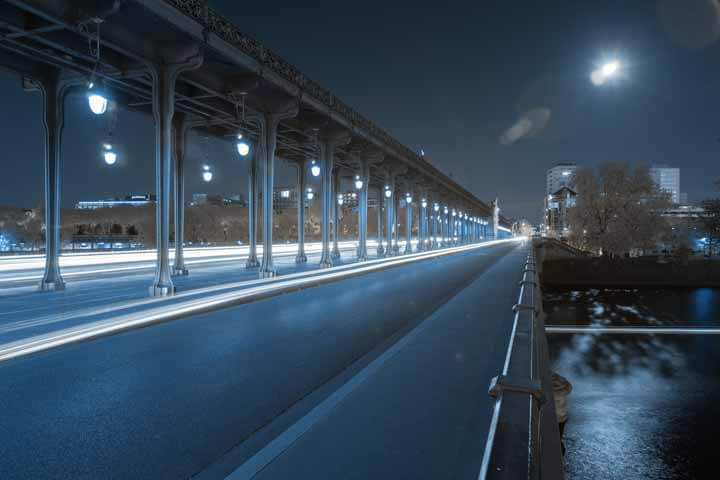
720nm infrared filter is more interesting. Flare is still highly visible, but the exposure is much better, with great details under the bridge. The infrared effect is visible here, with white foliage and a moody blue color.
- Kolari Vision 590nm infrared filter: 24mm – F/8 – 100iso – 25s
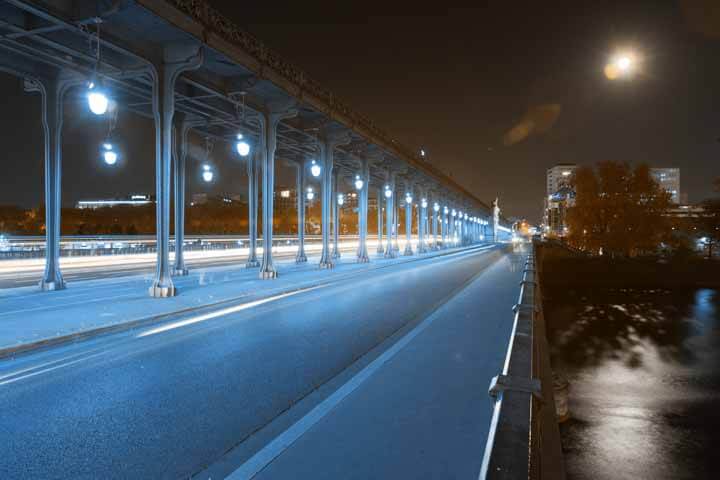
590nm infrared filter follows the previous observations. The sky is a bit darker due to the impact of visible light to the exposure measurement. Exposure time is also shorter.
- Kolari Vision 550nm infrared filter: 24mm – F/8 – 100iso – 15s
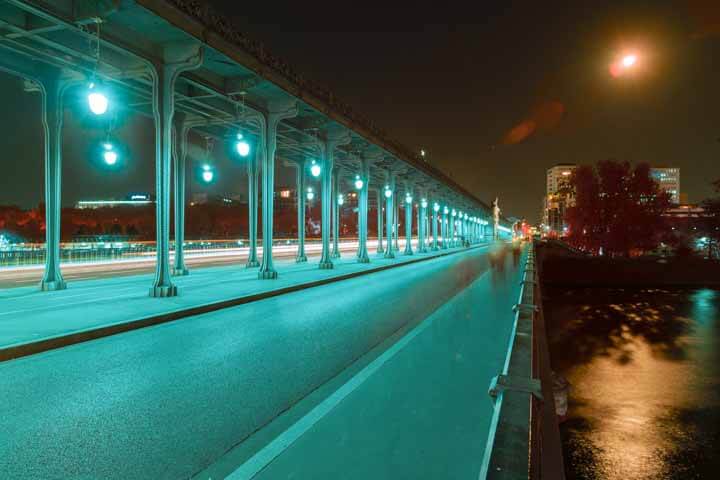
550nm infrared filter offers a close result compared with 590nm. The exposure time is even shorter.
Conclusion: Not all infrared filters produce good results when shooting night scenes. The 850nm filter is too selective to create an interesting effect in most cases and requests too much infrared light compared with the emission of urban lights. Other infrared filters, from 550nm to 720nm, are usable and offer their own color mood.
2.2 Color impact
As shown in the previous part, each infrared filter has its own color cast, not only on the foliage but also on the light sources.
- Kolari Vision 720nm infrared filter: 24mm – F/6.3 – 200iso – 30s
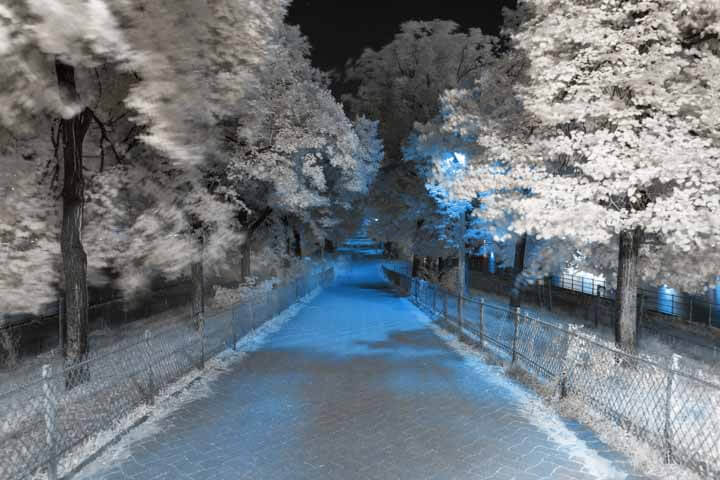
The color of the foliage is still white but less bright. The urban light is blue or white.
- Kolari Vision 590nm infrared filter: 24mm – F/8 – 100iso – 30s
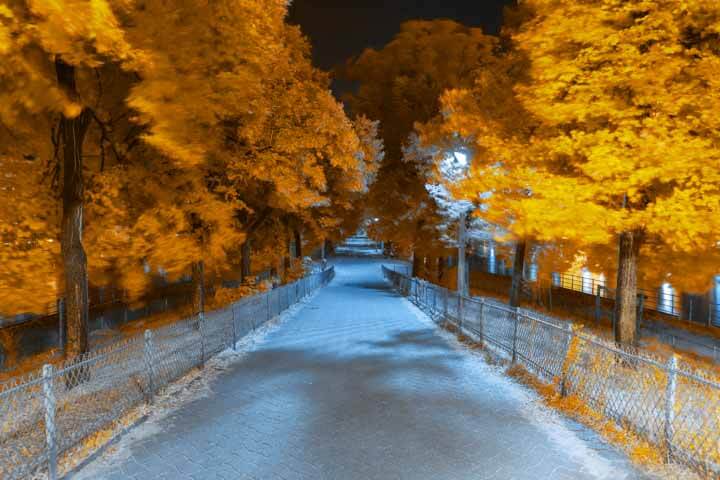
The color of the foliage is yellow, the same way as in dadaylight. The urban light is blue or yellow and clearer than at 720nm.
- Kolari Vision 550nm infrared filter: 24mm – F/8 – 100iso – 20s
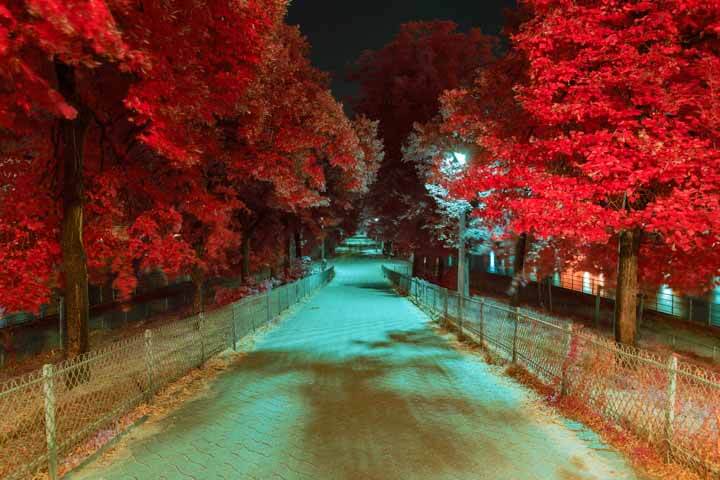
The color of the foliage is red, the same way as in daylight. The urban light is cyan, green or red and even clearer than at 590nm.
Conclusion: at night, the color of the foliage stays the same as it is during the day for each infrared filter. The main impact is visible on the color of the urban light: the less selective the filter is, the colors vary.
2.3 Urban composition at night
Regarding the previous parts of this tutorial, here is a summary of the elements to take into account to obtain quality infrared pictures at night:
- Be as far as possible from light sources: find a high or isolated point of view.
- Adjust exposure time according to the light sources to avoid over exposure.
- Do not hesitate to increase the ISO sensitivity, even with long exposure time.
- Use a sunshade/lens hood.
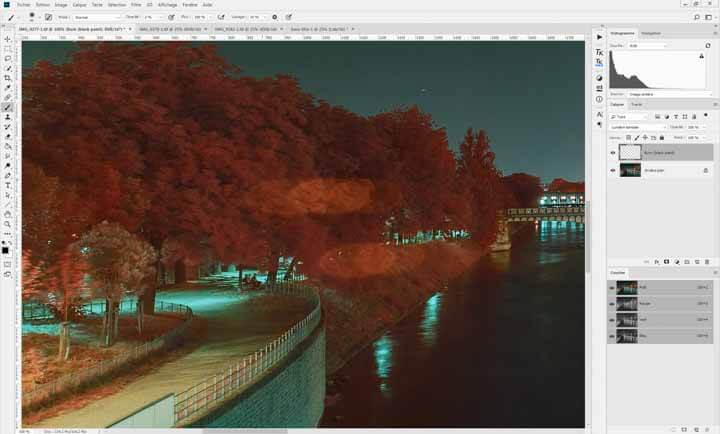
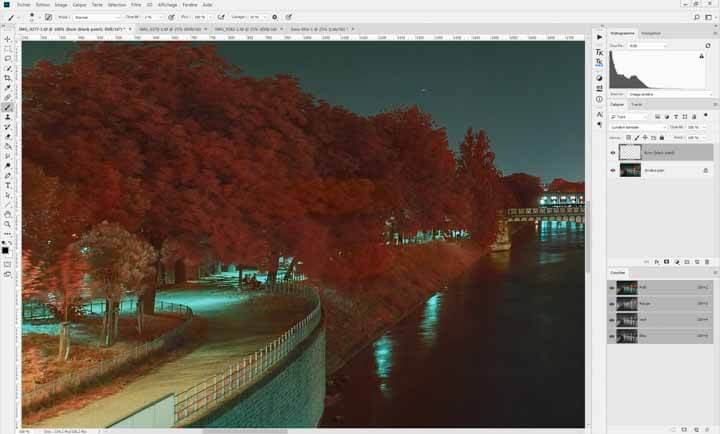
Here is an example of what you can obtain with these recommendations at 550nm:
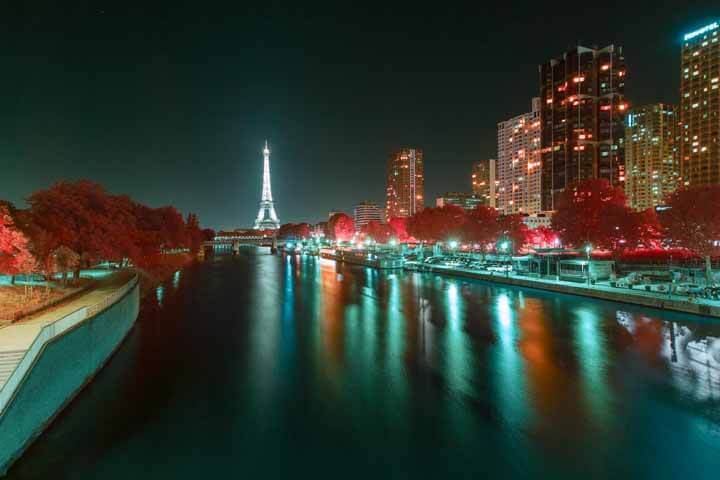
In this picture, a flare was reduced using the dodge and burn technique to darken it.
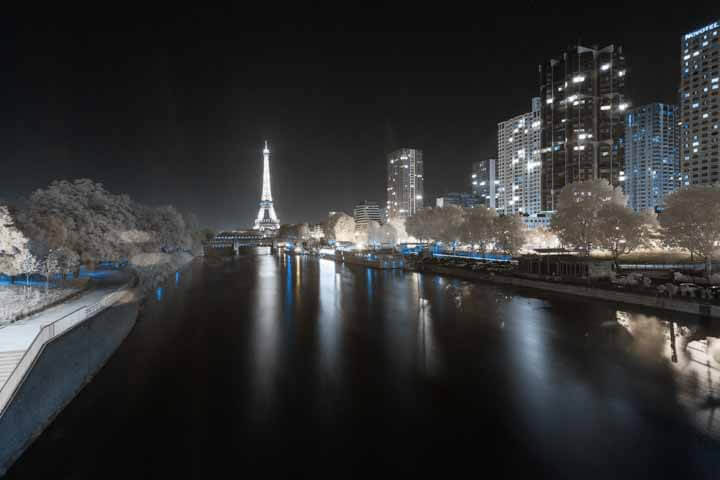
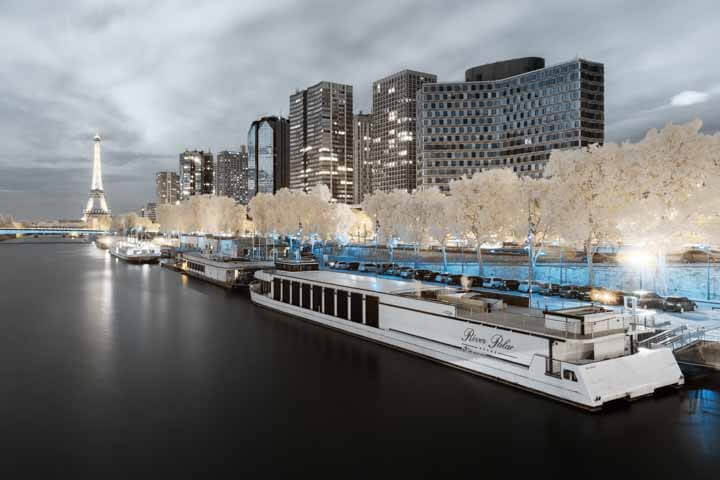
One last parameter should be taken into account: the weather. During an overcast night, the clouds will act as reflectors and infrared light will have a better distribution.
Part 3: landscape composition at night
Since there are no urban light sources out in nature, infrared landscape photography is very difficult to do at night.
The only type of picture you can usually take would be pictures of stars and the Milky Way with ISO set very high. In this case, the results will be no better than shots taken without infrared filters at all due to the low levels of visible light. For this kind of photo, a full-spectrum camera is a better choice.
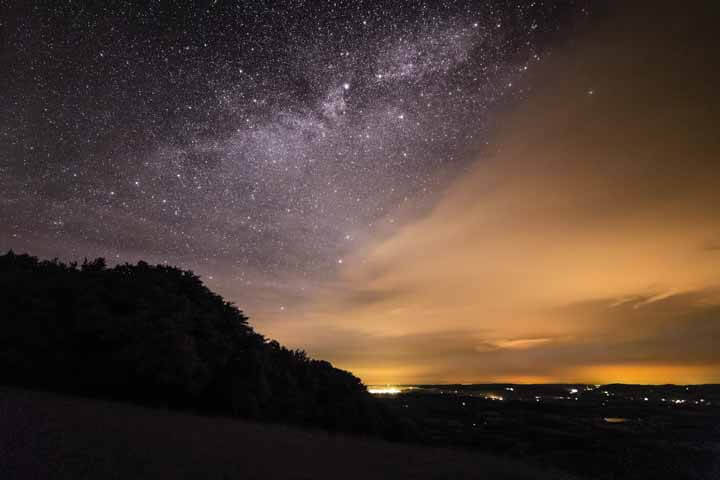
Canon 6D full-spectrum – 14mm – F/2.8 – 3200iso – 20s